
Month 1
This month we add a border to the star, add large triangles of focus fabric to set the star on point, and make sawtooth borders that are added to the center with the help of "floater" borders, that will ensure your borders are all the perfect size:

Sue Garman has written excellent instructions--I encourage you to read them, carefully, more than once, if necessary. The center star should be 16.5" unfinished. If it is not, you can adjust your first border to make the star plus the first narrow border exactly 17.5" unfinished.
Tips for Cutting and Sewing in Month 2:
1. Cut borders exactly to size--Sue strongly recommends always cutting borders on the lengthwise grain--that is parallel to the selvages. This is the most stable grainline of fabric.
2. Press borders in half, Right Sides Out, press Star block in half Wrong Sides Out--when you pin the mid-point of each, they NEST, fitting nicely in place.
3. Pin the center, each outside edge and several places along the star/border.
4. Sew slowly and sew straight. This is not a race. Slow down so you can be as accurate as possible. If you can slow the machine speed down, do so. I use lots of pins because I don't sew over pins-- having more pins naturally slows me down.
5. When adding the large half-triangles to the first narrow border, sew with the triangle on the bottom, that is a bias edge and it will feed better against the feed dogs.
Tips for Pressing:
1. Press toward the path of least resistance. I pressed both border seams toward the border--this adds a little fullness to the narrow border and floater borders. Those borders finish at 1/2" so there is just enough space for two 1/4" seam allowances.
2. DO NOT use steam in the iron when making/pressing the sawtooth paper piecing borders.
Making Sawtooth Borders:
There are several ways to make half square triangles--these finish to 1" and there are 102 of them. With the paper piecing method, I am making them AND sewing them together at the same time. Trim the papers slightly larger than the outside line--having lots of extra paper makes the pieces bulky. Cut the number of triangles you need for the first (left) border, 25 of each color:

I have the older Add-a-Quarter Ruler, so I use a postcard as the straight edge. In show 2001 Carolyn Hock showed the newer version of that ruler.
Placing that first triangle seems to get people--here is my tip:
Put the butt side of the fabric on the butt side of the paper. We start with a background triangle:

Cover the triangle printed on the paper--hold this first piece up to the light if you need to, to see that it is placed correctly. Some people like to use a tiny dot of washable glue stick to hold this first piece in place. Put the colored triangle on top of the background triangle, right sides together, just like you normally would:

CAREFULLY FLIP ALL THIS OVER. If you need to pin, put the pin on the paper side, double checking that you haven't moved the fabrics when pinning. I don't pin. Sew with a small stitch, 1.5 works for me, starting and stopping beyond the the seam line, just like you normally would. Sew ON THE LINE:

I work all four papers at the same time, chain piecing as I go:

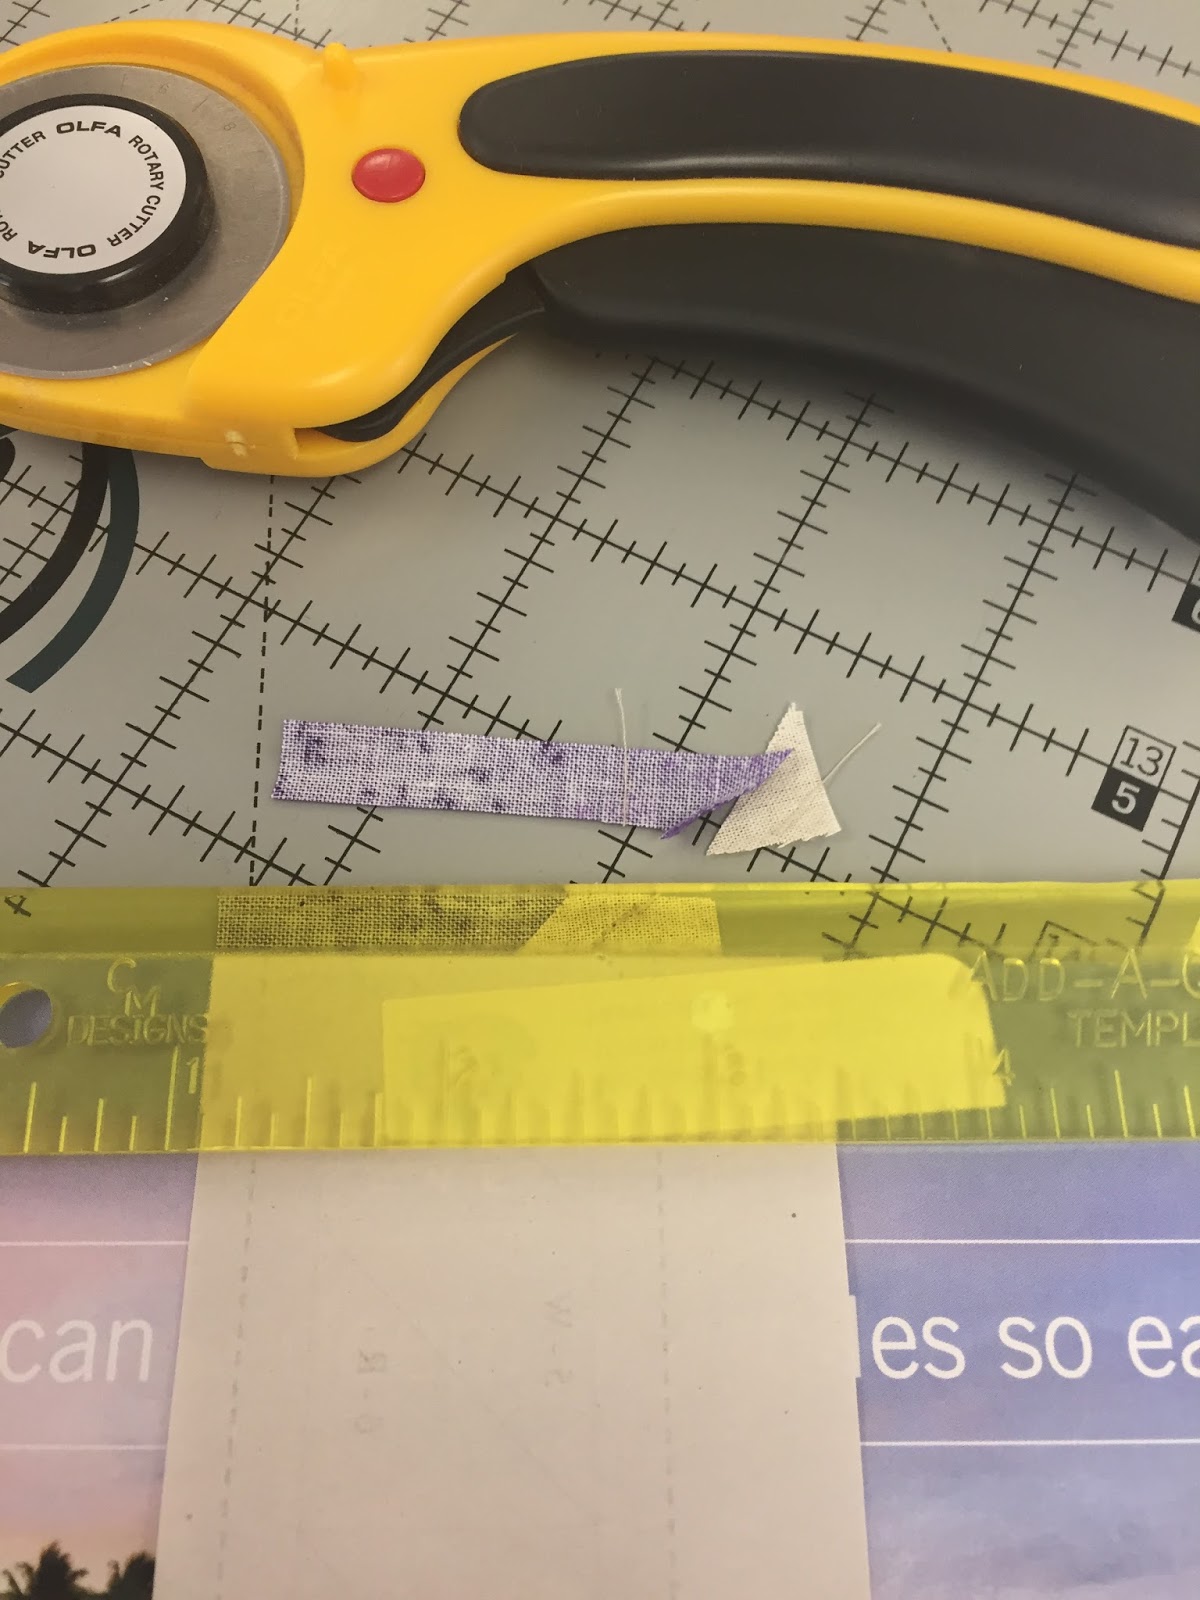
After sewing the first seam, it is time to trim the colored triangle--it is oversize to start with. By trimming it now, we will know exactly where to place the next background triangle. Place the postcard on the next line to be sewn:

Fold the paper back on the postcard. Place the Add-a-Quarter ruler firmly against the paper/postcard edge, and trim the excess away. The purple triangle seam allowance is now exactly 1/4":
Think about this, what color did I just sew? Purple. So the next piece is background. And it goes in the same orientation as the previous background triangle--lay it out to be sure you are correct:

Flip the background triangle over onto the purple triangle, lining up the seam allowances. Be sure the background triangle is positioned so it will cover the paper as it should. There is not a lot of extra fabric here so you have to place the pieces carefully:

What happens when you have an OOPS?! Here I didn't place the purple triangle carefully and when I opened the seam this is what I saw--I drew a pencil line on the butt side of the paper so YOU can see, this triangle does not come close to covering the space it needs to cover. I must fix it:

It is hard to pick these tiny stitches out, especially if you try to dig on the paper side with a stitch ripper. Instead, use Scotch Magic tape--place a small piece of tape on the paper, on the seam you need to remove--my problem seam is where pieces 3 and 4 are sewn together:

Carefully remove the seam, both pieces of fabric, from the paper--the tape will keep the paper intact, and you can use your stitch ripper to gently, slowly, un-sew those stitches, working on the background fabric side:

Once the problem triangle is removed, you can reposition it, more precisely this time, and re-sew, directly on the tape--you can still see the line through the tape.
Here are all four paper patterns sewn, ready to be trimmed:

To trim them, place the 1/4" mark on the ruler on the solid line, being sure you are cutting these exactly 1/4" away from the solid line:

Here they are, nice and trimmed, with all the fabric I "wasted" with this method. I am happy to use up that much fabric to achieve that much precision. And, by the way, I kept track, it took me under an hour to sew and trim each of the four borders. The first one took longer because I had to take photos:

Now you join the four paper pieces with 1/4" seams and your sawtooth border is done. I removed the paper at the places where the units are sewn together so I could get them sewn quickly. The rest of the paper was removed while watching TV, later. With the tiny stitches, the paper comes off quickly and cleanly:

Measure, and if you're living right, this left border is 25.5" unfinished:

The right border is made exactly the same. The top and bottom borders are made the same with one MAJOR DIFFERENCE: the FIRST triangle placed on the paper is the COLOR (purple in my case), then the background triangle is added. Also, there is a single background square added to one end of each of the top and bottom borders. It DOES make a difference in sewing the triangles exactly as shown--IF you want the borders to come out "marching" in the correct orientation.
Once the four sawtooth borders are sewn, trimmed, and stripped of their paper, you will use Sue's great instructions to determine the size you will cut your "floaters". I wrote a tutorial about this which you can find here. It uses Sue's exact instructions so it may not provide any new information to TQS members, but may be helpful as general information.
Remember to cut the floaters from lengthwise-grain fabric--I cut two at once so they are exactly the same size. Measure exactly. Pin a lot. Sew slow. My left and right floaters need to be cut 24.5", here are two longer strips folded in half and placed on top of each other--this is four layers of fabric. The ruler is placed ON THE FOLD at 12.25", half of 24.5".

Here are the top and bottom floaters, in half, four layers, ruler placed ON THE FOLD at 12.75", half of 25.5":

Here are both sets of borders, trimmed and ready to attach to the quilt:

I pinned the first floater, the left side, to the center, placing the floater on the bottom, so I could see the seam allowances at the mid-point:

I pinned the two outer edges, the middle, and then added about 10 pins over the length of the seam to be sewn. Note, I always place a pin at the bottom edge, out of the way of the presser foot, so I can sew completely off the edge without removing that last pin. It helps to keep me straight all the way to the end of the seam:

Ready to press. Place the fabric you want to press TOWARD, in my case the blue floater, facing up. Set the seam by pressing it closed first. Then use the edge of the iron to press the blue fabric up and away from the center. I can't iron and take a picture at the same time so:


Here is the front, all done:


Next month, we'll be making Evening Star blocks, one of my favorites!
NOTE: I've been asked about the paper. I am using newsprint and found it here. Note the paper costs less than the shipping. You may find it at Dollar General or Family Dollar stores on a 9" x 12" pad, you'll have to trim the pages to 8.5" x 11". One of my group friends bought a pad of lightweight tracing paper and really liked that too, inexpensive and see-through. She has to print one page at a time in her printer.
And, look at the great blocks the Sunday Sew and Sews have made:


Let's Quilt!
Barbara
Thanks for all the extra tips Barbara! Your quilt is going to be gorgeous!
ReplyDeleteGorgeous! Great tutorial! I love to use my add a quarter ruler when paper piecing.
ReplyDeleteWe are all sooooo grateful for your excellent tips. Almost as good as being in your Sunday group...note I said almost. We all want to move to Huntsville. Thanks so much for sharing your expertise.
ReplyDeleteYour instructions are very useful. Thanks!
ReplyDelete