Tuesday, May 22, 2018

Spring Market Portland OR 2018


It is one of my life's joys that I get to work at Spring Market, a trade show that is open to the trade, not the public. The Spring Market moves around the country, while Fall Market is always in Houston, the week before Festival. Last year Spring Market was in St. Louis, next year it will be in Kansas City.

Shop owners come from all over the world to meet with fabric companies, publishers, pattern designers, sewing machine companies and many more vendors who are all part of this $3.75 billion dollar industry. I enjoy seeing some of my favorite people at Market.

Here is just a taste of my trip to Market:

Set up day is chaotic on the show floor but it is always ready to open on time:


There is a lot of art in the Oregon Convention Center:


My very favorite is this Foucault Pendulum, the coolest non-quilt thing at the show. My university had one of these in the Science Building so it always takes me back to see this:


The Oregon Convention Center is a LEEDS certified building, meaning they have worked very hard to reuse and recycle things and reduce their carbon footprint. There are several large wall displays that explain how they do that. Here is a fun display:


The view of the convention center from a nice restaurant on the top of a nearby hotel. The restaurant is called Altabira. I recommend reservations:


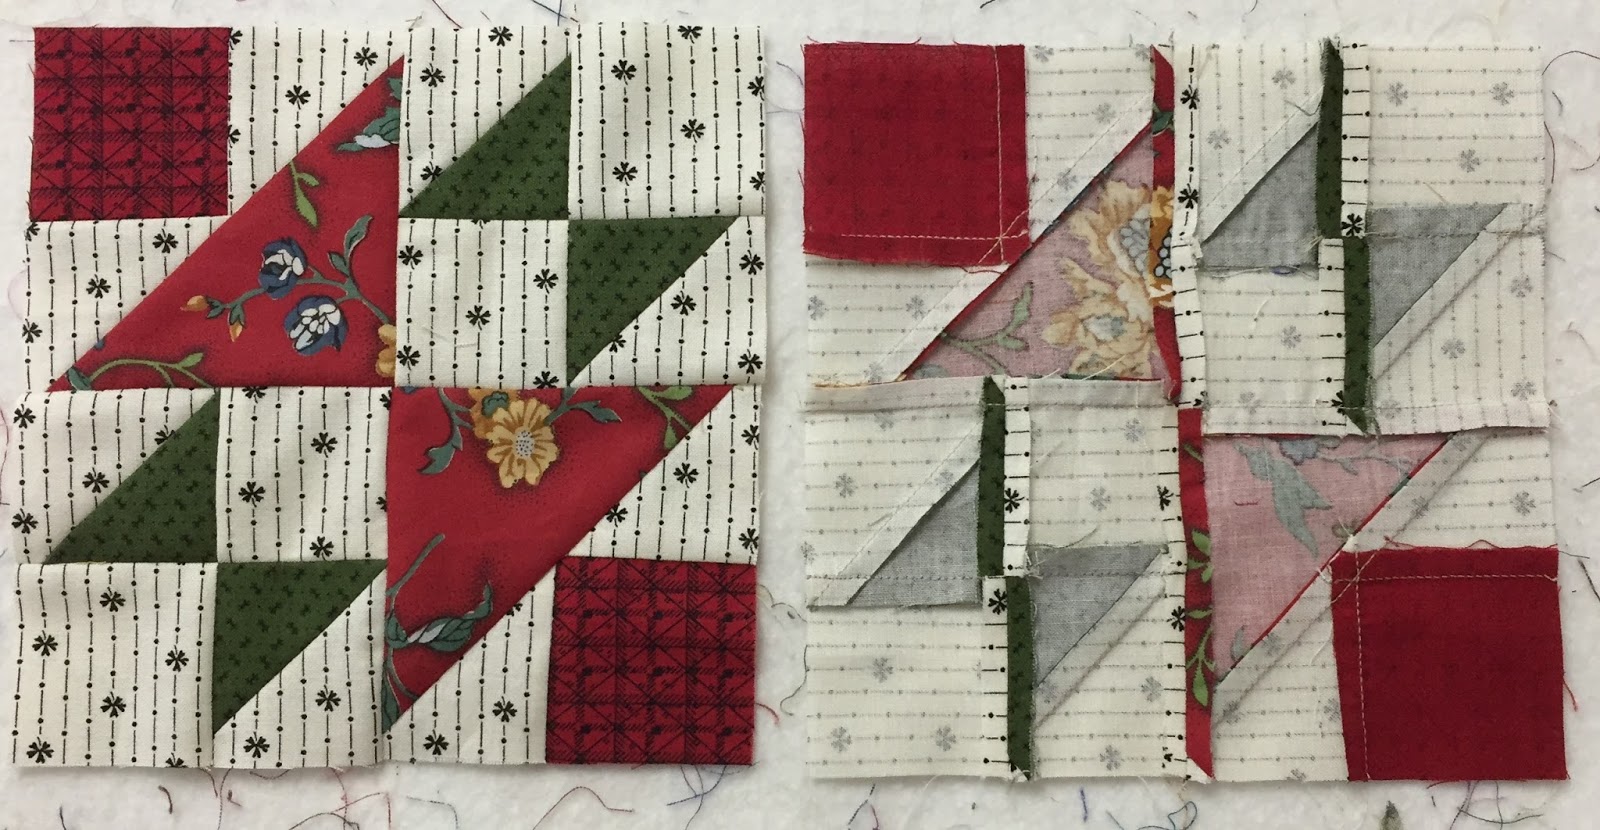
At Schoolhouse vendors show what is new in 30 minute mini-classes. A quilt I participated in making was unveiled by StudioE, using Peppered Cottons, wonderful shot cottons that are a delight to work with. My block is in the lower right:

RJR always has a great wall that faces the wide walkways and many people take photos here:

Great fabrics are unveiled as they are now available for shops to order for future delivery:

Patrick Lose

Gypsy by Jessica VanDenburgh for Windham Fabrics

Gypsy

Road Trip by Allison Glass for Andover

Metropolis by MODA
Metropolis by MODA
An adorable pattern:


Occasionally we get a little time to get out of the building and explore. We hoped on the light rail and went to Saturday Market, where there are lots of arts and crafts things for sale, many food trucks with many different kinds of food, and lots of people. It was a sunny day and everyone was having a good time:


This guy stood completely still for long periods then would move unexpectedly:


 Kids always have fun:

All too soon we pack up and it's time to go home. Here is just a small portion of the Education Office crates being readied for return shipment to Houston. Each crate is numbered, inventoried, and sorted by which of 3 locations they will be shipped to, then palletized and headed out for shipment. It takes a good bit of time to do this right but we've got it down to a science now. After 20 years I am still impressed with the way this all works:


The carpet in the Doubletree, 11th floor, I love gingko leaves:


I flew from Portland to Detroit and was amazed by this lightshow in the tunnel from one Terminal to the next. It did change to bright red while I was on the walking sidewalk but I didn't stop to capture that:


My goodies. I almost always buy thread and this time I got some great fabrics too. And tote bags, we always get tote bags:

Now it's time to get back to work. Several tasks have to get done today and tomorrow--first up was laundry: check, all done. 

You can find thousands of images on Facebook and Instagram, among other social media, #quiltmarket, if you want to see lots more of what happens there.

Let's quilt!

Barbara

Saturday, May 12, 2018

My Barn Quilt Block

Happy Mother's Day to ME!!!


My husband is a very handy man. Some time ago he saw Alabama Barn quilts on my Facebook feed and decided he would make me one. A few weeks ago he started a "secret project" and this is what he installed today.

The block is a Pinwheel and there are four of them. He looked at my computer while I was designing My Favorite Things a few weeks ago and saw this design, one that would be fairly easy to lay out and paint. He selected the colors, red and white--what a perfect choice! He decided where it would hang. This is what we call "the Doghouse" though we don't have a dog--it's his man cave/workshop. It is also right at the end of our driveway so everyone who drives up will be greeted by this wonderful and unexpected work of art.

The only advice my mother gave me about marriage was: "Marry a handy man". So I did.  Thank you, darling, I love it--and YOU! It will make me smile every time I come home.

Let's quilt!

Barbara

Free Motion Quilting and Ruler Work

In between piecing projects I've done some free motion quilting and ruler work on my Bernina Q20 sit down long arm machine. While my desings are far from perfect, the quilts are getting done and  I can see improvement.

This is a baby quilt made from the leftover fabrics used in Stella's Splendid Sampler--see this post for more info.  I did "stitch in the ditch" first along all the row seams then used a ruler/template for the semi-circle motifs in the light print blocks and the yellow print blocks. One of my favorite designs is "wishbone" quilting so I used that on the strippy rectangles. Finally, I did a swirl motif in the outer border, really fast and fun.


This I call the "Simple What Nots Sampler". When I taught the second Kim Diehl "Simple What Nots" club at my local shop, I decided not to finish the six small quilts individually as I had with the first "Simple What Nots" club taught the six months previous to this class. I just saved all the small tops, then put them on the design wall and figured out what was needed to join them all together. More info can be found here


A few details:


These are great quilts to practice with because the prints are busy and the individual stitches don't show, just the texture of the quilting. Another tip: use busy prints on the back:


Earlier this year, Amanda Murphy presented a Ruler Work Quilt A-Long on Bernina's We All Sew page.  It was a good way to practice ruler work designs. I just wish I had used a new piece of muslin for the top instead of the stained piece I pulled from an old box. Washing helped it but some staining is still visible:


Practicing free motion quilting can generate a lot of "quilted scraps". My earliest pieces aren't very good but they'll be perfect as kennel quilts for our local animal shelter:


The outer edge is finished by turning the back to the front and sewing the edge in place by machine, no added binding. These can be used in the animal cages, washed a lot, then tossed when they get too ratty to use. 

My next practice piece will be larger and from a nice solid fabric. I want to work on a few favorite motifs, mastering them as well as I can. Then I'll get a few more tops quilted. All of quiltmaking is a learning process. I read a lot on quilting, follow several blogs and watch a lot of YouTube videos. Practice makes better.

Next week I am off to Portland, OR for Spring Quilt Market, my favorite show, I think, of all I go to. It is so good to reconnect with friends in the industry and get a chance to see what is coming on the horizon. And, I just might buy some thread...

Let's quilt!

Barbara

Sunday, May 6, 2018

Foothills Quilt A Long--Last Chance


I learned about the Foothills Quilt A Long, by Mary Elizabeth Kinch about two months ago. Yesterday I decided to get started as I knew the information was not going to be online for much longer.  This information will only remain online until May 10, 2018--so you only have a few days left.

Based on an antique quilt with "Chain and Bars" blocks, this is a great project to play with your favorite fabrics.

First, go to the Blog and read all about it, Foothills Quilt QAL. Mary Elizabeth asks you to register,   then go to the information page with her very detailed photos and instructions.

Yesterday I took the time to read through all her posts on the Quilt A Long--before I did my "fabric pull". Her information is excellent--I was particularly taken with her proposal that you use this quilt to learn about your fabric choices and make this a "creative" process, not just a "production" process, like "how fast can I get this made?".  Even if you don't want to make this quilt, her description of how she did her fabric pull for her quilt is very informative--I highly recommend you take the time to read it.

I thought I would dig in my closet and spend lots of time pulling fabrics. First, I started with a shoebox under my cutting table that had lots of great reproduction fabrics. In less than 5 minutes I had pulled these and was done, happy with this eclectic group:


While Mary Elizabeth makes her units one piece at a time, I prefer to paper piece the flying geese units. I printed the patterns in Electric Quilt 8, a wonderful software program I've used from the beginning to create patterns and handouts:

Before trimming, front and back

Trimmed to sizr
Mary Elizabeth encourages you to make your blocks with your favorite method.

Here is my first block:


What I learned from this one: it's not my favorite and I'll make different fabric choices for the next block. But what I know for sure, in a quilt with many of the same blocks, not every one can be the "star", some have to be "supporting characters". This is one of those, it's not bad, but it doesn't make my heart sing either.

I'm off to teach the Sunday Sew and Sews now but I wanted to get this information out there right now in case you missed this opportunity and would like to try your hand at these blocks. There are terrific photos on Facebook and Instagram--the fabric choices are fun to see, some are very bright and contemporary, nothing like mine or the original antique quilt at all.

Let's Quilt!

Barbara


Friday, May 4, 2018

My Favorite Things


At the conclusion of the six-month Long Time Gone class I taught from September-March, I was surprised when the 13 students asked me to come up with another six-month class so they could keep coming. I figured they would be glad to have their one Saturday a month back. No, they wanted more.

SO, I got to work on this:  My Favorite Things.

Six classes, about 2.5 hours each, one Saturday a month from June to November, 2018. Each month we will focus on one of my favorite blocks, how to make them, how to use them. No sewing in class--I bring my machine to demo the process. They will get a comprehensive handout and I will bring lots of quilts each month, definitely a "Show and Tell".

The students have plenty of choices. They can make "units" each month to be used to create the quilt shown here. That is one possibility. OR they can make separate, small quilts each month featuring that month's blocks. Whatever they want to do with the knowledge they gain, is fine by me.

Here are my fabrics for this large quilt, washed and pressed and ready to go:

The past few days I've spent a lot of time designing the quilt and writing the handouts. Now the fun part--I get to sew it!

There are advantages with this kind of "no-sew" class:

Students will learn so much more than they expect to improve all their quilting skills
All sewing is done at home, no need to bring equipment to class
Friendships are built in long-term classes

Handouts and patterns are provided in class--listen, take notes, ask questions, learn

For information and to sign up for this class, go to Huntsville Sew and Vac. Hurry, space is limited to no more than 20 students--class begins Saturday June 9, 2018.

Let's Quilt!

Barbara


Tuesday, May 1, 2018

Month 5: The Patchwork Barn


This is the FREE Block of the Month pattern "Patchwork Barn", designed by Edyta Sitar exclusively for The Quilt Show. You must be a Star member of this world-wide quilt guild/show/internet community to receive the free patterns each month, beginning January 1, 2018. Join today and get started on this journey.

Previous instructions are here:

Introduction
Month 1
Month 2
Month 3
Month 4.

NOTE: On The Quilt Show, the Forum is the best place to ask questions, find answers, find out if there is an error on the pattern, as there was for Month 2, Block 5--as soon as I found out about the error, I posted a Topic to correct it, February 3. I recommend you check in there frequently. And there is a Show and Tell Topic--show us your blocks. Forum Patchwork Barn

Block 13

This block has half square triangles (HST), small squares and a unit called Birds in the Air or Mary's Triangles, as well as other names.

We have made HST several times already--refer to Month 4 for more information, including instructions for 3 different ways to make them. This time, since I needed 12 HST units, I decided to do the Grid method again. I cut fabric 8" x 6" from both the background and the print fabrics and drew this grid on the back side of the background:


There is a narrow border around the outside of the grid, this makes it easy to turn the corners. One start, one stop, and all 12 HST are sewn. All I have to do is press toward the dark fabric and "trim to perfection":


To make the Birds in the Air units, you can follow the directions in the pattern, if you like. I will show you a method that uses a Half Square Triangle Ruler, a tool you may already have.

Cut a strip of fabric 2" x 12.5"--this will be the colored square in the outer corners. Cut a strip of background fabric 2.75" x 12.5". Sew these together down the long seam, press toward the BACKGROUND fabric:


Keeping the seam line straight, cut six 2" segments--like servings from a sandwich:

Note: I cut 7 segments as I started with strips that were longer than needed--OOPS.
Sew these into pairs of off-side four-patches--note the seam line will NOT meet in the middle--this is a good thing. Use sharp scissors to clip half way between the two seams, UP TO BUT NOT THROUGH the sewn seam:

 Press the seams toward the BACKGROUND fabric:

 There are several brands of Half Square Triangle Rulers, this one is from Creative Grids. Each ruler has lines labeled a particular way, be sure you know the method your ruler uses. With this ruler, the bottom of the ruler is placed on the line that corresponds to the UNFINISHED size of the unit. Remember, you want to cut the background fabrics in half, NOT the square fabric, RED in my case. If you have cut and sewed with accuracy, the ruler will cut this unit exactly in half, right where it should:


The pattern calls for a square cut 3 7/8", then cut in half diagonally--I cut 4" squares, much easier. Cut the square in half and pair those triangles with the unit just made. The raw edges of both triangles are aligned on the DIAGONAL. Because my square was 4", a tad bit hangs out at the bottom, it will be trimmed after the block is sewn:


If all is well, the sewing line goes precisely through the seam, we call this "crossing the X":


Press toward the large triangle, and "trim to perfection":

Lay out the block and sew the HST together with two small squares, then join the top row to the bottom row:


NOTE: My background is a stripe. With the grid method, half the HST have the stripe going up and down and half go left and right. This block was assembled with all the stripes going up and down. The remaining two blocks will have some of each. If this bothers you, do not use a directional fabric when pre-sewing, as you can't totally control how the stripes will finish. You would have to custom cut each piece to be sure you got the stripes going as you want. I decided to just let it go with these blocks.

I am often asked about pressing. In the pattern, the little arrows indicate the recommended pressing sequence. Here is how I pressed this block, it's not the "right" or the "only" way, it's just the way I did it this time. The beauty of making 3 of these little blocks is you can try different techniques with each to decide which you prefer:


Block 14: 


Again there are four HST in the four corners, make them with your favorite method.  This time I used the Half Square Triangle Ruler, cutting strips .5" larger than the finished size and cutting four triangle pairs for each block. Quick and easy.

To make the little four-patches for each block, I started with 10.5" x 1.25" of both the A and B fabrics, sewing down the long side, pressing toward the dark fabric. Then I sub-cut these into 1.25" segments and joined them into four-patches, four of these units for each block.

Mathematically, these four-patches should be less than 2" to fit perfectly, 1.9142". That is a weird measurement, so just do the best you can. When you add the four small triangles around the four-patch, they need to be 2.5" square, unfinished.

What I did was trim the four-patches just smaller than 2", but not all the way to 1 7/8"--I just eyeballed this cut. My triangles were cut from 2" squares, not 1 7/8" as the pattern instructs, to allow for trimming. You could cut the four-patches to 1 7/8" and cut the triangles from 2.25" squares--when you trim the unit to 2.5" the four-patches will "float"--this means the points of the four-patches will be slightly inside the square, the corners of the four-patch will not touch the outside of the block. Do whichever you prefer. I tried to get mine as close to accurate as I could::


Block 15: 

This is one of my favorite star blocks, called the Evening Star or the Morning Star or other names.

The star point units are really flying geese units, where the "goose" is the background and the "sky"
is the star points. Since I like to make four flying geese at once, I used the method I showed in Month 3. See my  Four Flying Geese tutorial  for this method. Of course, you can follow the pattern directions if you like.

This block goes together quickly, once the star points units are made. They are oversize so have to be trimmed down to the correct size:


We would love to see your blocks on the Show and Tell Forum.

Let's quilt.

Barbara