Pages

Friday, June 30, 2023

HOMEWARD BOUND -- MONTH 7

 This quilt is the 2023 Block of the Month quilt for The Quilt Show. It was designed by Sarah Fielke exclusively for The Quilt Show and is only available at The Quilt Show. The best news is it's FREE for Star Members of The Quilt Show. Each month in 2023 a new part of the quilt is released for download to Star Members. 

It's time to start on the wide applique border that features lots of flowers, leaves and birds. We will work on these borders in Months 7, 8 and 9.


The first TIP is to WATCH THE SHOW that introduced this quilt on January 1, 2023. Sarah Fielke, the designer, shows how to create the paper pattern that is used for placement of the long stems. It is a FREE SHOW FOR EVERYONE, not just Star Members. Find it here: 

Show 3201

The first decision is how wide you will cut the four borders. The pattern says to cut them the actual size needed, 8.5" wide. As I handled them for many hours, I got a LOT of fraying at the edges and wished I had cut them 9" or wider, allowing me to trim away the frayed edges after all the applique was done.

Another idea suggested by a member watching on a LIVE broadcast, is to cut the long edges with a wavy blade rotary cutter. Again, I would still cut the borders wider than needed. 

Yet another way to deal with fraying from all the handling is to use Terial Magic, a liquid stablizer, that adds stability. A light spray is all that is needed. Again, I would still cut the borders a bit wider. And some people simply use starch or sizing to stiffen their background fabrics. 

It is a little tricky to cut the borders wider because a star and square of background are added to both ends of the Top and Bottom borders. They will be the exact size needed.  I did oversize the first border I cut but then changed my mind.  I wish I had left the border like this, so I could trim it to the correct size AFTER all the applique was done. Your quilt, you decide:


WATCH SHOW 3201 BEFORE PREPARING THE PAPER PATTERNS. There is a LEFT SIDE and a RIGHT SIDE. Be sure you know which is which.

In laying out the vines, I made a note of where the ends came to in relation to the Star points and bottom of the border fabric:


Here is the top border. I marked lines for the stems with a Crayola Washable marker so I could see the line but that was a mistake. The pen bled and I will have to wash it out later.

The paper pattern so you can see how it is used.

The stems are added before the vine is sewn in place:


Here are the borders marked, and one with the vines in place:

Remember to leave enough unsewn vine on the left and right side borders--they will be completed once the sides and top and bottom are sewn to the middle of the quilt:


I machine appliqued all the stems and vines, using a small blanket stitch and matching green thread. That was the fastest way to get them done. 

To help with Fabric Selection for those using the Kit fabrics, here are the MONTH 7 fabrics:

Large Circle       Tiny Dots Sky       4
Middle Circle     Background          4
Small Circle       Unicorn Poop Shimmer--used on the Tabs    24
                           Petal flower center does not appear on the Fabric List--it could be Unicorn Poop                                         Dazzle--simply use your favorite for this small circle   4
Petal                   Paperweight Paprika        24
Tab                     Roman Glass Pink           24

Feel free to change these fabrics if you like. I changed the small circle on the petals to a vibrant yellow/gold. Here you can see both choices. In hindsight, I would also make the small circles on the Tabs a deeper color as they disappear on the tabs:


I did all the flowers and leaves by hand applique. For me, the Tabs were easier once I prepped the edge by lightly gluing the tabs to freezer paper templates I made. It was easy to remove the freezer paper with tweezers since the bottom of the Tab was open:


I used a Circle Template to draw the circles the size needed to cut. This one was sold years ago for quilters but you can easily find this tool in the drafting section of an office supply store. I use Perfect Circles by Karen K Buckley for making the circles. Watch her show you how here.:


Next month we will add a lot of flowers and leaves.

Let's quilt.

Barbara

Sunday, June 18, 2023

QUILT FESTIVAL HOUSTON 2023 -- MY CLASSES

 It's that great time of year when classes for International Quilt Festival are announced and Enrollment opens. Many classes FILL in the first week so those in the know are ready with their class selections and make sure they enroll as soon as Enrollment opens.

This year is special for me--I am TEACHING at Houston. Having worked in the Education Department for almost 25 years, I have known that someday I would change jobs from "Faculty Check-In Person" to FACULTY. This is the year.

I am teaching 3 of my favorite classes. 

Thursday November 2, 2023, 9-5, #411 WESTERN SUN:

Wild Western Sun  about 50" square 

This class teaches so many great techniques, like paper piecing, hand or machine applique and, as always in my classes, lots of tips and tricks for accurate precision piecing. 

What if you want to use Reproduction fabrics instead of brights? No problem:
My King size bed quilt, 110" square, 25 whole blocks, 12 half blocks, 4 quarter blocks

To see a recent class of Western Sun and find links to additional blogs about it see this Blog: Western Sun in TN

FRIDAY NOVEMBER 3, 2023 , 9-5, #507 ANTIQUE ROSE STAR: 

my top

Student Work--a baby quilt

Student work in beautiful fabrics

A small sample in bright contemporary fabrics--see how easy it is to put this together in class:


We will speed cut the shapes and learn how to piece this block quickly. It looks great in any kind of fabric, from Civil War Reproductions to Modern to Brights. And there are many ways to set this block. I think it is my most favorite class to teach.

For more student work see this Blog: Antique Rose Star

Saturday November 4, 2023, 9-5, #606 Disappearing Patchwork:

About 62" square, 16 total blocks

This started out as a challenge to myself to make a Neutral quilt. It was a stretch for me, but I was satisfied with the result. There are MANY WAYS to set the blocks, so it is fun to play with design ideas as the blocks get made.

How about we make it with Bright fabrics? Here is a quick sample I just created:

I also had a lot of fun quilting the neutral quilt. See some detail photos in this Blog: Disappearing Patchwork -- the Quilting

Find all the Class Catalog and Information here: Class Info Hub Houston 2023

Enrollment is due to begin Monday June 19, 2023. Be ready if you really want to take any of the classes--they do FILL FAST! 

I hope to see many of you in class. For years, I have been asked at Festival "When can I take a class from YOU HERE?" The answer to that question is NOW, THIS YEAR, 2023!

Let's quilt.

Barbara


Sunday, June 11, 2023

COLOR CATCHERS -- WHEN YOU DON'T PRE-WASH

 Sometimes I pre-wash all the fabric for a quilt. Sometimes I don't.

 I used to pre-wash everything. When I discovered Shout Color Catchers I stopped pre-washing most of the time. Since most of my quilts have many fabrics, this saves a lot of time. When I am ready to start a new quilt, I just pull the fabrics from my stash and get started.

This quilt was made in 2006 and has hung on my living room wall pretty much since then, other than when I was teaching it:

The other day I decided to replace it with something else and wash it. I was pretty sure I had not pre-washed the fabrics. 

I always use at least one Shout Color Catcher when washing a quilt:

Since this quilt has a lot of red fabrics, I used two Color Catchers. Here is the result:

White one is new out of the box, two red ones after washing the quilt

After washing in the machine, I could see there was a bit of red staining on the back of the quilt but none on the front:


The smartest thing I should have done at that point was to wash it again with at least two more Color Catchers. Instead, I dried it. The next time it is washed, with Color Catchers, the red on the back may not come out. 

See how much red is on the label--which was white when it went into the washing machine:


The quilt looks fine on the front, lucky for me. I think we will use it as the Summer quilt this year. The pattern name is Summer Romance by Glad Creations. Seems appropriate. 


Everyone should have Shout Color Catchers in their laundry supplies. And every kid going off to college should be gifted a box and told how to use them. New blue jeans washed with white t-shirts can made those t-shirts gray/blue. 

I don't know how they work, it's magic, but they have saved me several times in the past. I have written about them before, check out those posts here:


What is your experience with fabrics that "bleed"?

Let's quilt.

Barbara

Sunday, June 4, 2023

FULL CIRCLE SPECIAL EVENT CLASS ALMOST FULL

The response to my local SPECIAL EVENT class of FULL CIRCLE has been fantastic. There are only a few spots left for the adventurous quilters who want to stretch their wings and fly. Now you don't have to travel to Monterey CA to take the class March 2024 where I will be teaching it at Empty Spools Seminar. You can sleep in your own bed. 

My top is done and currently with the longarm quilter. I love the colors I chose and how it came out flat and square:


This quilt will teach you a lot:

 Paper piecing with Freezer Paper
 Precision piecing of small units
How to piece curves accurately
How to make circles
How to applique, by hand or machine or both
Basic Embroidery stitches should you want to do them
And So Much More...

DETAILS and REGISTRATION can be found on Southern Charm Quilting's website: FULL CIRCLE SPECIAL EVENT

September 11-15, 2023  Class is 10-3 each of these 5 days
Southern Charm Quilting, 1847 University Dr NW  Huntsville AL 35801
Fee: $200, includes lunch the first day
Pattern Fee: $55, to be paid the first day  
  
The pattern is by Wendy Williams, who designed Color My World for The Quilt Show as the 2021 Block of the Month quilt. This quilt is easier than that one though it has a similar feel because of being a circular design. 

You DO NOT need the pattern prior to the first day of class. It is so important you wait for class instructions before starting this quilt. I have written an 8 page Handout with "Changes, Tips and Clarifications". You will receive it the first day of class with the pattern.

My Supply List provides excellent information for Fabric Selection. The amount of fabric listed for each block is for the entire quilt.

I am also happy to help you with Fabric Selection PRIOR TO THE FIRST DAY OF CLASS. Send me photos of your fabrics if you want help. 

Students are flying in from Houston, TX, driving from Atlanta and Mobile, and lots of locals have wisely decided to take this "once in a lifetime" 5 day class locally.

I did a "practice class" in March with 6 great women at My Joyful Journey Retreat. See how great they did  HERE

These women have become friends and continue to meet and encourage each other as they work on FULL CIRCLE. I got to see them recently. Take a look:

Cyndi has Quadrants A and B complete and sewn together:


Victoria is working on hers: 

Julie is making hers in Pittsburgh Steelers colors for a fan. She is also an engineer who has created several NEW DESIGNS for her quilt:


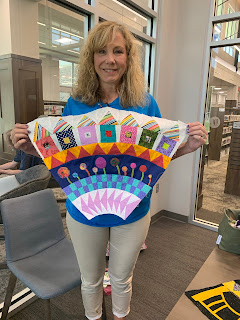
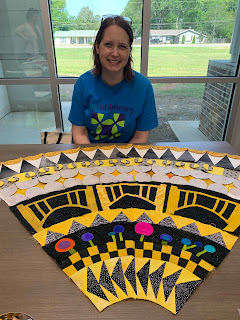
Sue is making progress on hers as well:


If you want to LEARN A LOT, IMPROVE YOUR SKILLS, and HAVE FUN, register online today for this SPECIAL EVENT. 

I hope to see you there.

Let's quilt.

Barbara