I have been a very satisfied member of The Quilt Show since January 1, 2007. There is so much to learn on the website, not just from the hour-long shows that are posted every two weeks, but from the Classroom, and the Forum--where I have made friends from all over the world, to the Daily Blog and Newsletter. And for fun, I enjoy the Puzzles and Games.
Each month I will post a blog on the first of each month, featuring tips and tricks for that month's patterns. The pattern provides excellent step-by-step cutting and sewing instructions. I will provide suggestions for speed-piecing, OR paper piecing if the block lends itself to that.
And the Patchwork Sunday Sew and Sews will appear again--this time we are meeting at a local quilt shop, Patches & Stitches. This way more people can attend and they get to shop when no one else is there--fun! See what the Halo Sunday Sew and Sews did in 2017: here.
PRINTING NOTE: I only printed the complete quilt in color for the front of my notebook and the first page of my patterns. The actual pattern instruction pages I printed in black/white. Each month the first page is the full color quilt pattern and the last page is a "For Notes" blank page--I did not print either of those pages. Instead, I selected a range of pages to print: for example, 2-3. If you want to print it all each month, that's fine too.
Let's get started. The Introduction Information is available now, for Star members, so be sure you are logged in to have access. Introduction. This features the fabrics in the optional kit you can buy, if you want to make the quilt just like the sample. It also shows how much of each fabric you need, so if you are working from your stash, as I am, you can get your fabrics selected and put together.
1. Select Your Fabrics. Here are mine:
The sashing/border is Kona Snow solid white, and lots of yellow, cheddar, pink, red, purple, and green. I don't know how much is here--LOTS, more than enough for several quilts, probably. I did pre-wash these, a dark load on the left and a light load on the right, including the white. See the Color Catchers to see the amount of dye that ran in the wash. Read more about pre-washing here.
2. Prepare a Notebook. Here is mine:
I used page protectors for all the pages--easy to remove if I want to take them to a retreat or to the sewing machine. And many of the months are just two pages of instructions, so using one page protector with the pages slipped in back to back keeps the bulk down. Remember, I didn't print the full color quilt cover page nor the "For Notes" last page for any month.
3. Quality Tools:
You will need a sharp blade in your quality rotary cutter. My two favorite brands are shown. 45 mm size blade, replace if it skips. I have never known a person to change a blade and then say "I could have gotten another two weeks out of that old blade." Award-winning chefs use sharp knives, so should you.
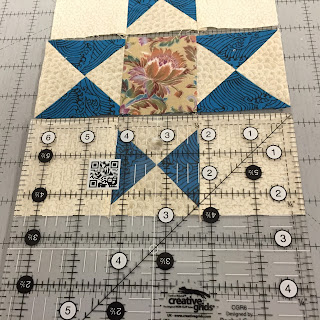
AND you will benefit tremendously from having a 6.5" square ruler. The blocks measure 6.5" when you have them made, 6" when sewn into the quilt. My two favorite brands are shown here: Quilter's Select, top, has a non-slip back that is very helpful and Creative Grids has excellent markings that make it easy to trim up the units and blocks. If yours is old, chipped, cracked, or not 6.5", buy a new ruler.
4. Prep Your Machine: Clean and oil it, replace the needle the proper size for the thread you are using. Have it serviced if you haven't done that in a year. Mine goes in for cleaning the day before my annual trip to Houston. I also sweep out any lint each time I change a bobbin, and do a deep clean and oiling every second bobbin. Use top-quality thread--I recommend Masterpiece by Superior, Aurifil 50 wt, or Quilter's Select 60 wt. To find out why Thread Matters go HERE.
5. Handy Accessories:
This is a nifty two-zipper pouch, hole punched to be used in a notebook. In mine there is a highlighter, pens and pencils, small sticky notes and a small calculator. Wish I could tell you were I got it, but I've had it for years. You can probably find something similar in an office supply store.
I also put about a dozen sheets of lined notebook paper in the back of the notebook, in case I want to write notes as I'm working on the blocks--really handy when I sit down to write my blog.
Having the patterns divided by month is very helpful. Here are the dividers I found:
The tabs are labeled 1-12. You can also print a Table of Contents, instructions are included in the package. I didn't find that necessary.
Be sure you have plenty of paper and ink. Here is what you get when your ink is low:
The one on the right was when I "thought" I had enough ink. The one on the left is after I replaced all 4 cartridges, the 3 colors and black. The poor quality one is worthless--unless I want to color it to match my fabrics. NO, not going to do that. But somebody probably would.
The only thing I have to add to my notebook is the master list of the 20 Sunday Sew and Sews group. Last year's group was very successful and I know this one will be too.
Look for the first set of pattern instructions January 1, 2018 and my blog post with tips on those first blocks. I look forward to this new journey we'll take together.
Let's Quilt!
Barbara


