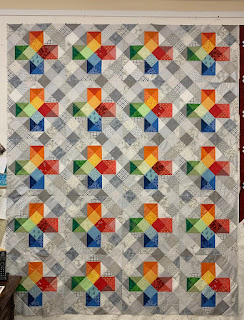
This quilt is the 2023 Block of the Month quilt for The Quilt Show. It was designed by Sarah Fielke exclusively for The Quilt Show and is only available at The Quilt Show. The best news is it's FREE for Star Members of The Quilt Show. Each month in 2023 a new part of the quilt is released for download to Star Members.
Even if you are not making this quilt, these tips may be of interest on other projects.
RESOURCES TO HELP YOU:
Watch BOTH videos Sarah provided for Month 2.
Watch the Show again to remind yourself of all the goodness to come.
Read the pattern carefully before beginning.
This blog is also intended to supplement the pattern and will often show what I did wrong to save you from the same mistake.
MAKING CIRCLES:
This month we start making circles, a lot of circles. Sarah calls this design Hollyhocks:
There are 116 circles in 5 different sizes--we make some this month and the rest in Month 3.
Sarah has a nifty way of making turned edge circles using cardboard templates and aluminum foil. You simply must watch the show--it's FREE for EVERYONE all of 2023--to see her amazing method: Show 3201 Those who bought the optional Accessory Kit have these templates for her method:
When making my test blocks, I didn't have the Accessory Kit so I made the circles with Karen K Buckley's Perfect Circles. I know how and they work great. Watch Karen show you how she does it:
Show 2007 I draw the circles on the wrong side of the fabric, using a pencil, and at night I cut them out, gather them using quilting thread, and slip the templar circle inside. A good dose of sizing, a hot, dry iron, and I leave them overnight to dry. The next day I make more:
PREPARING THE BACKGROUND:
The four backgrounds are cut 10.5" according to the pattern. This is the exact size needed to sew into the quilt. I wished they were cut 11" as I spent a lot of time holding them while doing all the applique. The downside to this is you might not be able to cut FOUR squares 11" from your background fabric. There is enough to cut 3 from one 11" strip x Width Of Fabric (WOF) and one more from the next strip. But I know people get nervous about "running out" of Kit fabrics so do what makes you comfortable.
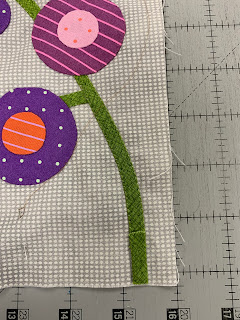
If you cut the background 11", be sure you allow for that when tracing the stem placement lines and securing those stems to the background. This is cut 11" and I drew a 1/4" line around it to remind me that is the size the block needs to be trimmed to when all the applique is done. It will be 10" when sewn into the quilt:
Sarah has excellent instructions on tracing the stem placement lines in her video. She uses her metallic pen, you can use a pencil. The line will be covered by the stem:
With the lightbox turned off you see how clearly you can see the placement lines:
What NOT TO DO: When I cut the pattern on the diagonal line as explained in the video, I accidentally cut the most important part OFF--the little diagonal line on the first page that will show me where to align it with the second page. I simply used a pen to draw that line back on and I was back in business:


Because someone will ask, this is the inexpensive lightbox I bought two years ago to work on Garden Party Down Under. It came from Amazon, is very lightweight, works great, and it cost me $21.58. Last week it was priced at $15.98:

The next what NOT TO DO: I didn't realize the 10.5" square was the actual size I needed so I didn't place the stem all the way to the edge. When I realized that, I knew I needed to add a tiny bit more stem to each of the four blocks. I could do it the hard way--take some of the stem off, join more stem, re-sew the stem back in place. OR the easy way--lay a bit more stem in place and cover the seam with a leaf.
Leaves are added in Month 3 and I will have something VERY IMPORTANT to say about those next month.
MACHINE APPLIQUE:
To sew the stems on the background I usually do machine applique. It's much faster than hand applique and usually a lot of the stem is covered with motifs anyway. I use a Blanket Stitch, #1329 on my Bernina 765. W 1.0 L 3.0:
I use thread that closely matches the stem on the top, and a neutral color thread, Quilters Select 80 wt in the bobbin. On the left I used white thread so you can see it, on the right I used green that closely matches the stem, completely invisible. You can use monopoly if you like but I prefer colored thread:
For hand applique, I like Quilters' Select Pre-Wound bobbins. It is fine, strong thread and I always have the color I need:
There is a trick to using fine thread for hand sewing successfully. Tie a tiny knot that secures the thread to the eye of the needle. This works great for silk thread, and this 80 wt. and any other fine thread you may want to use for hand sewing. Hard to describe in words, maybe this video in an earlier post will help explain it:
However you sew the stems and circles, enjoy the process. You have two entire months to get these four blocks done.
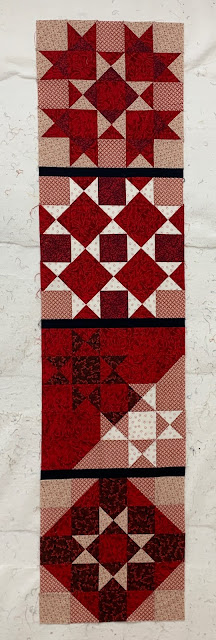
My sample quilt is complete so far into Month 6. My background is different because I got the Kit two months after starting the test quilt. Most of the fabrics are the same as or very similar to the Kit fabrics. I had a jelly roll of the Tula Pink fabrics to work from:
Share your progress and ask questions on the
Forum. When you share on social media, please use #thequiltshowBOM2023 and @thequiltshowsocial and @sarahfielke.
Let's quilt.


.jpg)


