Wednesday, April 29, 2015

Design Wall Occupied

There's always something on my design wall but this latest project may be stuck up there for a while. 

First, I finished the next 3 projects I'll be teaching for the Simple What Nots Club:

To teach this collection I decided I didn't have to make the entire small quilt each month.  This was a big time saver.  I make one or two of the blocks and usually make a larger version as well.  I am able to give tips on the process but also give options for how to enlarge the block or make them differently from the pattern instructions.  There is more than one way to do most anything and I like to give students options so they can find the method that suits them best.  That's why there is chocolate AND vanilla.  For perspective, those little Monkey Wrench blocks are each 3" finished. 

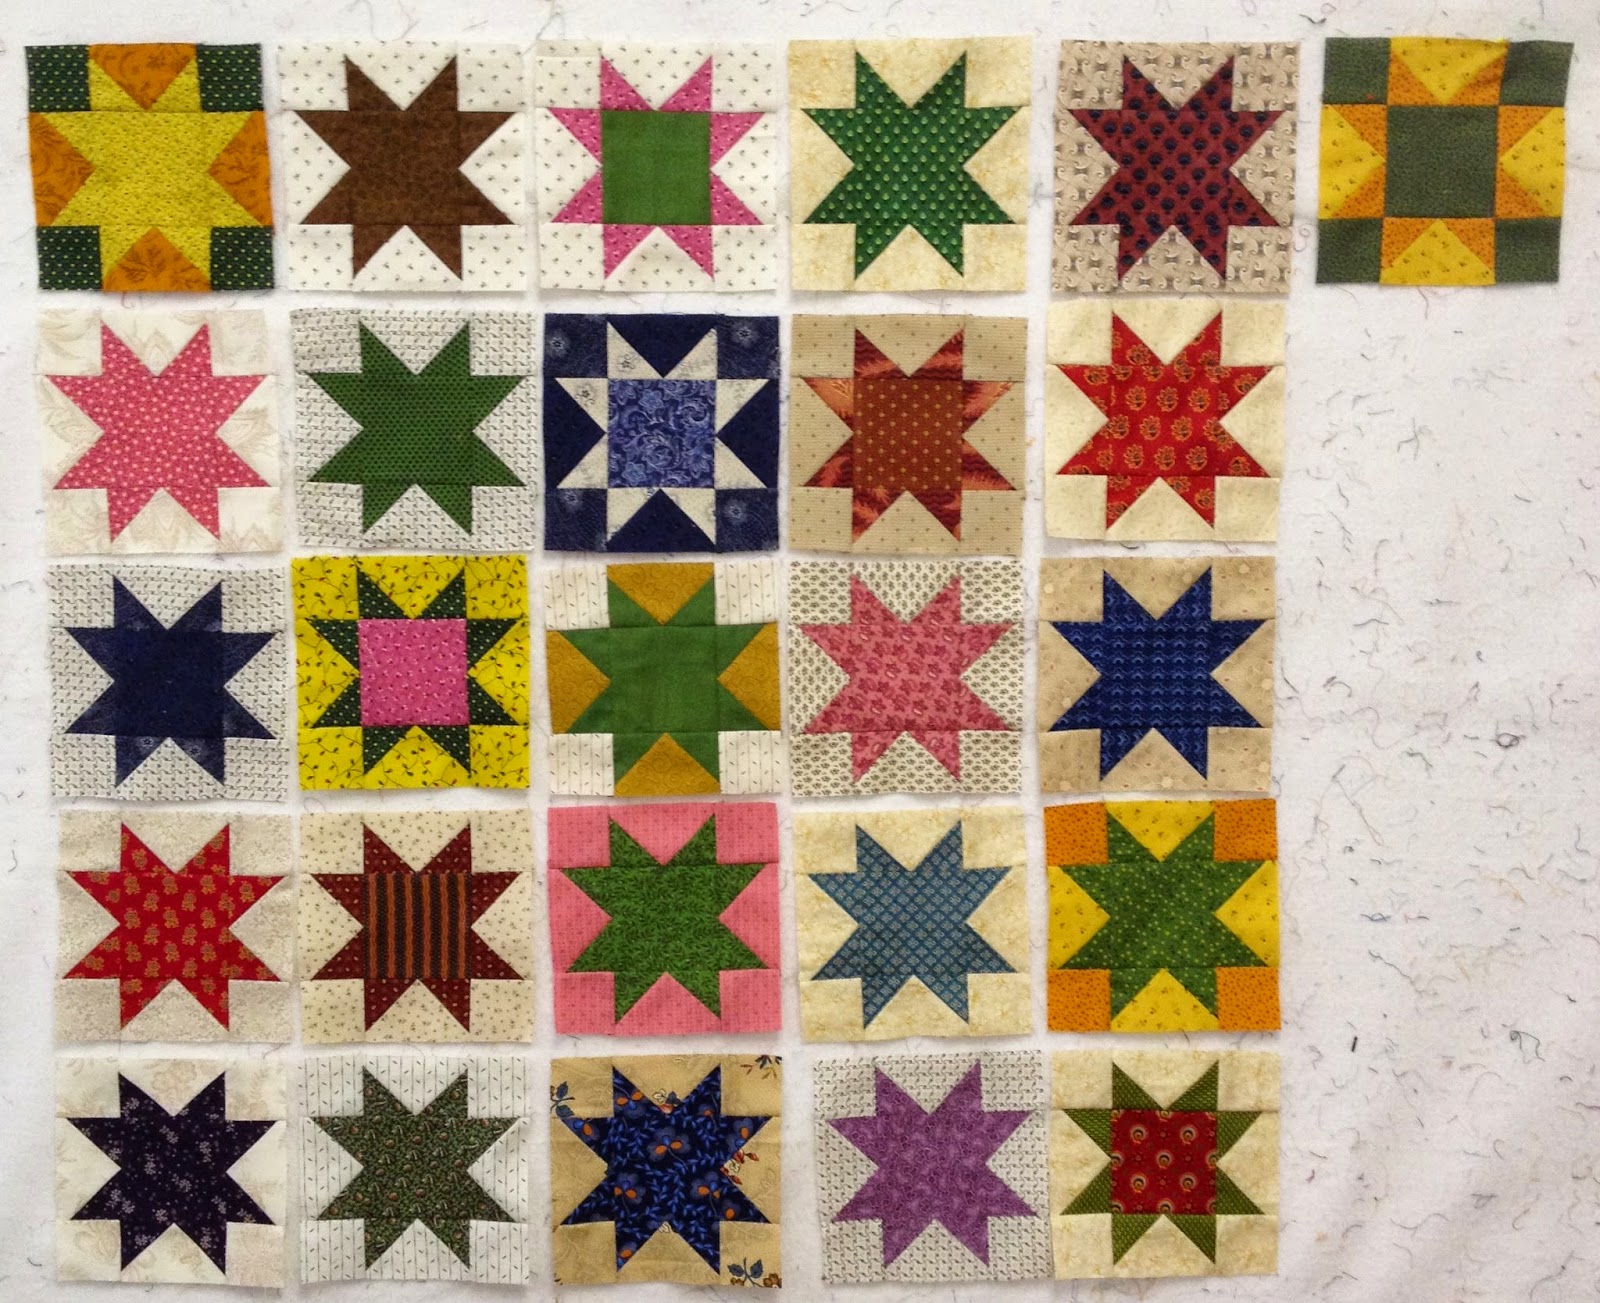
Next, I got the latest Stars in a Time Warp done--this week it's Paisley and I had no trouble finding repro paisleys in my stash:


The design wall is covered up with all the parts from the Simple What Nots Club Collection 2 and a larger piece from Collection 1.  My plan is to join them all into one larger quilt.  It will take some effort and planning (that means math) but that's the part I love.  Here are the parts just thrown on the wall--there will be rearranging and lots of piecing to get it all together.  With the first collection, I finished most of the quilts but don't need many more of these little quilts so this is my plan to use these parts up:


At night I am hand quilting my Antique Rose Star quilt so I can enter it in our quilt show in October.  This one is getting Big Stitch, using Perle Cotton size 8.  Slow and steady will get it done. 


There are more projects ongoing but you get the idea.  Once the Simple What Nots club is done I'll have more time to work on a few special projects.

Let's quilt!

Barbara


Tuesday, April 21, 2015

String Block Swap Challenge

I've been working on a quilt using string blocks I received in two swaps, one with our guild quilt show committee and one with 6 members of the Education Team that comes to Houston for Festival.  Here is the finished top:

45" square
 
I used the larger blocks in the center and some of the smaller blocks for a border, I have lots of small blocks left for another project.  I'll quilt it simply by machine, a good chance to practice free-motion quilting.  I'll also use it to practice stitching the applied binding in place by machine.  I usually hand-stitch the binding in place but there is a time when machine stitched binding makes sense, like baby quilts and donation quilts, so I want to work on that skill.

While working on this project I came up with several points to consider when working in a swap group.  Here are the positives:

1.  You will receive a wide variety of fabrics, many of which you don't have.
2.  People work with color differently so you may see color/fabrics in a new light.
3.  Each person puts their own mark on the quilt and it's a great memory project of people and a time in your quilting journey.

Here are the challenges:

1.  You may get fabrics you don't have for a reason, you won't love them all.
2.  Each person sews differently and has their own interpretation of the guidelines.
3.  Some of the blocks may not be useable depending on your design idea.

Tips for working in a swap group:

1.  Set clear guidelines and a deadline.  (Those who miss the deadline need a gentle push.)
2.  Keep it Simple--the more specific the design, the more variation you will get.
3.  If you are persnickety about your fabrics and design, you should sew your own quilts.
4.  Do not complain publicly about what you received, you won't be invited to join again.
5.  Use the blocks you can, and those you can't can be added to your "orphan blocks" stash to use for fun pieced backs or simple donation quilts--someone without a quilt will love those blocks.
6.  Use quality fabric and try your best to provide the fabrics requested.  Do your best work.
7.  Meet the deadline.  Follow the guidelines--ask if you don't understand something.

Paper Piecing Tips:

1.  Use lightweight paper, like telephone book pages.  Do not use vellum or heavy copy paper.
2. Use a small stitch, 1.5 or 16/inch--this makes taking the paper off a breeze.  Regular size stitches make taking the paper off an ordeal--and pulls out stitches at the beginning and end of each string.
3.  Be sure you trim seam allowances down to 1/4" if you sewed with a larger seam--before you add the next string. 

A group swap can be a fun experience but it's not for everyone.  Enjoy what you receive and make something useful with the blocks. 

Other projects I've been doing this week:

Stars in a Time Warp, Ombre

Four Patch Leader/Ender project

 
The four patch blocks are my latest Leader/Ender project and were sewn together as I worked on the String Block quilt.  I'm not sure if I'll put the tan/cream backgrounds in one quilt and the white backgrounds in a different quilt or use them in the same quilt--what do you think?  I have a large stash of four patches I've been making as leader/enders so it was time to figure out a use for them. 

We had a baby shower for my daughter-in-law and baby Stella will be well-supplied.  Here is a photo of the two happy grandmothers and our mama-to-be.  The next time we see her, Stella will be here:


Check out Judy L's blog to see what others are doing.

Let's quilt!

Barbara

Monday, April 13, 2015

Inspiration and Other Things

My guild quilt show is October 9-11, 2015 and I'm co-chair.  We have a few new ideas to help pay for the show.  One is a Special Exhibit of Quilts Inspired by the Quilts of Gee's Bend. 

Each of the 24 entries has to be 24" square and is the maker's interpretation of the quilts of Gee's Bend, whatever that means to the maker.  My thoughts on the quilts of Gee's Bend are that they often have improvisational piecing and the maker used what she had.  For the first one, I found images of Gee's Bend quilts, found a design I liked, and used my fabrics to follow that "pattern".  Here is the quilt I came up with:
Inspiration #1

(EDITED: to show finished quilt.)
The other day I heard there were those who believed a Gee's Bend quilt HAD to have denim or corduroy and I need to put that to rest.  So I went back online, looked at more images, found another I liked, and challenged myself to use only the fabric I had in two shoeboxes:  one with pieces between 4-5" wide and the other with pieces between 5-6" wide.  Shoeboxes hold my scraps that are too small to go back in the closet.  This proved to be a good way to "use what I had".  Here is that quilt:

Inspiration #2

 
I'll show these two finished quilts at the guild meeting this week to show denim/corduroy is not required.  And these are to be quilts "inspired" by the quilts of Gee's Bend, not exact replicas unless that's what the maker wants to do.  All 24 of these will be available for purchase at the show.  I think we will have a terrific display of these quilts and hopefully, all 24 will find new homes.

I love Lemoyne stars, also called 8 pointed stars, and during my Open Studio demonstrations at Chicago, I showed how to string piece paper foundations for those stars, in addition to showing how to string piece squares.  My go-to paper for this kind of work is phone book pages.  This morning I discovered I had 7 of the 8 star points done for a 12" star, so I whipped up the 8th and put the block together:


I still have to remove the paper--that's a good job to do sitting on my front porch swing, as it's a rainy day today.  This was fun and I love digging into my deep string stash and finding some wonderful small scrap of fabric long gone.  There's a piece of African fabric in there, and a few of my all-time favorites, of which I have  no more. 

Now to get the Stars in a Time Warp stars cut and sewn from last week and be sure I'm ready for our monthly Simple What Nots club Friday night.  This is my busy week:  teach class Tuesday night, attend guild meeting Thursday night, conduct the Club Friday night, and attend the baby shower Saturday for my wonderful daughter-in-law and our new grandgirl, Stella.  Who has time for a job?!

Linking up with Judy L's blog for Design Wall Monday.

Let's quilt!

Barbara


Monday, April 6, 2015

Stella's First Quilt

I finished Stella's first quilt, Little Letters, from Temecula Quilt Co blog.

 
Once she is born, I'll add the label with her date of birth--her first gift from her BB.

I've also been keeping up with Barbara Brackman's Stars in a Time Warp quilt along . I'm making 2 blocks each week for a large quilt:

Each Wednesday a new color or style of fabric is discussed and I look forward to learning about that fabric/style, then searching my stash for similar fabrics.  These are 6" blocks, someone on the Flickr group is making them 4"--wish I'd thought of that!

Check out Judy's blog to see what others have been working on.

Let's quilt!

Barbara

Tuesday, March 24, 2015

Quiltmaking 101--the Beginning

Since 1989 I've been teaching the beginning quilt class, Quiltmaking 101, at my local quilt shop, Patches & Stitches. I love teaching beginners, encouraging them, watching them succeed when they didn't think they could.  I also teach the hard stuff:  feathered stars, mariners' compass, etc. but my heart is with the beginners.  I tell them I have 3 goals for the class:

1.  They feel they've gotten their money's worth from the class.  It's not inexpensive to start quilting.
2.  They finish this project so their descendants won't find a box under the bed and wonder: What was she doing with this?
3.  I addict one of them, completely and totally to quilting, so the industry continues to thrive--I am always successful, every 5 week class, with this goal.

Here is the project:

Mix N Match Stars, pattern by Glad Creations, my sample

While this is not the usual beginner's quilt, I have found it to be the right amount of challenge for the person who really wants to learn to make quilts.  It is also perfect for the self-taught person who wants to improve and learn tips and techniques.  People often come back a year or two later to take it again.

The pieced border is optional--when I tell them it took me 8 hours to make those borders, most of the students choose to go with the Super Simple Borders option.  I have prepared a 7 page handout with both options, instructions for a practice 1/4" test block, a Rail Fence, and lots of piecing instructions. 

The most difficult thing for beginners to intermediate quilters to master is the dreaded "scant" 1/4" seam allowance.  What is "scant"?  How do you find it on your machine?  I  have them practice that in the first week at home, between gathering their supplies at week 1, to making their first block in class week 2.  Most get it or get a lot closer than their first effort.  It takes practice and maybe, drawing a line on the fabric, using a taped guide on the throat plate, getting a 1/4" foot, etc. 

The next most difficult thing for beginners to intermediate quilters is choosing fabric.  I help them start with a focus or theme fabric, or a theme:  Christmas, Baby, Patriotic, etc.  Find that first fabric that will usually be the border and select fabrics that go with it.  It takes a little while but most get it quickly and they leave the shop excited about their quilt-to-be. 

We spend 5 weeks together and I can say many of these students become my friends and many join our guild, Heritage Quilters of Huntsville.  One of the best perks of my job is receiving a thank you note or email from a student who has found her/his bliss and is so excited to continue their quilting journey.  I received one of those just recently and with Terri's permission, I share a bit of it here:

      I would like to thank you for taking the time out of your busy schedule to
teach a beginner's quilting class. I learned so much and I am definitely hooked
on quilting. I have already started my second quilt.

      I finished piecing my quilt together on Feb 20th and found a sweet lady that said she would
long arm quilt it by the 27th. (The baby shower was on Feb 28th). She totally surprised me and had it done on the 24th. She did a beautiful job of quilting it in a butterfly pattern.
      Thank you once again for your time and patience! I hope to take another class from
you soon.

Sincerely,
Terri

 
Here is Terri's finished quilt, a baby gift for a new grandbaby, Ella.  Even though she was under a tight deadline, Terri made the pieced borders and got it done on time.  Great job, Terri!

One lucky tool my students have to help them is a series of videos I did several years ago for www.monkeysee.com   It's called How to Quilt and you can find it here.  It took 6.5 hours to video the seven 3 minute segments.  I wasn't paid anything for this but it has been very helpful for the students at home as they try to remember everything I taught at week 2.  Each segment covers a small bit of the process.  I laugh when I tell people about it:  I can teach you everything you need to know in 21 minutes!  I thought they were pretty hokey the first time I saw them but they sure have helped my students.

To finish, here are just a very few quilts from past students, some tops done, some not quite yet--one week between finishing the blocks and having a complete top can be a challenge when life gets in the way.  I am always happy to get photos of their finished quilts and I add them to my slideshow of QM 101 quilts:

Linda R

Debbie E

Peggy H

Rhonda St.

Sophie on the right

I'm off to Chicago today to work at International Quilt Festival . To help fill the schedule, I'll be teaching 2 classes at Make It University on hand-piecing Lemoyne Stars and doing 2 two hour demo sessions on String Piecing at Open Studios.  If you are anywhere near Chicagoland, come to the show--don't miss a great opportunity to see quilts and shop vendors and take classes.  I am also taking a machine quilting class with Catherine Redford--I've got a busy week ahead!  Two of my quilts that were in the book 500 Traditional Quilts will be in that Special Exhibit and the Red and White--By the Numbers, the 40th anniversary Commemorative Quilt will be displayed. I'll be very happy to see it again.

Let's quilt!

Barbara


Tuesday, March 17, 2015

Happy St. Patrick's Day!

To celebrate St. Patrick's Day, I made 2 more Stars in a Time Warp, these in overshot green.  When we had the lesson in overshot green, a few weeks back, I used more bright greens.  Then I realized I had the perfect overshot green in my stash, the beautiful Peppered Cottons designed by Pepper Cory for StudioE fabrics.  So I added them to the group--can you find the new ones?


Here the are

Tomorrow, Barbara Brackman will introduce the next color we will learn about and I will make 2 new blocks to join these--I am having a blast with this project!  Check it out:  here.

I also got a head a bit with the Simple Whatnots Club project I'll be teaching in April:


This pattern is called Cloud Nine and the little one at the bottom is the size in the project.  It finishes at 3.75"--that's tiny.  So, I made a larger one, that finishes at 10".  On the larger block, I added the triangles on the four outer corners, which I omitted from the small block--I just liked it better without the triangles--though I reserve the right to change my mind later.  If I were making the entire quilt, I definitely would add them because they create a super secondary pattern when the blocks are joined with sashing.  See all the projects here:  Simple Whatnots Club Collection 2.

That's it for today--have a great St. Patrick's Day!

Let's quilt something green!

Barbara

Thursday, March 12, 2015

Stars In a Time Warp

I am having fun with these Stars, from Barbara Brackman's terrific Blog.  She is at week 9 already, using a different color/style of fabric each week.  It's very educational and fun!

This week is Chrome Yellow

I am making 2 blocks per week

 
It is less than 2 weeks until Chicago so I am concentrating on getting my kits ready for Make It University and my demo samples prepared for Open Studio.    Almost set with all that.

Our guild does a great quilt show every two years and I'm co-chair of that so we are really ramping up for all that needs to be done, even though the show isn't until October.  We will have one more face-to-face meeting with our committee in May--there was only one date we could make work before late in the summer and that just won't work.  We have wonderful people working with us--ours is a show not to be missed, if you are anywhere near North Alabama.

It's weird--for 34 years I worked for H&R Block and doing my own tax return, along with those of my kids, was just something that got done at work.  This year, I have to make time to do it at home!  Time is flying by, I'll be in Chicago for a week later these month, so I'd better get busy on ours and one son's.  The other son I managed to get done last week.  A word of warning about tax software:  if you say "yes" when you should have said "no", you'll get the wrong answer.  Several times I said "I sure am glad I know what the right answer is supposed to be" because I was not answering those odd questions correctly.  It took more than a few attempts to get that return correct. 

I found out recently I will have 3 quilts on display in Chicago at the Spring International Quilt Festival:  Red and White--By the Numbers, My Joyful Journey, and A-Round with My Friends--the same 3 that were in Houston, 2014.  If you're at the show, come say hello, I'll be in the Education office or working on the show floor.  Here is all the info you need for Chicago: Quilts.com


Let's Quilt!

Barbara