Sunday, February 12, 2017

Baby Quilt

So, what do you do when Stella's Splendid Sampler is done, except for block #100, which will be unveiled tomorrow?  The pieced borders are done, the floater borders are cut and waiting, the entire top is pieced together except the last row, even the binding is made and the backed is pieced.

And what  do you do when your  cutting table looks like this?


Because you cut far more 1.5" strips for those pieced borders than you needed?  And you remember you have a baby quilt to make for a new arrival this summer.  What DO you do?

I looked through the photos of quilt designs I've been saving, and found an antique quilt in this pattern, fast, easy, strip-piecing which I enjoy, the perfect solution.  So I got out the phone books I use for strip paper piecing,  The pages measure 8.5" x 6.75", perfect!  I cut them in half, 4.25" x 6.75", just the right size to cover with 6 strips of fabric:

Measure from the 3" mark at the center, trim to 6" x 4"

Remove the paper after trimming
 It took some simple math to figure out what size to cut the squares needed for the next step:  3.5" yellow print squares cut in half for the short triangles sewn on both ends of the fabric strips, 5"  light polka dot squares cut in half for the large triangles sewn on both sides of the blocks:


Trim to 7"

Then it was playtime, moving the blocks around until I liked the layout:


Sew them together, add a border, call it done:


And look what was left, still LOTS of strips:


AND a bunch of 4-patches, made while assembling this baby quilt.  I'll use those for another quilt, like this:


Now, the studio is cleaned up, and I'm ready for tomorrow, when I can finish Stella's Splendid Sampler.  All in all, a very productive day.

Let's Quilt!

Barbara

Friday, February 10, 2017

Sew-A-Long Link Up Party

Welcome to our first Sew-A-Long.  If you missed the other parts you will find them here:

Part 1 Introduction

Part 2 The Shoo Fly

Part 3 The Old Italian Block

Part 4 Setting Your Quilt On-Point


Part 5 Finishing Your Quilt

Now it's time to see what you've been doing.  And hold a Giveaway!

Link a photo of your finished quilt top to the Link below and be entered to win this:


The gift includes:

One of my favorite books, Quilts!Quilts!Quilts!
A previous year Quilt Art Engagement Calendar featuring my quilt Joyful Journey
A package of marking pencils in lots of colors
A 1" x 6" Omnigrid ruler
A bundle of 8 fat quarters of Metallic Fabrics--very glitzy

If you are unable to do the link-up, email me your photo and I'll post it for you.

The winner will be announced next Friday February 17, 2017--good luck!

Let's Quilt!

Barbara


Thursday, February 9, 2017

What's Under My Needle

Yesterday I put the final stitches in Rajah Revisited:


This was the 2016 BOM from The Quilt Show.  It's 68" square and very cozy.  I love the back fabric--bought at the annual Patches & Stitches New Year's Sale, buy 1 yard, get 1 yard free--I buy almost ALL my backs at that sale.    The quilt was beautifully quilted by Deanna Plotts, a Huntsville long arm quilter.  She used Feathered Curls, one of my most favorite pantographs, and sized it small scale to fit those small pieces.  All in all, I really like this quilt.  While working on this kind of heavily pieced quilt, I often just want it done.  I was at this stage with this one, but now, seeing it finished, I'm glad I persevered.  The center panel came from Quilt and Textile Collections.

What else am I doing?  Stella's Splendid Sampler is almost done--later today I'll make block #99 of 100.  I started the pieced border, designed to use up a bunch of the fabrics in this quilt.  Here you see the process and the huge pile of 1.5" strips I cut.  Looks like there will still be lots of strings left:


The Sunday Sew & Sews met last Sunday to discuss the Halo Star Medallion, Month 2.  In conversation, I learned something new and great to know:  Shelia mentioned she uses her Ipad to print the pattern pages.  That had never occurred to me, I just print from my computer in the studio, and run back and forth across the house to the office where the printer is.  Amazing!  I can print from my Ipad too--it's all on the same network.  I LOVE to learn new technology.  No more running back and forth to check the paper.  The lightweight paper often feeds better one sheet at a time, this tip will be such a help.  Thanks, Shelia!

Be watching tomorrow for the Link Up Party to go live--I am eager to see if there are more than the four people I know for sure who did the Sew-A-Long.  There is a Giveaway for those who post a photo of their finished top.  Of course, if the quilt is finished, that is extra special.

Let's Quilt!

Barbara

Friday, February 3, 2017

Sew-A-Long Part 5 Finishing Your Quilt

Welcome to our first Sew-A-Long.  If you missed the other parts you will find them here:

Part 1 Introduction

Part 2 The Shoo Fly

Part 3 The Old Italian Block

Part 4 Setting Your Quilt On-Point


Your quilt top is done, now it's time to finish your quilt.  My traditional style, Red and Green version:


This was machine quilted, free-motion and ruler work. It has wool batt which provides a lovely loft and definition to the quilting designs. The binding was applied by machine, then hand-stitched down to the back.

My Bright sample:


This was machine quilted very simply, with straight lines done by ruler work.  A cotton batt makes this flat and comfortable for a sleeping baby.  It was completely machine bound, applied to the back, then machine-stitched down on the front.

BATTING AND BACK CHOICES:

My favorite cotton batt is Quilters Dream Request weight--it comes in natural and white, choose white when your background is white.  It quilts easily by hand or machine, it drapes beautifully, looks great in a wallhanging, and is easily machine washed and dried.

My other favorite batt fiber is wool.  This quilt has Fairfield Nature-Fil wool batting because the crib size I had on hand was exactly what i needed for this quilt.  Wool makes the quilting designs prominent, is wonderful for sleeping in any climate, and makes the quilt very soft.  The only drawback to wool is that it shouldn't be dried in a hot dryer.  I always air-dry my quilts with wool batt so it is very important I have a label on the quilt with the batt information.  More on that later.

I like my back to hide my free-motion quilting stitches, usually, because I'm not very good at that yet. A busy print will hide everything.  Look for sale fabrics for the backs.  It is not important to me that the fabric on the back is one from the front, just that it looks like it was part of the plan.

Cut the back and batting about 4" larger all around than your top.  When having your quilt long-arm quilted, you should make the back and batting 8" larger all around so the quilter can load the quilt into the machine properly.

QUILTING DESIGNS:

This is one of those things that quilters seem to agonize over, myself included.  I use a piece of plexiglass to try out design ideas:

A Dry Erase pen works great, glass has tape around the edges to avoid marking on the quilt top with the pen

Another idea
I also draw the block design on paper and practice with pencil before stitching on the quilt.

On my traditional quilt, first I stitched in the ditch all over--then I could remove the safety pins I used to baste the 3 layers together.  Then I free-motion quilted two different designs in the two blocks.  The simpler one is better--I marked it with a stencil and red chalk pencil  The design on the Old Italian block is too busy in the middle.  I could take it all out and re-do those 6 blocks but I won't.  On the border, I used a curved ruler to stitch the spine for the feather, then free-motion quilted the feathers.  That came out all right, though I have too much quilting on the spine as I backtracked while creating the feathers.


On the Bright quilt, I decided to keep it very simple, stitch in the ditch all  over, then the middle of each row in both directions.  On the border, I used a cable stencil and chalk powder,  I should have taken more time to carefully plan those cables, some places have a wonky join.  Not taking that out, either:


PREPARING THE BINDING:

Binding can be made from bias-cut fabric or cross-grain fabric.  I did one of each.  For the traditional quilt, I cut the border fabric  into 2.5" strips.  For the bright quilt, I used the border stripe, but cut it on the bias.  I like how striped fabric looks as binding.

To determine how much binding you need, measure the perimeter of the quilt and add 12".  The extra gives you enough fabric for the joins and the turn the corners.  The traditional quilt is 32" x 40", making the perimeter 144" + 12" = 156.  Divide that by 40" to get the number of strips you need=3.9, rounded up to 4 strips. The strips are cut cross-grain, meaning from selvage to selvage, about 41"-42".  I cut mine 2.5" because I like that size binding, about 3/8" and I've done it enough to know that size fits my quilts.

For the bias strips, I cut a 45 degree bias cut about 24" long, then cut 2.5" strips in both directions until I had the amount of binding I needed.  The bright quilt is 33.5" x 42" so I needed 163".
First cut and two strips cut to the left of the first cut

Fabric folded up to allow one cut /strip. Ruler is placed at 7.5", then moved over to 5" and 2.5" to cut strips.

One additional strip was needed
I want the joins to be on the diagonal, making them far less bulky than if they were sewn straight.  I cut first. Place all the strips WRONG side up, cut a 45 degree cut from the upper left to the lower right:


Bias seam, pin if you need to, points stick out 3/8" on each end
After joining all the binding strips together with a bias seam, press the seams open, then fold the binding in half, wrong sides together, press the entire binding flat.

There is one more step now that will help me a lot at the end.  At the beginning end of the binding, I cut a 90 degree angle and draw a pencil line on the wrong side, from the upper left to the lower right:


SEWING BINDING TO THE QUILT:

 Trim the outer edges of the quilt square.  I use a ruler and measure from the border over to the edge, being sure to trim the outer edge precisely the same all around the quilt.  Here the 3.5" line on the ruler is placed on the inside edge of the border across the top and down the right side, giving me a perfectly square corner and borders that are exactly the same size, all the way around:


TIP:  lay out your quilt and check to see that the fabric joins will not fall at any of the four corners.  Whenever I take a "shortcut" and don't do this, I'm always sorry.  It only takes a minute or two to check and it's easy to move the starting place a bit to avoid that problem:

Binding pinned loosely in place to check corners

It is a good idea to check your seam allowance to be sure the binding will fit neatly over the edge of the quilt.  You are striving for an equal amount of binding on the top and bottom.  My 2.5" cut strips work well with a 3/8" seam allowance and I get that seam allowance with my walking foot attached and the needle position moved 4 clicks to the right.  To test yours, set a long stitch length, baste 4-5" of binding to the edge of the quilt, take it out of the machine and check it.  Make any adjustment necessary to get you the size binding you like.  NOTE:  I increase the stitch length to 3.0 mm--you will be sewing through 5 layers and a longer stitch is necessary.

Begin sewing the binding place well away from a corner,  I start in the middle of the bottom edge of the quilt.  Leave a 6" tail of binding for ease in joining the beginning and ending tails later.  As I approach the first corner, I fold the binding up at a 45 degree angle and finger press.  That shows me where to stop sewing at the corner:


Fold binding up and finger press

Stop sewing at the crease you finger pressed , I back stitch a few stitches
Remove the quilt from the machine so you can fold the binding neatly to create the corner:
Fold the binding straight up, creating a 45 degree angle

Fold the binding straight down, keeping the fold even with the top edge of the  quilt
Begin sewing at the fold, backstitch a few stitches if you desire as I do, and continue sewing down the edge of the quilt to the next corner.  Repeat until you have sewn the last corner.  Stop sewing about 12" from where you began stitching, leaving an ending tail:


To join the ends,  remove the quilt from the machine and go to a flat surface where you have room to work.  Lay the quilt out flat.  Place the beginning end flat on the edge of the quilt.  Take the remaining ending tail and lay it flat so that it meets the beginning tail:

Fold the ending tail back over on itself, so that there is just a tiny gap between the tails, no more than 1/8"

Use a ruler to draw a line 2.5" from the fold, OR whatever measurement you cut the strips

Carefully cut on the line
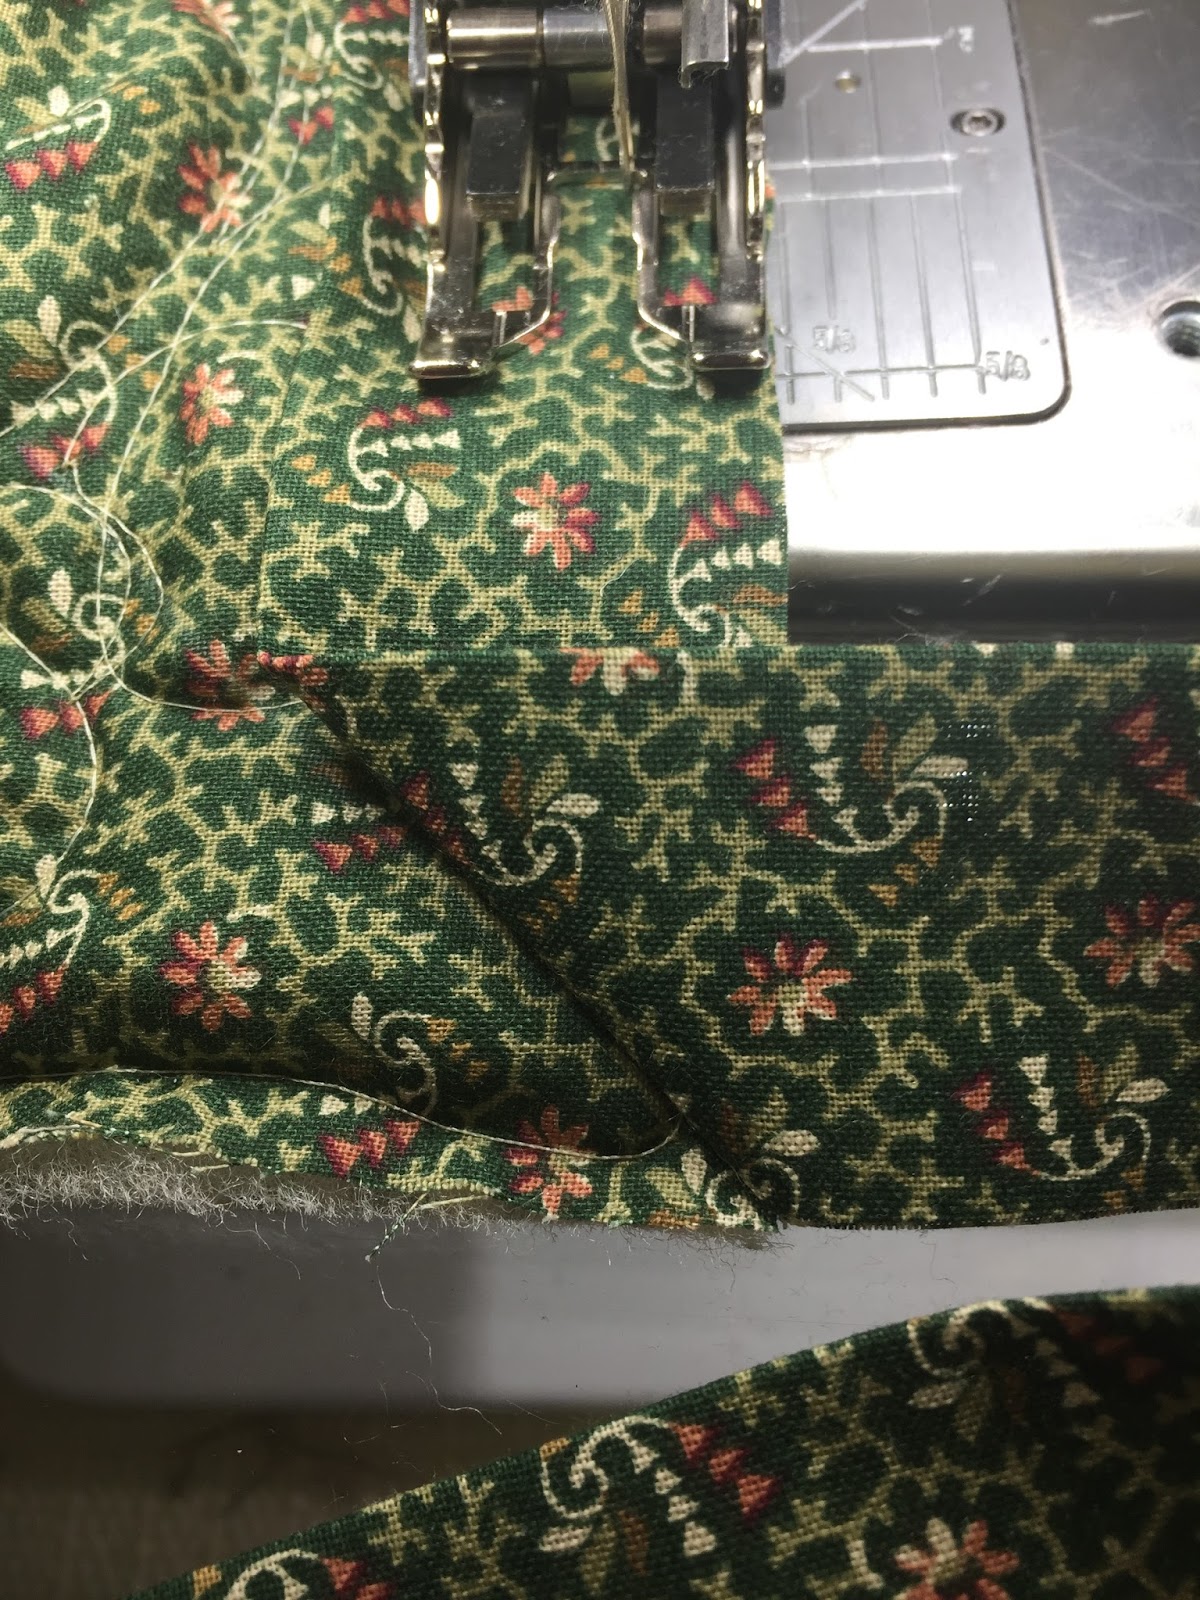
 Remember the pencil line you drew on the back side of the beginning tail?  You will  use that now.  Place it on the cut edge of the ending tail, at a 90 degree angle, with the pencil line running from the upper left to the lower right.  Pin in place.  Check to be sure the binding will fit nicely around the quilt.  If it does, sew the seam on the pencil line, check it one more time, then cut the excess away press the seam open, and finish the binding by sewing the remaining edge closed:

Beginning tail on top of ending tail

 Sew on the pencil line

Trim excess 1/4" away from seam, press seam open

Your binding is now attached to the quilt--good job!  Now you will either hand sew the binding to the back or machine sew it in place.

If you want to machine sew the binding in  place, it is recommended you sew the binding on the BACK of the quilt.  This will allow you to sew the binding in place on the front side of the quilt, being able to sew where you are going.  I also discovered my machine-sewn binding would fit a bit better if I moved my needle position over only 3 clicks to the right, one less than with the hand-sewn binding.  Live and learn.

To hand-sew, use thread that matches the binding.  Sew with a blindstitch, catching the fold and the back of the quilt with small stitches.  At the corners, fold one side in, then the other, to make a neat miter on a 45 degree angle:


Use Wonder Clips to hold the binding in place.  One will do, two are helpful, three are more than enough:

Green thread disappears on the binding.

For machine sewing, use decorative thread and/or stitches if you like.  I used bright variegated thread and a straight stitch:

Stitch close to the edge

Front View


Back View

You're almost done.  Make a label for your quilt.  Name your quilt, if you like.  Include the pattern sources if it's not your original design.  Include your name, location, date, and anything else you want future generations to know.  When I use wool batt, I always include that information.  If the quilt is a gift, I include the name of the person it was made for and the reason, such as a graduation gift.  The simplest method is to use a permanent pen to write this information on light colored fabric and attach the label to the quilt.  If the back is light, you can write directly on the quilt.  I use my computer and print out labels on fabric sheets prepared for printing, Printed Treasures or Electric Quilt Ink Jet fabric are favorites I have used successfully for years.

Here are the labels on the back of these quilts, after washing.  I air-dried the wool batt quilt and machine dried the cotton batt quilt.  The cotton quilt shrunk from 33.5" x 42" to 31.5" x 39".  The wool batt quilt, air-dried, shrunk from 32" x 40.5" to 30.5" x 39".  Both are soft and cuddly now:


 I always have quilts that need labels.  Here is the full page of labels I printed, ready to sew on other quilts now:


I also add a hanging sleeve to every quilt I make, incorporating the top edge into the binding itself.  Then I only have to hand-sew the bottom edge of the sleeve by hand to the quilt back.  For a quilt this size, I cut the sleeve 6.5", for a bed quilt or one I am entering in a show, I cut it 8.5".  When folded in half the sleeve is about 4" wide, as required for most shows.  It is easy to do now, during construction.  Here you can see the backs of both quilts, with their hanging sleeves:


That's it, all done.  Next Friday February 10, there will be a giveway for anyone who has their top done and posts on the Link-Up.  Be sure to stop back to see what others have done.

I hope you learned a little something.  What I learned is the next Sew-A-Long won't be a "teaching" one, it will be a "design" project, replicating one of my antique quilts, way in the future.

Let's Quilt!

Barbara


Wednesday, February 1, 2017

Halo Star Medallion--Month 2

Here are tips and tricks for making the Halo Star Medallion, 2017 Block of the Month from The Quilt Show.  You can find the previous post here:

Month 1

This month we add a border to the star, add large triangles of focus fabric to set the star on point, and make sawtooth borders that are added to the center with the help of "floater" borders, that will ensure your borders are all the perfect size:


Sue Garman has written excellent instructions--I encourage you to read them, carefully, more than once, if necessary.  The center star should be 16.5" unfinished.  If it is not, you can adjust your first border to make the star plus the first narrow border exactly 17.5" unfinished.

Tips for Cutting and Sewing in Month 2:

1. Cut borders exactly to size--Sue strongly recommends always cutting borders on the lengthwise grain--that is parallel to the selvages.  This is the most stable grainline of fabric.

2. Press borders in half, Right Sides Out, press Star block in half Wrong Sides Out--when you pin the     mid-point of each, they NEST, fitting nicely in place.

3. Pin the center, each outside edge and several places along the star/border.

4. Sew slowly and sew straight.  This is not a race. Slow down so you can be as accurate as possible.     If you can slow the machine speed down, do so.  I use lots of pins because I don't sew over pins--       having more pins naturally slows me down.

5.  When adding the large half-triangles to the first narrow border, sew with the triangle on the     bottom, that is a bias edge and it will feed better against the feed dogs.

Tips for Pressing:

1. Press toward the path of least resistance.  I pressed both border seams toward the border--this adds a little fullness to the narrow border and floater borders.  Those borders finish at 1/2" so there is just enough space for two 1/4" seam allowances.

2. DO NOT use steam in the iron when making/pressing the sawtooth paper piecing borders.

Making Sawtooth Borders:

There are several ways to make half square triangles--these finish to 1" and there are 102 of them. With the paper piecing method, I am making them AND sewing them together at the same time.  Trim the papers slightly larger than the outside line--having lots of extra paper makes the pieces bulky.  Cut the number of triangles you need for the first (left) border, 25 of each color:


I have the older Add-a-Quarter Ruler, so I use a postcard as the straight edge.  In show 2001 Carolyn Hock showed the newer version of that ruler.

Placing that first triangle seems to get people--here is my tip:

Put the butt side of the fabric on the butt side of the paper.  We start with a background triangle:


Cover the triangle printed on the paper--hold this first piece up to the light if you need to, to see that it is placed correctly. Some people like to use a tiny dot of washable glue stick to hold this first piece in place.   Put the colored triangle on top of the background triangle, right sides together, just like you normally would:


CAREFULLY FLIP ALL THIS OVER. If you need to pin, put the pin on the paper side, double checking that you haven't moved the fabrics when pinning.  I don't pin.  Sew with a small stitch, 1.5 works for me, starting and stopping beyond the the seam line, just like you normally would.  Sew ON THE LINE:


I work all four papers at the same time, chain piecing as I go:


After sewing the first seam, it is time to trim the colored triangle--it is oversize to start with.  By trimming it now, we will know exactly where to place the next background triangle. Place the postcard on the next line to be sewn:


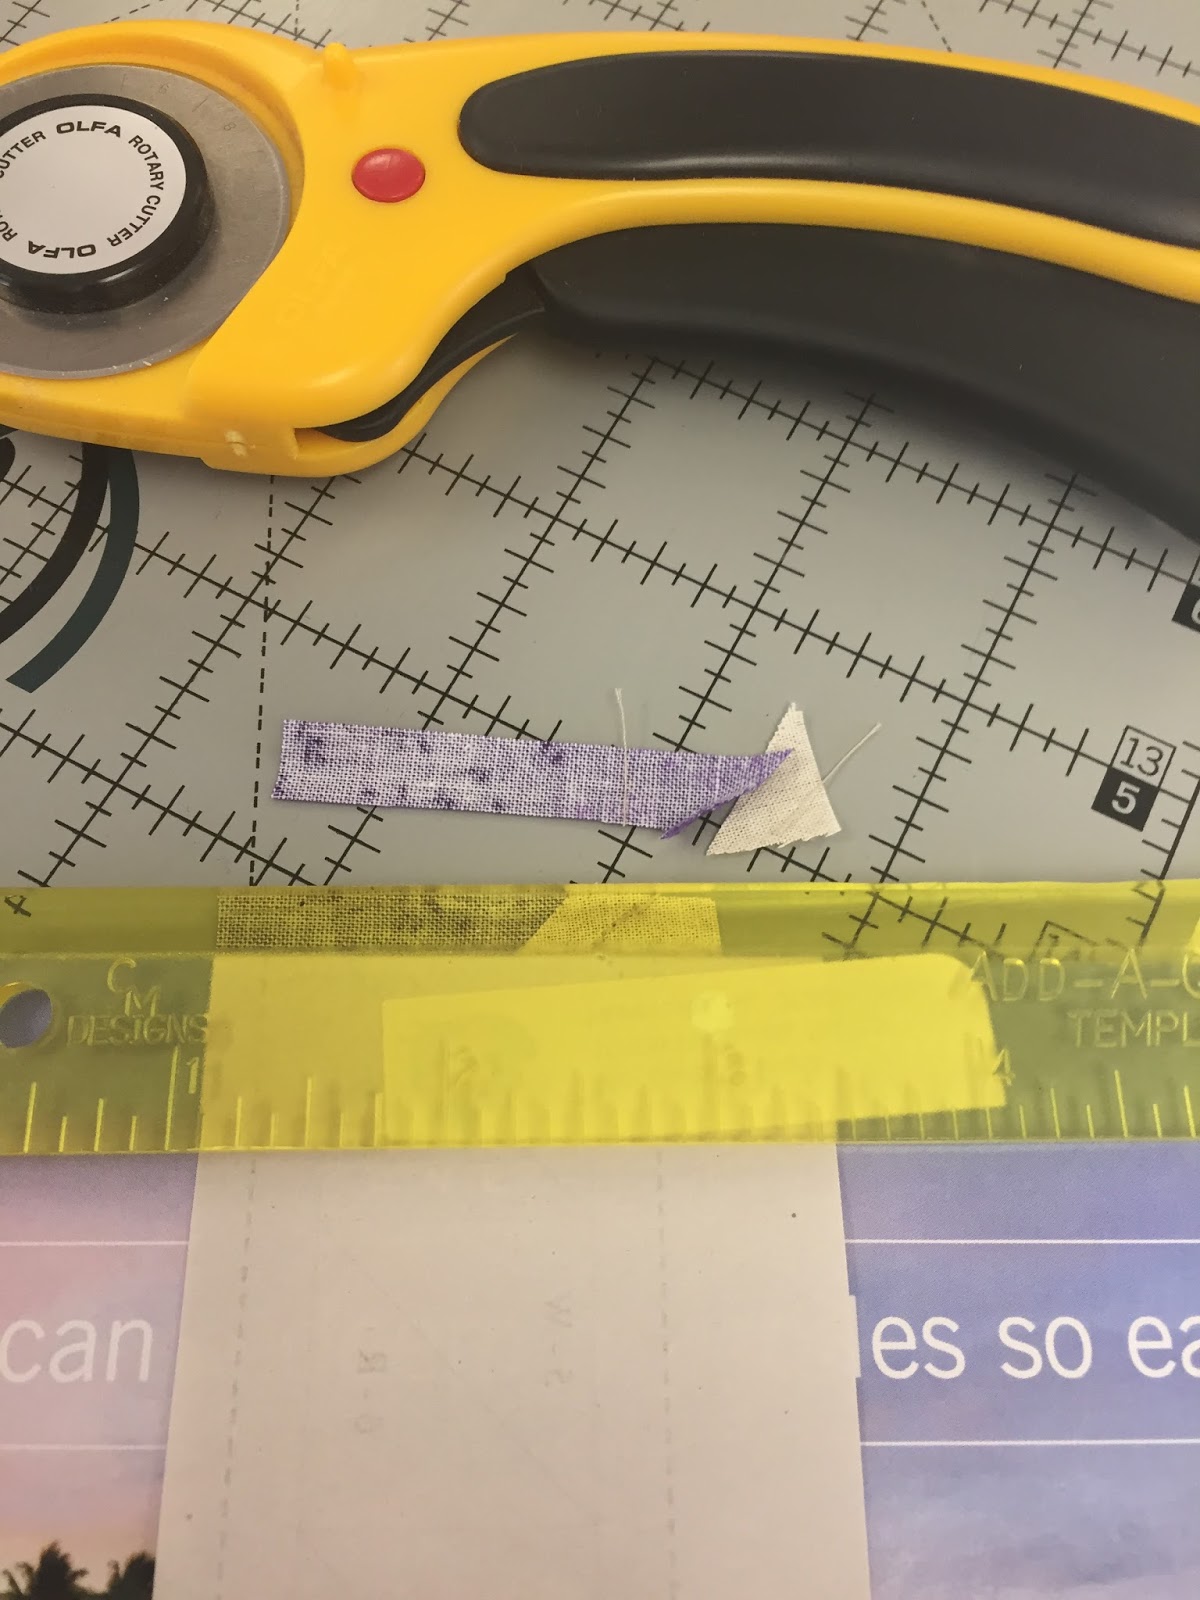
Fold the paper back on the postcard.  Place the Add-a-Quarter ruler firmly against the paper/postcard edge, and trim the excess away.  The purple triangle seam allowance is now exactly 1/4":


Think about this, what color did I just sew?  Purple.  So the next piece is background.  And it goes in the same orientation as the previous background triangle--lay it out to be sure you are correct:


 Flip the background triangle over onto the purple triangle, lining up the seam allowances. Be sure the background triangle is positioned so it will cover the paper as it should.  There is not a lot of extra fabric here so you have to place the pieces carefully:


What happens when you have an OOPS?!  Here I didn't place the purple triangle carefully and when I opened the seam this is what I saw--I drew a pencil line on the butt side of the paper so YOU can see, this triangle does not come close to covering the space it needs to cover.  I must fix it:


It is hard to pick these tiny stitches out, especially if  you try to dig on the paper side with a stitch ripper.  Instead, use Scotch Magic tape--place a small piece of tape on the paper, on the seam you need to remove--my problem seam is where pieces 3 and 4 are sewn together:


Carefully remove the seam, both pieces of fabric, from the paper--the tape will keep the paper intact, and you can use your stitch ripper to gently, slowly, un-sew those stitches, working on the background fabric side:


Once the problem triangle is removed, you can reposition it, more precisely this time, and re-sew, directly on the tape--you can still see the line through the tape.

Here are all four paper patterns sewn, ready to be trimmed:

To trim them, place the 1/4" mark on the ruler on the solid line, being sure you are cutting these exactly 1/4" away from the solid line:


Here they are, nice and trimmed, with all the fabric I "wasted" with this method.  I am happy to use up that much fabric to achieve that much precision.  And, by the way, I kept track, it took me under an hour to sew and trim each of the four borders.  The first one took longer because I had to take photos:


Now you join the four paper pieces with 1/4" seams and your sawtooth border is done.  I removed the paper at the places where the units are sewn together so I could get them sewn quickly.  The rest of the paper was removed while watching TV, later.  With the tiny stitches, the paper comes off quickly and cleanly:


Measure, and if you're living right, this left border is 25.5" unfinished:


The right border is made exactly the same. The top and bottom borders are made the same with one MAJOR DIFFERENCE:  the FIRST triangle placed on the paper is the COLOR (purple in my case), then the background triangle is added.  Also, there is a single background square added to one end of each of the top and bottom borders.  It DOES make a difference in sewing the triangles exactly as shown--IF you want the borders to come out "marching" in the correct orientation.

Once the four sawtooth borders are sewn, trimmed, and stripped of their paper, you will use Sue's great instructions to determine the size you will cut your "floaters".  I wrote a tutorial about this which you can find here.  It uses Sue's exact instructions so it may not provide any new information to TQS members, but may be helpful as general information.

Remember to cut the floaters from lengthwise-grain fabric--I cut two at once so they are exactly the same size.  Measure exactly. Pin a lot. Sew slow. My left and right floaters need to be cut 24.5", here are two longer strips folded in half and placed on top of each other--this is four layers of fabric.  The ruler is placed ON  THE FOLD  at 12.25", half of 24.5".


Here are the top and bottom floaters, in half, four layers, ruler placed ON THE FOLD at 12.75", half of 25.5":

 Here are both sets of borders, trimmed and ready to attach to the quilt:


I pinned the first floater, the left side, to the center, placing the floater on the bottom, so I could see the seam allowances at the mid-point:


I pinned the two outer edges, the middle, and then added about 10 pins over the length of the seam to be sewn.  Note, I always place a pin at the bottom edge, out of the way of the presser foot, so I can sew completely off the edge without removing that last pin.  It helps to keep me straight all the way to the end of the seam:


Ready to press.  Place the fabric you want to press TOWARD, in my case the blue floater, facing up. Set the seam by pressing it closed first. Then  use the edge of the iron to press the blue fabric up and away from the center.  I can't iron and take a picture at the same time so:


Once the four floaters are sewn in place, you repeat with the four sawtooth borders, left, right, the top, then bottom Again, I pressed the seams toward the floater, away from the sawtooth border, It would not be fun to try to press all those sawteeth back on top of themselves:


Here is the front, all done:

Here is the back, all done:


Next month, we'll be making Evening Star blocks, one of my favorites!

NOTE:  I've been asked about the paper.  I am using newsprint and found it here.  Note the paper costs less than the shipping.  You may find it at Dollar General or Family Dollar stores on a 9" x 12" pad, you'll have to trim the pages to 8.5" x 11".  One of my group friends bought a pad of lightweight tracing paper and really liked that too, inexpensive and see-through.  She has to print one page at a time in her printer.

And, look at the great blocks the Sunday Sew and Sews have made:


Let's Quilt!

Barbara