This month we add a border of 4" Evening Star blocks, each with a "stagger strip" attached, and a floater border between the stars and the middle of the quilt, already completed.
Here are some tips that I hope will help you with this month's steps.
1. Decide--will you paper piece the stars or piece them the regular way? Sue's directions are for paper piecing.
If you will be paper piecing, print the foundation patterns, being certain they print the correct size. Each star block is 4" finished; with the 1" finished stagger strip added, each star unit is 4.5" x 5.5"
unfinished. The small corner squares are 1" finished--use that as a guide.
If you will be sewing your stars the traditional pieced way, you get to decide if you want to cut the pieces the
exact correct size OR do you want to make
Oversize geese, then trim them to size? I have a
detailed tutorial on making four geese at once, just enough for each star, and making them
oversize--allowing you to "trim to perfection"--find it here:
My Flying Geese Tutorial. These geese units (the star points) finish at 2" x 1".
I tried both methods, timing each one, and while the paper pieced block took 30 minutes and the traditional pieced block took 20 minutes, my precision was better with the paper piecing method. So that's what I did.
2. Tips for Paper Piecing: I wrote a tutorial for Month 1 that includes lots of tips, on things like the paper, thread, how to press, etc. If you haven't read that, you can find it here:
Paper Piecing Primer--Halo Star Medallion Month 1. I used plain newsprint, inexpensive and already cut 8.5" x 11". My thread of choice is Masterpiece or Aurifil. NO STEAM in the iron, we don't want pulp.
4. Fabric Selection: now you can play in your fabric, selecting lots of pieces for your star points and centers. I returned to the background fabric I used for Month 1--I changed to a different background for Month 2--but you'd have to get awfully close to tell the difference. I have a stack of 8 background fabrics that will work their way into this quilt, all very similar. For star points and centers, I picked 8 fabrics from the stash I put together for this quilt, some I'll use again a lot and some that might not appear again--they just had to look good with my focus fabrics. Don't sweat the small stuff!
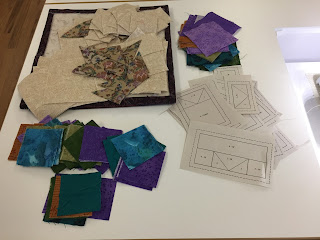 |
| Backgrounds, Centers, squares for star points, focus fabric star points cut into triangles, some paper foundations ready to go |
4. Making the Stars: Cut out the four paper foundations needed for each block, trimming close to but not on the outer dashed line. Wider margins just get in the way. Select the center and star points for the block, cut the squares for the points in half, cut the large background square into quarters, and you're ready to go.
After placing the star point triangles in the wrong place more than once, I had to figure out where they should really go. Put the "butt" side of the background triangle on the "butt"side of the paper, then place the first star point triangle so the outer corner of the triangle (on the lower right) is in line with the corner you can just see on the upper left--the newsprint is light enough to see through. When I lined up the star point triangle with the bottom of the background triangle, as you normally would in traditional piecing, the star point didn't fit to cover the space it had to cover. Once I moved it up, like this, it fit every time.
I chain pieced the four units, flipped open the first star point triangle, then added the second star point triangle, again lining up the purple corner with corner on the paper:
Make all four units, finger pressing firmly during construction. Press all four units with a hot, dry iron before trimming.
5. Block Assembly: Here is what I did. When making the stars, I paper pieced all the units, four per block, then trimmed each unit carefully. To trim, I placed the 1/4" line on my ruler on the solid line on the paper foundation, and cut exactly 1/4" from that line, creating a precise 1/4" seam allowance on each unit:
Remove the paper after you have each unit trimmed. Here three of the units have the paper removed, one is trimmed and ready to have the paper removed:
6. Pressing of Seams: I discovered the best way for me to press the seams was the center row IN to the center, and the top and bottom star point rows, out, toward the solid squares, the "path of least resistance". Of course, I figured that out after making the 7 stars for the left border--when joining those 7 star units, it became obvious this was the better way to press so I re-pressed those 7. This allows the units to "nest" a bit as you join them together. The "stagger strip" is automatically pressed down during paper piecing construction. Here the paper is still on so you can see the units. I took the paper off before joining the four units into one star block unit:

7. Lay out the Stars: however you like, moving the various fabric combinations around until you're happy with them. If you have a camera that happens to also make phone calls, use it to snap a shot when you're satisfied with the layout. Here you see the final border, the bottom one, laid out with the other three borders already sewn together. Be CERTAIN you add the additional, longer "stagger strips" to the top and bottom rows, according to the instructions. I ran out of background fabric at the very end--my bottom longer stagger strips are a different fabric than all the rest, don't tell:
8. Sew the Borders: I pressed the seams open on the star units, that worked best for me.
9. Floaters: use the instructions in the pattern to measure your sewn borders and the middle of the quilt you finished last month. My sewn borders were 1/4" longer than the perfect measurement. I don't know why, they SHOULD be perfect, but all 4 borders were 1/4" longer so I simply used those measurements when figuring out my floaters. Lucky for me the middle was ALSO 1/4" bigger than perfect so my floaters remained 1/2" finished, 1" cut.
10. Joining Floaters and Star Borders: Cut the floaters from fabric parallel to the selvage for stability. Carefully cut them the size you determined they need to be. I cut two at a time so both left and right floaters will be
exactly the same size, then I cut the top and bottom, two at a time. Don't get your measurements mixed up. I pressed the Floater with the Right side out and I pressed the middle of the quilt with the Wrong side out. At the centers, I place a pencil mark in the seam allowance indicating the middle of both the floaters and the quilt. I do the same with the star borders. This makes it very easy for me to see the mid-point of each when pinning them. I pin the middle, each outside edge, and then use additional pins along the edges, about a dozen pins at this length:
It is not a race to see how fast you can sew the various borders on--slow and steady will allow your borders to be as straight as possible.
I pressed ALL seams toward the Floater--it is 1/2" wide so has just enough space to contain both seam allowances. I like how the seam allowances seem to fill out the floater just a bit. Sue's instructions say to press away from the center. Do what works best for you.
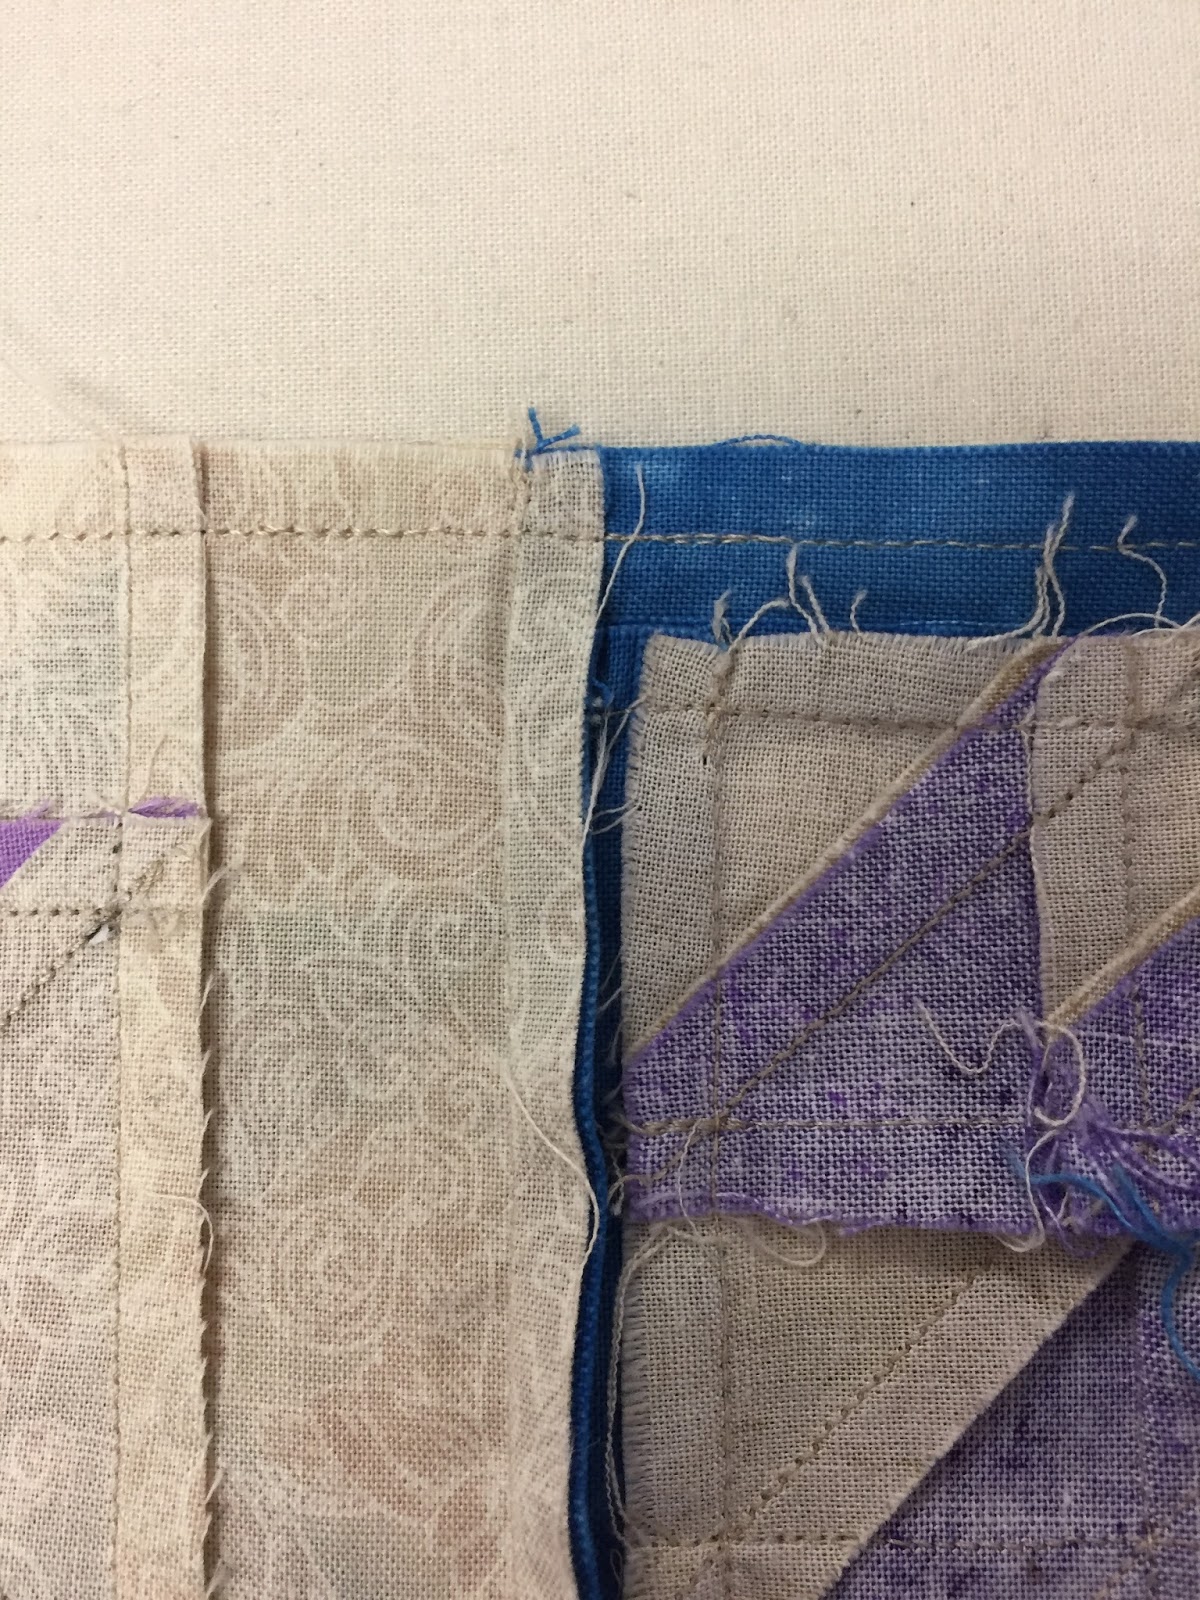
11. What could go Wrong? Sew with seam allowance sides facing you so you can keep the seam allowances flat. Occasionally, there are seam allowances on the bottom you can't see and sometimes they get "wonky", a technical term:
Fix this as soon as you see it, probably while pressing the seam flat. Your finished quilt will be better for it. This is NOT a quilt police thing, it's a "how can you make the best quilt possible" thing. You are putting a LOT of work into this project and it deserves your best efforts. I confess--this happened to me 3 TIMES this month, and I was careful with pinning and sewing. NO BIG DEAL, just unstitch a few stitches and re-sew the problem area so it is FIXED:
While pressing all your floaters and borders after sewing them on, watch for threads that have been sewn through to the front of the quilt. Gently pull to remove or carefully cut them off at the surface--it is a lot easier to do this now, rather than after the entire quilt is done. You want a nice, neat quilt.
That should hold you for now. Next month we tackle those curved flying geese units.
Let's Quilt!
Barbara