Showing posts with label machine applique'. Show all posts

Sunday, April 28, 2024

PICK A PETAL -- MONTH 5

PICK A PETAL is the 2024 Block of the Month quilt designed by Jen Kingwell exclusively for The Quilt Show. It is FREE to Star Members, join today to take advantage of this great bonus. WATCH Jen's Show to see how she makes this quilt--it is FREE for EVERYONE all of 2024: Jen Kingwell Show 3401

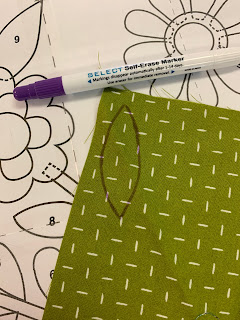
It is time to start the applique on the lovely Log Cabin borders. Here are two photos showing Jen Kingwell's stitching. We will learn more about the embroidery in future months:


Here is mine on the design wall. I am preparing two of the borders to travel with me to Texas. The hand applique will be done in my hotel room in the evenings:

All I need to work on these away from home are needles, thread and a good pair of scissors. A needle threader helps too. The pre-wound bobbins of Quilters Select 80 wt. thread is perfect for hand applique and has every color I can possibly need:


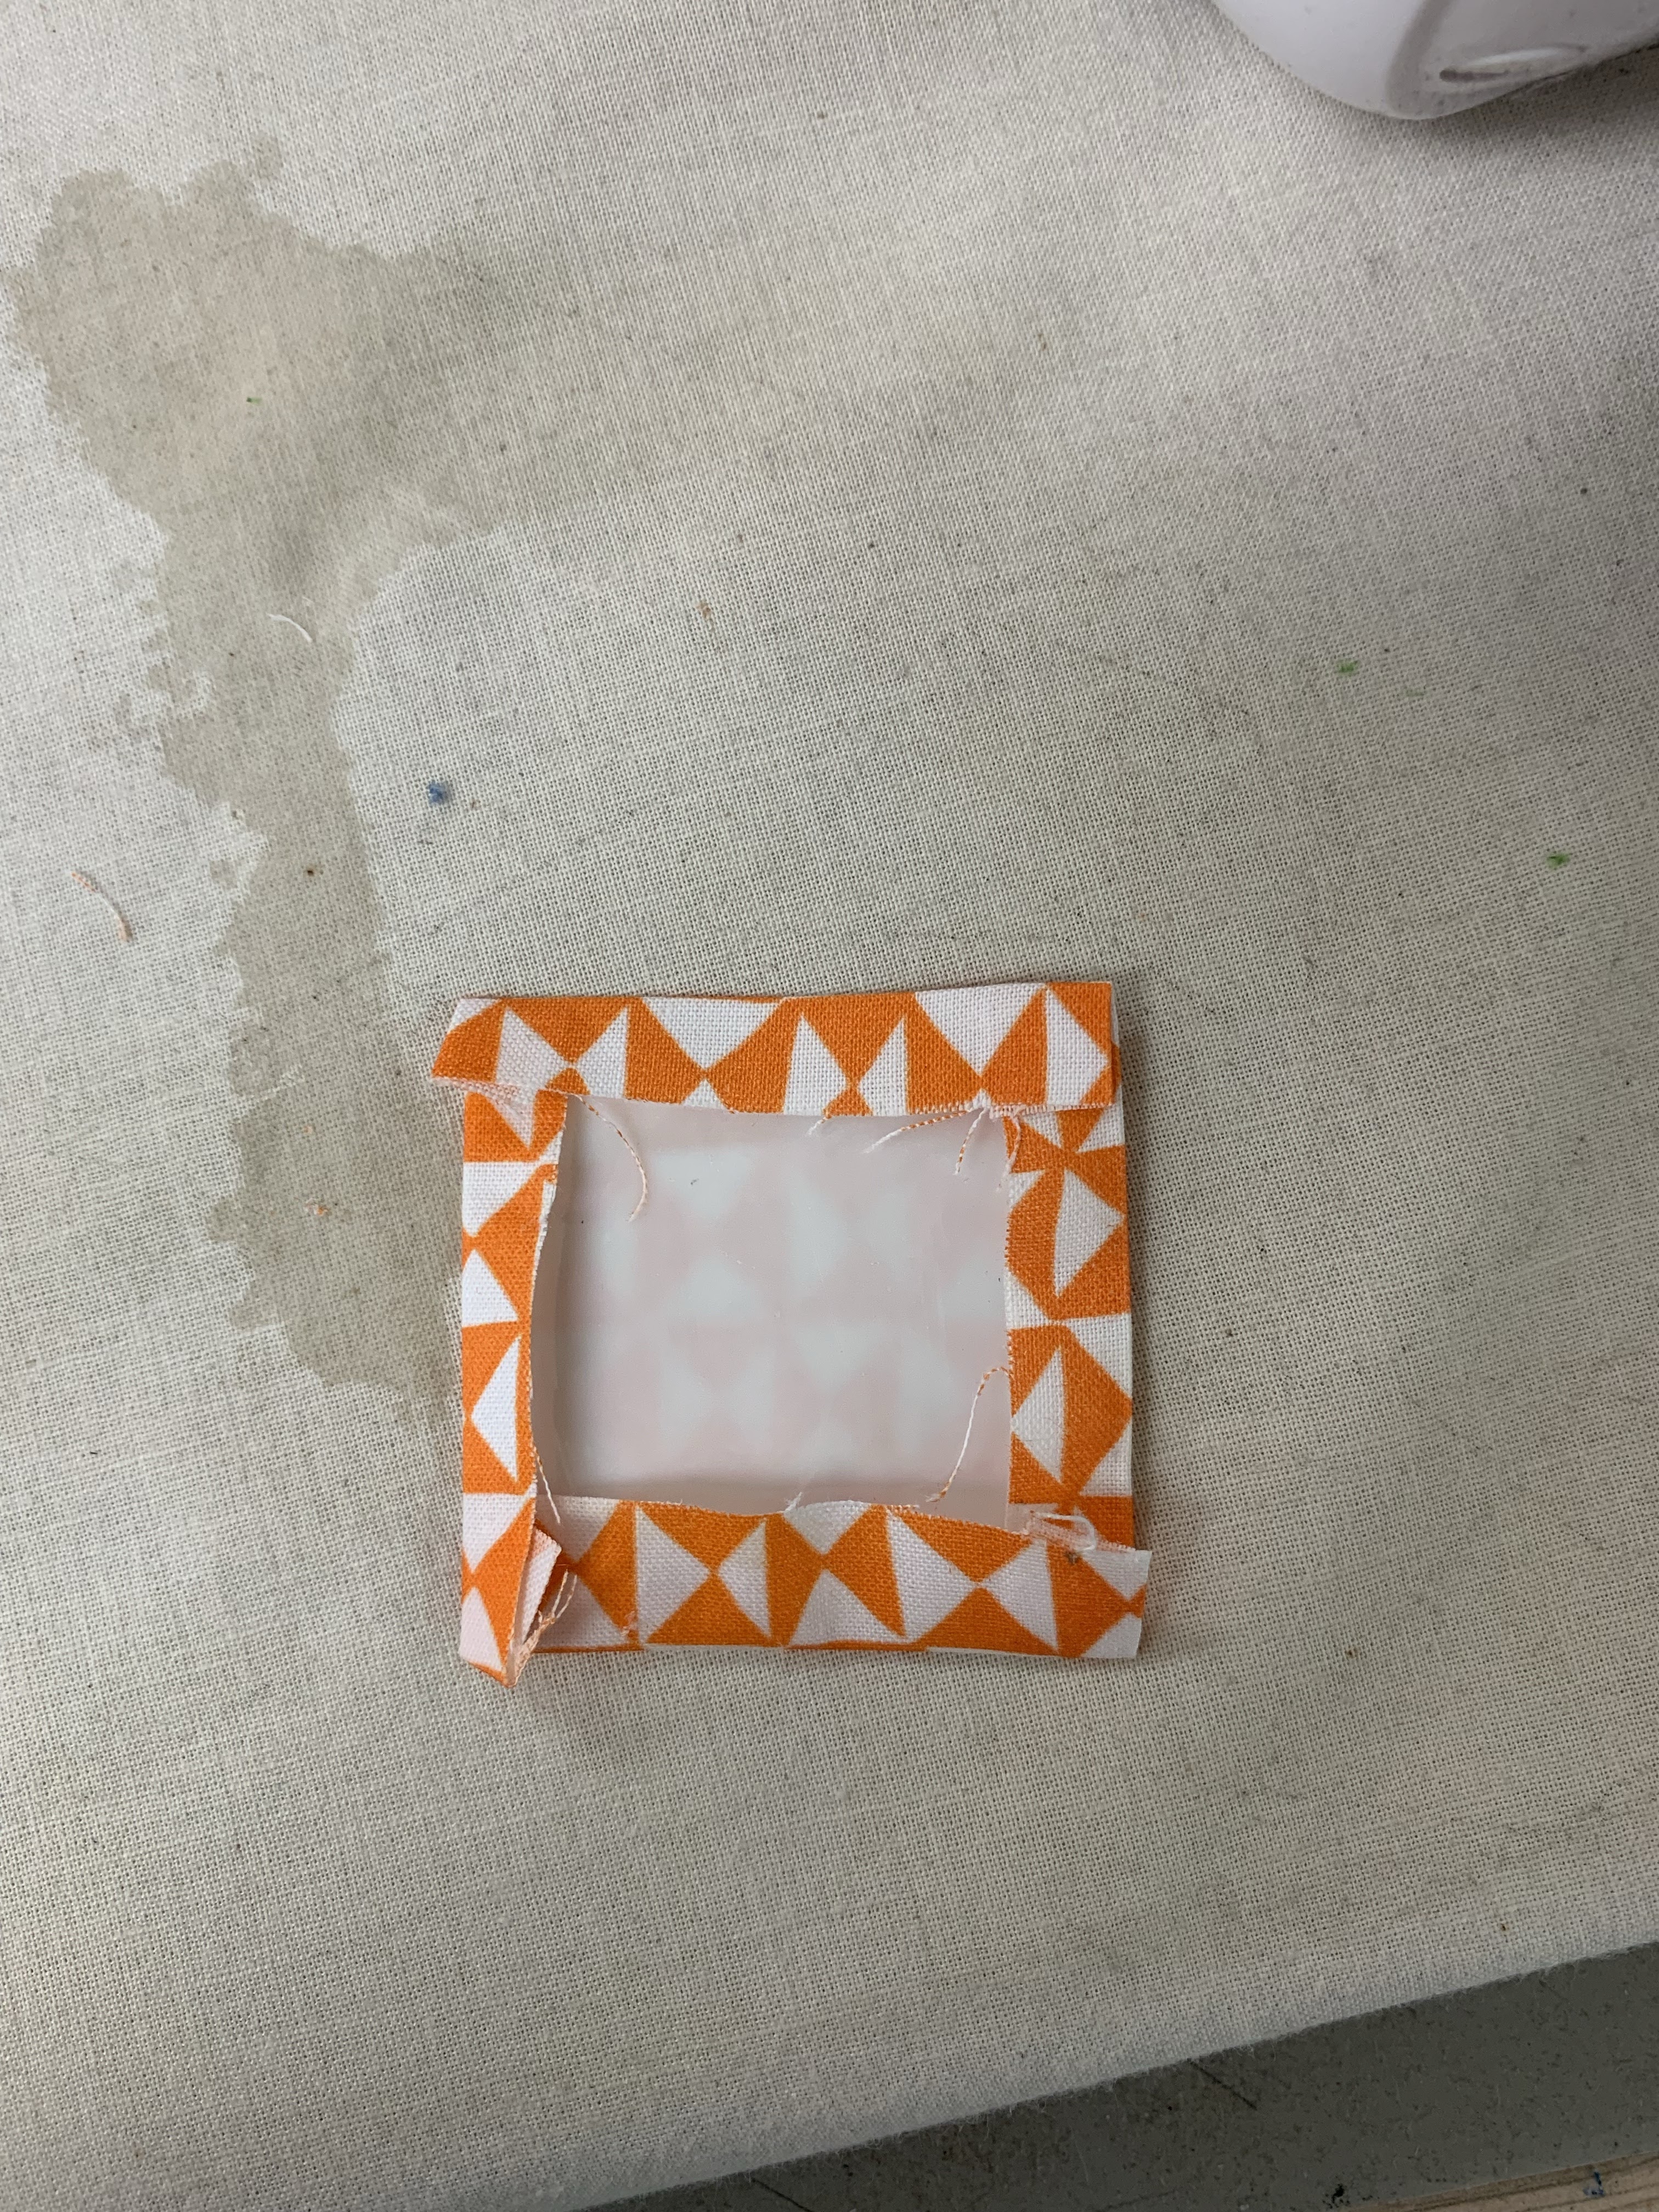
I prefer turned edge applique to raw edge so that is what I am doing. The Kit includes Mylar templates for all the shapes used in the quilt. Mylar is heat resistant plastic, use a synthetic setting on your iron, not super hot. 

Searching on the internet for videos to share with you, I found a couple. The first is Jen Kingwell showing hand applique of circles:

MARSHALL Quilt

The second is Margaret Mew demonstrating how to prepare applique shapes using Mylar templates:

Margaret Mew

On my blog I have written MANY times about turned edge applique. Use the SEARCH box in the upper left to look for Turned Edge Applique to find them. 

A very helpful tool for preparing applique shapes is a Sandpaper Board. Jen Kingwell's is perfect, not very expensive and can be used on both sides. Buy it at The Quilt Show Store:

For bias stems I simply cut bias strips 3 times the size of the finished stem. For 3/8" stems, cut 1 1/8" wide bias--or close. These whimsical flowers should be "organic", not precise. Then I fold them in thirds and they are done. Here is a bunch I have ready:

For the flowers I dug through the Mylar templates to find the ones I needed for Month 5. This is the BOTTOM ROW Log Cabin border  of the quilt. I complicated my life by putting 6 Log Cabin blocks on the Top and Bottom rows, and 4 on the Left and Right Sides.  It takes extra effort to figure out which motifs are intended to go on the outside corner blocks. And their orientation. So, I recommend you follow the instructions for the Log Cabin block rows, Month 4.

Then I played with fabrics to make my selections. While I used the photo of Jen's quilt as a guide, I made changes using the Kit fabrics. And sometimes I just used some of my favorite fabrics. 

If the shape could be easily prepared for machine applique that is what I did. Squares are easy. 

Use the Sandpaper Board to hold the fabric while tracing around the template. A mechanical pencil is my marker of choice, as long as I can see it:


I cut a slightly larger than 1/4" seam allowance: 

This is a starch-like product; use starch, sizing, Best Press, etc, to give a crisp edge. I like to use this small Steamfast iron because it is easy to clean the starch off the bottom. (Mine is not one of those recalled for safety): 


Once dry I remove the template and the shape is ready to be sewn in place: 

Once I had the stems prepared, I used very small dots of Roxanne's Glue Baste It to hold the shapes in place for machine applique. I did the stems first then added any other shapes that would be sewn down by machine. If the shapes were easier for me to prepare for hand applique, that is what I did. Here are several prepped and ready:

This shows the stem machine appliqued and the flower parts prepared (the circle) or traced ready for hand applique:


The stitch I use for machine applique is one Alex Anderson has taught several times. It is a Single Blanket stitch. On my Bernina 770 it is stitch 1329, Width .8 and Length 1.7. Play around with your machine to find a stitch you like. Then WRITE IT DOWN so you can use it again. Even though I have saved this stitch in my FAVORITES, I still write it down so I know I am using the same one each time. In the past I have used a small zig zag, that works well too.

Here is a great VIDEO of Alex showing her process. It starts at about 10 minutes into the video:


For thread, I used Quilters Select 80 wt, color # 275, a bright green, in the top and a neutral in the bobbin. I knew I wasn't going to change thread colors so this was a good choice. The stitch is small, the thread is fine, it's hardly noticeable even when there is contrast with the applique shapes. Remember, when the quilt is done most people won't see it from any closer than 6 feet away:


Feel free to draw your own "organic flowers"--Jen encourages you to do this in the pattern instructions.

Next month we will be adding the appliques to the Top Border. Embroidery instructions begin in Month 7.

Please add your Progress photos to the FORUM. That is also the place to ask questions, I check there frequently.

Let's quilt!

Barbara


Monday, January 31, 2022

GPDU--MONTH 2: VINE APPLIQUE AND DOGTOOTH BORDERS

Garden Party Down Under, aka GPDU, is the 2022 Block of the Month quilt for The Quilt Show. Designed exclusively for The Quilt Show by Irene Blanck, the patterns are FREE all year to Star Members. If you are not a Star Member, you can still watch the Show I taped last August. You may learn tips and tricks that will encourage you to try applique. Watch the Show Here


This month we add a vine applique border to the center made in Month 1 and then surround it with the matching Dogtooth Border on the outer edges.

IMPORTANT THINGS TO KEEP IN MIND this MONTH:

1. Cutting the borders for the vine applique:

The pattern tells you to cut 4 background borders, 23.5" x 5.5" and two 6.5" squares of background for the Basket corner. To have no seam in the border, cut FOUR Width of Fabric (WOF) strips 5.5" wide, then sub-cut into a 23.5" x 5.5" border. IF YOU ARE WILLING TO  HAVE A SEAM IN THE MIDDLE, cut TWO WOF strips 5.5" wide. From those, cut TWO borders, 23.5" x 5.5", then use the leftovers to create the other TWO borders--be sure the seam is at the exact center--11.75" from the center seam to the outer edges makes the background borders 23.5" x 5.5". 

The center seam isn't noticeable and after quilting will be very hard to see:


2. Understand the Vine Applique Border PATTERN:

The pattern presented is HALF the required size. At the Center, it says to "MIRROR pattern at this point". First, check to be sure your pattern is printed the correct size. This is easy--join pages 3 and 4 and MEASURE from the outer edge to the Center--not including any seam allowances, the pattern should be 11.5" x 5.5". With the seam allowance, it will  measure 11.75" x 5.5". If yours is not this size, adjust printer settings to get it the correct size before you begin.

Using a lightbox, you can see where the narrow stems go for the 48 leaves, 12/border. I marked them with a Self-Erase Marker, one border at a time, then stitched a Satin Stitch, 1/8" wide, instead of making 1/8" stems. Satin Stitch is a zig zag stitch with stitches very close together. My settings were 4.5 W by .15 L. It was fast and easy, the same green thread I am using for machine applique was perfect. Stabilizer is necessary for machine stitching like this--I simply lightly fused a small scrap of Print & Piece Fuse Lite to the area where each stem was to be stitched--it tore away easily after stitching: 

VERY IMPORTANT TO  UNDERSTAND: to MIRROR the pattern, you  have to TURN THE PATTERN OVER TO THE BACK SIDE. Consider printing on Vellum, a thick tracing paper, which allows you to see through it. ALLOW INK TO DRY FOR A FEW MINUTES--you don't want printer ink on your fabric. 

Here the pattern is right side up--you can READ the words: 


Here the pattern is MIRROR IMAGE--the words are BACKWARDS:

I could see through a copy paper pattern when it was upside down with a Lightbox, but the Vellum makes it very easy to see from the top side.

It is absolutely essential the vines come in and out of the border to the corners exactly as the pattern shows because the vines attach to the Basket corners as shown:

UPDATE, PLEASE NOTE: the pattern does not include two additional leaves at each of the baskets, where the vines attach to the baskets. The instructions say to add the additional leaves after the borders are attached, I missed that. See them in this photo:


3. READ Irene's Instructions before beginning:

The pattern tells you the length of vine needed for the 8 vines that go on the vine border. It says to leave at least 4" of vine off each end--these will be attached to the Basket Corner blocks AFTER THE FOUR VINE BORDERS ARE SEWN IN PLACE. 

Here vines are hanging off the vine borders. waiting to be stitched onto the Basket Corner block:


)

Here the top vine has been added to the Basket Corner block. The right vine will be added to the Basket Corner block after the top border has been sewn to the middle: 


4. Flower Petals on Large Center Circle:

I found it difficult to sew the 6 flower petals onto the large circle since I had cut  out the large circle and hand sewed a running stitch to the large circle first. In hindsight, it would have been easier to start with a 5" square of fabric for the Large Circle--sew the 6 petals in place to it, THEN carefully draw the large circle, being sure the petals were centered. Again, the pattern printed on Vellum makes it easy to see where to place the petals:


5. Double Circles:

Karen K Buckley's Perfect Circles are the method I am using for the many circles in this quilt. I waited until the borders were completely sewn on to add the Double Circles--this can be done when adding the leaves and vines if you prefer. 

Having learned my lesson with the Flower Petals on Large Circle, I first stitched the small circles to a square of fabric which would become the larger circle:

Once the small circle was sewn to the square, I used a circle template to draw the cutting line for the large circle on the back of the square. Cut out the large circle, baste a running stitch in the seam allowance, then add the Perfect Circle disc--this allowed me to be sure the small circle was centered, or very close to centered. Sew the Double Circles to the borders--there are 8 of these:

6. Dogtooth Borders: 

Whether making the Dogtooth borders by hand with Irene's pattern/instructions, or paper-piecing them with my Optional Alternative Instructions, BE SURE YOUR PATTERN IS THE CORRECT SIZE. 

Each of the 4 borders is 33" x 2.5" FINISHED--meaning when sewn into the quilt. The patterns to work with must be 33.5" X 3", including seam allowances. Irene's pattern is half the needed size, mirror at the center. My PDF paper pieced pattern is full size--when glued together, be sure they are the exact correct size. 

Be sure you sew the Dogtooth borders in the correct orientation--the "teeth" in Month 2 point IN. Month 1 they point OUT. Ask me how I learned this lesson...

They are made like the Dogtooth border in Month 1, review the video for this step in Month 1 Videos.

7. The Dangling Leaves:

There are 8 leaves which dangle off the edge of the Vine Applique Border onto the Dogtooth borders. After sewing the 4 Dogtooth borders to the outside edge, add those remaining 8 Leaves:

Missing Leaf: 


Dangling Leaf ready to be sewn in place:


Next month, we will make an applique vase and one of  six pieced blocks. We will make a tiny Dresden Plate for the center of the pieced block. More fun to come!

Need a Laugh? Here is the first photo I took, of Month 2 completed--when I thought I was done. It happens to all of us from time to time: 


Let's quilt.

Barbara


Sunday, January 2, 2022

GPDU Month 1--Part 2

 Once the Stems are in place, it's time to add flowers, leaves, berries and the  vase.  Irene's Month 1: 


Irene Blanck used Needle Turn Hand Applique. I used Turned Edge Machine Applique. You can even do Raw Edge Machine Applique. Compare the preparation BOTH Turned Edge and Raw Edge Applique using Print & Piece Fuse Lite  in this detailed post made for the 2020 Block of the Month: Afternoon Delight

PREPARATION OF THE SHAPES  Irene's method, Needle Turn Hand Applique:

Using a lightbox, trace the shapes with a suitable marking device on the FRONT SIDE of the fabric. Markers  to try might include a mechanical pencil, chalk pencil, washout marker, or Quilters Select Self-Erase marker. Different fabrics require different markers so you can see the line to turn it under.

Fabric on top of pattern with lightbox turned on: 


After tracing the  leaf, lightbox turned off: 


Cut out the leaf with about 1/4" seam allowance. I gently turned the edges under with my fingers: 


Using the lightbox for placement, use a few tiny drops of glue toward the middle of the leaf to secure it for sewing: 


All shapes are prepared in this way. Let's discuss Flower C. It is designed to be made with 9 individual petals, sewn to the background, then a circle is sewn to the center.

PREPARATION OF THE SHAPES--Turned Edge Machine Applique

Because my method is turned edge machine applique, I found it easier for me to make those as one Flower, then make a slightly larger center circle if needed to cover any edges at the place where there is very little seam allowance. 

I used Fabric Glue stick and the Appliquik tools to turn the seam allowance under: 


Now it is ready to be stitched by machine.  If there were 9 separate petals it would be more challenging  to get them glued exactly in place before sewing. Or maybe that's just me. There are 2 Flower C's in this block--why not try both methods  to see which you prefer?


STITCHING:

There are Videos on the 2022 BOM Month 1 page showing both hand and machine stitching. Show 3001, available for all to watch for FREE, shows machine stitching.

Irene likes to use about 5 neutral threads ranging from light cream to medium brown for all her applique. I usually prefer to use thread that matches the applique--probably because I love color. It's
your choice, try both to see which you like best. 

Irene uses Wonderfil 60 wt Egyptian cotton thread. This a Wonderfil 100 wt polyester set in similar colors to those she uses:


Quilters Select 80 wt polyester Prewound Bobbins. When doing hand applique or hand sewing a binding, I rarely find this not to have exactly the color needed: 


While I enjoy needle turn hand applique, I usually chose the speed of machine stitching these days. In Show 3001 I show how I tried several machine stitches before settling on a small zig zag stich for GPDU #1. Width is 1.5 and Length is 1.0. That worked well for me and I am using it again for GPDU #2.

Since I had 9 of us making blocks for the sample quilt, I wanted to give everyone the same thread. It was eye-opening to the Sunday Sew & Sews that green thread could be used on so many different fabrics and it worked fine. They were skeptical at first. We used Quilters Select 60 wt Perfect Cotton Plus thread, color #208 Chartreuse: 
I think both the Neutral threads and this green work so well because they are so fine. On a few of the darker fabrics I will use a darker thread. Try different threads to find you favorite.

NOW COMES THE SCARY PART: 

When all the stitching is done, carefully trim your oversize block to exactly 18.5" square. There is a Video on this task in Month 1 Videos. BUT--note the CHANGES I had to make on how to accurately cut my center block--see the photos and explanation below. 

Trimming the Applique blocks to the correct size after all the stitching is complete is important. Having a big square ruler helps but you can use any ruler that is at least 9.25" long. Simply be sure you know where the exact center is and measure out 9.25" in all directions. I use an erasable marker for this method, double checking before making those cuts

VERY IMPORTANT NOTE:   BEFORE YOU MAKE THE FINAL CUTS TO SQUARE UP THE CENTER BLOCK, check to see that ALL the appliques are far enough inside the area of the Block. 

Notice HERE the outside berry will be right at the seam allowance if I trim it here:


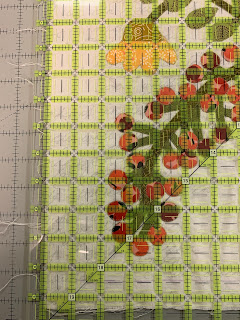
Instead, I moved the ruler over to have about 3/4" space from the outside cut edges to the appliques on BOTH  the left and right sides:


You also want to be sure the bottom edge of your vase is sitting straight on the block:


Once your lovely center applique block is 18.5", it's time to add the Dogtooth borders.  See that process in Part 3. 

Let's quilt.

Barbara

Sunday, March 21, 2021

MY JOURNEY: QUILT # 25

 Another quilt from the Special Exhibit My Joyful Journey, part of the Virtual Quilt Festival, December 3-5, 2020.

QUILT # 25: RUFFLED ROSES  88" x 88".  machine pieced and appliqued,  longarm quilted, 2011-2019 Quilted by Lois Kindley


The Story: designed by Sue Garman as the 2011 Block of the Month quilt, I worked on this quilt sporadically for 8 years. When Sue died in early 2017 I was determined to finish it to honor our close friendship.  It was awarded "Best of Show" at the Fanfare 2019 Quilt Show. For so many reasons this is currently my most favorite quilt of all I have ever made. 

I have written about this quilt many times, including a detailed description of the machine applique process used. Use the Search Box above for "Ruffled Roses" or check out the Tutorials Link above.


This brings us the END of this Special Exhibit. I hope you  have enjoyed seeing my life's work and the journey it has taken me on. Stay tuned for what's to come. 

Let's Quilt.

Barbara

Sunday, March 15, 2020

AFTERNOON DELIGHT--Month 6--EARLY RELEASE!!!

This pattern is the 2020 Block of the Month pattern offered FREE to Star members of The Quilt Show--join today to receive the entire year of patterns free. 

This month we introduce the other pieced pattern: the Double 9 Patch:


There are 64 total of these blocks in the quilt and the instructions are for making 12 each month for 5 months, then the final 4 blocks. Of course, if you want to make them all as soon as possible, that is fine too.

NOTE: VERY IMPORTANT CUTTING INFORMATION--Sue's instructions have us cutting strips 1.25" x 10" for making the 9 patches. Once sewn into groups of 3 fabrics, we cut SIX SEGMENTS--if you cut and sew perfectly, those six segment use 7.5", meaning you have 2.5" leftover. That leftover amount can be used in the NEXT set of 12 Double 9 Patch blocks. OR CUT THE STRIPS 1.25" x 8" allowing a half inch extra for straightening the segments as you cut. The choice is yours. 

These blocks have little squares--3/4" finished, just like the Shoo Fly blocks. However, the Shoo Fly blocks were a little forgiving in that the tiny 4 patch "floated". These blocks will require you to do the best you can on the three things that can go wrong: the CUTTING, the SEWING, and the PRESSING. 

THE CUTTING:

Make sure you cut the strips carefully, 1.25" wide. Cut straight and slow. There is not much wiggle room for less than perfect cutting with these blocks. Lay out the prints and backgrounds as shown in the pattern--there are twice as many Print/Background/Print units. 


My strips laid out for this second quilt I am making

THE SEWING: 

I encourage you to check your piecing accuracy right from the beginning. Sew the first two strips together, sewing as straight as you can. It's not a matter of how fast you can sew them, it's how accurately you can sew. Press toward the darker fabric, away from the background.

MEASURE NOW: the strips should be 2" wide--.75" + .75" = 1.5" plus the .5" seam allowance:


If they are slightly wide, it is easy to trim off the excess. If they are slightly narrow, STOP. Fix this now. It might be the thread is too thick--I use Masterpiece 50 wt or Quilters Select 60 wt or Aurifil 50 weight. Want more information on thread?  Thread--It Matters

It might be you sewed too fast or went crooked instead of straight. Figure out what caused the strips to be less than 2" wide when sewn together. Once you know how to achieve that 2", you are good to go.

ANOTHER NOTE: You get to decide how perfect your piecing has to be. If "close is good enough" is your motto, that's perfectly fine. No quilt police here.

I wish I had taken my own advice. I know how to piece accurately, right? I simply chained, chained, chained, then turned the two strips into three strips BEFORE I measured. Guess I was in a hurry because my strip units were too narrow, by at least 1/8". It was difficult to get my 9 Patch blocks the right size, 2.75" UNFINISHED.  So there was a lot of un-sewing for me. Believe me, you want to find out at the first  possible moment that you need to adjust your seam allowance, not several hours in.

THE PRESSING:

When pressing the print strip away from the background strip, use the edge of the iron to press the print away from you. Press as flat as possible, don't wiggle the iron back and forth across the seam. Just use a firm pressing motion to press the print up, away from the background.


CUTTING THE SEGMENTS:

I put the middle strip on top of the other strip, right sides together, being sure the seams were nesting. Then I cut them into 1.25" segments. To be sure I got the maximum amount of scrappiness, I worked with 5" cuts at a time, cutting 4 segments:  4 x 1.25" = 5". Now they are ready to chain through the machine:


PIECING THE SEGMENTS:

To pin or not to pin, that is the question? I started out pinning but found I could get the intersections precise enough without pinning. You decide whether you need to pin or not.

Be sure to sew straight to make your center square a real square. Again, speed is not as important as accuracy.

After sewing the first two segments, check to see if they are 2" wide by 2.75" long. If now, figure out why. If so, great--add the outer segment to finish the 9 patch.

Pressing the seam allowances--you have 3 choices. Press the seams OPEN--I rarely do that so I didn't show it. OR twirl the intersections as shown on the left. OR press away from the center. You decide. I like those twirled seams and how flat they  make the block so that was my choice:

Check that the 9 patches are 2.75" square, unfinished. If they are not the right size now, they will not miraculously become the right size when you do the next step.

CREATE THE BLOCK:

Add the 2.75" background squares to create the block. It will be 7.25" unfinished when done, the same size as the Shoo Fly blocks made earlier.

Pressing the seam allowances on the blocks--again, you have a choice. You can twirl the seams again or press to one side, (or open). Here is what I did--I pressed toward the middle so those seams will nest with the Shoo Fly blocks:


There are two applique blocks this month. Here are mine from the sample quilt:

Block 21
Block 22

We enjoy seeing your blocks so post them on the SHOW AND TELL--Your Blocks Topic

Let's quilt.

Barbara