Showing posts with label applique' block. Show all posts

Sunday, October 30, 2022

GPDU -- MONTH 11 and 12

Here we are close to the end of Garden Party Down Under. Designed exclusively for The Quilt Show by Irene Blanck, this lovely quilt is sure to be a favorite in your family for years to come. 

Month 11 brings us the last vases--I call these "Skinny Vases". Here are mine in the sample quilt I made last year: 


Here are designer Irene Blanck's: 


I made a tracing of the circular flower for placement help. Here you can see mine is more oval than round but that's OK:


Once the two skinny vases for Month 11 are done, you can complete the left side of the quilt. Then you make the left side Diamond Border, either by applique or piecing--see my post on the Month 10 Diamond Borders for more information.

I liked these Skinny Vases so much I made them again, even though all my previous blocks were already put into two finished wall hangings. It was time to make one more project from my 2022 sample blocks made this year:


Month 12 has you make the top and bottom Diamond Borders, including a floral motif in each of the corners. Once that  step is done, your quilt top is finished!

One more step--upload a photo to the Forum for the world to see your beautiful top: Show Your Finished Top Here    Take a look to see really great quilt tops.

Here are the two wall hangings I made earlier this year with the blocks made as samples for the blogs and videos. It just goes to show you don't have to make a bed quilt if you don't want to:

Months 1 and 2, 38" square


Months 3-7, 50" square


In December I will have closeups of the quilting I did on mine. 

This month we have released BOTH Month 11 and Month 12 patterns so those who joined or renewed at the end of 2021 can still get ALL the patterns without having to renew for another year. Of course, I can't imagine why everyone wouldn't want to renew, The Quilt Show provides a lot of bang for your buck. I learn something from every show--a new show is released every two weeks. AND you have access to ALL the previous shows, going back 14 years.

AN IMPORTANT REMINDER ABOUT ACCESS TO THE PATTERNS:

The patterns are FREE to Star Members of The Quilt Show until December 31, 2022. There are many reasons to become a Star Member, the Block of the Month patterns are one. If you love this quilt, you can make it, just download and/or print and save the patterns in a safe place. After December 31, 2022, we will no longer be able to provide them to you, nor can anyone else. You will be able to buy them from the designer when she regains the rights to the  pattern.

Very soon it will be time to get ready for the 2023 Block of the Month project. It is a charming quilt, full of things to learn and I know you will like it. I am happily working on mine.

Let's quilt.

Barbara

Sunday, July 17, 2022

Student Progress with Garden Party Down Under

This year I am teaching a lecture/demo class on Garden Party Down Under at a local shop. There are 11 students working on this quilt. The two-hour class meets every other month--just enough to keep everyone motivated and most have kept up so far. Having a class deadline helps. Though it's not required. Even those not caught up benefit from the tips and tricks shared by all in the class.

Admire their efforts to date: 

Claudia 

Claudia--shoo fly blocks are just the best

Claudia--love that vase fabric!

Cyndi--using all leftover fabrics from previous quilts

Cyndi--love that vase. And her Dresden is various black prints, all 12 different

More lusciousness from Cyndi

Sally is adding some wool and lots of hand embroidery

Look at Sally's detail handwork

More from Sally

Franny has only made it to one previous class but she is loving this project

Lots of Franny applique
Franny's Month 1 and 2 together


Great blocks from Sandy--who always smiles so big--fire the photographer!

Sandy

Love this vase and the entire block from Sandy

Sandy used a dark background for the Dresden Plate center


Julie got a sense of accomplishment from joining months 1-5 together

Julie--I covet this one!

Julie's month 7 block--the easiest one yet

Leila is doing her applique with the Back Basting method. At the May class she explained the process, and I told the students how to find more information on this method. Google "back basting applique"--I believe Jeana Kimball first taught this method years ago. 

Phyllis gave it a go after the May class and she tells us "This is my applique method going forward". Here are two photos showing the process Phyllis is so happy with.

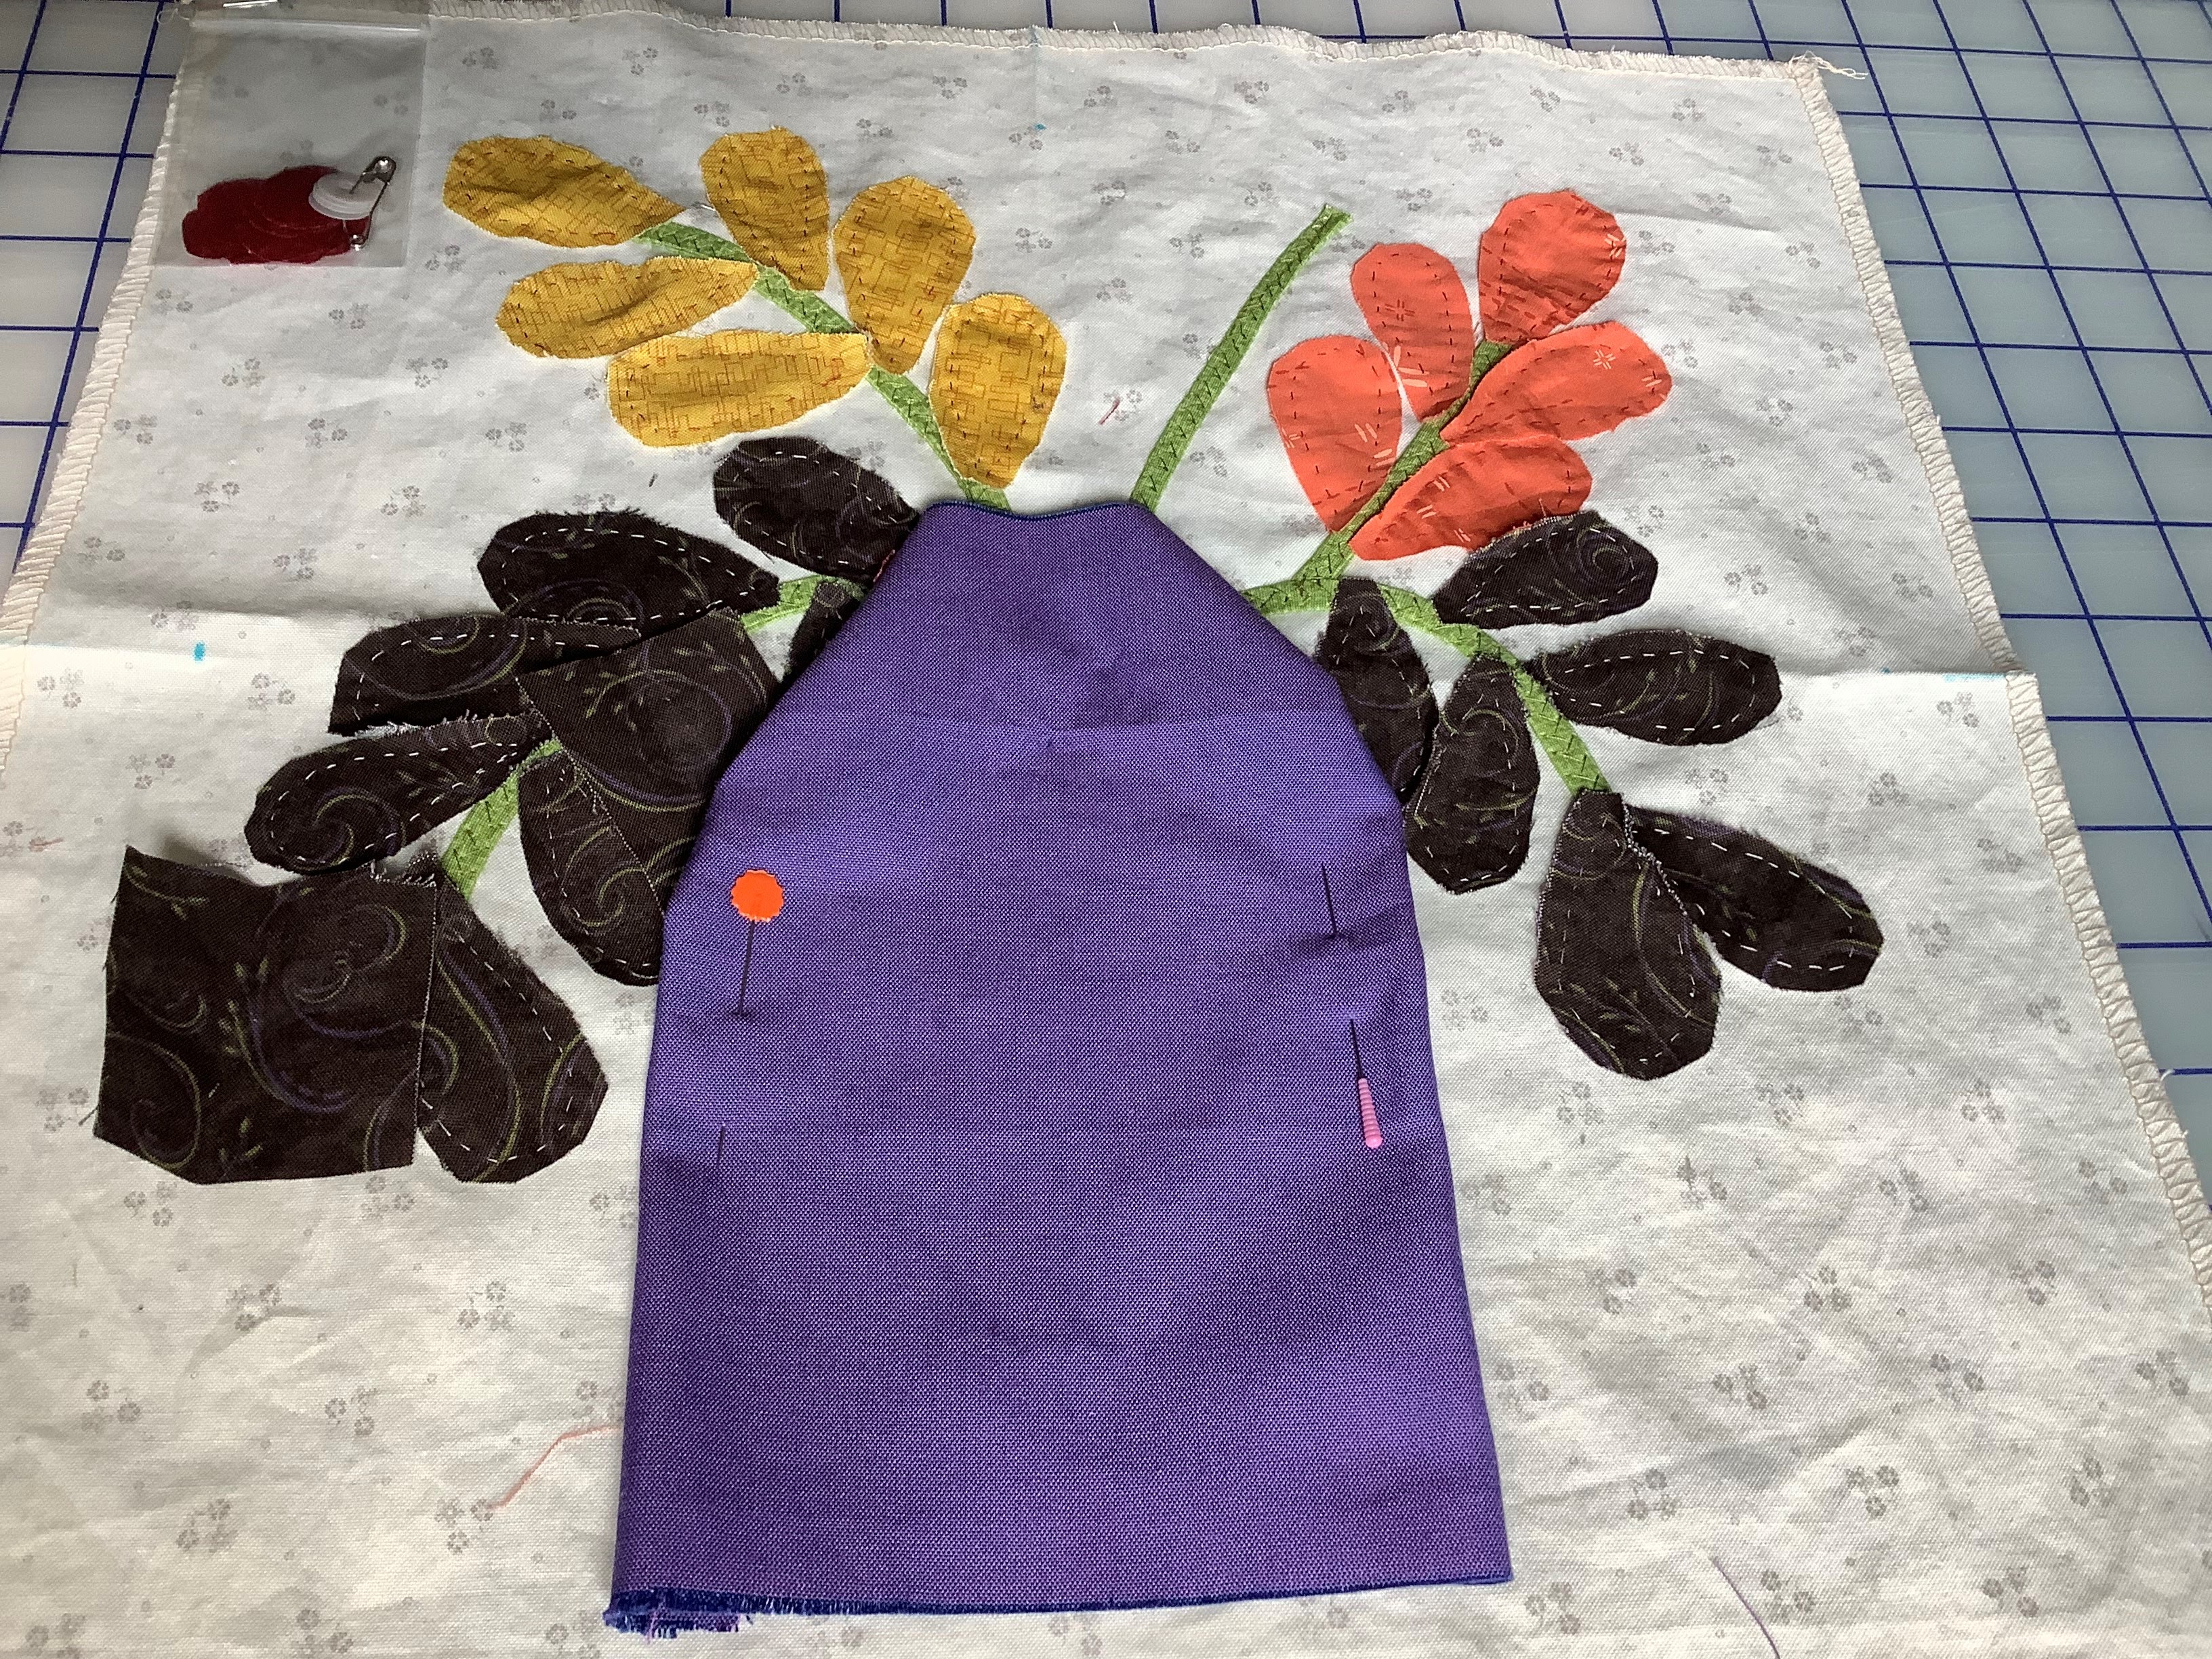
Here the leaves are back basted and ready to be appliqued, except for the lower left leaf--it is ready to be back basted. The vase is a chunk of fabric ready to be back basted: 


Another of  Phyllis' finished blocks: 
Back basting has the advantages of no marking on the front of the quilt, no pins once the shapes are back basted to the background, which makes it very portable hand sewing, and the basting lets you know exactly where to turn the edge of the shape under. Try it, you might like it.

In these year-long classes, friendships are usually formed. Several of these women have been in prior Block of the Month classes with me: Color My World, Sizzle, Afternoon Delight, Patchwork Barn and Halo Star Medallion.  I look forward to seeing each of them every class.

One of our group is undergoing cancer treatment at the moment. Before class started this time, she was gifted a lovely hand made shawl, made especially for her, in her colors, by one of the other students--who only  met her this year. Quilters make the BEST friends:

Cyndi and Julie

Speaking of Cyndi, I have long coveted her stash! She has a great eye for color and design and a DEEP stash. Before class she  showed me this wonderful scrap quilt she is making, all from her little scraps. String/Crumb piecing is so much fun to do, and even better when the fabrics are this bright. The pattern is in Bonnie Hunter's book String Frenzy.  The string piecing was done on paper. Great job, Cyndi:


Being Summer, 5 of our classmates were out of town for this month's class--we look forward to seeing their progress in September. 

It is not too late for YOU to start making Garden Party Down Under. This pattern designed exclusively for The Quilt Show by Irene Blanck is FREE to Star Members of The Quilt Show with Alex Anderson and Ricky Tims  There is so much to learn and enjoy as a Star Member and this FREE pattern is the icing on the cake. It is available until December 31, 2022, when the rights to the pattern return to the designer and she can sell it. Join NOW and get it FREE.

Let's quilt. 

Barbara


Wednesday, June 1, 2022

GPDU -- MONTH 6 Shoofly Block and Applique Vase

 It's Month 6 of the 2022 Block of the Month quilt for The Quilt Show. The pattern Garden Party Down Under was designed exclusively for The Quilt Show by Irene Blanck and is ONLY available FREE to Star Members of The Quilt Show through all of 2022. Join NOW -- it's not too late!

Original Blocks by Irene Blanck


This Month we start the Shoofly Blocks that are made in months 6, 7, 8 and 9. Each has eight 4" Shoofly blocks and a center block.

A few suggestions that differ from the provided instructions:

1. Cut the center square 5" instead of 4.5". Applique tends to "shrink" the background and having a little extra allows you to trim the completed square to 4.5", keeping the applique in the center.

2. The 16 colored squares and 16 light squares used to make the Half Square Triangles (HST) can be cut 2.5" instead of 2.75", still allowing you to "trim to perfection" once sewn. 

3. BUT, NOTE THIS TRICK: to draw the diagonal pencil lines quickly, cut FOUR light squares twice the size of small square. My small squares are 2.5" so I cut the light squares 5". Draw a pencil line from corner to corner on BOTH diagonals. Cut the 5" large square into four 2.5" squares and the drawn lines are done in less time:


Sew 1/4" away from the diagonal line, on both sides, cut apart on the drawn center diagonal, to create two half square triangle units:


Press toward the dark fabric, trim to exactly 2". There is very little waste and perfect HST: 

Lay out the pieces to sew one Shoofly block:


Small pieces require precision piecing. Test yourself--using the FINISHED SIZE OF EACH PIECE.  After you sew the light rectangles to the HSTs and the center square to a rectangle, measure them.

Upper row: HST is 1.5" + rectangle 1" + 1/2" seam allowance--3" from edge to edge. Middle row: rectangle is 1.5" + 1" square + 1/2" seam allowance--3" edge to edge. Bottom row is the same as the top row. 

Do this now to be sure you have the correct sizes so far. If it is not the right size now, it will not miraculously become the right size when you do the next step. Find the mistake at the first place it happens. 

Once you find there is no excess or shortage, you know exactly how to sew a 1/4" seam allowance and can stop checking. I still check every seam:


Pressing, choose the method that works best for you. Here are two options: 


I love Shoofly blocks and these 4" finished ones are just adorable: 
Decide what you want to put in the middle of the block. The pattern uses the small Dresden plate. I chose to applique Double Hearts.  Some people used a floral motif from the first months blocks--anything that fits on the 4" finished center will work. Some chose to simply make an additional pieced block and forego applique. It's your quilt, you get to decide: 

My Shoofly block

The great thing about making 4 of these Shoofly blocks is you can cut them all out now and work on them as "leaders/enders" over the next few months. I kept the cut pieces beside my machine and made them as I was sewing other projects. They almost make themselves that way:


The applique block is similar to the previous blocks EXCEPT it's square! 12" W x 12" H. I do find it helpful to make a window template to audition potential vase fabrics. NOTE: this vase has a Top and Bottom Lip that will require an additional small piece of fabric in those two places: 


There is a straight stem that is 1/8"-- it does not have to be cut on the bias as it is straight. The remaining 1/4"  stems curve a bit so need to be cut on the bias.

Next month we make another Shoofly block and a 12" vase applique block. 

Let's quilt.

Barbara

Wednesday, March 30, 2022

GPDU -- MONTH 4: Applique Block and Pieced Block

Garden Party Down Under is the Block of the Month quilt for The Quilt Show. The patterns are FREE all of 2022 for STAR Members. 

 It's Month 4 and once again we have an applique block and a pieced block. Here are mine from the test quilt made last year:


This time I decided not to make this block from the Kit fabrics--I made this same block last year and decided once was enough. 

Important things to remember: the jug is asymmetrical-it has a handle on one side. If using a fusible product, like Print & Piece Fuse Lite, the jug will be reversed unless you draw the pattern in reverse. This is discussed in the Optional Alternative Techniques document found in Month 1 for STAR Members:

Month 1 Additional Instructions

There is also a Video about using Fusibles for Machine Applique found in Month 1 Videos:

Month 1 Videos


I find a window template very helpful for selecting fabrics for the vases/jug:


This jug is different from the preceding vases--it has a "lip" at the top that is the INSIDE of the jug: 

Irene used the WRONG side of the jug fabric for hers. That would probably work fine with this gray 
Bubbles fabric, I chose a different gray--this is the wrong side of a gray print. It will be covered with 4 stems so it won't show a lot. NOTE: the LIP  is the FIRST piece of fabric to be placed on the background:

This pattern has both 1/8" and 1/4" stems. I have seen beautiful 1/8" stems made by students from 1/8" ribbon. The outer edges of ribbon are finished so you can either stitch right down the middle with straight or zigzag stitches. Or couch it by hand or machine. 1/8" wide is pretty narrow so it doesn't need a lot of threadwork.

Once the lip is in place, note that Leaves 2 and 3 are sewn next because they go UNDER stems:


Next add the stems and all remaining leaves and flowers. The jug can be stitched in place after the stems are put on top of the "lip"--one of the heart-shaped leaves goes on top the the jug.

REMEMBER WHEN TRIMMING THE FINISHED BLOCK: trim it to 13.5" Wide x 12.5" High. See the  Month 3  blog and LIVE video for my Cutting Guide Tip:


The 4-Patch on Point block with the Dresden Plate center is exactly the same as Month 3. The pattern was updated to provide a full size Dresden Plate should you wish to cut your own templates from cardboard or Print & Piece Fuse Lite. The instructions for the 4-Patch on Point were updated to say there are 32 squares cut for the eight 4-Patches, half light, half darker than the light ones. 

Here are Irene's Month 4 blocks:


All of Irene's blocks can be seen on the MONTHLY LAYOUT GUIDE

Next month we will make TWO applique blocks and no pieced blocks. A different pieced block will be introduced in Month 6. 

Be sure to look at and post on the Forum--it is great to see all the progress being made: FORUM  Click on the PHOTOS tab to see just the photos that have been posted in the SHOW YOUR PROGRESS Topic.

Let's quilt.

Barbara

Sunday, February 27, 2022

GPDU -- MONTH 3: Applique Vase and Pieced Block

 A  couple days early, here are some helpful tips to get you ready for the 2022 Block of the Month from www.thequiltshow.com: Garden Party Down Under, by Irene Blanck. It's not too late start--just join The Quilt Show and jump in.

This month we make the first of six PIECED blocks and an applique vase:

Irene Blanck's Month 3 blocks


Let's start with the pieced block, 4-Patches on Point:

Mine from Kit fabrics

When making small units, everything counts: the cutting, sewing and pressing. The block is 12" finished, when sewn into the quilt, so each 4 Patch on Point is 4" finished/ 4.5" including seam allowances.  

Following the cutting instructions, be as accurate as you can cutting the pieces. Sew with fine thread--no thicker than 50 wt. I piece with 60 wt. on top and 80 wt. in the bobbin--Quilters Select brand. 

The 4- Patch pieces are oversized then cut to the correct size--BE SURE to trim the 4-Patch to 3.25" before proceeding to add the background triangles. Those triangles are CUT from 3.5" squares--don't get mixed up.

It's easy to see how to align the triangle on the 4-Patch. Sew with the 4-Patch on top--it's always best to have the bias edge on the feed dogs--when possible, as it is here: 


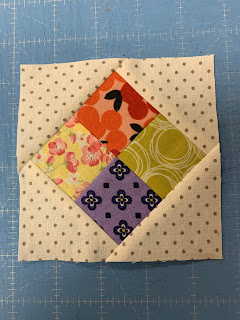
I trim the ears off the unit before adding the final two triangles--you can wait and trim at the end if you prefer: 


When trimming the 4-Patch to exactly 4.5" measure from the center out--the ruler should be at 2.25" at the center and top and bottom. This will also put a diagonal line on the center seam of the 4-Patch:

Trim the first two sides, turn the block completely around and trim the remaining two sides--this unit is now exactly 4.5" including seam allowances: 


DRESDEN PLATE: 

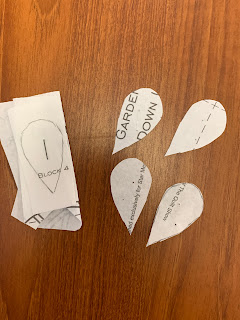
NOTE:  if you didn't buy the Paper Pieces Irene listed in the Recommended Supplies, there is a PDF on the Month 3 pattern/document page showing a FULL SIZE Dresden Plate that you can use to create your own petals and the center circle. 

The center of each of the 6 pieced blocks in the quilt has a small Dresden plate. For my sample quilt, made last year, I put Dresden Plates in the two 4-Patch on Point blocks, and Double Hearts in the four Shoo Fly blocks. The Dresdens take time to make so I simplified my sample quilt. You are free to put anything you want in the middle--including another pieced block, no applique.

I made two Dresdens, one by English Paper Piecing. one by regular Machine Piecing. In both cases, I cut out the 12 tiny petals the same way. Using a sandpaper board underneath, trace around each petal on the back side of the fabrics: 


I cut a 1/4" seam allowance on each petal, as I need that for machine piecing and it's the correct size for English paper piecing: 

I love using this drafting circle template for tracing circles. Find these in the Drafting section of an office supply store. So far, every circle size I need has been here. I draw the size to CUT on the back of the fabric and use a Perfect Circle Template for the actual circle size: 


Since circles from cardboard were provided with the petals, I used those to gather around:


For English Paper Piecing, use a light touch of glue to secure the seam allowances to the paper templates. This will be removed before sewing the plate to the background so go easy on the glue:
Ready to hand sew: 

English Paper Piecing, use thin, strong thread--I used Quilters Select 80 wt. thread. Catch just the edge of fabric folded over the paper template--don't sew through the paper. A Wonder clip helps to hold the petals together: 


Machine sewing process. Of course, you could hand piece them if you like:

Complete Dresden Plate machine pieced: 
I found it helpful to have a line on the front side to turn the upper edges to the back so I traced around the point of the petals with an erasable pen:


REMOVE the papers when the Dresden Plate is complete. Irene recommends using starch or sizing, etc. first, then remove the papers. Now sew it to the background with your favorite method, then add the circle.  

I machine appliqued one and hand appliqued the other. Your quilt, you get to decide.

My finished block:
Front

Back, showing how I pressed seams


THE APPLIQUED VASE;

One of my students had a brilliant idea for selecting fabric for her vases: she made a window template. If  using Print & Piece Fuse Lite, you will want to REVERSE the template since your shape will be reversed. It allows you to really see what your vase will look like. I chose neither of these:


Rather than print 4 pages onto PNPFL, since there were not a lot of shapes, I simply used a pencil to draw the shapes needed on one sheet of Print & Piece Fuse Lite. The large vase doesn't really require all the PNPFL, so I created a "border" of about 1/2" of it for the vase and the rest was used for shapes:


For multiple shapes, try this. Fold or stack small pieces together, draw the shape on the top piece, put a staple in the center to hold them securely, cut out the stack, remove the staple and you have 4 shapes all the same from small pieces of leftover PNPFL:

Here is the vase prepped for sewing. Be sure to cut out the opening around the handle BEFORE YOU FUSE the PNPFL to the back of the fabric. Then carefully cut out the fabric in the opening, leaving a 1/4" seam allowance to turn under, if you are doing turned edge applique: 


Ready to go: 
There is no need to explain all the applique procedures again. Review the Month 1 videos and blogs and Instructions if you need to or want to try another technique this time. 

You will  need about 26" of bias stems, 1/4 finished. I used Perfect Stems this time and that went pretty quickly. 

VERY IMPORTANT TRIMMING INFORMATION: this Applique block is trimmed to 12.5" H x 13.5" W, NOT a square. It must be this size to fit in the quilt. Be VERY careful with the trimming step. 

Here is a Cutting Guide Trick:   Using tracing paper that  is 9" x 12", tape two sheets together and cut out a rectangle that is exactly 12" x 13"--the Design Area of the block. This allows you to see exactly what the block will look like when sewn into the quilt. You must ADD SEAM ALLOWANCES when trimming the finished block. 

Here is WHAT NOT TO DO.  Placing the Cutting Guide exactly in the middle of the background, you can see the far most right small petal will be cut off at the edge, a big NO-NO (NOTE: my shapes are reversed from the pattern):


By moving the Cutting Guide a bit more to the right, all of the shapes are inside the Design Area, about equal all around and I am now safe to mark the outside edges for cutting--REMEMBER TO ADD 1/4" TO EACH SIDE WHEN YOU CUT. I used a water soluble marker to make lines several places on each of the sides so I know where to place the 1/4" line on a ruler. The block MUST BE CUT 12.5" H X 13.5" W:


Here are the Month 3 blocks from my Sample quilt made last year. Remember, my vase is reversed because I used a fusible product, PNPFL, to prepare the shapes. You can now sew Block 2 (vase) to Block 3, (4-Patches). They should be 25.5" W x 12.5" H when joined.

These blocks were made by Pam R, one of the fabulous Sunday Sew and Sews: 


Next month you will make the second 4-Patch on Point block. So if you like to work ahead, you can make another now.

NOTE: All the instructions for the 4-Patch on Point block and the Dresden Plate unit will be repeated next month, exactly the same as this month. Decide if you need to print them again or not. There will be a new applique vase block in Month 4. 

Let's quilt.

Barbara