Showing posts with label pieced blocks. Show all posts

Thursday, July 31, 2025

LAUREL RIDGE -- MONTH 8

 Laurel Ridge is the 2025 Block of the Month quilt designed by Lynn Wilder exclusively for The Quilt Show.  Star Members have FREE access to the patterns starting January 1, 2025. Made in two colorways, the complete patterns are excellent. You will love making this quilt. Lynn supports the pattern instructions with Videos too. 

This month we make the "Cat's Cradle" block, 32 of them. Making half square triangle blocks in units of 8 make these very fast and easy:

The only cutting change I made is my usual one: I upped the size of the pink triangles to 3.5" squares and the large background triangles I cut from 6" squares. I prefer to "trim to perfection".

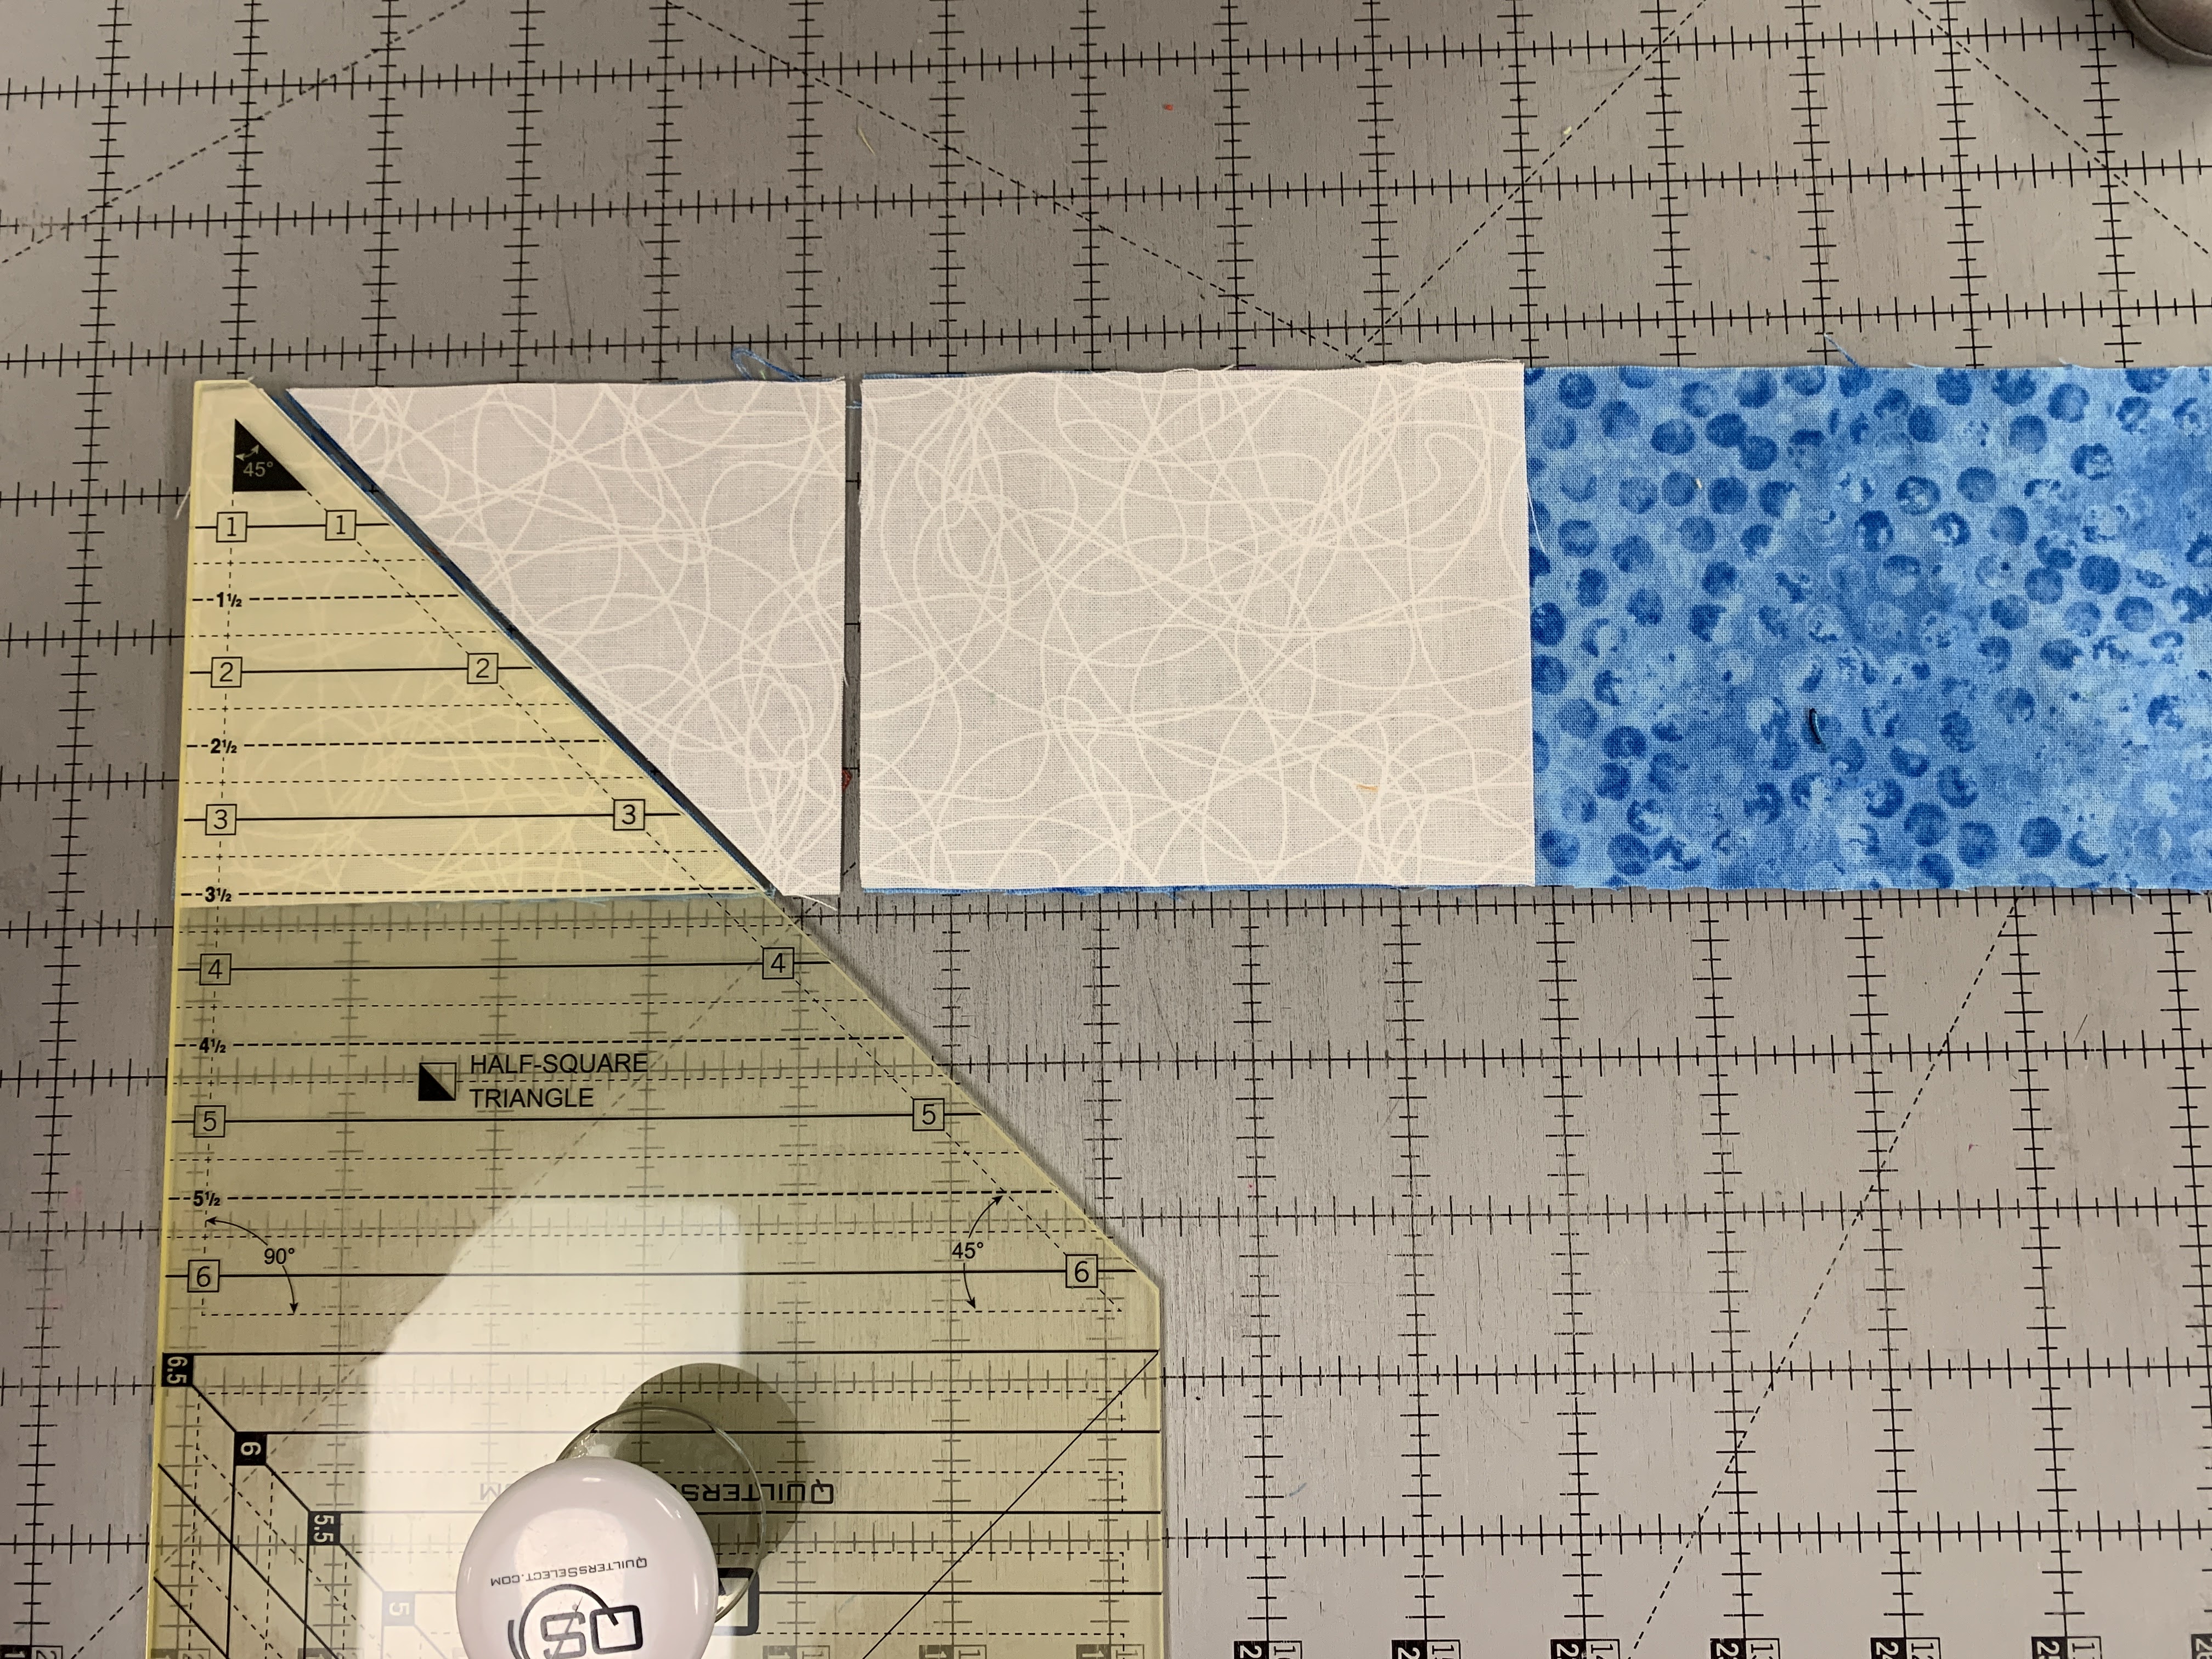
This does mean I had to trim the pieced half of the block so the large background triangle fits correctly:

Using a Half Square Triangle ruler, I placed the 1/4" diagonal line on the center spot where the pink triangles cross the yellow triangle. The 5.5" line on the ruler is at the bottom of the triangle, and I can see that the HST square will be in 1/4" on both points--very important.

When sewing the large background triangle to the pieced half of the block, you want to "cross the X"--this will insure your middle is perfect:


With blocks as easy as these, I usually prepare all the pieces needed, following the excellent cutting instructions in the pattern. Then I work on these as "leader/ender" units while working on other projects. The pieces are made over time, then it is a simple matter to complete the blocks with the sewn parts. 

If I just want to make these 32 blocks immediately, I use a different ongoing project as my "leader/ender". My 3" Old Italian blocks are perfect for this task. See the instructions here: Summer Sew A Long:


Next month we move on to Nine Patch Stars, the blocks with the most pieces.

Let's quilt.

Barbara


Sunday, June 29, 2025

LAUREL RIDGE -- MONTH 7

Laurel Ridge is the 2025 Block of the Month quilt designed by Lynn Wilder exclusively for The Quilt Show.  Star Members have FREE access to the patterns starting January 1, 2025. Made in two colorways, the complete patterns are excellent. You will love making this quilt. Lynn supports the pattern instructions with Videos too. 

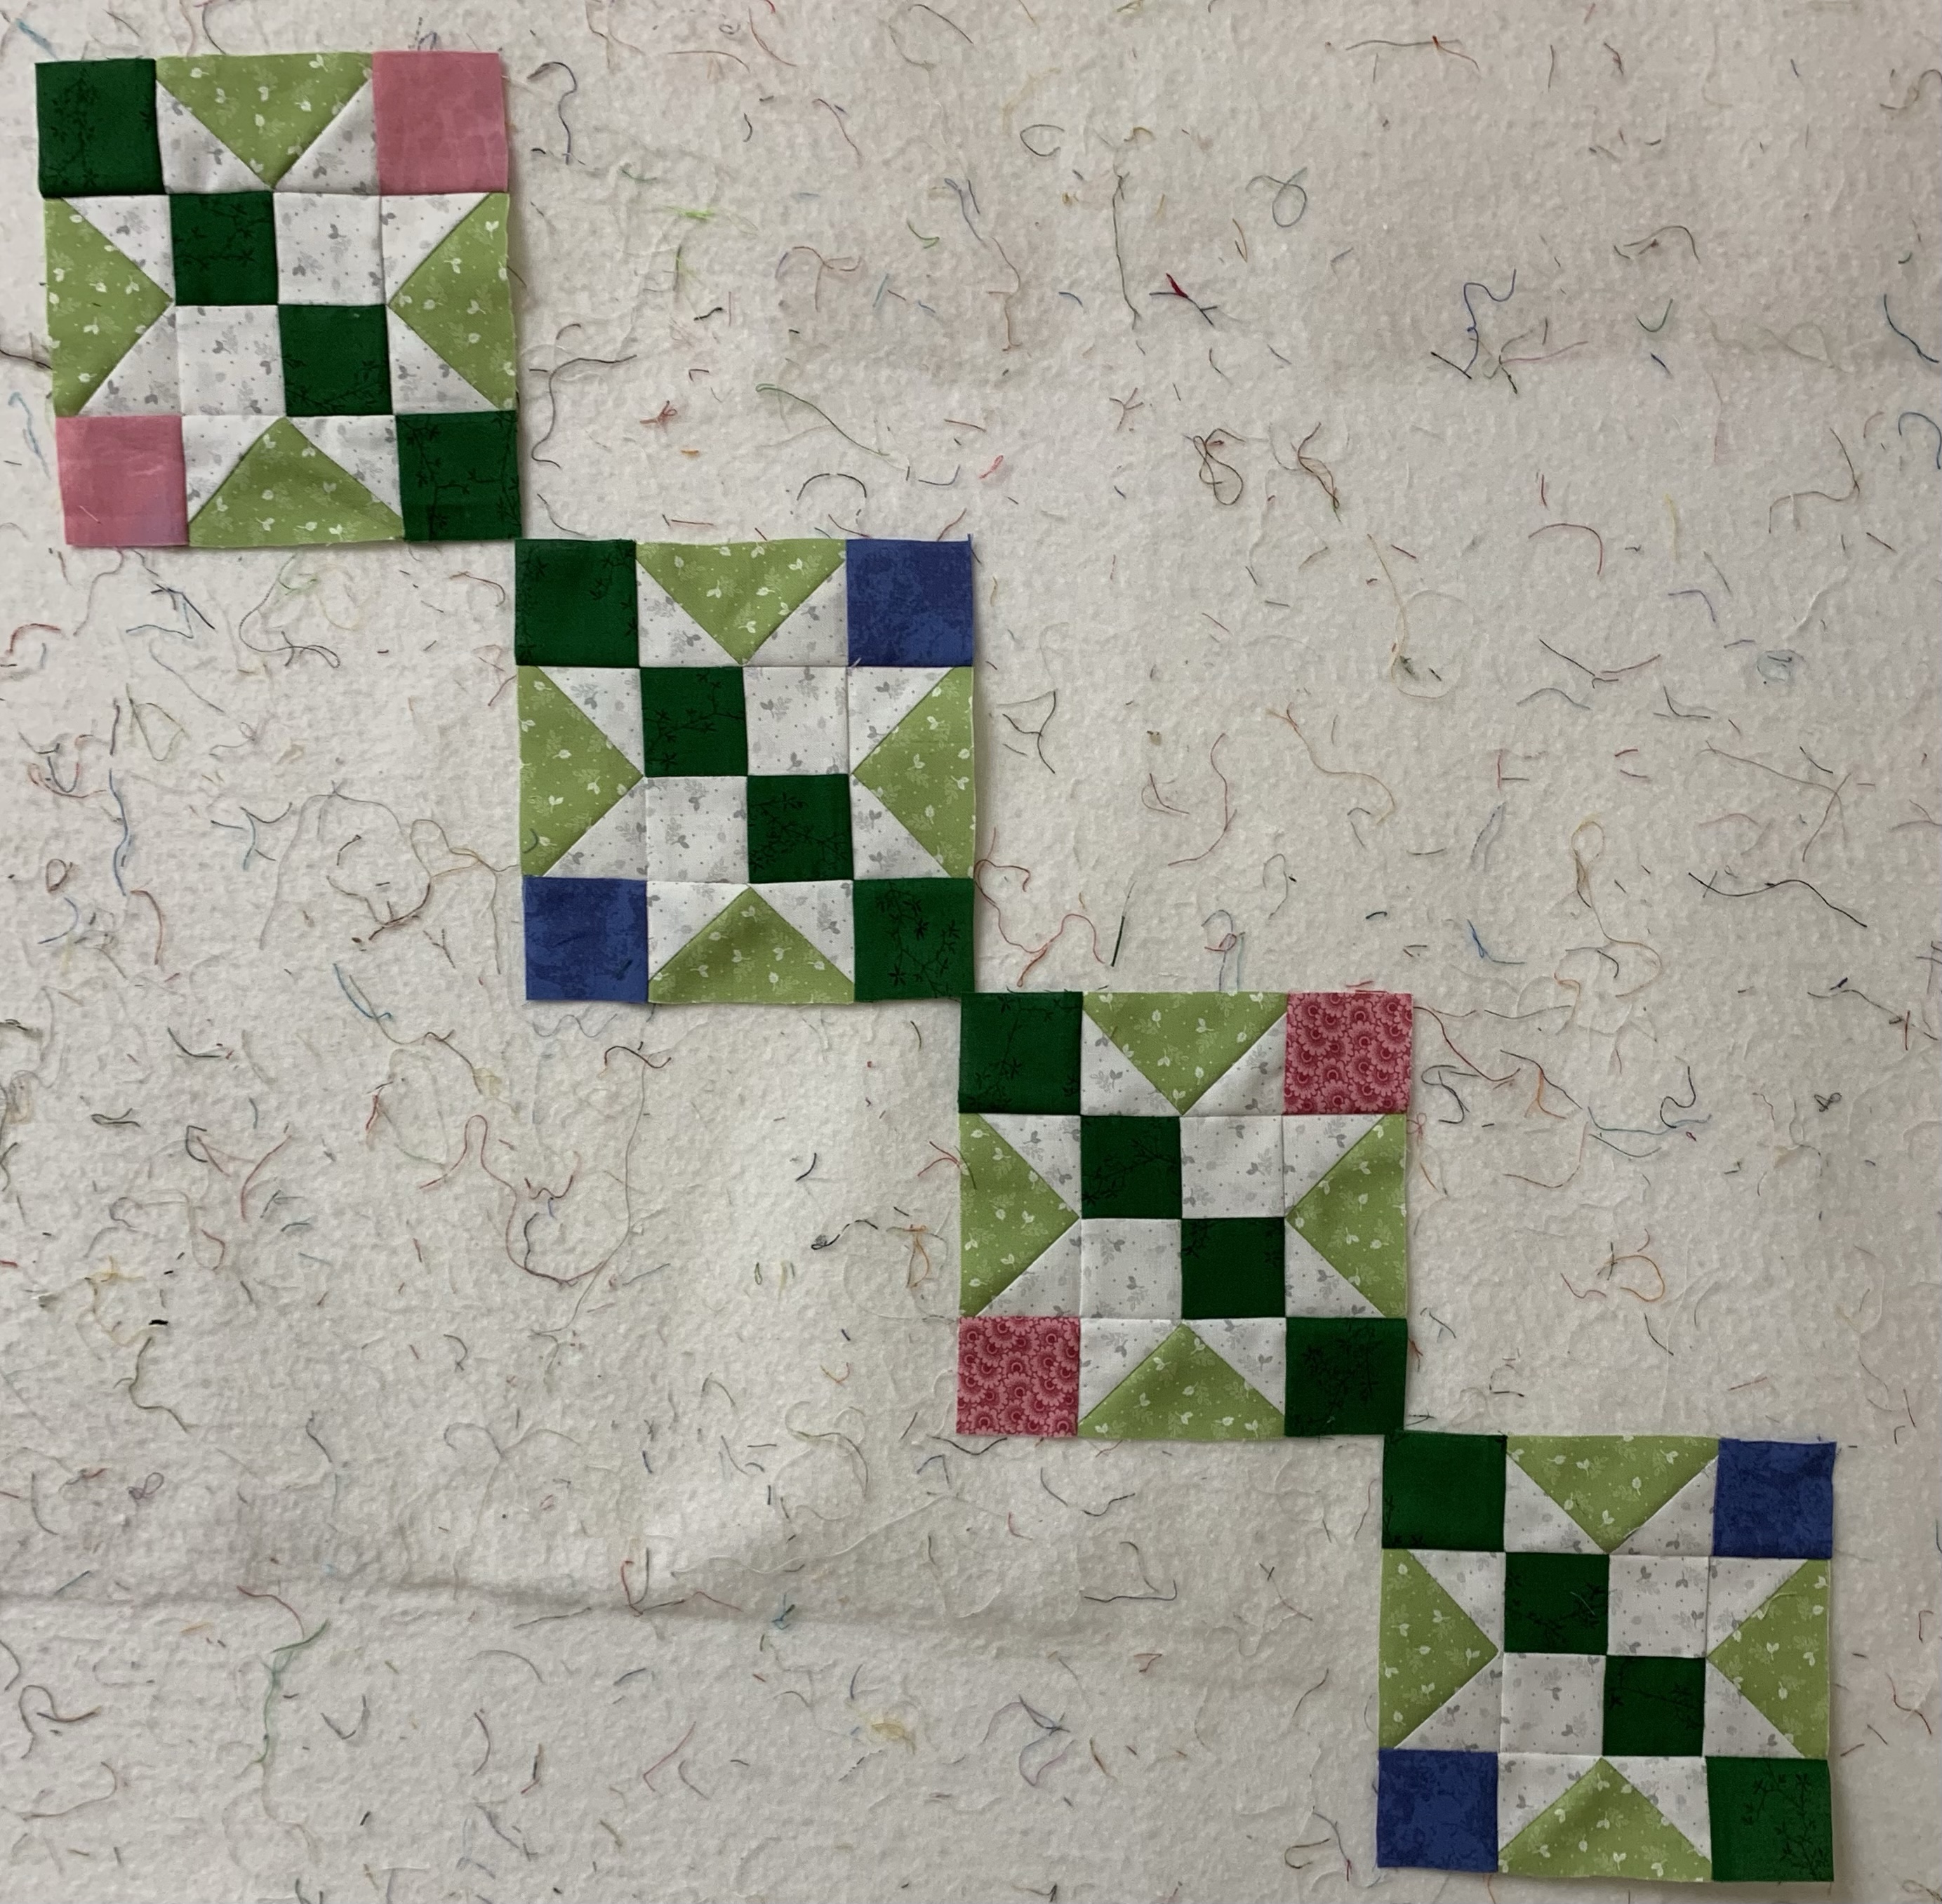
Month 7 finds us making more Four Patch in a Star blocks. We first made these in Month 1. Find my post here: MONTH 1 FOUR PATCH IN A STAR

This month we make 24 blocks. If using the Kit Fabrics, follow the pattern instructions for fabric selection. If using your own fabrics, select whatever you like. 

MY CUTTING ADJUSTMENT: I like to cut the E triangles from squares that start at 4.75". CUT 3 STRIPS 4.75", sub-cut into 24 squares, 4.75" each. Draw a pencil line on BOTH DIAGONALS, then cut the 4.75" square into 4 small squares, 2 3/8" each, with the pencil lines already drawn. 24 squares 4.75" = 96 squares 2 3/8". 

I found it helpful to have that slight extra amount. To follow the pattern instructions, cut the squares 4.5", that creates 4 squares 2 1/4" as per the instructions:

I used my Month 1 blocks, saved after I changed all my other star blocks to have a dark green square running diagonally:

First set of blocks I made

Second choice, all blocks have dark green squares on the diagonal


Because these blocks are exactly the same as Month 1, Lynn has not done a video for Month 7--go back and watch the  Month 1 Video--it's very helpful.  The LIVE broadcast for this month will be THURSDAY July 3, noon Central Time. For my USA friends, enjoy the Fourth of July holiday!

Next month we'll move on the a fun, easy block, Cat's Cradle.

Here's what I've been up to--it's DONE!


Let's quilt.

Barbara


Sunday, June 8, 2025

ALTERNATIVE BLOCKS FOR LAUREL RIDGE

 I was asked about the two alternative blocks I made for my Laurel Ridge quilt, the 2025 BOM quilt designed by Lynn Wilder exclusively for The Quilt Show

Any 5" blocks can be substituted for any 5" blocks in the quilt. I wanted a simple block to help me finish this project. And I wanted a more complex block to add interest.

The EASY BLOCK -- Five Patch Shoo Fly:  Brackman #1847


For a 5" finished block, there are 4 Half Square Triangles (HST) 2" finished, and 4 Rectangles 1" x 2" finished. And a center square 1" finished.  

Make HST as you like. I made two blocks at once by cutting a 6" square of background and the green fabric. Draw a diagonal line in both directions, then sew 1/4" on either side of the drawn lines. Cut apart into 8 sewn triangle pairs. Trim HST to 2.5" and you have 8 HST, 2.5" with seam allowance.

This is the same way we made HST for the Basket Blocks in Month 5: Month 5  These are two different sizes but the process is the same:


Cut 4 rectangles 1.5" x 2.5", and 1 center square 1.5". Sew the block together, in 3 rows, very easy. The block is 5.5" with seam allowances.

There are other ways to make HST. See my TUTORIAL here: Half Square Triangles

The MORE COMPLEX BLOCK -- Mosaic, Brackman #2123:


What I liked about this is the Flying Geese are the same size as those made in Month 1: 1.25" x 2.5" finished. See my blog about that here: Month 1

The HST corners are 1.25" finished. I made 8 of them at once from two 4.5" squares, one background, one dark pink. The process is the same as described above. 

The center square can be made a couple ways. I pieced it. The plaid square is cut 2.25". The background triangles that surround the plaid center are cut from 2 squares cut 2.25":


Sew two opposite triangles to the square, press toward the triangles. Add the remaining two opposite triangles, trim center block to 3" square. 

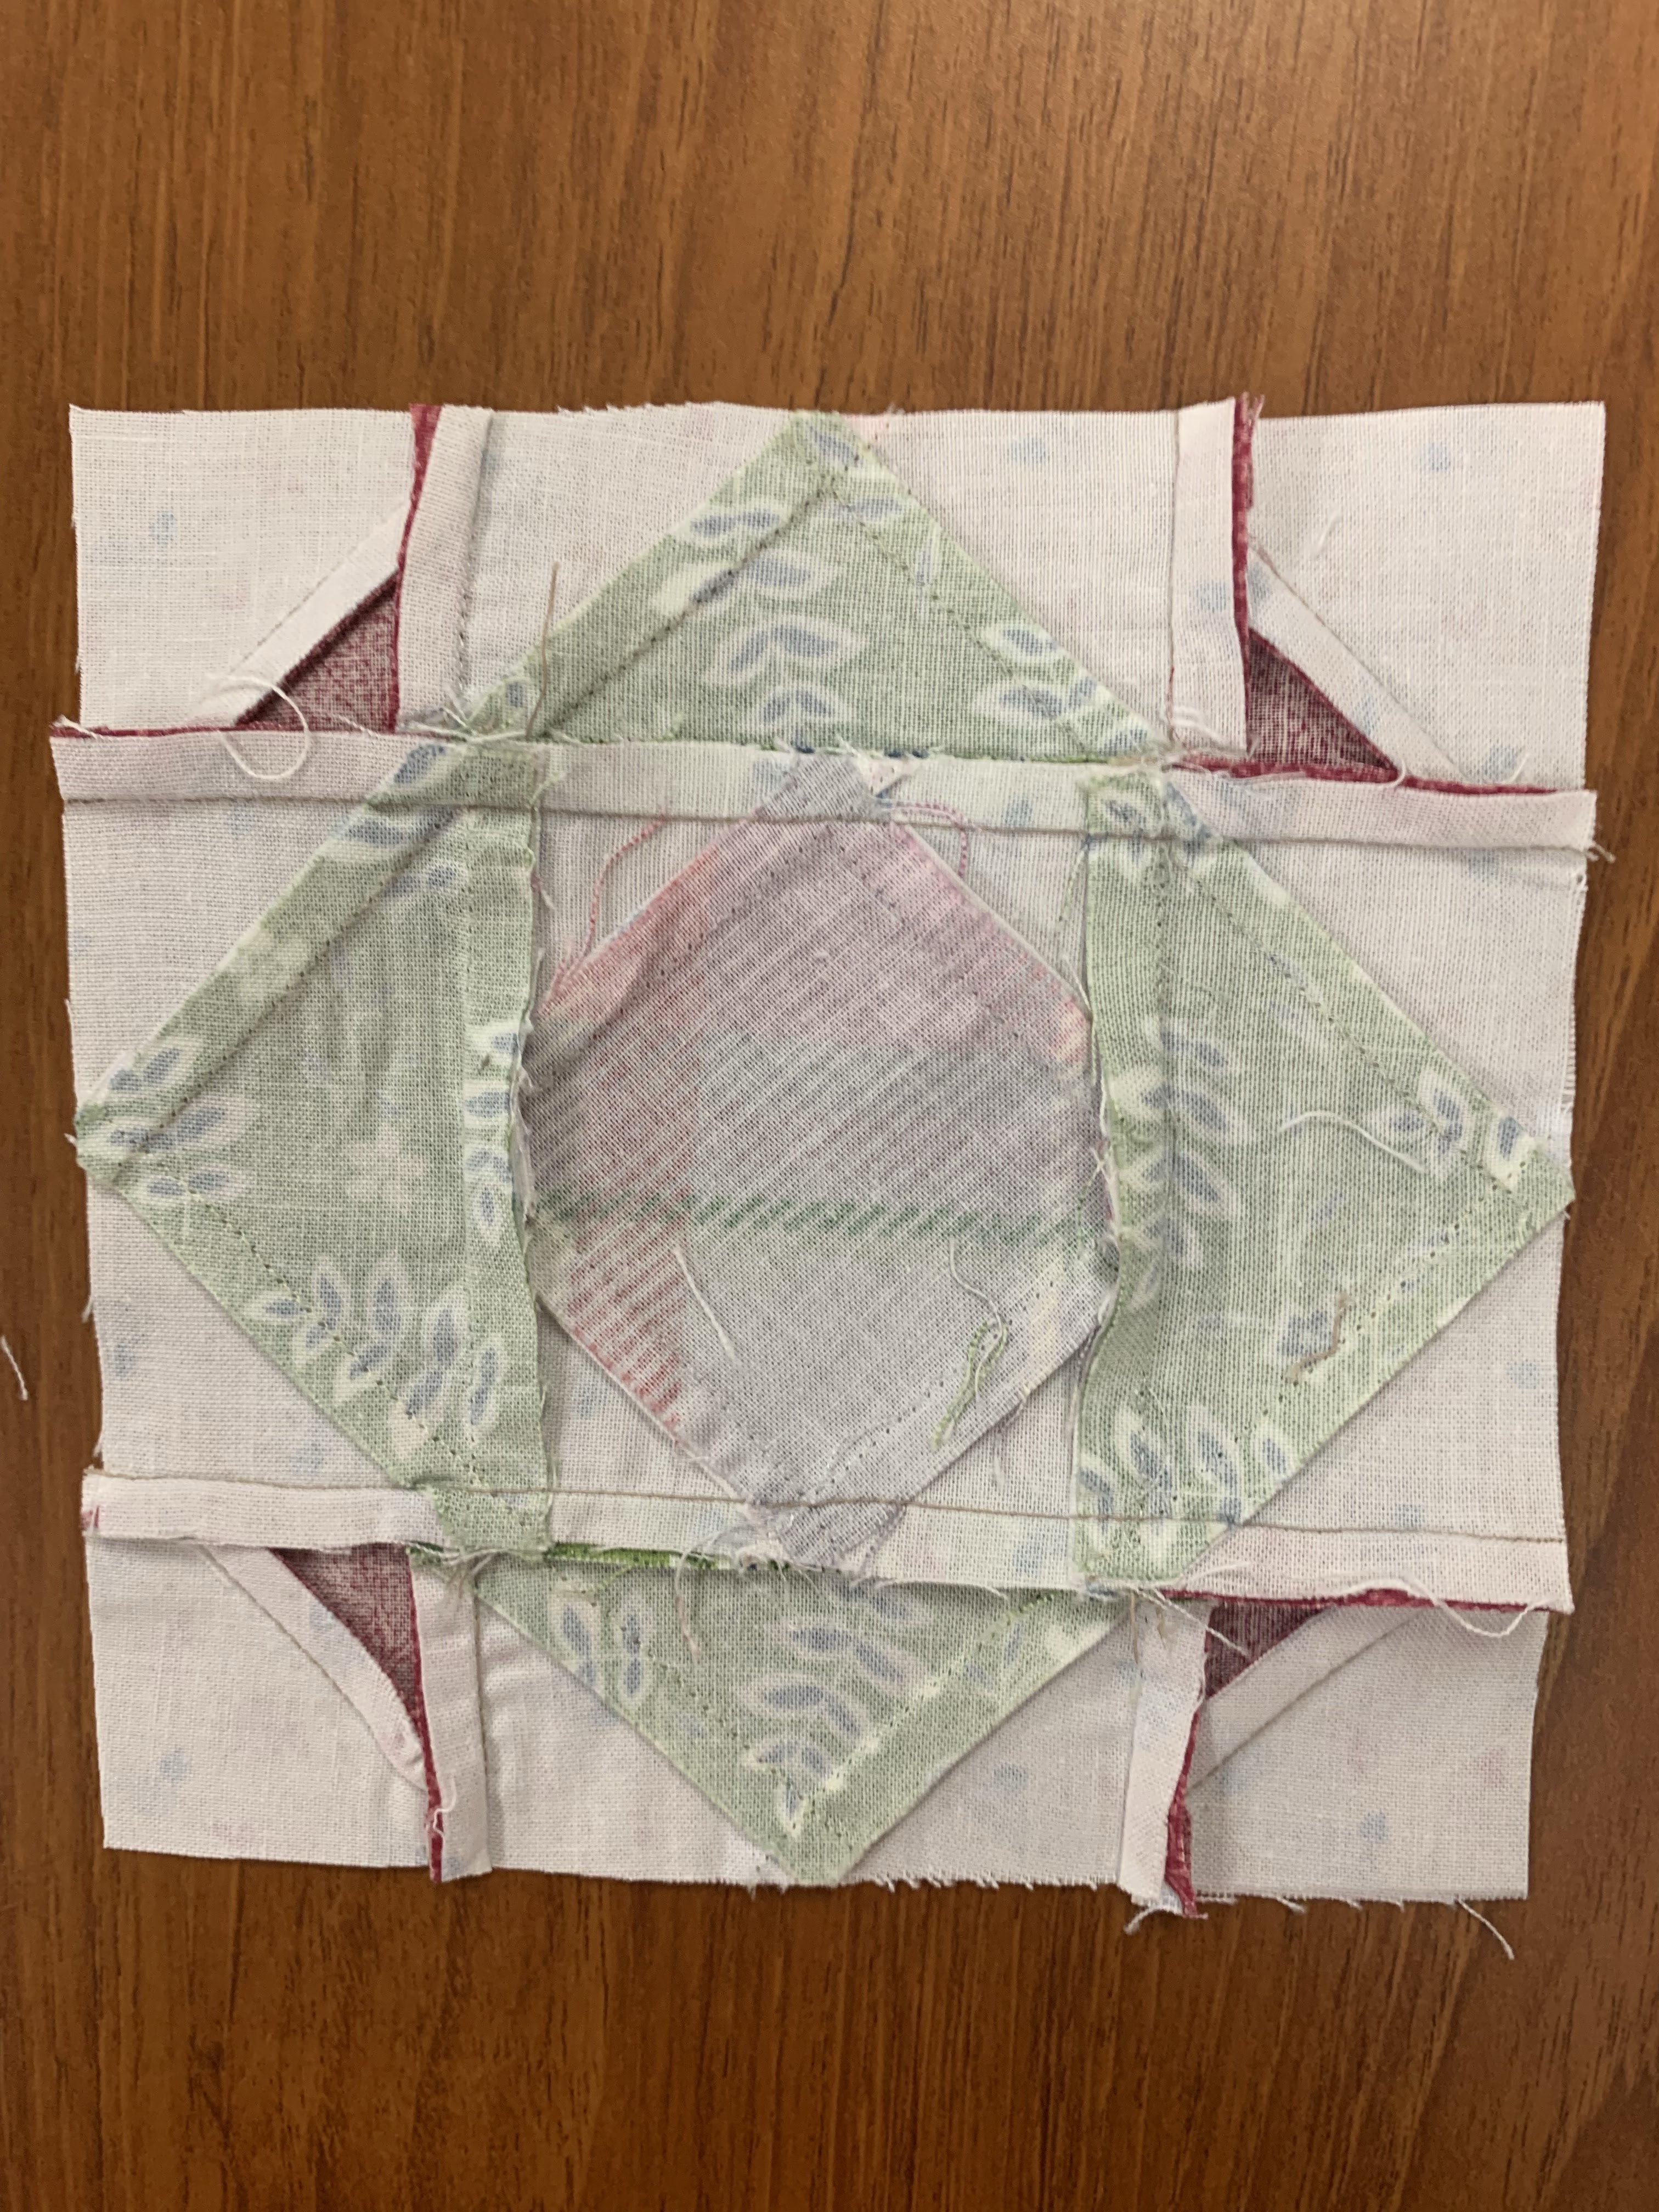
Now assemble the block in three rows. There are a lot of seam allowances on the back. Here is how I pressed mine. You might prefer to press seams open. I starched it and set two heavy clappers on the block to dry flat:


So there you have the two alternative 5" blocks I made. 

Next week I will show how I made four 10" Lone Star blocks, that take the place of sixteen 5" blocks:


Let's quilt.

Barbara


Friday, February 28, 2025

LAUREL RIDGE -- MONTH 3

Laurel Ridge is the 2025 Block of the Month quilt designed by Lynn Wilder exclusively for The Quilt Show.  Star Members have FREE access to the patterns starting January 1, 2025. Made in two colorways, the complete patterns are excellent. You will love making this quilt. Lynn supports the pattern instructions with Videos too. 

This month we make Half Square Triangles--BIG ONES! We make a lot, 48 total, but the designer's method for making 8 at once makes it fast and easy.

Here are mine. Note I changed the Spiceberry Pink fabric for a deep Green from my stash:

The pattern instructions are excellent and Lynn Wilder provides a Video too, so you will find this month fun to do.

I am a math person so love to have "formulas" for making several blocks at once. Half Square Triangles, 8 at a time? Right up my alley! 

The formula is so easy:

Finished size of the HST = 5". Multiple this by 2 = 10". 

Add 2" for the seam allowances = 12". 

Lynn recommends and I was very glad I did, adding an additional 1/2". 

Cut ONE 12.5" square of BOTH FABRICS. This will give you 8 HST, that FINISH AT 5"--meaning once sewn into the quilt. The HST unit when made has to be 5.5" including Seam Allowances.  This formula works for ANY SIZE HST you want to make 8 at a time.

FIRST STEP: Draw diagonal lines from corner to corner on BOTH DIAGONALS on the back of the lightest fabric. Place fabrics RIGHT SIDES TOGETHER, then sew 1/4" on BOTH SIDES OF THE LINE. If you don't use a 1/4" foot you can draw the sewing lines if you like:

SECOND STEP: Cut the large square into FOUR SMALL squares, by cutting North, South, East and West--or "make a cross" as Lynn says: 

Then it is a simple matter to press toward the darker fabric--the Floral or the Green in my case--and "trim to perfection", making the HST exactly 5.5" square:


Lynn has additional excellent Tutorials on lots of these kinds of tips in the Classroom at The Quilt Show: Easy Patchwork Math.  She has included a link to the Tutorial that applies to each month directly on the Pattern Instructions. I encourage you to take a look at those each month. Much of what she teaches in those lessons is exactly how I do the steps. 

Next month we move on to blocks that will take a good bit more time than these, the Checkerboard Blocks.

Remember you can Ask Questions and Share Your Progress on  THE FORUM.

Let's quilt.

Barbara


Sunday, October 29, 2023

HOMEWARD BOUND -- MONTH 11

This quilt is the 2023 Block of the Month quilt for The Quilt Show. It was designed by Sarah Fielke exclusively for The Quilt Show and is only available at The Quilt Show. The best news is it's FREE for Star Members of The Quilt Show. Each month in 2023 a new part of the quilt is released for download to Star Members. 

As always, watch any Videos that are provided to supplement the pattern instructions. 

This month we add the 4 Hearts to the pieced borders made last month. Then we complete those borders and add them to the center of the quilt:


Follow the directions in the pattern to create the pieced border. Take care to have the light fabrics facing into the center of the quilt and the darker fabrics facing out, if you want your quilt to look like Sarah's. I did not do that with the Month 5 border and I also didn't have the Kit at that time so some of my fabrics in Month 5 are different from the Kit. My Month 10 HST units are exactly like the pattern. 

You will add 4 of Star A made in Month 6 to the four corners of the pieced borders. Nice to have those done already, right?

Now we make the 12 Cabins for the last border, Cabins A and B.

CABIN A Wall Fabric: Tiny Dots CANDY    make 8 of these

CABIN B Wall Fabric: Tiny Dots PEACHY  make 4 of these

CUTTING SUGGESTION FOR THE ROOF: The pattern shows how to make the Roofs from Flying Geese units, FOUR AT A TIME. The cutting measurements are EXACT SIZES--everything has to be perfect for the roofs to come out the correct size--the marking, cutting, sewing and pressing. I prefer to use larger sizes so I can Trim to Perfection. 

I cut the Roof Fabric 5.5" square. The background fabric squares need to be 3 1/8" square. To QUICKLY DRAW THE DIAGONAL LINES on the background fabric, I cut the square 6.25", drew the diagonal lines on the wrong side, then cut the 6.25" square into FOUR small squares, each 3 1/8". 

The Roof units are made Four at a Time, just as I showed for making the Star Point units in Month 6. Find that blog here: Four Flying Geese at Once That blog also has a direct link to my full TUTORAL on this method. 

Similar to the center cabin, these little cabins have SMALL PIECES. I found it helpful to create a pattern in Electric Quilt so I could be sure of the cut sizes. We are not providing this pattern--you can always draw it out for yourself if you like. My page shows the sizes of the 4 units:


I did not paper piece the units as each was small and I didn't want to make all those little units with paper. I pieced it just as the instructions say.

When piecing such small units, accuracy is so important.  I strongly recommend you check EACH SEAM as it is sewn. This tip I learned from Sally Collins, the master of making small blocks. To IMPROVE ALL YOUR PIECING, watch her show:


Here are photos showing how I checked each seam as I went. You want to find the mistake as soon as it happens, not after you do the next step:

A 1" piece sewn to a 1" piece should be 1" x 1.5"--this needs trimming on the peach side

Adding the 1" x 1.5" peach piece makes this 1" x 2.5", more trimming needed 

Adding a 1" x 2.5" wall makes this 1.5" x 2.5" 

Adding the other wall makes this 2" x 2.5" There are TWO of  these units

The Door unit is 1.5" x 2.5" Some trimming needed here on the peach

The bottom half of the Cabin is 2.5" x 4.5" Trim to perfection


The back of the units showing how I pressed the seams

Completed Cabins are 4.5" square, including seam allowances 


When checking for accuracy, use the FINISHED SIZE OF EACH PIECE, then add the 1/2" seam allowances to determine what size the unit should be. 

That is it for this month. Next month we make the stair-step pieced units for the outer border and it's all done!

We are getting toward the end of this year. The MOST IMPORTANT ADVICE I  HAVE FOR YOU: be sure to SAVE, COPY, PRINT, whatever method you prefer, ALL THE PATTERNS before DECEMBER 31, 2023. After that, all rights to the patterns return to Sarah Fielke, the designer. We cannot give anyone these patterns after that date, and no one else here can legally give them to you either. Please be proactive in saving what you still need so you can finish without having to BUY missing months.

Let's quilt.

Barbara


Wednesday, May 31, 2023

HOMEWARD BOUND -- MONTH 6

  This quilt is the 2023 Block of the Month quilt for The Quilt Show. It was designed by Sarah Fielke exclusively for The Quilt Show and is only available at The Quilt Show. The best news is it's FREE for Star Members of The Quilt Show. Each month in 2023 a new part of the quilt is released for download to Star Members. 

This month we make ALL the stars that will complete the entire quilt. Here you see 4 of them added to the pieced borders made in Month 5:

There are 3 Stars, two are small and one is large. It can be confusing to figure out which fabrics are used for which stars, especially if you are using the Kit. This information should help.

First, I need to say I CHANGED THE SMALL STARS CONSTRUCTION for my blocks.. The pattern makes the star points from two Half Square Triangles, like this:


I prefer star points made from Flying Geese, like this:


There is a detailed TUTORIAL on this Blog for making four flying geese at once, oversized so you can "trim to perfection". All my TUTORIALS are listed above in the TUTORIALS tab. You can also find it here:

Four Flying Geese
 

This photo shows the FABRICS for the TWO DIFFERENT SMALL STARS. STAR A has peach points and the blue background ladybugs in the center. STAR B has purple points and the white background ladybugs.

NOTE: I used a different background for my quilt so I could start before the Kit arrived. The BACKGROUND SQUARE is cut 3 1/2":

BIG TIP: the fastest way to draw diagonal lines on the back of 2 1/8" squares is to CUT A 4 1/4" SQUARE. Use a mechanical pencil to draw two diagonal lines from corner to corner. Then carefully cut the 4 1/4" square into 4 small squares, each 2 1/8" with the pencil line already drawn. Much faster than cutting MANY very small squares and drawing the lines separately:


IMPORTANT NOTE: cutting 4.25” squares requires more fabric than the half square triangle method. If using the Kit, this might be a factor. Especially with dark purple. I will choose another dark purple for the cabin roofs in month 11 if I don’t have enough.

Here is STAR A showing the various steps to making four Flying Geese at once. Refer to the TUTORIAL for specific info:


Here are the completed SMALL STARS. Make 12 STAR A and make 8 STAR B:


The final star is LARGE: STAR C. It is a Friendship Star block. Make 4 of these. 

I have a love/hate relationship with this Star. I am usually quite unsuccessful at making the "Star Point" unit for this block. NOTE: These are NOT 60 degree triangles. Use the template in the pattern.

If I  had to make a lot of these I would simply create a Paper Piecing pattern for that unit. This time I stuck it out, trying to make at least one of these stars accurately. Once again, not real successful. I must have a mental block against it. These will have to do.

The secret must be using the TEMPLATES as accurately as possible. Hold the template firmly in place as you trim. And be sure to trim off the very small angular cuts on the bottom of the points--they help with aligning the points to the background triangle. 

If you are cutting your own templates from the pattern, make them as accurately as possible. If using the plastic templates from the Accessory Kit, hold them firmly in place as you cut. 


At least ONE of those outer points will be HIDDEN when the Star is sewn into the quilt. Oh, well...

Once you have ALL 24 STAR BLOCKS made, you are done for the Month. 

In Month 7 we start on the wide applique borders that feature the birds and lots of leaves and flowers. We will work on these four borders in Months 7, 8 and 9.

Here is my TIP for those borders: cut them wider than needed so they can be trimmed once sewn. I had a lot of fraying on all four of the borders--there is a lot of time spent handling them--I did mostly needle turn hand applique. It is a bit tricky to do because the top and bottom borders include a STAR A and a square on either end--those are made the exact size needed. More info on all that next month.

While on my recent TEXAS TOUR, I met Venetta M, who is making her Homeward Bound by machine applique, with a narrow zigzag stitch. Her work was spectacular! The background was crisp and firm, no fraying at all. She had cut the background slightly bigger than needed and marked the seam allowance so she could place the circles inside the design area correctly.

She explained she treated the background fabric with TERIAL MAGIC --buy it from the Quilt Show Store! She said a light spritz was all that was needed. I sure wish I had done that:


So, that does it for Month 6--enjoy the  process. Here is Sarah's quilt with Star A in place:


Let's quilt.

Barbara


Sunday, February 26, 2023

QUILTERS SELECT 3N1 HALF SQUARE COMBO RULER

 Recently I was asked to make two videos for Quilters Select rulers: the 3n1 Half Square Combo Ruler and the 60 Degree Triangle ruler. They sent me the rulers and I got to work.

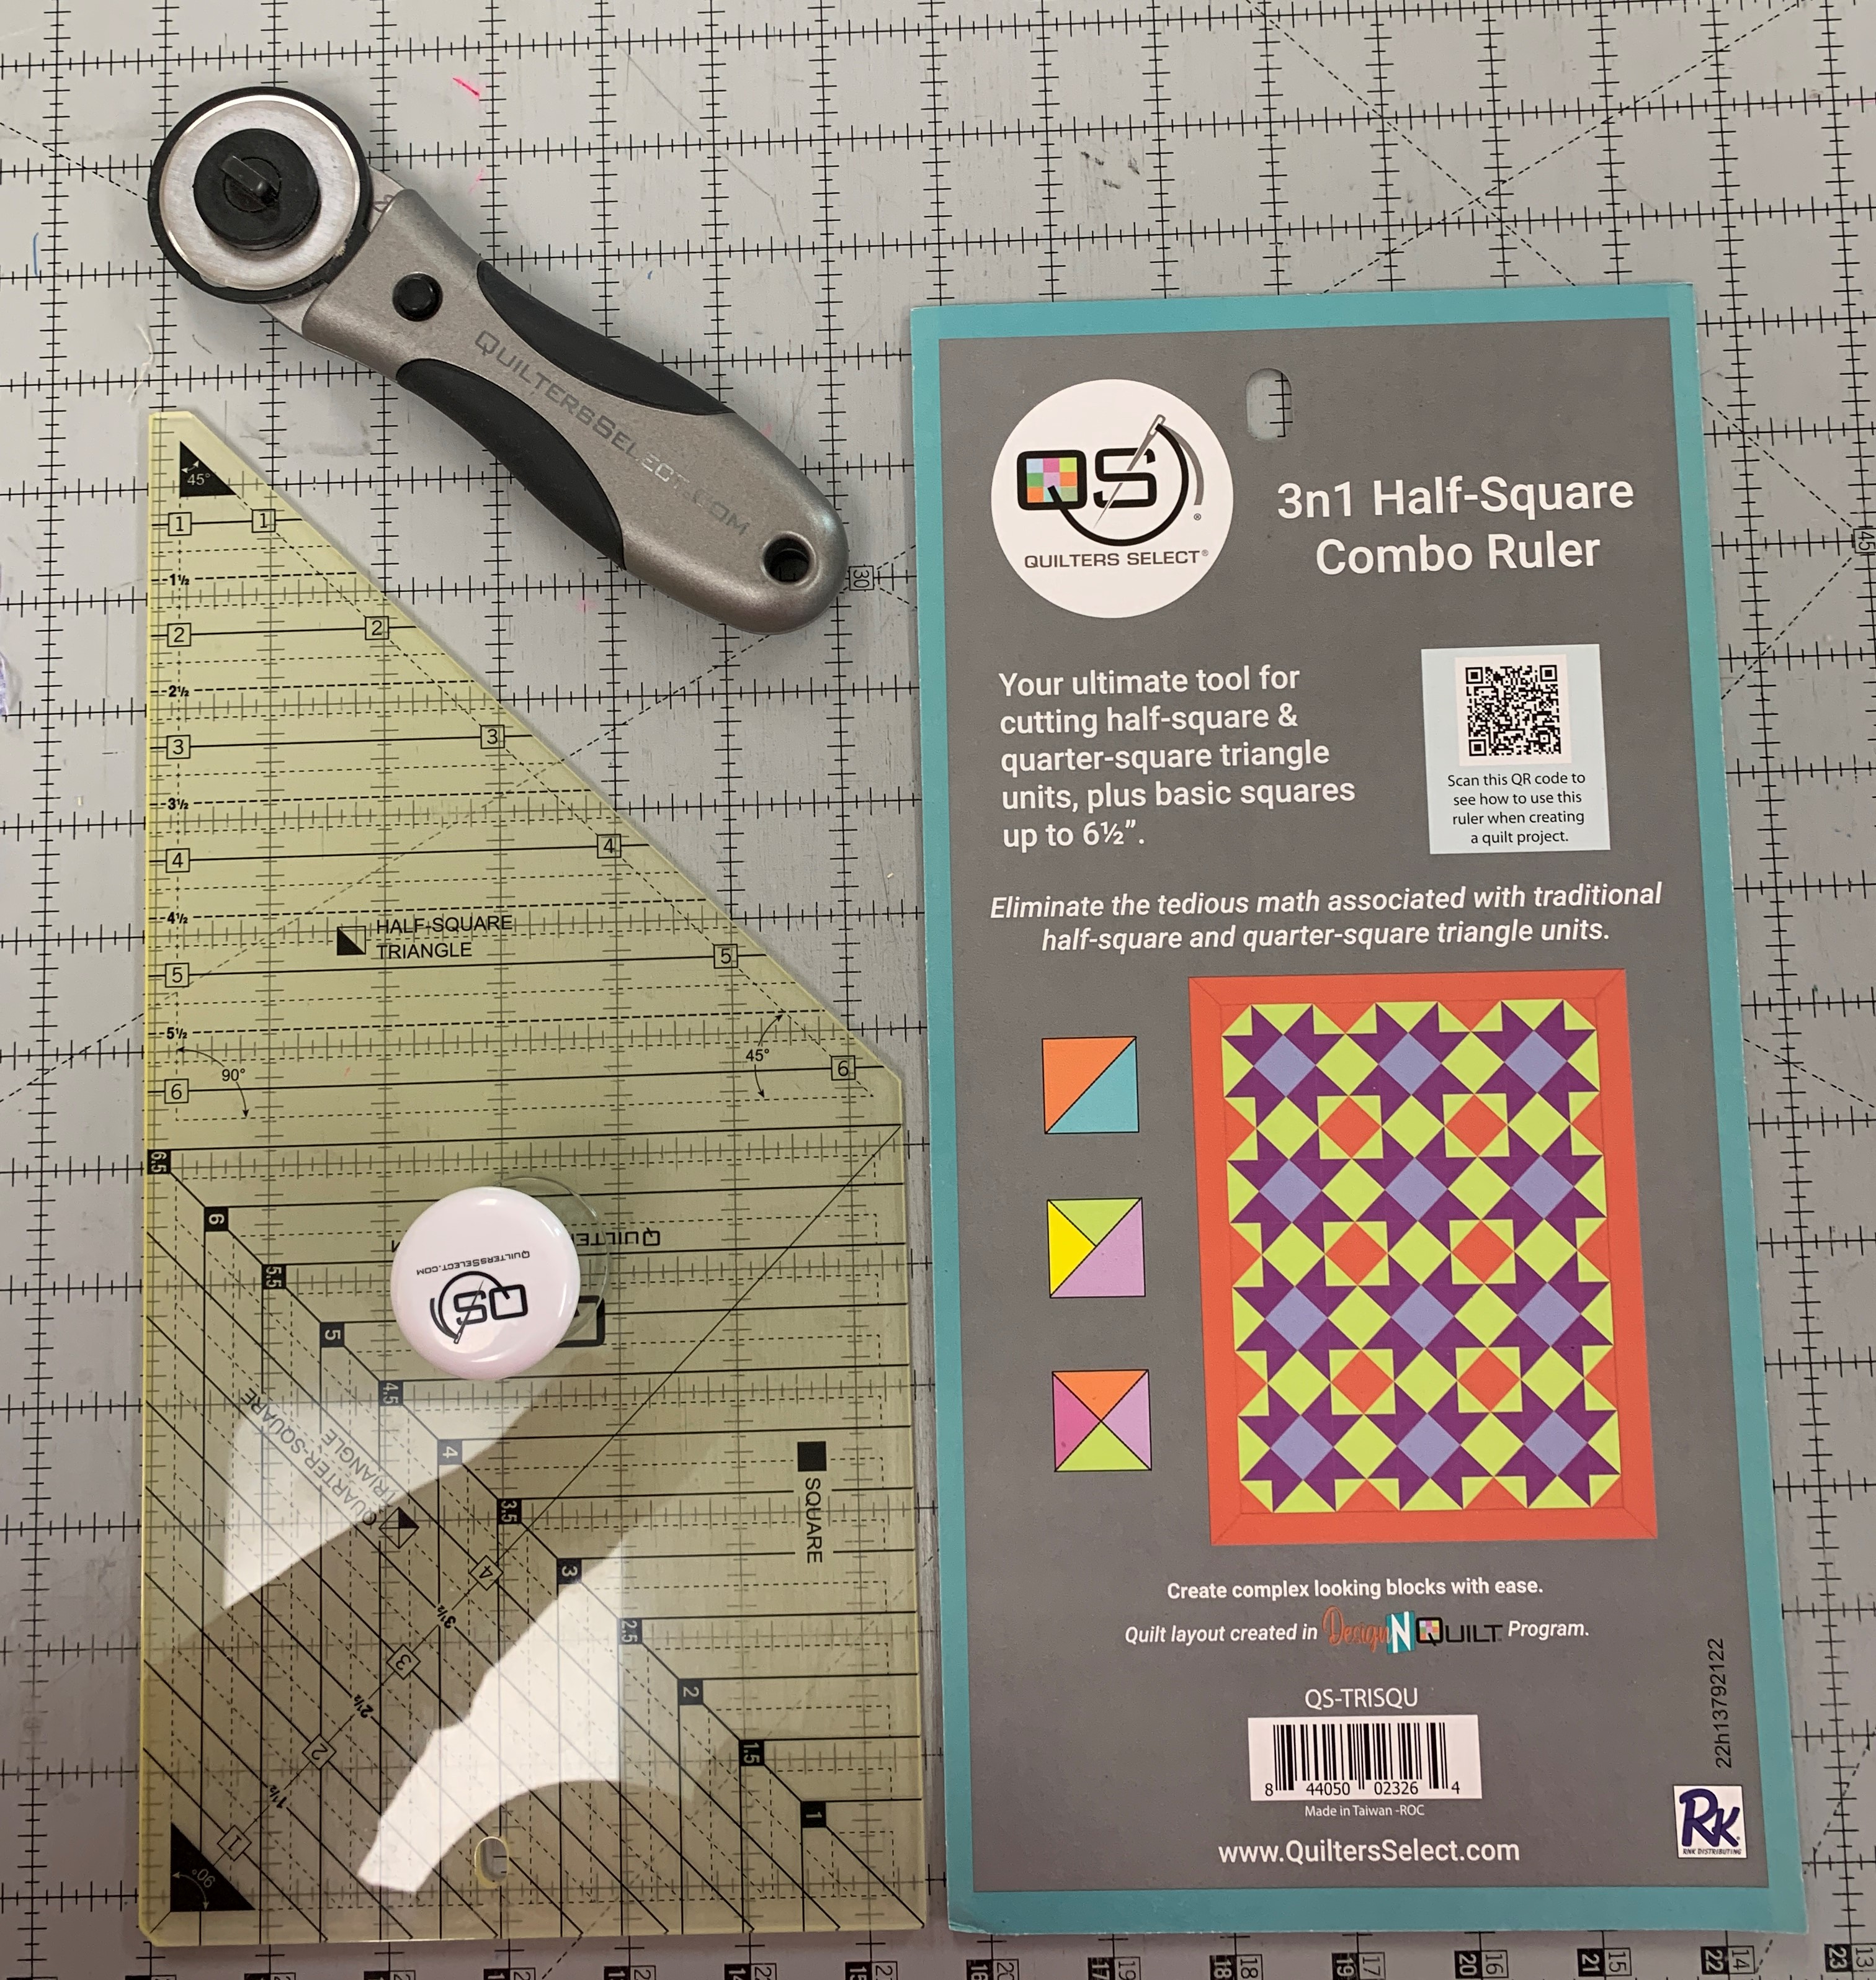
Let's look at the 3n1 Half-Square Combo Ruler. I nicknamed this "the Big Ruler that Does Everything":

The QR code on the package makes it easy to find the instructions and projects on the Quilters Select website. Using a fun knob handle on these rulers helps preserve the original non-slip coating. Our hands naturally have oils, maybe hand cream, maybe sanitizer. It really helps to preserve the coating by using a handle: 

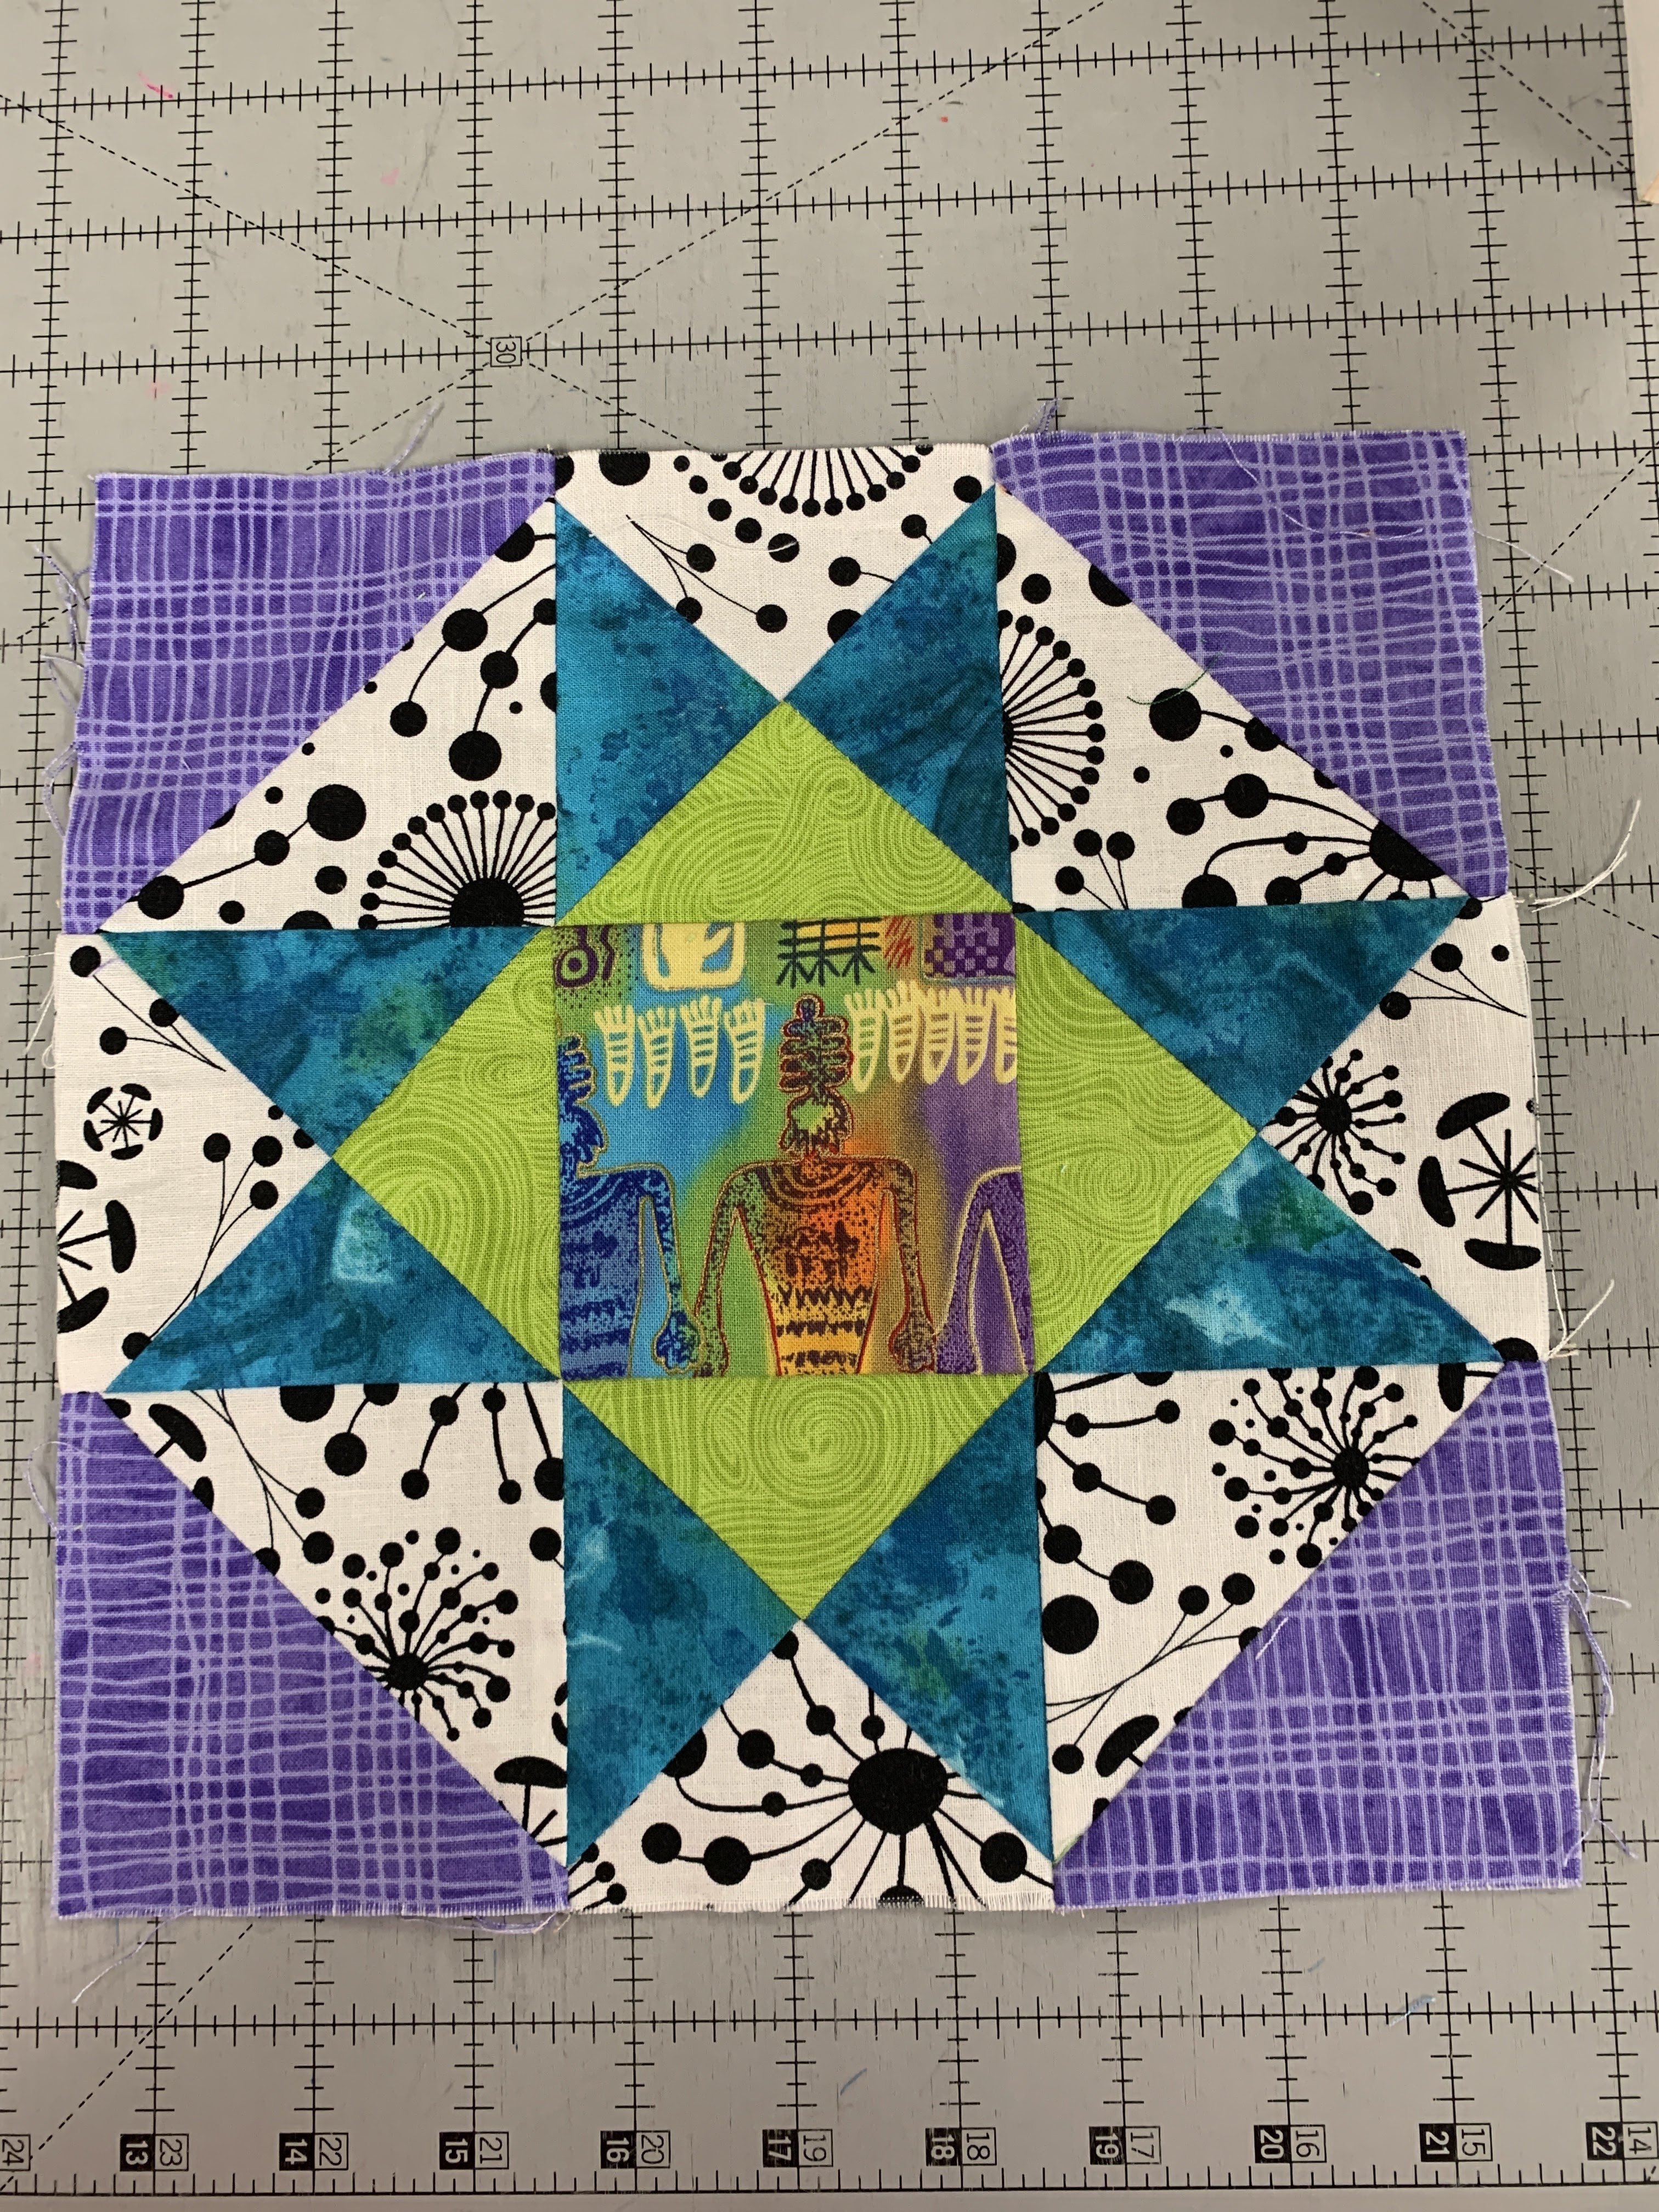
I often use this Swamp Angel block for beginners because it uses squares, half square triangles and quarter square triangles--the 3 shapes this ruler is used for:


Let's cut a square for the center:  Add 1/2" to the finished size of the square for the size strip to cut. This is 3 1/2".You can cut squares up to 6 1/2". The fish are already cut, let's make a different center with this blue print:


Now let's cut half square triangles. Again, add 1/2" to the finished size of the unit, a 3 1/2" strip:


The clipped off point makes it easy to chain piece the triangles and not have a point eaten by the machine:

I press to the darker fabric for this block, use the square part of the ruler to be sure it's 3 1/2:"

Now let's make the quarter square units. The math is easy. The finished size of the unit is 3", meaning when it is sewn into the block. Divide that in half: 1 1/2" add 1/2" = cut 2" strips. Here four strips are lined up in pairs, white/green--right sides together and yellow/green--right sides together. Once cut, they are ready to be chain pieced: 


Like any tool, it might take a few times using it to become fully comfortable with it. But this is a keeper in my studio. I am soon going on retreat, followed by the cruise and it's great to know I can take this one ruler in place of 3 small rulers.

Find more information here: Quilters Select Tools

Watch the videos HERE, they start at about 9 minutes in.

Next week I will show the 60 Degree Triangle Ruler.

The Quilt Show Store has a special deal: buy both rulers and get a free Quilters Select Self-Erase Pen, another great tool. Watch for it here: The Quilt Show Store

Let's quilt.

Barbara


Sunday, September 11, 2022

Headed to Mobile

 I will soon head south to Mobile, AL to present a Lecture and Workshop for the Azalea City Quilt Guild.

Tuesday September 13, 2022 the Lecture is the ever-popular "Time Management for Quilters", 10 am, Regency Church of Christ. Full of ideas and suggestions for making the most of the time we have to be our creative selves:


On Wednesday we will spend the day making a Charming Sampler, using Charm packs we buy and love but don't know what to do with:

Sample 1 approx. 34" 

Sample 2 approx.34"

The Guild was happy to report this class filled almost immediately and asked if we could add more students. Of course. So we will be a full house at 25 students. 

Making small blocks, these are 3", is a good way to improve piecing skills and play with colors. Students who take this Workshop report learning so much more than they expected to, tips that will improve all their piecing going forward.

Mobile is as far away from my home as possible and still be in Alabama, it will take all day to get there. But there will be wonderful seafood dinners and I really look forward to that. And making new friends with this guild.

Let's quilt.

Barbara