Showing posts with label mariner's compass. Show all posts

Monday, January 25, 2021

COLOR MY WORLD--MONTH 2

 This Block of the Month quilt is available FREE to Star Members of The Quilt Show with Alex Anderson and Ricky Tims. It was designed by Wendy Williams exclusively for The Quilt Show for 2021. It is not too late to start--you will learn a lot.

NOTE: If you are a Star Member--be sure to WATCH THE VIDEO--lots of important info there too.

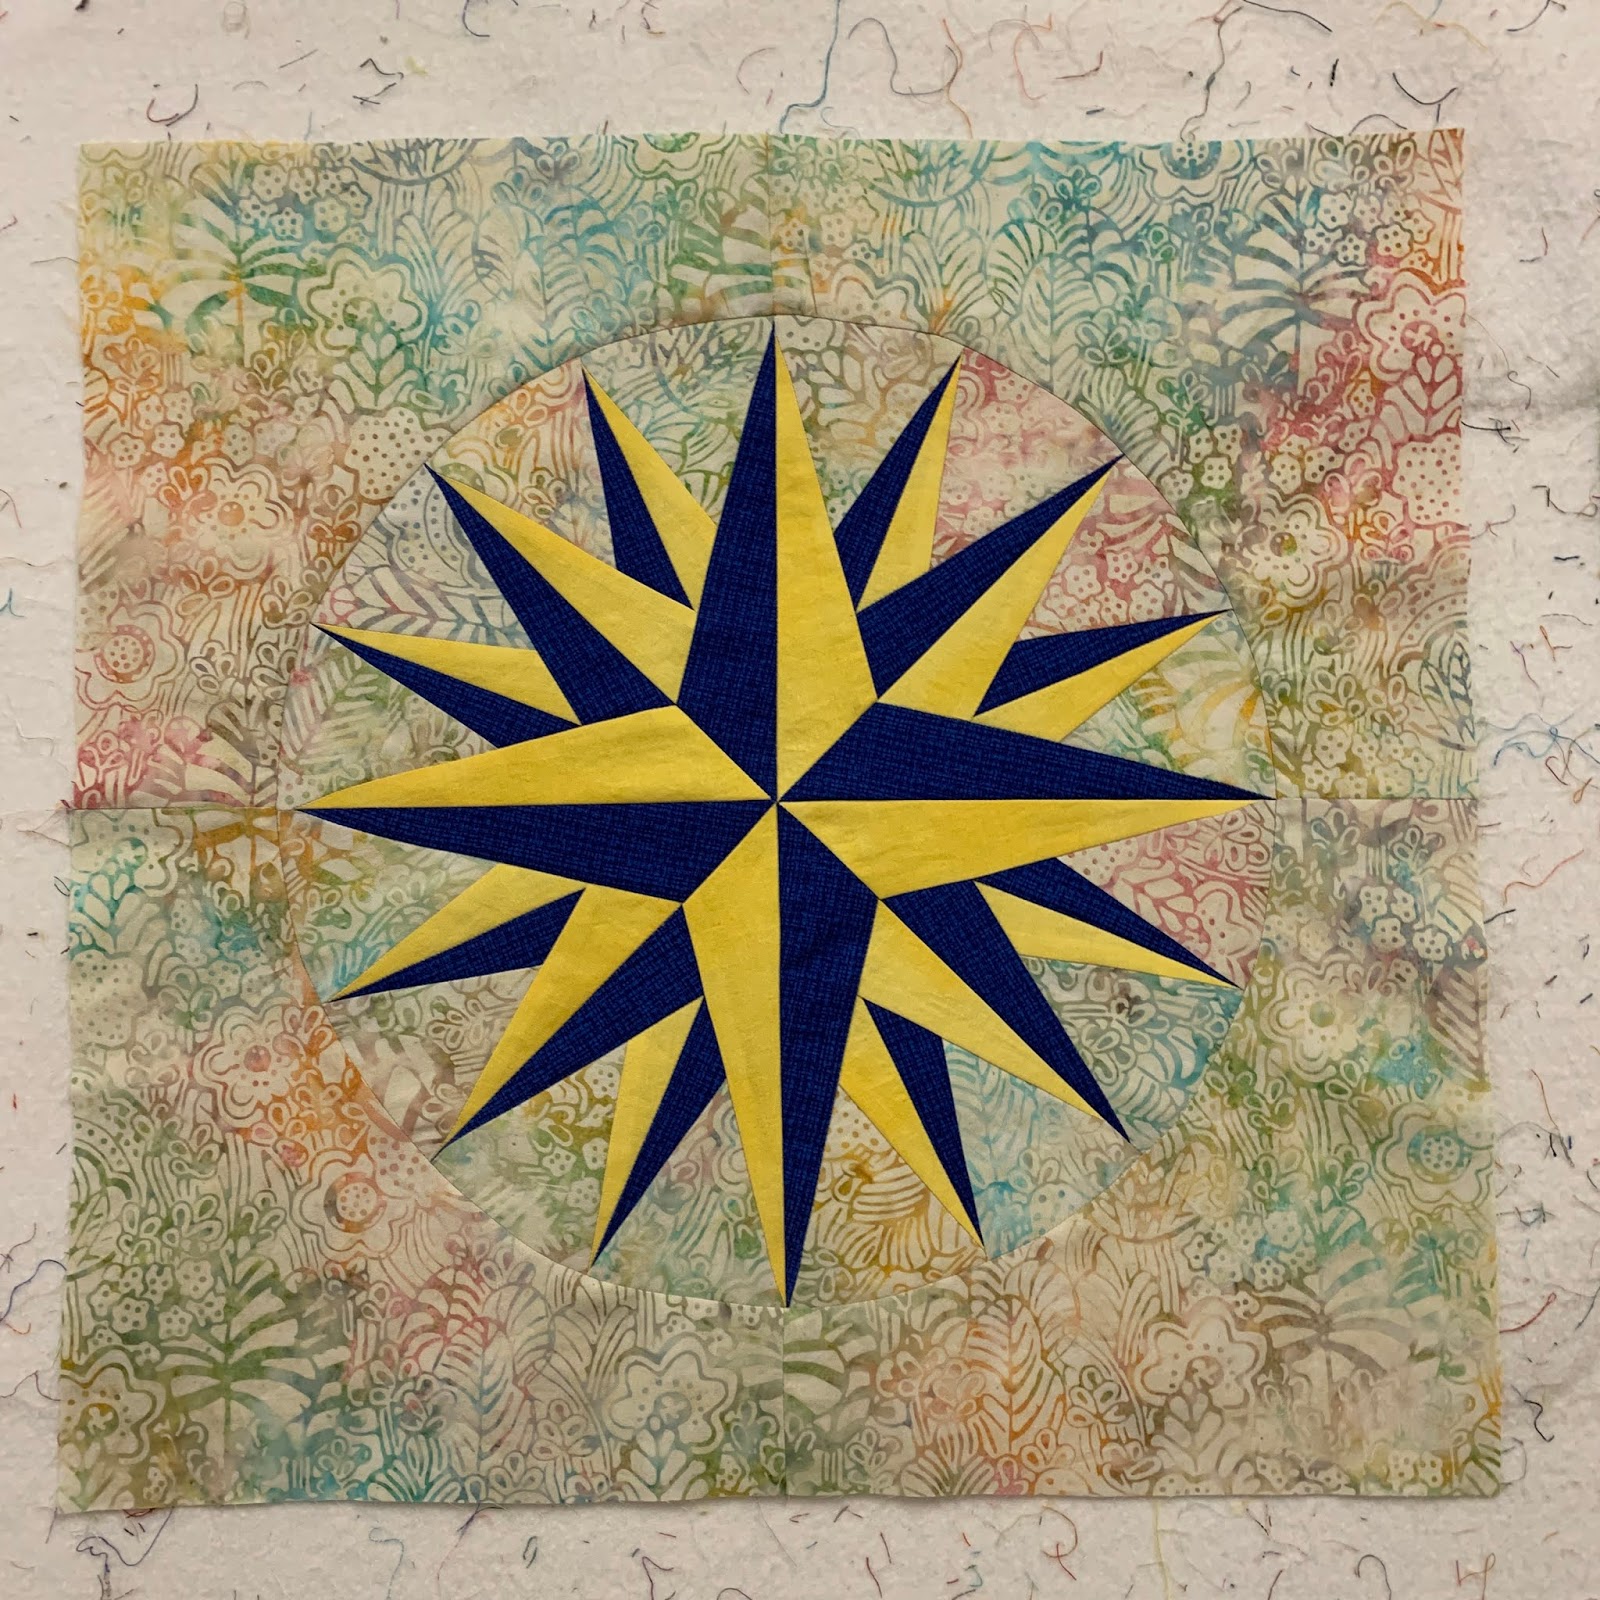
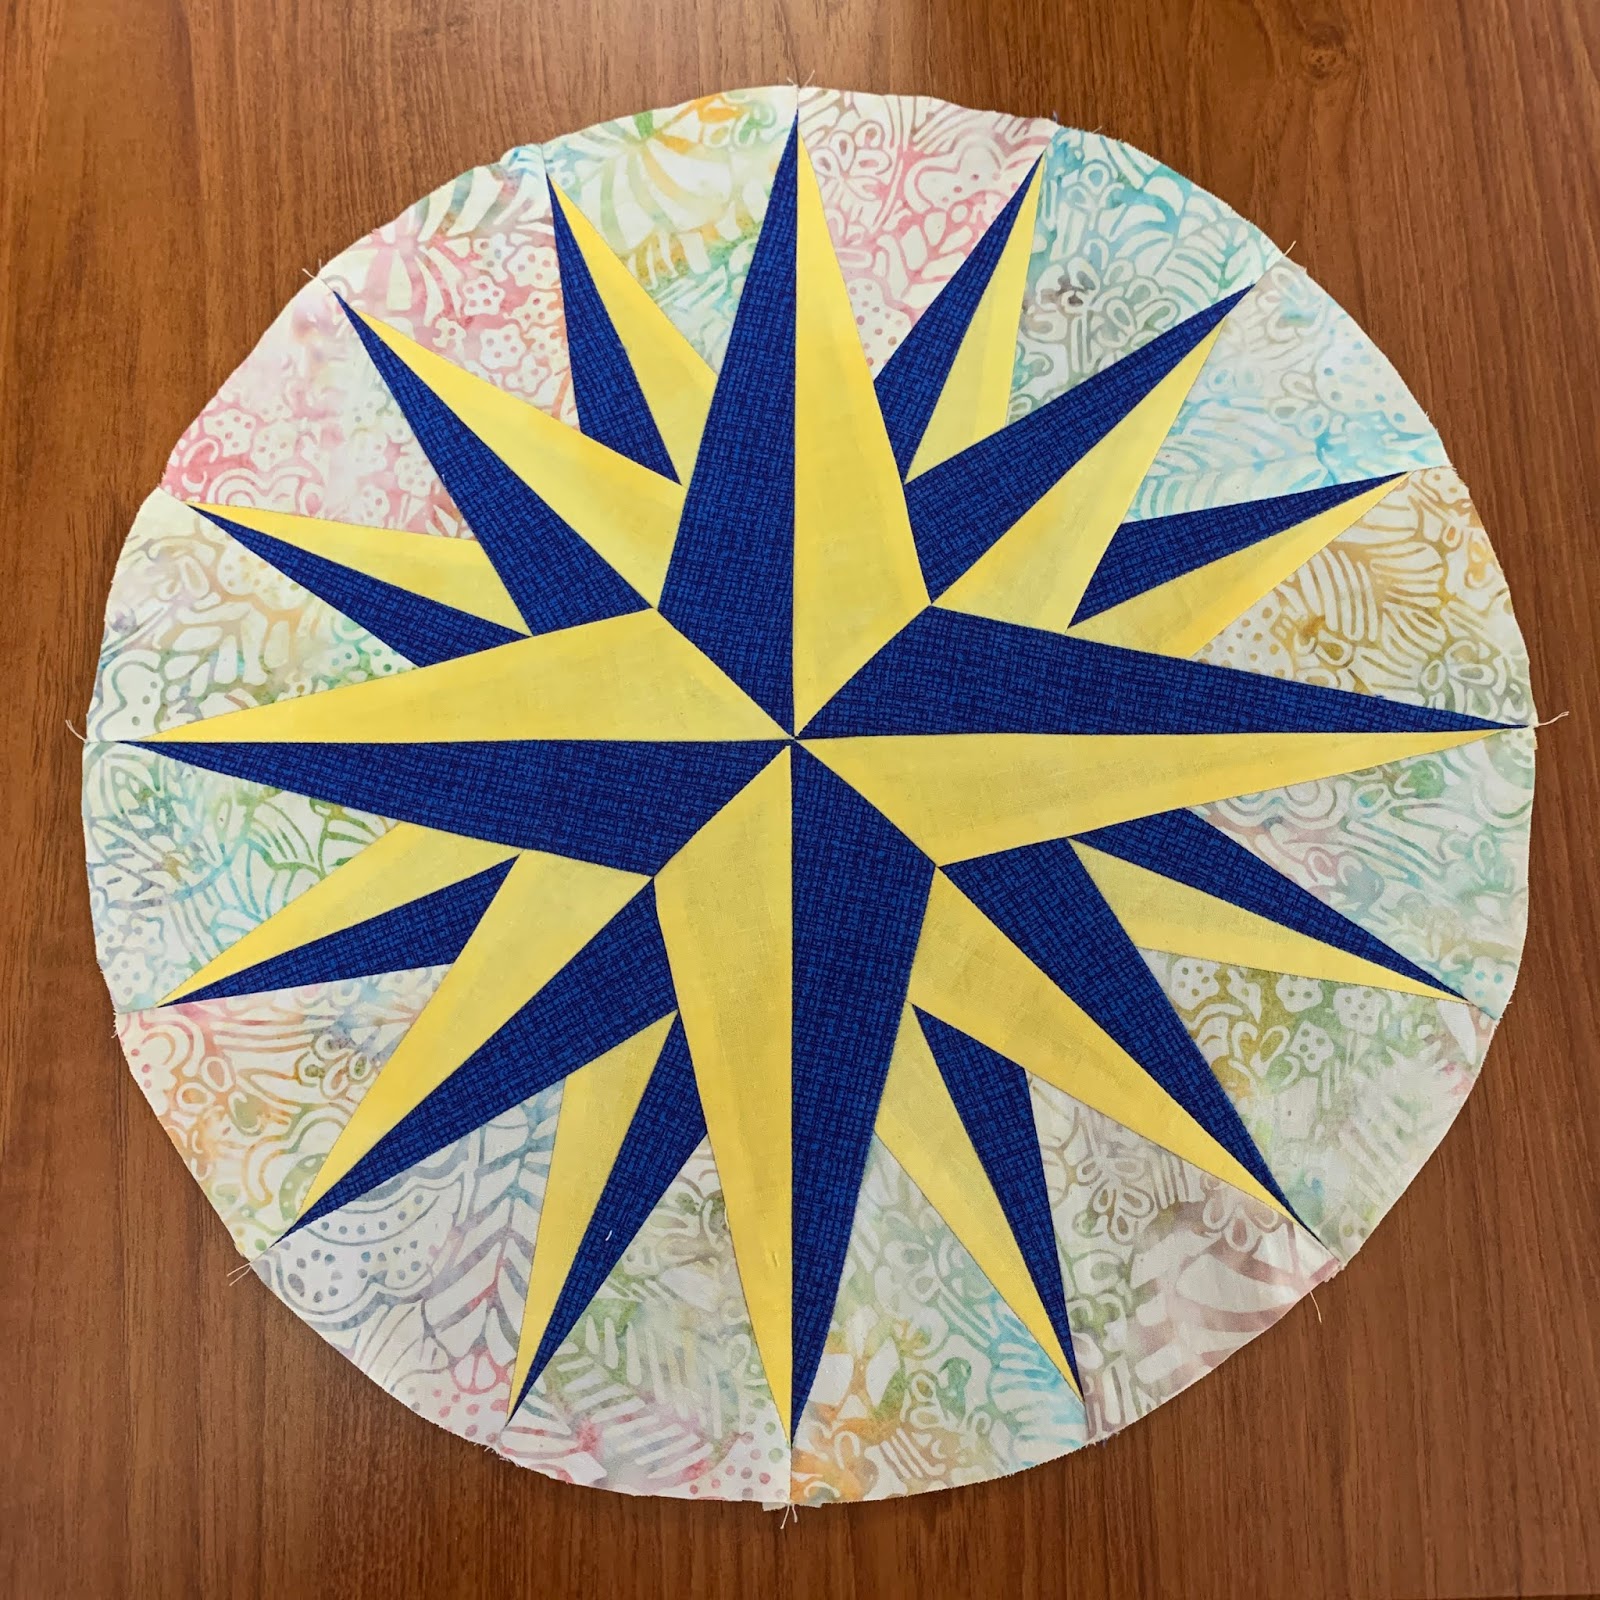
This month we go to the center of the quilt to make a Mariner's Compass. The pattern has excellent, step-by-step instructions with photos--take the time to read them. Wendy used two pretty blues for her Compass: 


I used my two favorite kit fabrics, a shiny gold and shiny purple, for mine: 


Last summer as I was making the sample quilt, I was so focused on getting it done, I didn't take photos of the process. No problem, I made another one: 

Using Freezer paper for paper piecing was new to me and I found it very enjoyable. I was eager to share this process so I wrote a detailed blog about making this Mariner's Compass last June: Freezer Paper Foundation Piecing.  I will touch on the most important instructions again here. 

Helpful things to know and do for this month:

1. First, as always, it is absolutely essential that the 1" scale box is exactly 1". Much has been written about printing on the Forum--each person has to figure out what the correct settings are for their printer. 

2. Here you can see that Section 1 and Section 2 look very much the same BUT--the darks and lights are located opposite of each other. Be sure to take the time to fold all the lines on the patterns, in both directions, just as we did in Month 1, before starting to sew: 

3. It is easy to get the colors mixed up--use a pencil to write your colors on the paper to keep it all straight, especially if using more than just one light and one dark. I suggest after you cut out your fabrics, using the cutting instructions in the pattern, lay out all your pieces to be sure you have them in the proper order.  It is really easy to sew the wrong piece in the wrong place--ask me how I know...  NOTE: the LARGE piece, 8" x 3", is for piece F, the largest point in the Compass.

4. When piecing angles like these, it can be tricky to get the pieces lined up accurately before sewing. I use a few pins to test the placement before sewing to be sure the fabric will cover the paper completely after sewing. Pin on the sewing line, open the fabric and double-check. If it's right, sew it. If it needs to be moved just a bit, do that, re-pin and try again. 

5.  As pieces are added, they are pressed over, onto the freezer paper--the waxy side. The excess is trimmed 1/4" away from the line--using one of my favorite tools, the Add-A-Quarter ruler:

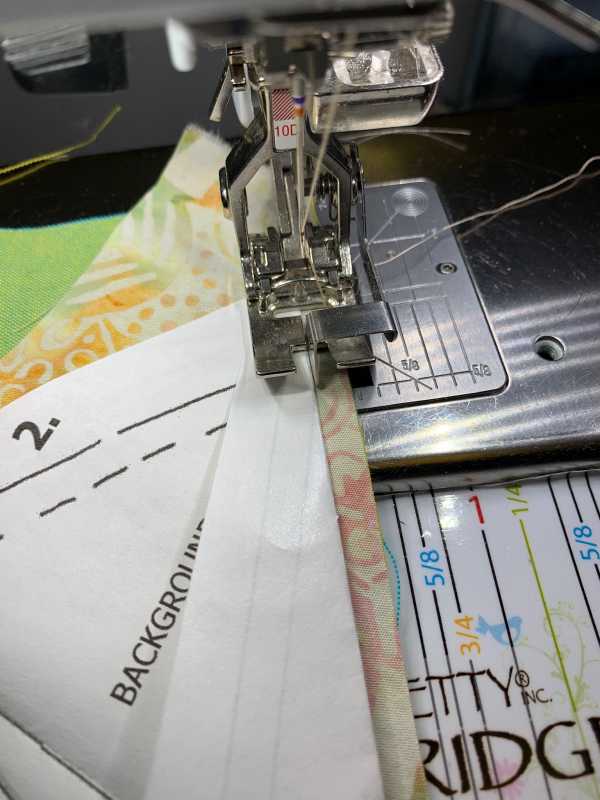
6. If you haven't tried the Edgestitch Foot yet for Freezer Paper Foundation piecing, you really should. Sometimes called the Stitch-in-the-Ditch foot, or the Edge-Joining Foot, or the Topstitch foot, most machines have this foot available. I learned about it in January from the Forum, and WOW--how I wish I had known to use it last Summer as I made the quilt--such a help! I was still able to use the single hole throat plate and keep the needle in the center position. The guide runs right along the edge of the paper--no more stitching through the paper--just keep your eye on the guide:


7. Each fabric is added in turn until the paper is covered with all the fabrics needed. When the pattern is completely stitched, carefully trim 1/4" away from the sewing line--see Step 6 below first!  Then carefully remove the unit from the Freezer Paper--and the paper is ready to be used again! A real bonus if doing a block with many of the same units. I used the two paper patterns to make the 8 units needed, 4 of each. So I only had to print 1 sheet of Freezer paper to get ALL the patterns needed for this 14" block:


8. Trimming the outside curved edge is tricky with a rotary cutter. I used good quality scissors, I am a fan of Karen K Buckley's Perfect Scissors--to trim exactly 1/4" away from the dashed line, creating the seam allowance. You want the Compass points to be 1/4" away from the outside edge. 

NOTE: when joining the wedges, I recommend you start at the center point and sew to the outside edge to prevent the seam allowances at the outside edge from becoming stuck:


9. When joining units together that put more than 4 fabrics at one point, I always pre-check the center by machine basting, BEFORE sewing the center seam. Here are the two halves, ready to be sewn together:


10. Using a long stitch length, I use at least 5.0, carefully pin the center and then baste, about 1" on either side of the center: 

11. Take it out of the machine, hold your breath, and check yourself. If it meets YOUR approval, turn the stitch length back to the proper size, and sew the entire seam, pinning all along the edges. 

If it doesn't meet YOUR approval, it's a simple matter to remove the basting stitches, fiddle a bit again, re-pin, baste again and check. I was happy with this:

12.  This center point is probably the most important part of the entire quilt because your eye will go right there and it is a high contrast spot. It is worth your time to get it as accurate as you can:


13. Here is the way I pressed the back. The longest seams are pressed open--these are the seams that join the 8 wedges. Do what makes you happy: 


14. The finished size of this Mariner's Compass is 14". That means the Compass with seam allowances should measure 14.5" now. 

15. All the outer edges are bias so take care to handle gently. If you have a place on a wall you can put it, do that, so you can admire your handiwork. Even using a piece of cotton batting to put the Compass on will allow you to see it but not handle it excessively. The piece of batting can be draped over a chair if wall space is limited.

Next month we are back to Small Houses #3 and #4--same size as Month 1 but different windows and doors. 

Be sure to share your work on the Forum--there is a specific category to SHOW  YOUR MARINER'S COMPASS. We want to see and cheer you on.

Let's quilt. 

Barbara


Wednesday, June 24, 2020

Mariner's Compass Background

In the last post, I showed how I made a Mariner's Compass circle using Freezer Paper foundations. Check that out  HERE--Freezer Paper Piecing

Now it is time to add the background to complete the block:


There are several ways this can be done. As usual, I look for the "fastest method that gives me the result I want".

1. APPLIQUE: I could have turned under the edge of the Mariner's Compass 1/4", either pressed or basted it, and then appliqued it to a square of background, either by hand or by machine. I was fairly certain that would take me a lot of time to prepare and it was not likely I would get a nice, smooth, round circular shape.

2. PIECING: Much more to my liking. My steps:

I found  a Mariner's Compass pattern in Electric Quilt 8,  quilt design software I have used for many years, and printed out the background curve for a 14" Mariner's Compass block.  I could have drawn a 14" circle, using a yardstick compass, but having the software made it easy:


I copied the template onto Freezer paper, leaving as much extra beyond the finished outside  line as I could. I can always trim the background smaller when I decide what comes next.

The background was cut into a square about 20" and folded in quarters. I pressed the freezer paper template so the outside edges were exactly on the left and bottom side folds and about 2.5" extra was on both the top and right sides--the outer edges of the square.

Had I thought it through in advance, I could have placed the FINISHED EDGE of the freezer paper  template on the folds and that would  have created a complete circle, with no seams necessary.

Instead, I cut it like this, and knew instantly I would have to add those seams. Oh, well:


The four quarter circles ready to be seamed to make the complete circle:


Using the pattern template that was used to piece the actual Mariner's compass, I made registration marks at the place the background circle would join points of the Compass:


I spent a bit of time pinning the background circle to the Compass--the Compass is on the bottom for machine piecing. There is a pin at each place the Compass point meets the circle--those pencil marks--and a pin in between all the other pins to easily keep the edges aligned. You can use fewer pins and work to keep the edges aligned with your fingers or a stiletto as you sew--the extra pins really help me:


Once sewn, I turned it over to see if any seam allowances got twisted on the bottom--sometimes that happens despite your best efforts. I only had one so I quickly fixed it--un-sew a few stitches with my trusty stitch ripper, and resew those few stitches. All good to go.

I pressed the background away from the Mariner's Compass, and declared this block Done:


I am not sure what will come next for this block--I have another big project that has to get done first. But someday it will get done and be a gift for a sailor.

Let's quilt.

Barbara

Sunday, June 21, 2020

Freezer Paper Foundation Piecing

Learning a new technique is interesting. Having the time to explore a new technique is priceless.

I have been a fan of "paper piecing" for years--where you sew through paper patterns, using a tiny stitch, then remove the paper when done  and sew the units together to make a block. In teaching this, I find that quilters either love it or hate it.

Center of a gift for a sailor

The plus side of paper piecing is ACCURACY. With complex patterns like Mariner's Compass, you can get sharp points fairly easily.

The down side to paper piecing is REMOVING THE PAPER, and those tiny stitches are challenging to remove when we make a mistake--and we ALL make a mistake, from time to time.

I am learning to Foundation Piece on Freezer Paper patterns. The exact same method as regular paper piecing, except the pattern is printed on the matte side of Freezer paper and you DO NOT sew through the paper.

I have known about this method for years but never tried it--I was perfectly content with "regular" paper piecing.

Here are the basics--I will have a detailed Tutorial when time permits. I am enjoying learning this so thought you might like to see it too.

As usual, the fabrics are cut into over-sized pieces or chunks.


The first fabric is pressed to the waxy side of the freezer paper, securely. The second fabric is placed on top of the first fabric, right sides together, using the standard 1/4" seam allowance:


Sewing with a regular length stitch, just beside the fold of freezer paper:


See how the stitches are just along the paper, not through it: 

 As pieces are added, they are pressed over, onto the freezer paper--the waxy side. The excess is trimmed 1/4" away from the line--using one of my favorite tools, the Add-A-Quarter ruler:


Each fabric is added in turn until the paper is covered with all the fabrics needed. When the pattern is completely stitched, you carefully remove the unit from the Freezer Paper--and the paper is ready to be used again! A real bonus if doing a block with many of the same units. I used the two paper patterns to make the 8 units needed, 4 of each. So I only had to print 1 sheet of Freezer paper to get ALL the patterns needed for this 14" block:


The 8 units are sewn into four sections of two units each. Here are 4 units sewn into 2 quarters, then joined to make a half block:


 Two halves, ready to be joined into a circle:

The best tip I give quilters when making blocks with places where many seams come together, like Lemoyne Stars and this Mariner's Compass, is to machine baste that center first. I turn the stitch length up, to 5.0 here from my usual 2.0. I baste stitch about an inch on either side of the center:


I open it and take a peek--if I am happy with it, I turn the stitch length back to normal and sew the entire seam, stitching right over the basting stitches. If I think I can do better, it is a snap to pull out those basting stitches and try again. I was satisfied with this:


Here is the back of the Compass:

On Wednesday, I'll show you a few ways to create a background for this Compass.

UPDATE: Here is the link to the BACKGROUND post:

Mariner's Compass Background

Let's quilt.

Barbara

Thursday, September 3, 2015

The Hard Stuff

I'm giving a presentation to the Madison Station Quilters next week on "The Hard Stuff".  I'll talk about these more challenging quilts:

Mariner's Compass, made 2001, original pattern


Double Wedding Ring--this is a mini, made 2009, pattern by Virginia Robertson

Feathered Stars: Joyful Journey made 2009, pattern by Sue Garman

The PowerPoint is ready and I did step-outs for blocks needed for my next quilt, Diamond Jubilee.  I'm about a year and a half behind in starting that one so this was a good reason to get started.  Here are the 2 blocks I made this week:


These are 15" finished stars.  One I made by Foundation Paper Piecing with Sue Garman's pattern, Stars for a New Day.  The other I did by regular piecing.  The problem with that:  those feathers are a weird size for regular piecing:  13/16".  Yes, I did all the measurements in sixteenths of an inch--crazy!  At the lecture, I'll have suggestions on how not to make it so hard.

I've also been plugging away at the Barbara Brackman  Stars in a Time Warp QuiltAlong blocks.  Here are the last four weeks:


Barbara Brackman is the queen of quilt block history and has written many books about this wonderful topic.  I have them all and this is a great way to learn more about fabrics and techniques over the centuries.  I am making two 6-inch Sawtooth Stars each week--I now have 68 blocks done.  Each week, Barbara shows some possibilities for how to use our stars and I'm beginning to think about how I want to set them.  Time will tell.  Here are a couple possibilities:
I'm on the lookout for a Printed Center Medallion panel

A lifetime of Applique' though
 
Now it's time to get those garments started for Houston--that will be here before I know it.

Let's Quilt!

Barbara