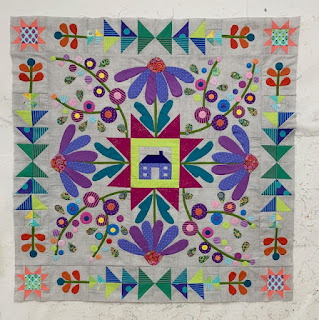
This quilt is the 2023 Block of the Month quilt for The Quilt Show. It was designed by Sarah Fielke exclusively for The Quilt Show and is only available at The Quilt Show. The best news is it's FREE for Star Members of The Quilt Show. Each month in 2023 a new part of the quilt is released for download to Star Members.
This month we make ALL the stars that will complete the entire quilt. Here you see 4 of them added to the pieced borders made in Month 5:
There are 3 Stars, two are small and one is large. It can be confusing to figure out which fabrics are used for which stars, especially if you are using the Kit. This information should help.
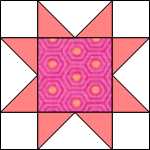
First, I need to say I CHANGED THE SMALL STARS CONSTRUCTION for my blocks.. The pattern makes the star points from two Half Square Triangles, like this:
This photo shows the FABRICS for the TWO DIFFERENT SMALL STARS. STAR A has peach points and the blue background ladybugs in the center. STAR B has purple points and the white background ladybugs.
NOTE: I used a different background for my quilt so I could start before the Kit arrived. The BACKGROUND SQUARE is cut 3 1/2":
BIG TIP: the fastest way to draw diagonal lines on the back of 2 1/8" squares is to CUT A 4 1/4" SQUARE. Use a mechanical pencil to draw two diagonal lines from corner to corner. Then carefully cut the 4 1/4" square into 4 small squares, each 2 1/8" with the pencil line already drawn. Much faster than cutting MANY very small squares and drawing the lines separately:
 |
Once you have ALL 24 STAR BLOCKS made, you are done for the Month. In Month 7 we start on the wide applique borders that feature the birds and lots of leaves and flowers. We will work on these four borders in Months 7, 8 and 9. Here is my TIP for those borders: cut them wider than needed so they can be trimmed once sewn. I had a lot of fraying on all four of the borders--there is a lot of time spent handling them--I did mostly needle turn hand applique. It is a bit tricky to do because the top and bottom borders include a STAR A and a square on either end--those are made the exact size needed. More info on all that next month. While on my recent TEXAS TOUR, I met Venetta M, who is making her Homeward Bound by machine applique, with a narrow zigzag stitch. Her work was spectacular! The background was crisp and firm, no fraying at all. She had cut the background slightly bigger than needed and marked the seam allowance so she could place the circles inside the design area correctly. She explained she treated the background fabric with TERIAL MAGIC --buy it from the Quilt Show Store! She said a light spritz was all that was needed. I sure wish I had done that: |


Still debating on what fabrics to use for my stars. I did get out my tri-rec ruler set. Laying them against the paper templates, they are an exact fit.
ReplyDeleteTri-Rec ruler is correct, it is not a 60 degree angle.
Delete