Showing posts with label fabric selection for quilts. Show all posts

Sunday, May 18, 2025

BUCKET LIST QUILT # 6

As I sort through all my fabric, I continue to pull fabrics for specific quilt projects I know I want to make.  Now I am up to BUCKET LIST QUILT # 6.

Last year I had a fabulous trip to Texas in April--Beaumont, Austin, and Victoria. Austin was "playtime" with 3 new-to-me friends and we had a great time. Read about that trip here; TEXAS 2024 

At a terrific quilt shop in Wimberly Texas I bought a yard and a half of a panel I loved, planning to make a special quilt for my granddaughter Stella. Click for a closeup to read the words of inspiration:

Now I've decided to make a quilt with this for ME--Stella will get whatever is left.

Once I decide on a BUCKET LIST QUILT, or any quilt project, really, I go to the closets and start pulling fabrics I think will work. Mostly I am concerned with COLOR, then TEXTURE--or the "feel" of the fabric designs. And I always want a variety of Lights, Mediums and Darks. At lease one DEEP DARK and one SPARKLER--like bright orange or lime green.

I LOVE "shopping in my closet", after all, I bought this stuff because I loved it or knew it would be right for a "someday" project. 

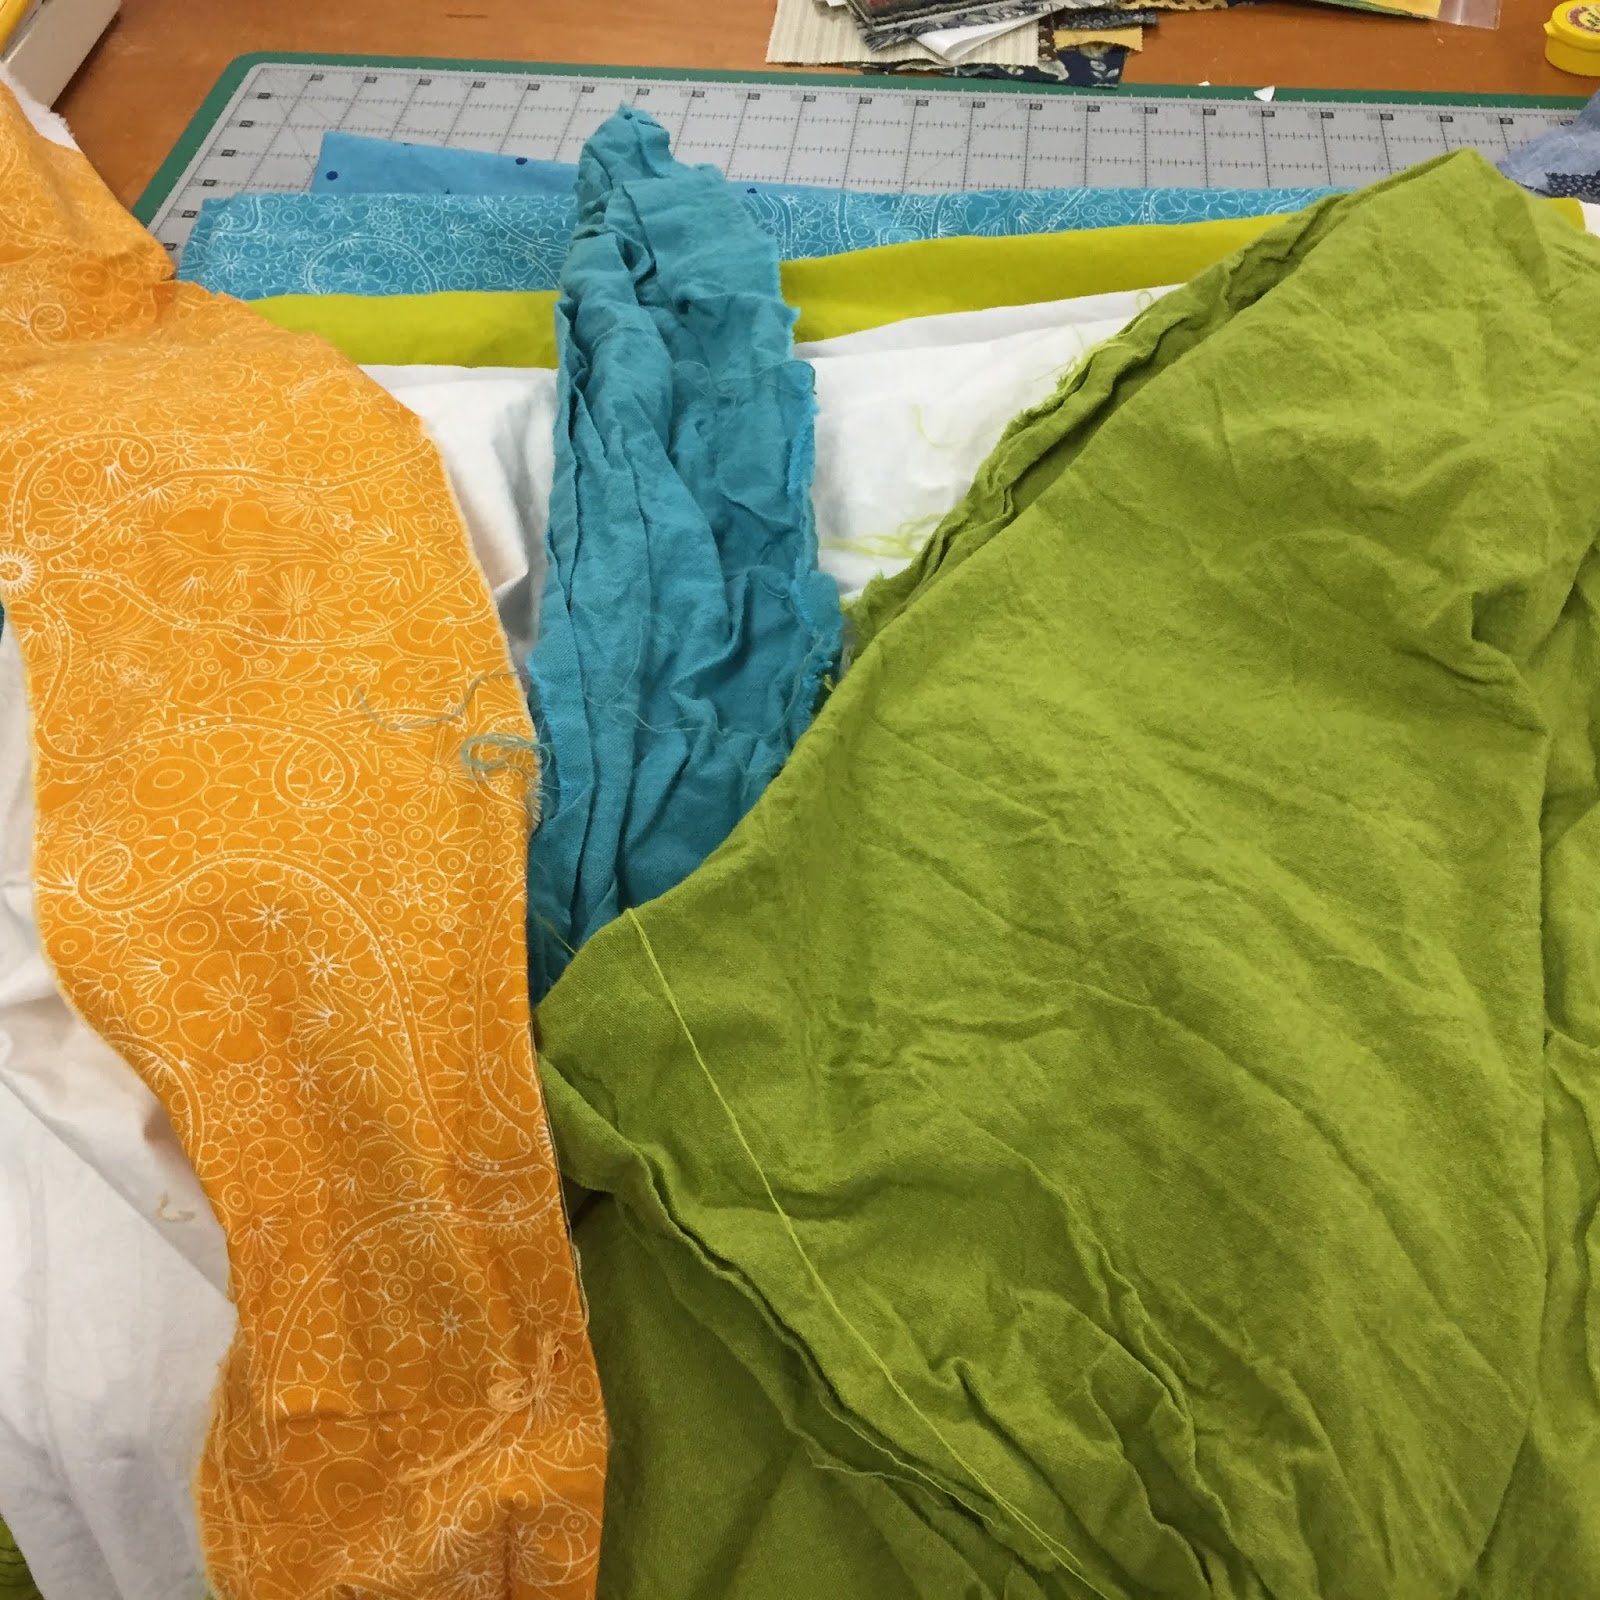
Here is the fabric pull for this quilt. It is surely more than I will need but it gives me lots of options for design as I have no idea at the moment what this quilt will look like: 


Safely stored in its' own tote bag, waiting for the day I say "it's your turn!" This ensures I won't use these specific fabrics for some other project and wish I hadn't when I get around to this one:


These BUCKET LIST QUILTS are in no particular order. I simply wrote about them as they made the list. At this point in my life, I am deciding what  quilts I REALLY WANT TO MAKE going forward. My plan is to have 10 quilts identified by the end of this year.

See the previous quilts:

BUCKET LIST QUILT # 1

BUCKET LIST QUILT # 2

BUCKET LIST QUILT # 3

BUCKET LIST QUILT # 4

BUCKET LIST QUILT # 5 My Next Lifetime Quilt  I am actively working on this one now


What is on YOUR Bucket List?

Let's quilt.

Barbara

Sunday, June 16, 2024

MORE STARS, OH MY!

 I have been having so much fun making Stars for my latest project, Oh, My Stars!, a pattern from American Jane. I wrote about it last week, find that post here:

Oh, My Stars!

Here is just a peek at the process. This is not the final arrangement--when the rest of the 13 full stars are made I will decide who goes where. This just lets me see the general idea:

Picking fabrics is my favorite part! The latest fabric "pulls":


Here they are ready to sew. Having them all set helps me make the most of my time the next sew day--just start sewing, these are cut and ready for assembly:

The actual sewing is slower and requires careful pinning and sewing. I make two diamonds first to be certain I like the 5 fabrics together, then I finish the star. Once that is done, I sew the other half of the strips and finish making either full stars, half stars or corners.

Each set of fabrics makes either TWO full stars, or ONE star and TWO halves, or ONE star and TWO corners:


The pattern quilt. There are 132 little 4" stars for sashing. I make the star points unit from flying geese, using my TUTORIAL for 4 Flying Geese at Once. Those geese are 1" x 2" finished, that's small. I am making them as I go, using them as Leader/Ender projects. I prefer that to having to make 132 all at once.


Let's quilt.

Barbara


Sunday, December 5, 2021

FABRIC SELECTION FOR A NEW PROJECT

 I love fabric and the more fabrics I put in a quilt, the better I like it. My process is simple and this is the process I use to help new quilters get started with Fabric Selection.

Start with a Focus Fabric OR a Focus Theme. Themes are things like "Baby" or "Christmas" or "Fall". Each of us has something that comes to mind when we think of those themes.

Since I am more Fabric Driven, I usually start with a Focus Fabric. A multi-print fabric  that speaks to me. I use it to choose the colors for the new project. 

For Garden Party Down Under, the 2022 Block of the Month quilt designed by Irene Blanck exclusively for The Quilt Show, I started with this fabric, a Timeless Treasures fabric, designed by the late Patricia Campbell. It's called Jacobean Arbor and is probably 20 years old: 


From that fabric, I selected the color families to use and adapted them to my stash. More yellow, less peach, more lime/bright green, less olive, etc. I dug deep in my stash of fat quarters or even smaller than that. If the color was right, it made the selection cut: 


The backgrounds are a wide variety of tone-on-tone prints. I only needed a 2 yard piece for the outer borders, everything else could be cut from smaller pieces. The two pieces in the back, the blue/tan dots and the gray/white dots never made it in the quilt--they were too busy: 


And this is my finished quilt. It does not contain ANY of the Focus Fabric:


My fabrics are somewhat different from the original quilt, designed by Australian designer Irene Blanck. It's no surprise hers has a more "Australian" feel to it. Here is hers:


The Quilt Show has put together a beautiful kit of fabrics similar to Irene's fabrics. She used many fabrics, as I did, and many were old favorites of hers so the Kit is not an exact copy of hers. It simply has the "feel" of hers. You can find it in the Shop of The Quilt Show, while supplies last.

If you would like to assemble your own palette, select your favorite Focus Fabric or Theme and play. This quilt is VERY SCRAPPY so small amounts of your favorite fabrics can easily be included.

Here are my suggestions for each fabric color group I used. You can always add more or change color families:

Background:  2 yards for outer Diamond Borders—they should be cut lengthwise for Irene’s applique method. Those who piece the outer border will not have to cut lengthwise, but still can if they like.

 5 yards additional Background fabric is needed—select five 1 yard pieces for a wide variety—this is more than enough.   I love the look of a variety of backgrounds but you can use only one if you     prefer--6.5-7 yards total.

Stems:  1 yard total is needed to cut stems on the bias.  3 Fabrics, 1/3 yard each for variety or only one fabric  There is almost 600" of bias stems in the entire quilt.

Vases:  There are 12 vases and each can be made from a 10" square of fabric--select a variety and use a different fabric for each vase  OR If you prefer fewer fabrics, select 1/3 yard EACH of 4 fabrics—this is more than enough for all the Vases—each Vase fabric will be used 3 or 4 times.

 The following Color Families are strictly based on personal preference. Use your favorites:

Yellow:  4 fabrics, ¼ yard each

Red/Pink:  6 fabrics, ¼ yard each

Purple: 4 fabrics, ¼ yard each

Orange/Brown:  4 orange fabrics, ¼ yard each.  Brown for the baskets in the corners Month 2—1/4 yard is more than sufficient--my baskets are purple.

Green: 6 fabrics, ¼ yard each, for leaves

Blue: 5 fabrics, ¼ yard each

 I hope this gives you an idea how to get started on your next project. Anything goes, if you like it, use it. For Garden Party Down Under, some have asked about using 1800's reproductions, batiks, 1930's reproductions, or completely modern fabrics. Each of those choices would work and be beautiful in their own way. It's your quilt, you get to choose.

Let's quilt.

Barbara 


Wednesday, December 4, 2019

AFTERNOON DELIGHT--Fabric Requirements

So many people have told me and The Quilt Show how excited they are that Afternoon Delight, a pattern by the late Sue Garman, is the 2020 Block of the Month Quilt for The Quilt Show. So, I am not the only quilter who had this great pattern on their bucket list!

The patterns will start January 1, 2020, the same day the show that introduces the Block of the Month is released. If you are not a Star Member, join now so you will be ready to jump in.  Join Now   

If you join in December 2019 you have the added bonus of access to ALL 12 months of the 2019 Block of the Month quilt, Sizzle by Becky Goldsmith--just be sure you download and print all of those instructions you want because after December 31, 2019 they will no longer be available from The Quilt Show--you will have to buy the pattern from Becky when she has it available for sale. 

Here is my version, made from the Kit fabrics available at The Quilt Show Store.


The Kits have been very popular, if you want one, you should order right away. You can add on 3 different border choices, or decide on your own border a year from now when you'll be ready to assemble your quilt.

If you would rather use your own fabric, this pattern is a great stash buster!

Sue's quilt from the cover of her pattern features a red border:


Here is what Sue had to say about Fabric Considerations for this quilt:

1. Her quilt was made with an assortment of civil war reproduction prints, small prints, and tone-on-tones, combined with shirtings. You will need LOTS of them. Fat quarters are convenient but long quarter yards are just as easy to use. Except for the border finishing triangles and borders, none of the fabric needs to be wider than 9 inches. Scraps from previous projects are also great in this quilt.

2. You could just as easily use a different set of fabrics: assorted red or blue prints with white-on-white or cream/tan background prints--or batik prints with a tan or white background. Use what you love!

3. You could also choose to use a single background fabric for the entire quilt. Sue said "I have not calculated how much background fabric would be required for the entire quilt; you will have to use your own math skills for that task!"

4. Sue also said "I have intentionally not included exact fabric color choices for any specific blocks in this quilt. If you, too, want a scrappy quilt, use whatever fabrics you wish!"

Oh, Sue! How often I thought of you and knew you were laughing at me as I used my math skills to calculate all the yardage. I spent many hours going through all 12 months to be sure the Kit would have enough fabric. No wonder you didn't do that...

Here is what you will need and it is the amount of fabric in the Kit:

Background: 10 yards    The Kit has 10 one-yard pieces of light prints. If you prefer fewer, you can use one or a few. If you want a variety, the beauty of this quilt is you don't  have to have it all when you begin. You can add to your stash over the year.

Prints for Piecing and Applique':  13.5 yards  The Kit has 27 half-yard pieces. Again, use fewer or more. If using quarter yards, you would need 54. Start with the color families you want to use and add a variety of light/medium/dark prints of each family. If you have fat quarter bundles you've been saving, this might be the perfect time to use them.

Yes, that's a lot. There is almost as much seam allowance in the pieced blocks as there is visible fabric. All I can say for sure is, with this much fabric, you will not run out. If working scrappy, you can easily add more--one red or green is as good as any other when working with this many pieces.

How about a Red, White and Blue quilt? I quickly pulled from my stash--I call it "shopping in my closet". A few whites that total 10 yards and a bunch of reds and blues. Many of the reds are leftover from Red and White--By the Numbers that I made in 2012-2013:


Border Fabrics: 4 yards, this is enough for the inner and outer borders AND binding. There is a narrow black border between the inner and outer borders—the pattern calls for 1 yard but 1/2 yard will do, it’s a very narrow border.

Sue recommends pre-washing and these fabrics would be great candidates for that. While I am not making a second complete Afternoon Delight, I will be making samples each month that will create a small version so pre-washing might be in my future...

We would love to see your fabrics--post a photo in the 2020 Afternoon Delight Forum under Fabric Show and Tell:

Fabric Selection Show and Tell--Afternoon Delight

One more important NOTE about the Kit: the fabrics are not labeled or numbered--you will decide which fabrics to use in each block--your choice.  This means each quilt will be as unique as its' maker.

Enjoy the journey!

Let's quilt.

Barbara

Wednesday, December 12, 2018

SIZZLE Fabric Selection and Preparation

This is an exciting time--selecting and preparing fabrics for SIZZLE--the 2019 Block of the Month from The Quilt Show.

Here is the Cool Kit I will be using, it looks so neat, tidy and pretty all packaged:

Here are the fabrics, separated into lights, greens, and blues:


Then I separated them into lights/darks, relatively speaking:


While I don't usually pre-wash my fabrics, the instructions recommend pre-washing so I'll do it  to as part of this process:


I snip off a small corner of each fabric before pre-washing to cut down on raveling, especially if I plan to wash fabric with clothing. The other advantage to this method is I always know these fabrics have been pre-washed:

Shake out each fabric flat, don't put into the washing machine folded. I used the Express Wash cycle, it's not dirty, after all, and just a bit of Orvus Paste, a mild soap I use to wash my quilts. AND I added a Shout Color Catcher to each load. Do not use hot water, cold or warm is fine.

Here is the result of the Color Catchers: light load on the left, dark load on the right. There is some color loss in each load but not enough to worry any more about:


After drying the fabrics, I intended to smooth them flat and press them before using each one, as the instructions recommend. I found the solid woven shot cotton fabrics really needed pressing now and fabrics just look so much more scrumptious pressed flat so I pressed them all.

NOTE: Great tip from one of the Sunday Sew and Sews--hang the shot cottons to air dry on a rack--don't put them in the dryer--much less pressing to do.

MY BEFORE shot cottons:


AFTER.  I recommend not letting your fabrics get bone dry, about 99% dry is best, they press nicely then:


The hardest part for me now, is to NOT start on this--Christmas needs some work at  my house; otherwise...:

Last week I helped a few students select their SIZZLE fabrics at Huntsville Sew Creative:

Sheila started with the small piece of batik on the lime and pulled fabrics in those colors

Peggy is going black, white, gray and Royal Blue
Terri is working with this lovely palette
Several other people stopped in to ask questions and see my additional palette--I am also making a Cool/Warm combo version:

Some of these fabrics are more than 10 years old--the colors are perfect for me. Here is my fabric inspiration, I went heavier on the purple, less of the darker blue:

Kauai Rooster

Class begins January 5 at Huntsville Sew Creative, 256-536-3757. There is still some room in this year-long adventure, call today to secure your spot. You will learn so much, I promise. No sewing in class, I lecture/demo/help you for two hours each month, you do all your sewing in the comfort of your home. I hope you'll join us.

Here is a 10 minute conversation with Becky Goldsmith, the SIZZLE designer and well-known quiltmaker, author and teacher--she will get you excited about our new journey too:

Becky Goldsmith Video

Let's Quilt!

Barbara


Sunday, June 10, 2018

Links for Students


I recently started teaching a brand-new six-month class locally, called My Favorite Things. During this journey, my goal is to teach the 12 students ways to improve their quiltmaking and become a bit more creative in their work. They can follow my pattern for the class quilt project, or make smaller quilts on their own, whichever they prefer.

The first session features Basic Pieced Units--Half Square Triangles, Four Patches, Quarter Square Triangles and Nine Patches, the building blocks of thousands of pieced quilt blocks. Once you can make these accurately, you are set.

Students receive handouts of the pattern and the class instruction, with links to helpful online videos or blogs. To make it easy to access those links, here they are, for anyone to find.

For those who are less experienced with piecing, I recommend:

Perfect Piecing--the Cutting--the First Step to Accurate Blocks-- it all starts with the cutting, strips or individual units. There is lots of info here to help make your cutting as accurate as possible.

Thread--Why Quality Matters--good thread makes for good piecing results

We use half square triangles a lot, here are three ways to make them:

Two Methods for Making Half Square Triangle Units

The Grid Method for Making Half Square Triangles--when you need a lot of the same two fabrics. This post also contains LOTS of tips/tricks for precise pieing.

One of the fun things I showed the class was the Fast Method of Making Nine Patches:


This method makes these two blocks, one with four neutrals and one with five neutrals. It's fast and fun and if you can work with those two block designs, well worth a try.

Here I made two sets at once and shuffled them up a bit:


The other skill that I preach about often is using Leaders/Enders, or Thread Kittys or Startie/Stoppies, at the beginning and ending of chain piecing. Find out why here: Time Management for Quilters.  I make "free" quilts from the small units made as Leader/Enders, I improve my piecing, save thread, and could not chain piece without this method. This link also takes you to Bonnie Hunter's info on this method--she is the Queen of this method. I can often convince new quilters to establish this habit more easily than I can convert more experienced quilters--but if you try it, I think you will see the advantages. Many tell me "I wish I had learned this trick years ago" once they do it.

Nothing is as good as being in a class, seeing the actual sewing demos, and hearing the answers to students great questions. But these links will help provide a taste of the skills this group of students will learn.

We also talked about fabric selection--I showed many quilts in class to see how these units, even though simple and basic, can make great quilts. The one that got the most attention was this one. I call it Hot Summer Nights, made it in 2000, and it's only half square triangles with a quarter square triangle border. What they liked the best was the rich, saturated colors. I used the one multi-print fabric to help me select the palette:


Find out how I selected fabric for the class project quilt, My Favorite Things, here.  The class project quilt will look like this--I am making this as we go, I just have to keep ahead of the students:


This should give you plenty to read for a while.

Let's quilt!

Barbara

Wednesday, June 6, 2018

Sometimes You Change Your Mind


My Foothills Quilt top is done and I am very happy. For more info on this quilt-a-long by Mary Elizabeth Kinch go here. 


There I was, zipping along, sewing Foothills blocks into rows, using a dark green fabric for sashing. I was in a hurry, trying to get this done as quickly as possible. When I stopped for the day, about half finished, I took time to really LOOK--and I clearly saw the dark green sashing was just TOO dark. I loved these blocks but I did not love how the quilt was coming together.

I thought about it overnight, looked again in the morning, and knew I had to take all that work apart and change the sashing. Here are some options I considered as I "shopped" in my closet:

I liked the gray that is on top of the pile the very best BUT there was not enough fabric for the sashing and an outside border. None of the others were just right--if I was going to go to all the work to take apart a half-day of sewing, the replacement fabric better be perfect!

Here is the design wall with the dark green sewn part on the bottom and a strip of that gray on the top:

Yes, I really liked that gray so I used it on the top two rows, being sure I really did like it, Yes, much better:


So I spent some time unsewing the bottom three rows, removing the dark green. When the gray sashings for the middle of the quilt were all cut I had exactly enough gray fabric left to cut 1.25" wide strips for a narrow outer border. You know I had PLENTY of dark green strips cut. I made a narrow gray outer border, on the outside of the quilt, followed by the 2.5" dark green strips for the final border. I still have plenty of dark green strips cut and lots more of that fabric, so that will be the binding.

Lesson to be learned here: be sure you are happy with ALL your decisions going forward. Being in a hurry cost me lots more time over all. It's not that I didn't have any more options:

Considering a few more fabric options before settling on the dark green would have been time well-spent. 

Now the top is done, a medium brown has been selected and prepared for the back, and once I get it basted I can quilt it. You can bet I'll spend a little time considering my quilting designs before I begin--I learned that lesson a few weeks ago--I had to spend a lot of time removing quilting stitches I didn't like, two hours worth of stitching, because I didn't think it through very well before I began. Sensing a bad trend here...

Sometimes I make a quilt just because I love the design or the story that goes with the pattern. That was the case with this quilt. It won't be a class--the designer asked that no one teach her design as she loves to teach it herself and there is no printed pattern. Perhaps she'll add it to a book someday. For now I'm just glad I made it and look forward to coming up with a good quilting design to enhance it.

Let's quilt!

Barbara

Wednesday, April 25, 2018

Starts and Finishes

I worked at it to the exclusion of all else last week so I could count this one done:


It is the Block by Block quilt made for the Patches & Stitches 40th anniversary. It uses 40 fabrics and has 40 blocks. The first 40 to bring a completed quilt to the shop wins $40 and I was determined to be in the top 20. #17!  Photo of the top here. Quilted on my Bernina Q20 sit down longarm, I enjoyed doing the big loopy designs across the top. I chose 4 different designs for the borders. Finished is better than perfect.

Time for a new start. My Favorite Things is a new quilt/class I am designing that will run for 6 months, from June to December, 2018. It will feature my favorite blocks and students can either make a small quilt each month or make "parts" that will be combined at the end into one large quilt. It's a lecture/demo class, no machines to drag to class, just learn several blocks each month, different ways to make them and ways to use them in quilts. More about the class here.

My fabric pull for this project:


Where did this palette come from? How about the chickens of Kauai?

I often save photos that feature colors I love together. This has been saved since 2006 when my husband and I made a trip to Hawaii to celebrate our 30th anniversary. This will be fun.

The beginning class I teach at Patches & Stitches finished last night--only two students attended the last of 5 sessions but had great quilts to show for their efforts and both are hooked on quilting now, always my goal:

Sharon, her top is complete

Tricia, made 30 blocks and still has two more borders to go. She plans to lengthen it a bit.
They both enjoyed seeing my Block by Block and decided to try that next. I love when students get excited and say "What can I make next?"  Both of these women have their next bed-size quilt projects picked out.

From time to time I participate in online swaps. Lori of Humble Quilts has done a doll quilt swap for several years. I received this one from Judith B along with a pin cushion and photo of her Featherweight machine which she used to make it,  a great touch:


And I gave this one, to Katy S:


It's fun to share small quilts with like-minded quilters.

Time to get a few things done so I can play with My Favorite Things.

Let's Quilt.

Barbara