
Be sure to READ ALL THE GENERAL DIRECTIONS and WATCH ALL THE VIDEOS. Each month's pattern has detailed instructions as well.
PRIOR POSTS WITH HELPFUL INFORMATION:
Block 1
Block 2
Block 3
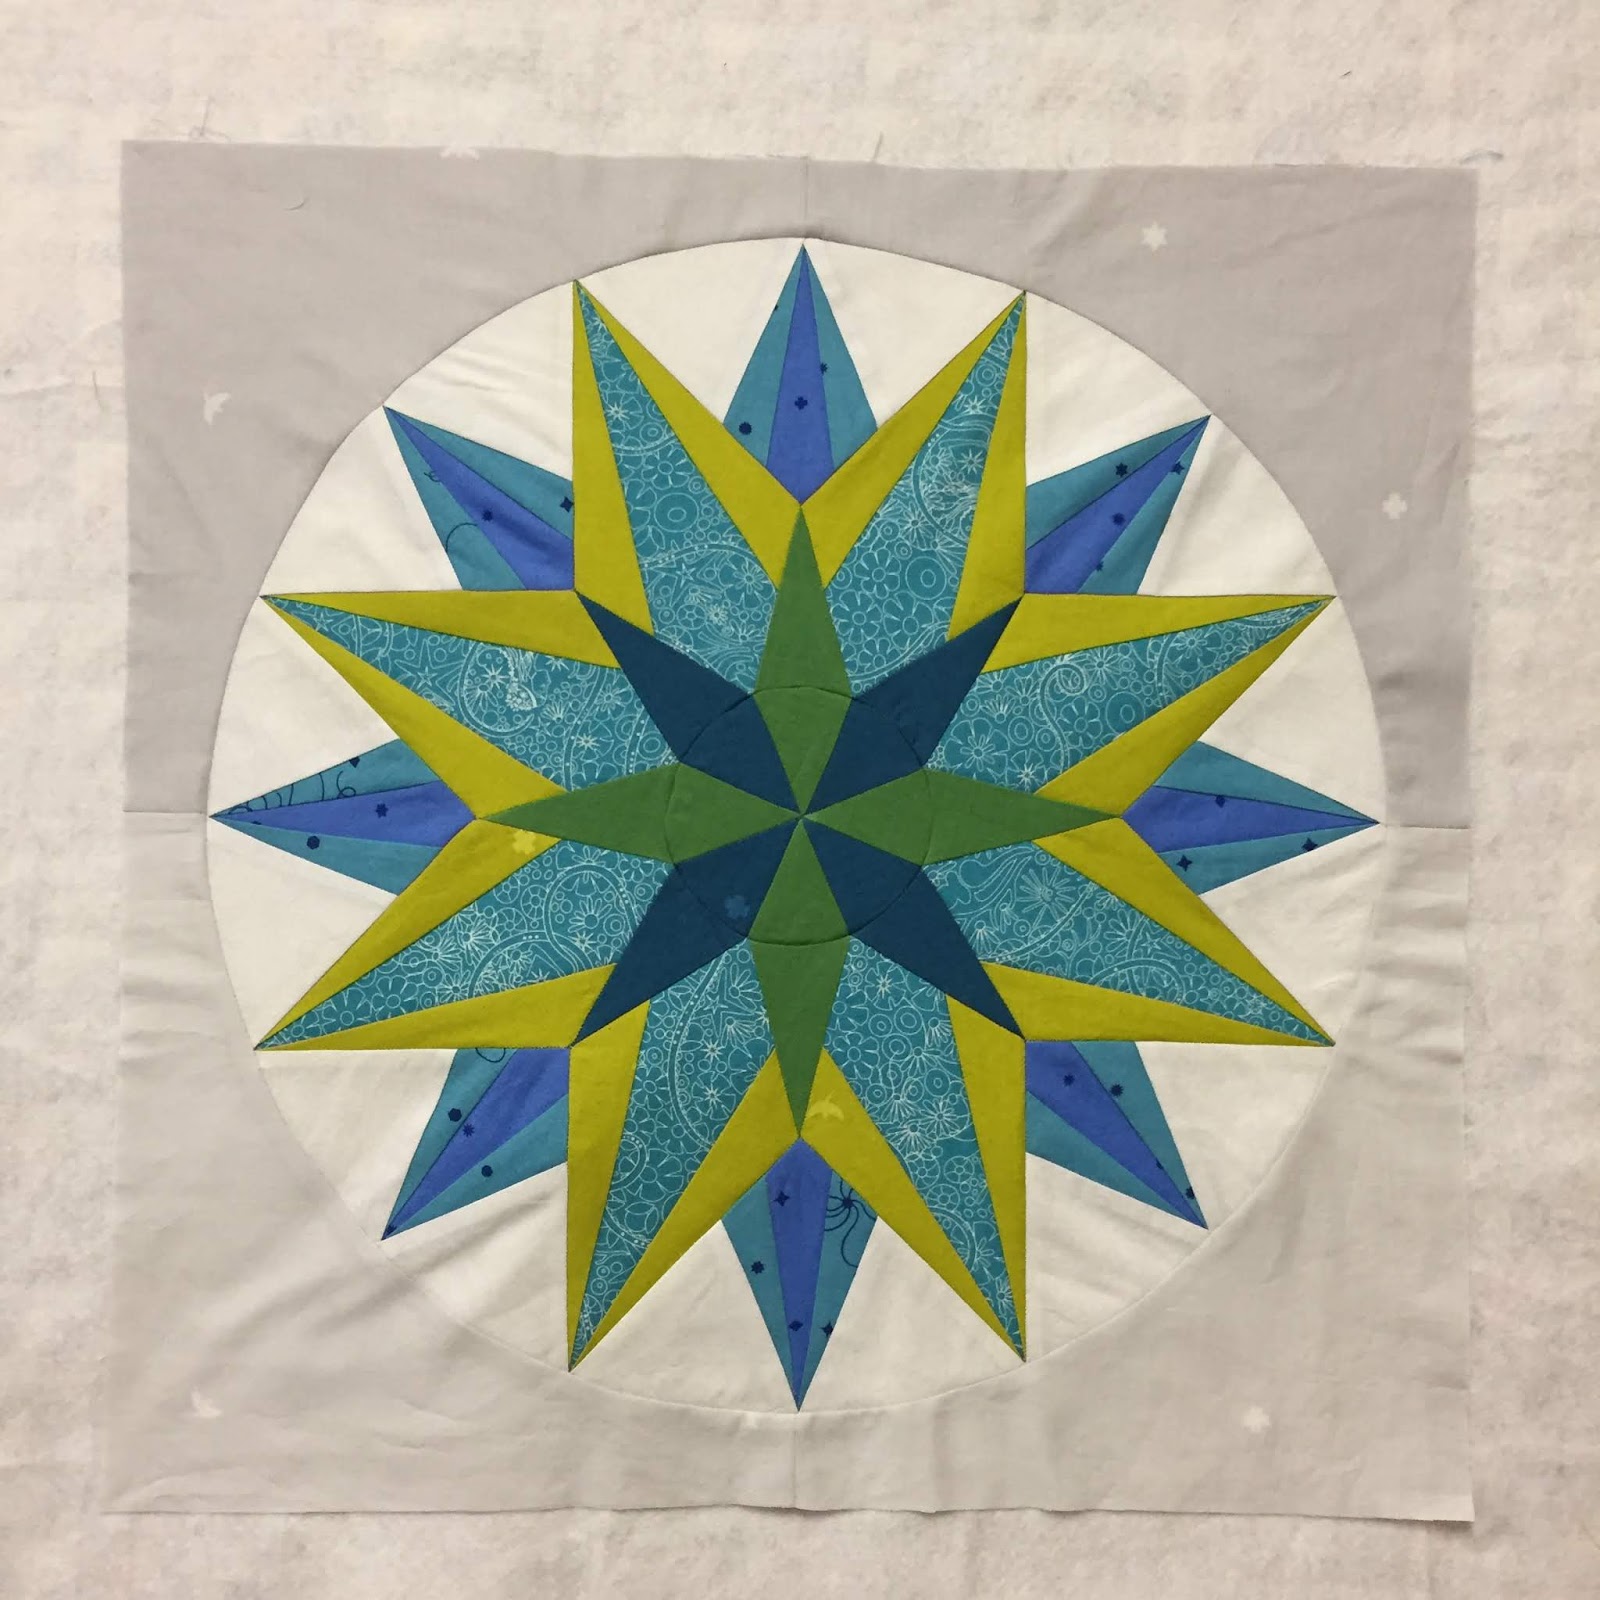
We have come to the first of 3 blocks that have that small circle in the middle--Blocks 8 and 9 have the same size circle. When you print the paper patterns for Block 4, you will have 8 paper patterns for the center half circles--you will use two of those paper patterns for this block and save the remaining half circle paper patterns for Blocks 8 and 9--you will have two extra.

Becky's instructions make it very clear it is important to put the correct fabric in the correct position. I find it helpful to use marking pencils to mark the paper. Here is the center circle paper patterns, marked, and with the correct fabrics in place, ready to sew:

Here are the Diamonds. NOTE It is very important to have 4 units that have the green fabric in position 4 and 4 units that have blue fabric:

And the Wedges:

CUTTING TIPS:
This month I am sharing some of my cutting tips. I want the fastest method that gives me the result I want. Fabric #1 for the Wedge is cut from 1.75" strips, into 8 pieces, 1.75" x 5.5". First, I cut the strips 1.75". Since there are two of them, I can layer them neatly on top of each other, cutting 4 layers at a time. I use a 12" long ruler--5.5" x 2 = 11". I place the 11" mark on the end of the fabric, BEYOND THE SELVEDGE:


Slide the ruler to 8", make that cut:

Slide the ruler to 4", make that cut:

I find this to be fast, I am sliding the ruler, not picking it up. This works well when the units to be cut are easy-to-use numbers, 4, 8, 12, etc. If dealing with
2 5/8" or numbers like that, it's not so fast if you cut the units the wrong size. You get to decide what cutting method works best for you.
Here are all the fabrics/patterns cut out, and ready to sew:

SEWING TIPS:
Although the basic process is the same as the previous 3 blocks, Diamonds and Wedges, these Diamonds have a lot of lines at the tip. To be sure you are starting to sew on the correct line, place your finger on the solid sewing line between Fabric 1 and 2 and follow it up to the outside tip--that will tell you which line to start on. Here I have marked that line in red:

When you lay out the Diamond/Wedge paired units, be sure the two fabrics in position 4 of the Diamonds alternate with each other. In the Cool kit, these fabrics are Flume and Grass. When four units are sewn together, you have a half block, repeat exactly the same steps to make the other half:

Once both halves are sewn together, it is time to tackle that little circle in the center. I highly recommend you stop and watch Show 2401 again to see Becky pin and sew that small circle in place. Start at about 31 minutes to see this all-important step.
Becky also has a great video showing this step--even though it focuses on working with Block 8, the sewing process to set-in the circle is very similar--Pinning and Sewing the Center Circle--watch it before sewing in the circle.

Remember, this is not a race and slow and steady is the way to go with this step. While the paper is off the large part of the block, you leave the paper on the center circle until it is pieced-in to the center. Use as many pins as you need, sew slow and steady, and you will be amazed how great your pieced-in center circle looks.
Add the appropriate Block Corners and your beautiful Block 4 is complete. NOTE: it does not matter if you add the Block Corners before or after you set in the Center Circle--I did the circle first because I was eager to get to it. Becky recommends sewing the Block Corners on first, to protect the bias edges of the Wedges.
Let's quilt!
Barbara
Where do I find the pattern? Or how do I make the pattern?
ReplyDeleteThe first paragraph explains this is the 2019 Block of the Month for www.thequiltshow.com Join as a Star Member to receive the pattern and all instructions free through December 31, 2019. The link to join is in the first paragraph also.
DeleteThank you Barbara for doing your blog on the BOM 2019. I make certain to read your words of wisdom before proceeding. They are a great help!
ReplyDeleteThank you--so glad you find this helpful!
DeleteIt is a gorgeous block!
ReplyDeleteThank you Barbara for your excellent tips for Block 4.
ReplyDelete