Sunday, July 31, 2016

Before and After

We get blind to things around us all the time, things that may be past their prime, to say the least.

As I took lots of photos recently for this blog I really saw just how worn out and ugly my pressing station had become.  So I replaced it and OH, what a difference!

AFTER:


So nice and clean!

BEFORE:

Dirty and torn, not nice to look at or work on.  Time to change it.


First, the table is an old computer table we got many years ago when computer systems were big and bulky, including the printer, CPU, large monitor, all the stuff we had back then.  It is 30" x 60", extremely sturdy and has a large space underneath where I keep garment-making stuff.

I had my husband cut a piece of board to lay on top and, because he is an engineer and a woodworker, he rounded the edges and made a beautiful, smooth surface to cover, 22" x 60":


This is the reverse side after I removed the staples that held the old muslin top in place and threw it away--too yucky!  On the bottom here is a doubled piece of Warm and Natural cotton batt--leftover from covering my 8 foot x 9 foot design wall.  It was dirty too so I just flipped it over.  Don't add more than two layers of firm, cotton batting--you want a firm pressing surface, not a mattress.


I cut the new muslin 30" x 70", about the size of the old piece, laid it on the table and then placed the batt and board on top of that new muslin, leaving about an even amount of excess all around.   All I used is a basic office stapler, nothing fancy, and didn't go to a lot of trouble on the corners--no one will see those.  Those staples were easy to remove too, using a simple staple puller.  And just so I wouldn't have to figure it out again, I wrote those measurements in Sharpie on the bottom of the board along with the date:


The last time I changed it was the day I was expecting 150-200 guild members for a Studio Tour, a few years ago.  That was one of those "Oh, no, look how dirty that thing is" moments too.

Time to reassemble the pressing station:


 I store two old cutting mats under the board--when I cut out garments I just lift off the pressing board and I'm ready to cut out pattern pieces.


On top of those cutting mats is a scrap piece of floor rug non-slip stuff, to keep the board firmly in place.  That's it, all done. It didn't take 15 minutes to do and would have been quicker if I wasn't taking photos of the process:


She's so pretty!  Of course, you can use decorator fabric, or that silver shiny stuff you can order but I'm happy with muslin--I can see what I'm doing clearly, the cost is small, and maybe I won't let it get so ugly before I change it again!

Just in case you want to know, I use a small "dorm" size ironing board on top of the pressing station when I have to press shirts or other garments.  My husband doesn't like it so when he has a bunch of shirts he wants ironed, he drags the old ironing board in from the garage and irons them himself.  Win!

Let's Quilt!

Barbara

Saturday, July 30, 2016

Piece Your Quilts Like a Pro--Part 1--the Cutting

There are only 3 things you can do "wrong" to make your piecing less than perfect:  the cutting, the sewing, and/or the pressing.  We will look at each of these skills so you can master them all and create beautiful quilts you will be proud of.  NOTE:  this post is photo-heavy and lengthy--it is a class in cutting!

8 points coming together nicely

A bit off--one of the points is "hidden"

3" block, pretty precise

One more set of 3" blocks

I am hoping you are after precise piecing, intersections that intersect, points that are sharp.  Now, having said this, you should know that I describe myself as a "95% quilter"--close is good enough most of the time.  If you are planning to enter international competition, that is NOT good enough.  If you are making quilts for people you love, it is fine AND you get to decide how precise it has to be.  I started 30 years ago as a "50% quilter" and was happy with that.  You will get better the more quilts you make.

One more DISCLAIMER:  I am not the quilt police and there is more than one way to complete any task.  I will show you what works for me and what has worked very well for the more than 1000 beginning quiltmaking students I have taught over the years.  If you have a different method that works well for you, I am happy for you and encourage you to keep at it. That is why there is chocolate AND vanilla--you get to choose. If you want some tips on how to improve, keep reading...

It starts with the cutting and that is where beginners seem to have trouble.  Rotary cutting changed EVERYTHING in quilting and is one of the primary reasons our industry has grown so much in the last 40 years.  Blades are sharp, rulers are abundant, and you need to learn how to use them.  My shots are for right-handed people.  Left-handed people can make great quilts--they just do everything upside down and backwards.

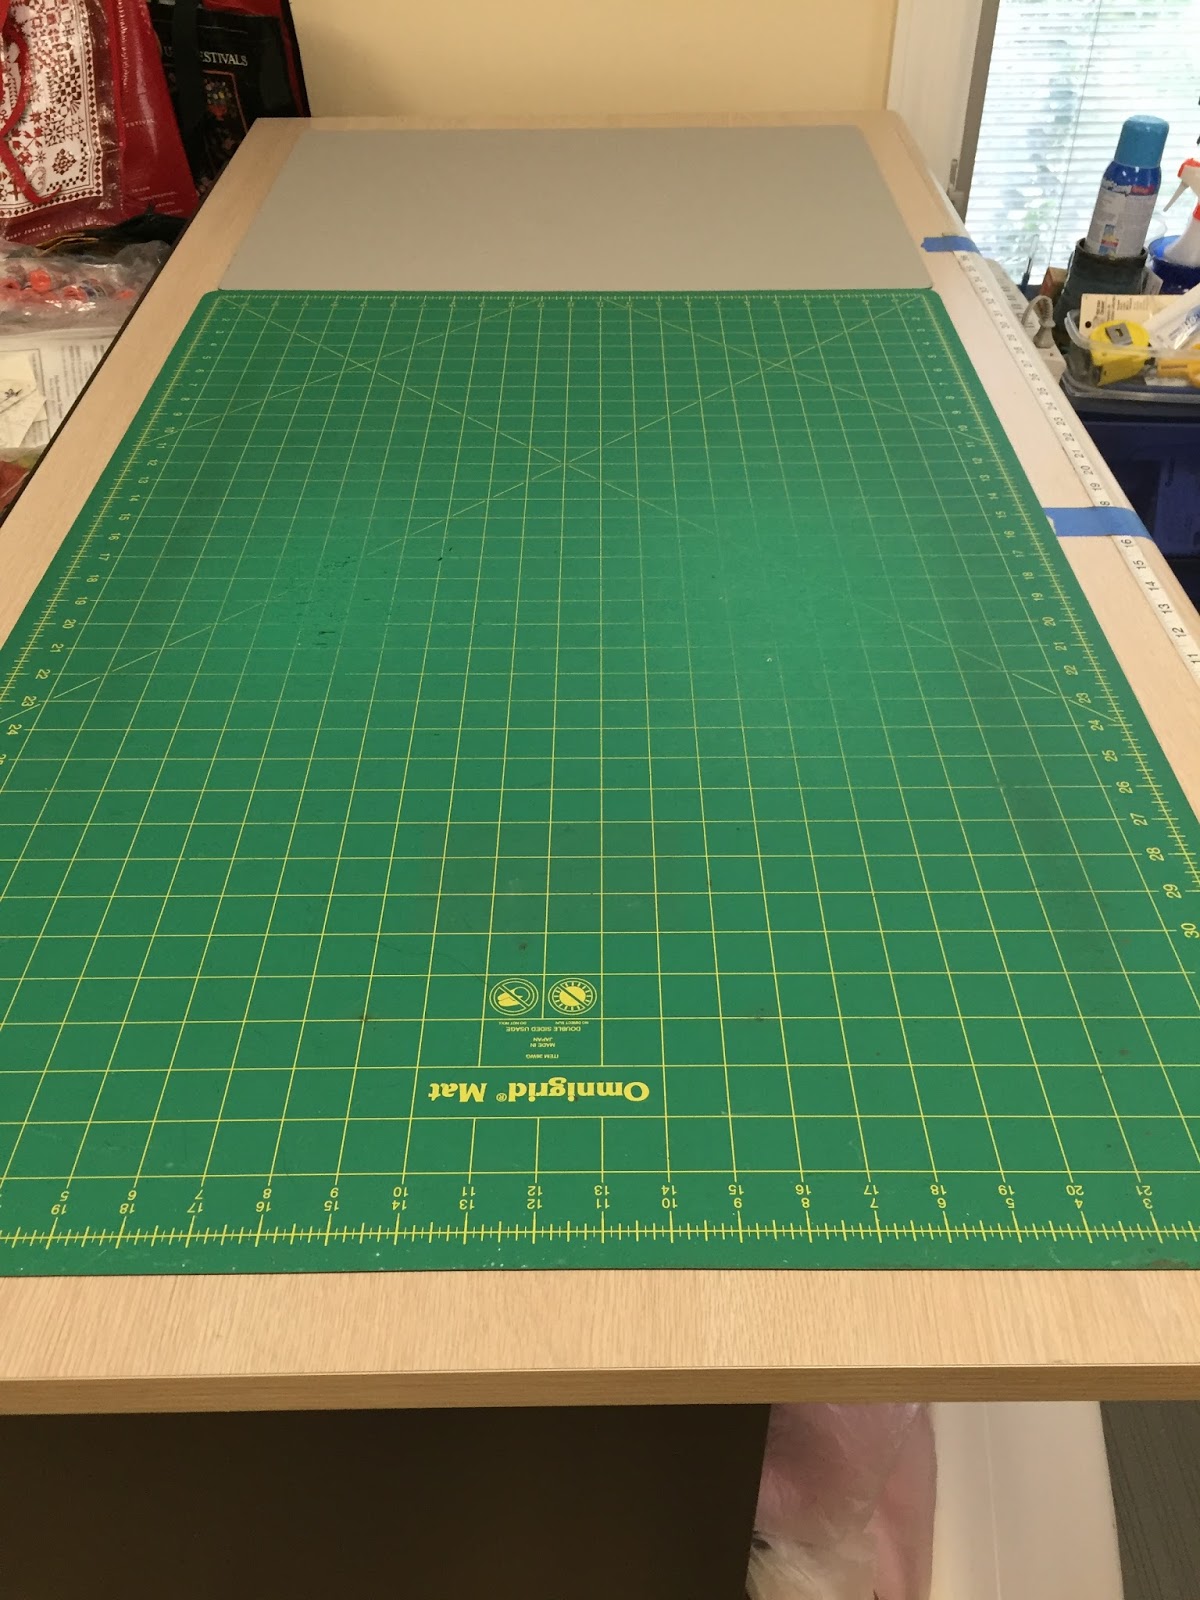
I prefer to cut only two layers at a time and use a 45 mm blade for this.  (Olfa is my favorite brand for their sharp blades and ease of use.)  When I cut four layers, I use a 60 mm blade--not often but occasionally.  My favorite rulers are Creative Grids and Omnigrip--my students get instantly better when they switch to these--the built-in grippers on the underside of the rulers minimize slipping.


 Here I have carefully pressed yardage to cut 2.5" binding strips.  You can see the edges are not even so they need to be trimmed.  Right handed people want their fabric on the right, ruler on the left. NOTE:  I do not use the lines of the mat for anything--I only use the lines on the ruler for measuring.


 Using two rulers, one a small square, and one a 24.5" long ruler, you will clean up that outside edge.  Place a line from the square ruler on the bottom edge of the fabric--that is the folded edge, the selvages are at the top.  Take care to press that folded edge neatly, eliminating any folds or puckers there.  You want the fold on the straight of grain as much as possible.


 Butt the long ruler up to the square, holding the square firmly in place so it stays on the fold line.


 Now you can remove the small square and hold firmly to the long ruler as you make that first long cut.  I find with Creative Grid rulers I can hold firmly in the middle and cut the entire 22-23" length without moving my hand.  It takes a firm grip and shoulder pressure to keep the ruler from moving.  Beginners find it helpful to cut about half-way up, placing their hand at no more than the 12" mark, then VERY CAREFULLY move their hand up toward the top of the ruler, again being sure it does not move out of place.  If it does, place the small square back on the foldline and start over.


 Now that the first cut is made and the long edge is perfectly straight, I place the ruler at the 7.5" mark.  WHY? Because I am cutting my binding strips 2.5" wide and with my 8.5" wide ruler I can cut 3 strips under the ruler before I have to set it again.  Here is the IMPORTANT POINT:
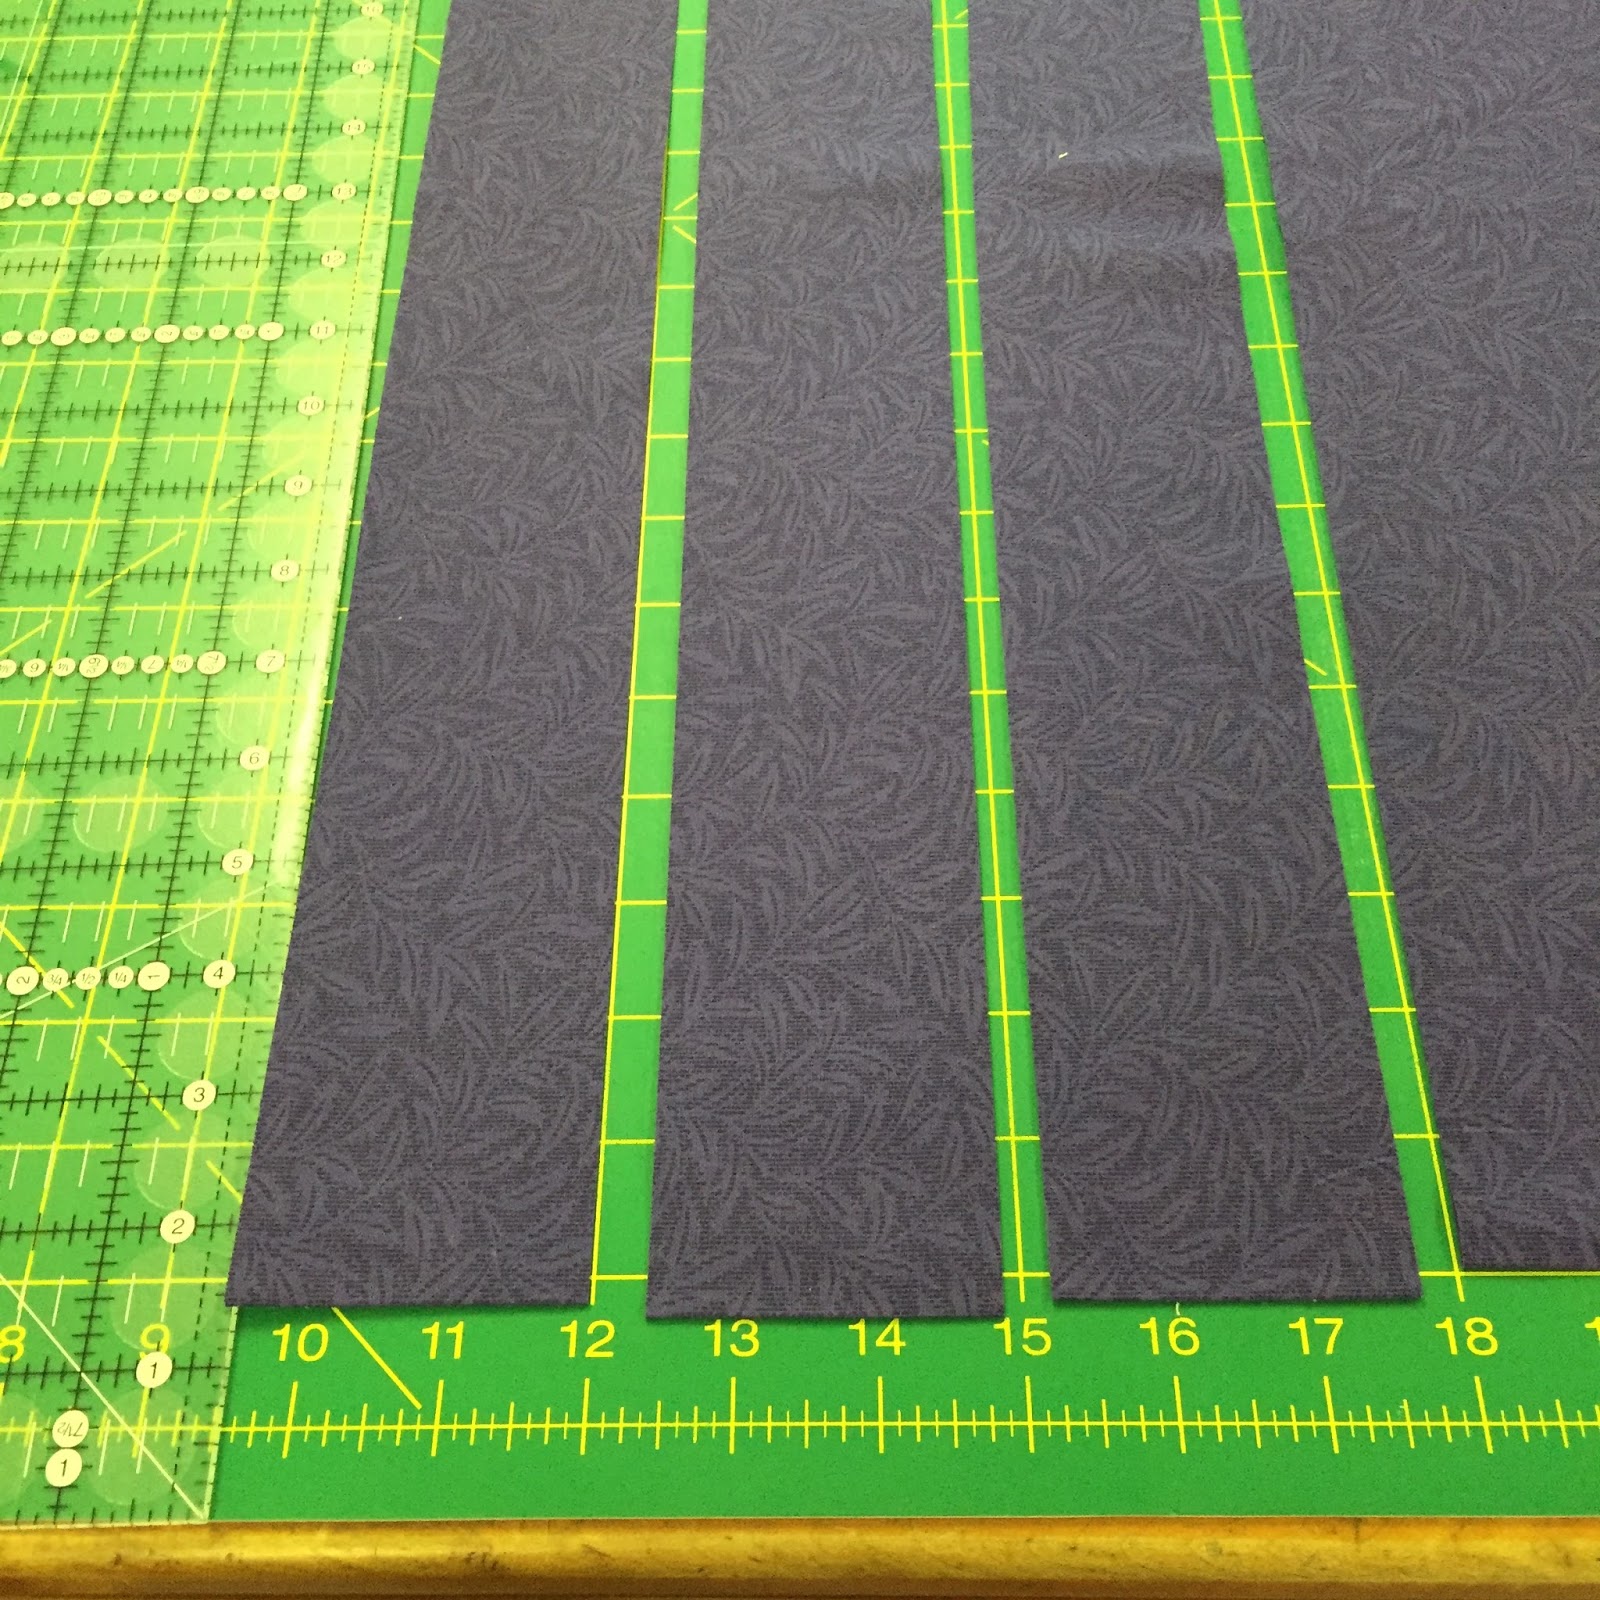
You want the edge of the fabric to split the measuring line in half--it is hard to see as this line is black and the fabric is deep purple. So let's try another fabric and ruler:


 The yellow fabric splits the black line exactly in half.  If you can see the green mat to the right of the black line, it is too narrow.  If you can see the yellow fabric to the left of the black line, it is too wide.  You have to place the ruler somewhere, you might as well place it exactly where it needs to go.

Back to my purple binding strips:


 After cutting the first strip at the 7.5" line, I carefully slide the ruler to the 5" line.  DO NOT pick up the ruler to move it, just gently slide it in place, being careful NOT to move the fabric.  Now I make that long cut.

 Finally, I slide the ruler over to the 2.5" mark, again placing it very precisely where it needs to be, then make that last cut.


Here you see the 3 strips that have been cut.  I move them out the way and place the ruler at the 7.5" mark again.  To be honest, I had not pressed more than the first 9" or so of fabric, so I took the fabric back to my pressing station and pressed another 20" or so.  Then back at the cutting station, I cleaned up the outside edge again, using the small square and long ruler, and then continued to cut 2.5" strips, 3 at a time, until I had the 10 strips I need.  (A binding tutorial will be coming up in the future.)

That is the basics of cutting long strips from the Width of Fabric (WOF).  If you are using fat quarters, you can fold them in half to cut 22" strips crosswise grain or 18" strips lengthwise grain.  That is a whole other topic for another time.  If you only have to cut 1 strip, just place the long ruler at the line for the width you need to cut, no sliding necessary.  The sliding method works well when the numbers are easy to calculate, like 2", 4" ,6", etc., or my 2.5", 5", 7.5".  Once you get into numbers like 2.375" it becomes more difficult and is just as easy to simply cut one strip at a time,

Here is how I cut fabric pieces for a block:

 Here I am using scrap fabric and I only need one 4" square so I don't cut an entire 4" strip.  If I was making several of these blocks, I would cut the strip 4" and sub-cut into 4" squares.

The block has been rotated 180 degrees so I can clean up the other two edges


 There is only a little sliver of waste, but a perfectly cut 4" square.

Now to be honest, this little block I am making actually needs four 2" squares and each will have a pencil line drawn on the diagonal.  I learned this neat-o trick about a year ago and pass it on to you:  Cut one 4" square, draw two pencil lines on both diagonals and then carefully sub-cut the square in half on both directions:


Viola!  You now have four 2" squares with the pencil lines already drawn!  There is a big added bonus:  if you are using a directional fabric, like a stripe, the lines are drawn so that the stripes will all go up and down in your block.  I like wonky quilts, I love the fun and playful vibe they have, but in reality I am a symmetrical kind of girl and just have to have my stripes in line.  Guess it's the Marine in me: left, right, left, right, all together now...


If you were to cut four separate 2" squares and then draw the pencil lines, you would need to draw two lines going vertically and two horizontally to the stripes if you wanted those lines to be lined up like I do.  By cutting the four squares at once, with the pencil lines drawn, you get this already done, no thinking necessary.

ONE MORE THING:  how to change your blade.

I am often asked by students how often to change their blade.  My answer is simple;  No one has ever changed a blade and then said "I could have gotten two more weeks out of that old blade".  You change it when you get tired of the blade sticking and not cutting all the way through your fabric every time.  A new blade makes you feel so good!

And here is how my brand gets changed correctly, yours may be different:


 I laid out the pieces in the order I took them apart.  Using a small piece of batting I carefully cleaned away the lint and dust and grime that gets on the various parts. Be careful when handling the blades, both old and new.


 Once clean, I reassemble.  With the black surface face up, I added one drop of sewing machine oil at the bottom of the black surface just above the word "safety cover".  If you get too much oil on it, wipe a bit off with that small piece of batting you have.  The blade goes on with the name "Olfa" facing you.  If you can't see the name, you have the blade on upside down.


 I love this brand of Sewing Machine Oil with its' long spout:  Zoom Spout Oiler from Nifty Notions.  I got it at my Bernina dealer.  I keep it in the bag, even when I use it, so any extra drop of oil does not get where I don't want it.
 Now here is the trick--how does that washer go back on?  Just yesterday a very experienced, super award-winning quilter confessed on Facebook she can never remember.  So I decided to add this to our little lesson on cutting.  The washer goes on  CUP UP.  See how the washer is sitting on the mat  with the curvy part up?  Like a cup, if it didn't have a big hole in the middle.


Just place it in the same orientation, cup up, and then reattach the screw, finger tight.  Warning:  don't have a man do this for you; they won't pay any attention to how they took it apart and their "finger tight" and yours is very different.  It will take pliers to unscrew it because it's way too tight.  Just tight enough that it won't come off and so the blade rolls easily across the mat and through fabric.

If you are still here, thanks for staying with me and if you find this  helpful, please share it all over the world.  Part 2 will be coming up on the next problem area:  The Sewing.

Let's Quilt!

Barbara

Friday, July 22, 2016

The Challenge

Our guild Challenge was last night so now I can show you my piece.  The theme was "A Road Less Traveled. It had a whole bunch of rules, size, there had to be a discernible "path", the path had to enter from the left and exit from the right, and the size was fairly small, 18" to 24" per side only.  You could interpret the theme in any way you chose.  Here is mine:


This is how it appeared on display.

This is what the base looks like:


Some of those fabrics are 30 years old starting on the left.  The path moves into more current fabrics, exiting on the right with fabrics I'm using in a current project today. If you've been quilting that long, take a close look, I know you used some of those fabrics too.  The quilt blocks represent some of my favorite patterns. The words tell  my quilting story, more or less. 

Here is the 9" feathered star I made from some of the fabrics used in my original Red and White--By the Numbers:


 My original plan had been to piece the feathered star into the quilt but when I got the star done I liked it enough to finish it separately and add it on top of the base quilt.  No one last night saw the base quilt as shown above.  

My next Challenge is preparing for a "Pretend I Am Moving" Sale--my closets are bursting at the seams and there is just too  much stuff everywhere.  The last four days in August I've invited my guild and all their crafty friends to come get great stuff at terrific prices.  So now I have to prepare.  So far, I've sorted out at least a hundred spools of thread and 30 books.  Then there are patterns, and notions, and lots and lots and lots of fabric.  My friend, Jenny K Lyon, recently remodeled her home and studio and wrote about moving into that studio here.  She is much more fastidious about order than I am, my space is much more chaotic, but she did make me think about the mess I have been surrounding myself with and the need I feel to pare things down a bit.    After the sale, if there is really great stuff, I'll post those items in my Etsy store.  I'll let you know when that happens.

I'm still working on The Splendid Sampler, keeping up though I occasionally change the block:


The bottom row are blocks 41-46.  Block 44 I colored with Crayola Crayons instead of more hand embroidery--so much faster!

And I got back to making more blocks for my Lifetime Quilt--joining four 10" blocks into a 20" unit--this will make it easier to take them off the wall when I need to:


Next week I'm going to start a series on Tips and Tricks to Improve Your Quiltmaking--so be watching for that.

Let's Quilt!

Barbara

Sunday, July 17, 2016

A Few Finishes and One WOMBATT

I've been quilting some old small quilts and have a few finished:


This is from an old Possibilities book, I made this top probably at least 12 years ago.  The hearts in the border are simply fused so I made sure to get quilting stitches across each heart.  The batting was a very soft cotton.  I'll save this for when I need a baby quilt in a hurry.  Husband has a habit of telling moms-to-be that I'll be happy to make them a quilt.


This was going to be a class sample, again many years ago, and I had done a bit of hand quilting using Perle cotton and big stitches.  Because it was basted and ready to go I got out silk thread and gave that a whirl.  Some of the areas stitched beautifully, some I had tension headaches.  Simple quilting following the lines I had drawn years ago and simply swirls and hearts in the border, which cannot be seen, so no need to do anything fancy there.  Might donate this one to our guild's comfy quilts program.

Then there is the WOMBATT, waste of money, batting, thread and time:


This is a pre-printed panel that has been buried in a drawer for years.  It was basted with polyester batt, and had thin muslin on the back.  I thought it would be good practice to quilt all the lines printed on the quilt and that is what I did.  Machine quilting polyester batt is a struggle and the fabric quality was POOR, very stiff and rough, not smooth like most good quality quilting fabrics are.  The results are a terrible quilt, not fit to donate to any people.  I will donate it to the Humane Society--animals won't care what it looks like.  This shot shows it after washing, which did help to soften the fabric just a bit.  Halfway through I knew it was a waste of time but I pushed on anyway--as a teachable moment of what NOT to do.

Up next, another find in the bottomless drawer.  At least this has cotton batt and quality fabrics:


I taught a private lesson to a student the other day and she brought along the top she finished from another class I taught her.  This is the Strippy Stars pattern from Deb Heatherly using a nifty ruler from Creative Grids.


Holly still has to add the border, a beautiful violet/fuschia print and she'll have a great quilt as a gift.  Good job, Holly!

Still keeping up with the Splendid Sampler and Circa 2016 while planning what is next.  Making quilts keeps me sane during insane times.

Let's quilt!

Barbara


Sunday, July 10, 2016

Q20 Quilting

Rooting around in a dresser drawer the other day I found several small quilt tops along with their batting and backing that were just waiting to be quilted.  I knew about the 8 or so larger ones calling out to me each time I enter that spare bedroom, the one that is a archaeological dig--these were others I'd long forgotten about.  Can you find the bed?:


Just a few of the quilt tops awaiting some attention.  This is the second spare bedroom and when someone actually needs to sleep here it takes a while to remove the many quilts and tops piled up here.  Unless they want to do the "Princess and the Pea" thing.

My Bernina Q20 needs some attention--she's been ignored too long lately.  I recently set a goal for myself to quilt at least one quilt a month until I'm more or less caught up.  The other day I quilted my Challenge quilt for our guild meeting in two weeks--that really doesn't count as it's a new "add" to the pile.  Here are the first two I am tackling, starting today:


An old pattern from a Possibilities book of baby quilts.  This will be fun and easy to meander all over.  The hearts in the borders are just fused in place so I'll be sure to hit them with some stitches as I quilt.


Then there is this pre-printed panel, commonly called "cheater's cloth".  It will be good practice to follow the quilting lines printed on the fabric.  No seams makes these panels good practice pieces for free motion quilting.

I enjoyed teaching yesterday.  In the morning the Smitten class finished up.  The students returned from a 2 week break with blocks done, a few questions, and were very eager to learn how to assemble the quilt--it's more challenging than the usual quilt settings as all the blocks are hexagons and need to be set-in to the blocks beside each other:

Donna's upper left corner, sewn together
Catherine's large stack of blocks

Celia is hand-piecing her blocks--a great option.

The pattern is Smitten by Jen Carson Kingwell and it uses Template Set H from Perfect Patchwork Templates.  My sample was made with hand and machine pieced blocks--the hand piecing being done on the road.  Such a fun quilt--I really enjoyed working with bright fabrics and black and white prints:


This week I also picked some more blackberries from our vines:


And kept up with The Splendid Sampler:
Block 42  Pencils
Off to quilt a baby quilt--Let's Quilt!

Barbara