
This is the FREE Block of the Month pattern "Patchwork Barn", designed by Edyta Sitar exclusively for The Quilt Show. You must be a Star member of this world-wide quilt guild/show/internet community to receive the free patterns each month, beginning January 1, 2018. Join today and get started on this journey.
Previous instructions are here:
IntroductionMonth 1
Month 2
Month 3
Month 4
Month 5
Month 6
Month 7
NOTE: On The Quilt Show, the Forum is the best place to ask questions, find answers, or find out if there is a change in the pattern. I recommend you check in there frequently. And there is a Show and Tell Topic--show us your blocks. Forum Patchwork Barn
We've made it to the last of the small blocks. If you have kept up, there are only 9 more blocks to make, three of each of this month's blocks. If you are not there yet, just keep working, it's not a race. Proceed at your own pace.
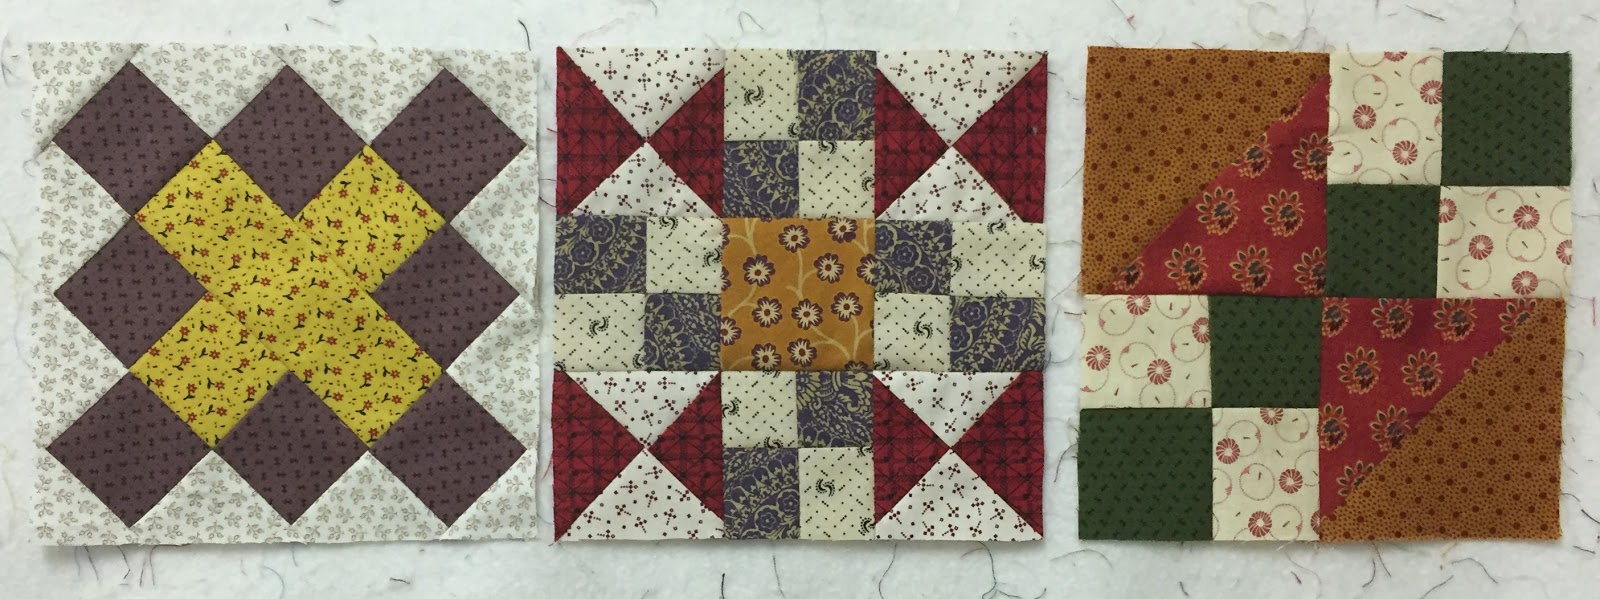
Block 22:

This block is often called the Album block. When used in a signature quilt, the center rectangle is a plain light solid fabric. Maybe you'll want to make one like that and use it to sign your quilt on the front, not just put a label on the back. Future quilters and collectors will thank you.
This block has a mathematical "issue". I've written about it for Block 8 and Block 14. The A, D and E pieces are slightly too small at the 7/8" measurement and would be slightly too large at the next whole number. What's a quilter to do? I cut the pieces slightly larger than the pattern calls for on those 3 pieces, about 1/16" larger. That is just a few threads, not a measurement that is easy to see.
I suggest you try this FIRST with the center Unit B, pieces D and E. When the 6 squares and 1 rectangle are sewn together, the square should measure exactly as shown in the pattern. To get that size, you either cut the pieces slightly larger OR cut as the pattern lists and sew with a skimpy seam allowance, 1/16" smaller than normal--not easy to discern at the machine.
If you cut the pieces for Unit B slightly larger and are successful getting that square to be the correct size, cut the remaining A squares that slightly larger size. The background pieces, B and C, are exactly correct as shown in the pattern.
While this all may seem a little "fiddley", if it doesn't matter to you if the points are "hidden" when the block is done, just do your best and trim the block to the required unfinished size and call it done.
Here is my first block as I prepare to square it up. I place the ruler exactly at the half way mark on the top and right side, being sure I will be able to square up the remaining two sides accurately. Very little waste and the block was the correct size:

Block 23:

This one is a snap: four quarter square triangle units, four 4-patch units and one center square. I prefer to make it even easier by making the pieced units from pieces cut slightly larger than the pattern calls for, allowing me to "trim to perfection". The center square is cut exactly as the pattern says. The pattern measurements are correct--if you use them, be sure you cut accurately, sew accurately, and press accurately.
At this point, I am working from my "leftovers" bags. I found these strips which would work to give me six of the eight pairs I need for the first block. Sewn and pressed to the darker fabric:

Placed right sides together, being sure the darks and lights are opposite each other:

Sliced into pairs, ready to be sewn into four patches:

I love to "twist" the center seam allowances on these tiny blocks. See my video on how to do that here, at the end of Month 1.:

The quarter square triangles are easy too. I wrote about that unit in Month 6. Here are a set ready to be cut apart and trimmed to perfection:


Block 24:

So glad to see this easy one for the final block! Now's the time to use your most favorite fabric for this simple block--two half square triangle units and two 4-patch units.
I talked about half square triangles in Month 2 for Block 4 and Four Patches just above, Block 23--these are just larger. Choose your favorite method for these two great patchwork units and you'll soon be done.
All done! Next month we will tackle the Barn block for the quilt center. Also, next month, in a separate post, I will discuss an alternative center and an alternative layout that will make the quilt larger without having to make more blocks. Of course, if you want this quilt to be queen-size, I suggest you do make more blocks--24 more blocks to be exact--that would be one more of all 24, or two of your favorite 12, OR...You get the idea.
Let's Quilt!
Thank you once again Barbara - I very much appreciate it.
ReplyDelete