Showing posts with label wash-away applique' sheets. Show all posts

Sunday, September 2, 2018

Month 9 The Patchwork Barn--Part 2 The Applique's

Now it's time for some applique' work. The instructions provide basic information on 3 types of applique'--Fusible Raw-Edge Applique', Machine Turned Edge Applique' and Hand Applique'. Each has advantages and disadvantages. Select the one you like best.

Luckily, Alex Anderson did a segment on several of these methods at the start of Show 2303. Take a look at that to see several applique' choices.

I can do needle-turn hand applique' and like that method a lot. But it is pretty slow and I needed to get this demo piece done so I chose Machine Turned Edge Applique'.  The project I am adding the applique' to is a 24" alternative center block, with a 3" border added. This will become a 30" small wallhanging BUT it could be the center of your quilt:.


The product I used is similar to the Quilter's Select product Alex demonstrated. I had this on hand and have used it successfully in the past:

Using template plastic,  I made templates from the pattern. Those were used to draw on the matte side of the Wash-Away Applique' sheet. I stacked several leftover pieces together, put a pin through to hold them, then used paper scissors, not my good fabric scissors, to cut out the shapes. This circle template had the size circles I needed, easy to draw them correctly:


There are various methods you can use to make the stems. Bias bars are commonly used. For this project, I chose the fastest method I know--I cut 1" bias strips and simply folded it in thirds and really pressed them hard to form the narrow, turned edge stems:


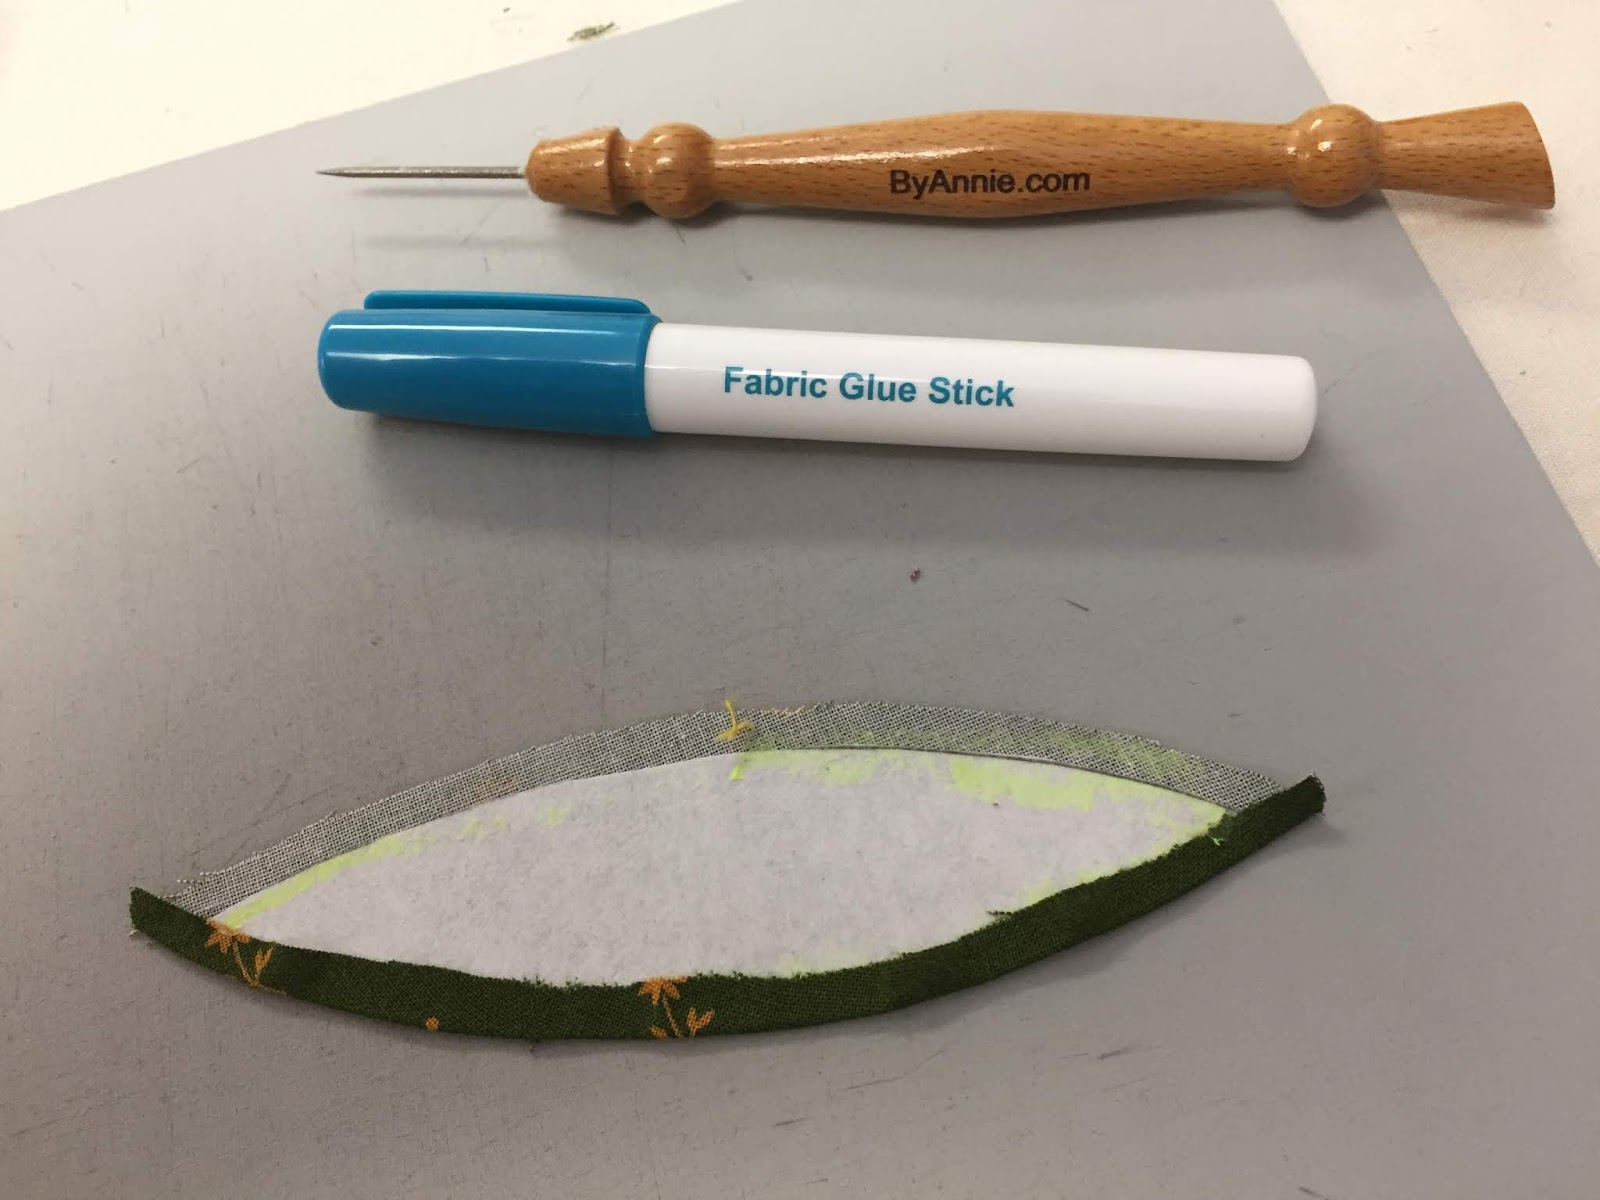
Here are some of the pieces prepped, ready to be trimmed to about a 1/4" seam allowance and the stems are ready to be stitched in place. The Wash-Away paper has a light fusible on the underside, be sure that is the side you place on the back of the fabric:

I used the glue stick Alex recommended, as I had one of those, and it worked very well:

For the small circles, I used Karen K Buckley's Perfect Circle Templates--they were so small it would have been difficult for me to turn them over the paper and get a good result. Karen is Show 2007.

Since I was creating my own pattern, I used two sheets of vellum, drew the border space I wanted to fill, and used the templates I made to trace the leaf and circle shapes. For the stem, I just drew a single line as a guide for placement of the stem:

Once I had drawn the design the way I liked it, using a pencil, I traced over the pencil lines with a Sharpie, so I could clearly see the design, on both sides. Because I can see through the vellum, I only had to design one half of the border--then I just turned the pattern over for the mirror image other side.

The only marks I made on the white border fabric was the curved stem placement line--drawn very lightly with a pencil. I pinned the stem over the placement line and stitched it. To place the other applique's, I set the vellum pattern on top of the border and slid the pieces in place, pinned and sewed them.


The machine stitching I did exactly as Alex demonstrated in Show 2303--go look there for her excellent video. I used a very small blanket stitch using thread to match the applique's. First, I stitched all the stems in place. Then I added the leaves--since I still had green thread in the machine. The red berries and red center flowers were added next, changing to red thread:

A couple of tips:

1. The edge of the borders get handled a lot--I wish I had cut them wider during construction, then trimmed to the finished size after the applique's are in place--I mentioned this in Part 1 also.

2. For the two-piece flower bud, I appliqued the yellow center on to the larger red flower before putting the flower on the quilt--less handling of the whole quilt this way. I found a stiletto helpful for turning the edge over and those Mylar circles are Karen K Buckley's Perfect Circles--I still have to make a few more of those:


So, I still have 3 more sides to go but the pieces are almost done--once I start the stitching, it goes pretty fast.

Whatever method you choose, I hope you enjoy the process and the way your Patchwork Barn is growing.

The next post in a few days will be the instructions for my alternative center block.

Let's quilt.

Barbara

Saturday, June 29, 2013

92 Circles and Counting

Finally got these 4 blocks done--each gets 2 more circles once the blocks are attached to the 4 borders--not for a few weeks yet.   This is not how the quilt will be assembled--I just wanted to see these parts all together. 


Now I  have 8 more baskets and 9 more sections of borders to complete--THEN I can assemble the quilt.  The pattern is Ruffled Roses, designed by Sue Garman for the 2011 Block of the Month for www.thequiltshow.com  The pattern is available for purchase at Quakertown Quilts. 

Let me make a pitch for joining www.thequiltshow.com  I've been a member since before it existed--that's my only connection.  It features Ricky Tims and Alex Anderson as the hosts of great hour-long shows--a new one premieres every 2 weeks.  The shows are loaded with lots of great information with both very well-known as well as up-and-coming quilt artists.  Even if I'm not particularly interested in the topic, I still watch each show, and always learn something.  There are tours of museums, art galleries, artists' homes/studios.  There are  also short segments on how to do something fun or interesting--I've learned how to do simple bindings for small quilts and how to make 3 D flying geese with only one seam, and so many other things over the years.

The Block of the Month instructions are included for the membership fee and are available all year.  Once the new year comes, the previous year's patterns are gone--and you can buy them.  If you checked above, you saw that the Ruffled Roses pattern set is $78 plus shipping.  The yearly subscription is about $40, including everything--a tremendous deal.

Consider it a worldwide quilt guild.  I  have made friends with people all over the world through the forum and members blogs--those are great resources for so much quilt information.  There are many classrooms with tremendous information.  Over the last 2 days I watched 3 Sharon Schamber classes on how to design her elaborate style quilting designs, how to stitch them on a domestic machine, and great stippling motifs--almost 3 hours of instruction for free.  Those 3 classes are free until tomorrow, June 30, 2013. 

When I say I "watch" them, I mean, they are airing on my desktop computer in the studio as I work on projects.  If I see something I really need to watch closely, I "rewind" and review.  I can watch on my Ipad too and have done that while traveling.  Technical support is terrific, if you should need it. 

Once you join you have access forever to all shows that have aired since you joined.  As well as all the free stuff, like projects, BOM, forums, etc.  Occasionally, there are previous shows made available for a limited time for free for everyone--a good way to see a show you might have missed or one that aired before you joined. 

Here's my pitch:  if I had to be exceptionally careful about how much money I spend on my quilt life--this would be the last thing I would give up.  That, and my local guild membership.  Of course, I cannot possibly outlive my fabric stash, so I don't "need" any more fabric.   But TQS--that I NEED!

Check them out--a lot of stuff is free even if you're not a member--you just have to create an account with a screen name.  If you decide to join, you can easily do that too. 

Let's Quilt!

Barbara


Sunday, July 22, 2012

The Joy of Quilting

I have finally made time to get back to the 2011 Block of the Month from www.thequiltshow.com, Ruffled Roses, designed by Sue Garman.  The last I took time to work on it was March 2011.  Adding the swag border would take some time, and as it was tax season, I let it go for "awhile".  Last week I jumped back in and got that swag border done and can move on--this quilt makes me happy!

The applique' method I'm using is new to me--I call it turned-edge machine applique'.  While I can do very nice hand applique', it takes me a while--the last applique' quilt I made took 7 years!  So I decided to try this method.  The prep time is lengthy, but the sewing time is a very fast. 

Here are my tools:

The Wash-Away Applique' Sheets from C&T Publishing are the secret to this method.  They have fusible stuff on one side and can be easily run through an ink-jet printer.  Since the patterns are downloaded from thequiltshow.com website to my computer, it is a snap to print the patterns directly onto the sheets.  No hand-copying necessary.  Here are the steps I used after printing the patterns:

1. Carefully cut out the pattern pieces directly on the line
2. Fuse the pattern pieces to the reverse side of the fabrics
3. Carefully cut out the fabric pieces, using about a 3/8" seam allowance
4. Using a washable glue stick and a stiletto or other tool, turn the fabric edges over the paper.  I found the best tool for this step was "That Purple Thang", a plastic pointy tool I've had for years.  For a clean work surface, I ironed freezer paper on an ironing mat.  When it got sticky, I replaced it.
5. When the shapes were nicely turned, I pressed them, glue side down, on a washcloth, to dry the glue and make a very nice piece. 
6. Now you could hand applique' but I wanted to machine applique'.  I used a very narrow, short zig-zag stitch.  The thread was Superior's Masterpiece 50/2 color # 132, a gray-green that blended well.  In the bobbin I used a light beige, same thread.  Some people use mon-poly in the top thread, I was more successful and happy with the cotton thread.  I used that same color on all the pieces, purple flowers, yellow centers, green swags, etc.  The stitching goes fast!
7.  The applique' sheet will stay in the quilt until it's completely finished.  Then I will gently wash it and the sheet goes away.  The package says "Sheets disintegrate into tiny fibers that leave no residue".  I tested it using the same fabrics and found this to be true--the test piece has a soft hand and will quilt beautifully.

Here is a PITCH:  www.thequiltshow.com is the best investment I make with my quilting dollars.  Every 2 weeks there is a new show and I always learn something, even if it's not from the featured guest--there are tips each show.  The most recent show has an art-sy focus but Alex had a segment on how to draw feathered cables for either hand or machine quilting.  There is a block of the month each year, free for just being a member.  That is the source of Ruffled Roses above.  To buy these 12 patterns costs $80-100 but are free for members for the year they are featured.  There are classes on all kinds of things.  There is a wonderful forum where I have gotten to know many quilters, from around the world, and have been able to meet up with some in Houston.  Consider this your online-quilt guild!

Why you should join right now--there is a special deal, $39.95 for a year (a $3 discount) and from now until September 30, 2012, the C&T video of Sally Collins' Precision Piecing is available FREE!  This is a 75- minute video that shows how to improve your piecing.  Sally is one of the most professional teachers I've ever had the pleasure of taking a class from and now you can learn from her in your own home.  I've taught beginners how to quilt for 25 years--the tips Sally provides here would be so valuable to them.  If your work isn't as precise as you'd like, watch this and find out why.  I've watched twice this month and will watch it at least once more--learning tips that make me a better teacher as well as quilter.

So I guess you can tell, I'm a huge fan of www.thequiltshow.com, with Ricky Tims and Alex Anderson--no relation, just a very satisfied customer.  Check out all the things on the website--some are free for non-members too, and then give it a try.  I don't think you'll be disappointed. 

Let's quilt!

Barbara