

This is the FREE Block of the Month pattern "Patchwork Barn", designed by Edyta Sitar exclusively for The Quilt Show. You must be a Star member of this world-wide quilt guild/show/internet community to receive the free patterns each month, beginning January 1, 2018. Join today and get started on this journey.
Previous instructions are here:
IntroductionMonth 1
Month 2
Month 3
Month 4.
NOTE: On The Quilt Show, the Forum is the best place to ask questions, find answers, find out if there is an error on the pattern, as there was for Month 2, Block 5--as soon as I found out about the error, I posted a Topic to correct it, February 3. I recommend you check in there frequently. And there is a Show and Tell Topic--show us your blocks. Forum Patchwork Barn
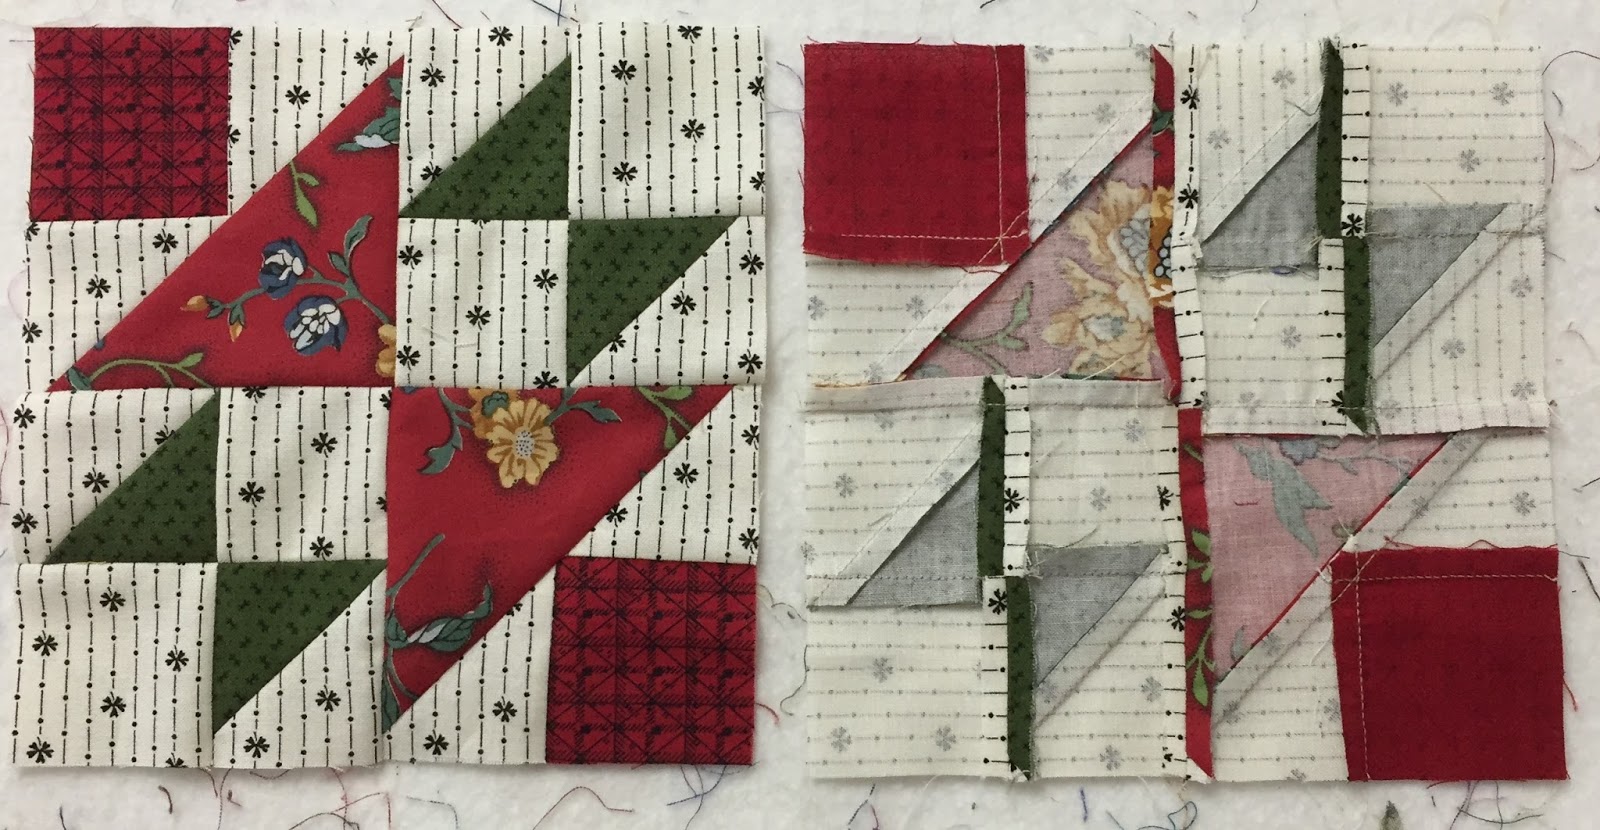
Block 13
This block has half square triangles (HST), small squares and a unit called Birds in the Air or Mary's Triangles, as well as other names.
We have made HST several times already--refer to Month 4 for more information, including instructions for 3 different ways to make them. This time, since I needed 12 HST units, I decided to do the Grid method again. I cut fabric 8" x 6" from both the background and the print fabrics and drew this grid on the back side of the background:

There is a narrow border around the outside of the grid, this makes it easy to turn the corners. One start, one stop, and all 12 HST are sewn. All I have to do is press toward the dark fabric and "trim to perfection":

To make the Birds in the Air units, you can follow the directions in the pattern, if you like. I will show you a method that uses a Half Square Triangle Ruler, a tool you may already have.
Cut a strip of fabric 2" x 12.5"--this will be the colored square in the outer corners. Cut a strip of background fabric 2.75" x 12.5". Sew these together down the long seam, press toward the BACKGROUND fabric:

Keeping the seam line straight, cut six 2" segments--like servings from a sandwich:
 |
| Note: I cut 7 segments as I started with strips that were longer than needed--OOPS. |


The pattern calls for a square cut 3 7/8", then cut in half diagonally--I cut 4" squares, much easier. Cut the square in half and pair those triangles with the unit just made. The raw edges of both triangles are aligned on the DIAGONAL. Because my square was 4", a tad bit hangs out at the bottom, it will be trimmed after the block is sewn:

If all is well, the sewing line goes precisely through the seam, we call this "crossing the X":

Press toward the large triangle, and "trim to perfection":


NOTE: My background is a stripe. With the grid method, half the HST have the stripe going up and down and half go left and right. This block was assembled with all the stripes going up and down. The remaining two blocks will have some of each. If this bothers you, do not use a directional fabric when pre-sewing, as you can't totally control how the stripes will finish. You would have to custom cut each piece to be sure you got the stripes going as you want. I decided to just let it go with these blocks.
I am often asked about pressing. In the pattern, the little arrows indicate the recommended pressing sequence. Here is how I pressed this block, it's not the "right" or the "only" way, it's just the way I did it this time. The beauty of making 3 of these little blocks is you can try different techniques with each to decide which you prefer:
Block 14:

Again there are four HST in the four corners, make them with your favorite method. This time I used the Half Square Triangle Ruler, cutting strips .5" larger than the finished size and cutting four triangle pairs for each block. Quick and easy.
To make the little four-patches for each block, I started with 10.5" x 1.25" of both the A and B fabrics, sewing down the long side, pressing toward the dark fabric. Then I sub-cut these into 1.25" segments and joined them into four-patches, four of these units for each block.
Mathematically, these four-patches should be less than 2" to fit perfectly, 1.9142". That is a weird measurement, so just do the best you can. When you add the four small triangles around the four-patch, they need to be 2.5" square, unfinished.
What I did was trim the four-patches just smaller than 2", but not all the way to 1 7/8"--I just eyeballed this cut. My triangles were cut from 2" squares, not 1 7/8" as the pattern instructs, to allow for trimming. You could cut the four-patches to 1 7/8" and cut the triangles from 2.25" squares--when you trim the unit to 2.5" the four-patches will "float"--this means the points of the four-patches will be slightly inside the square, the corners of the four-patch will not touch the outside of the block. Do whichever you prefer. I tried to get mine as close to accurate as I could::


Block 15:

This is one of my favorite star blocks, called the Evening Star or the Morning Star or other names.
The star point units are really flying geese units, where the "goose" is the background and the "sky"
is the star points. Since I like to make four flying geese at once, I used the method I showed in Month 3. See my Four Flying Geese tutorial for this method. Of course, you can follow the pattern directions if you like.
This block goes together quickly, once the star points units are made. They are oversize so have to be trimmed down to the correct size:


We would love to see your blocks on the Show and Tell Forum.
Let's quilt.
Barbara
Thank you Barbara - I find you BOM tutorials invaluable.
ReplyDeleteThanks!
DeleteI agree with promisso's remark. Your tutorials save the day.
ReplyDeleteThank you!
DeleteThanks so much for these tips and tricks - it makes these squares so much easier to make!!!
ReplyDelete