
This Block of the Month quilt is available FREE to Star Members of The Quilt Show with Alex Anderson and Ricky Tims. It was designed by Wendy Williams exclusively for The Quilt Show for 2021. It is not too late to start--you will learn a lot.
NOTE: If you are a Star Member--be sure to WATCH THE VIDEO--lots of important info there too.
This month we go to the center of the quilt to make a Mariner's Compass. The pattern has excellent, step-by-step instructions with photos--take the time to read them. Wendy used two pretty blues for her Compass:


Using Freezer paper for paper piecing was new to me and I found it very enjoyable. I was eager to share this process so I wrote a detailed blog about making this Mariner's Compass last June: Freezer Paper Foundation Piecing. I will touch on the most important instructions again here.
Helpful things to know and do for this month:
1. First, as always, it is absolutely essential that the 1" scale box is exactly 1". Much has been written about printing on the Forum--each person has to figure out what the correct settings are for their printer.
2. Here you can see that Section 1 and Section 2 look very much the same BUT--the darks and lights are located opposite of each other. Be sure to take the time to fold all the lines on the patterns, in both directions, just as we did in Month 1, before starting to sew:

3. It is easy to get the colors mixed up--use a pencil to write your colors on the paper to keep it all straight, especially if using more than just one light and one dark. I suggest after you cut out your fabrics, using the cutting instructions in the pattern, lay out all your pieces to be sure you have them in the proper order. It is really easy to sew the wrong piece in the wrong place--ask me how I know... NOTE: the LARGE piece, 8" x 3", is for piece F, the largest point in the Compass.
4. When piecing angles like these, it can be tricky to get the pieces lined up accurately before sewing. I use a few pins to test the placement before sewing to be sure the fabric will cover the paper completely after sewing. Pin on the sewing line, open the fabric and double-check. If it's right, sew it. If it needs to be moved just a bit, do that, re-pin and try again.
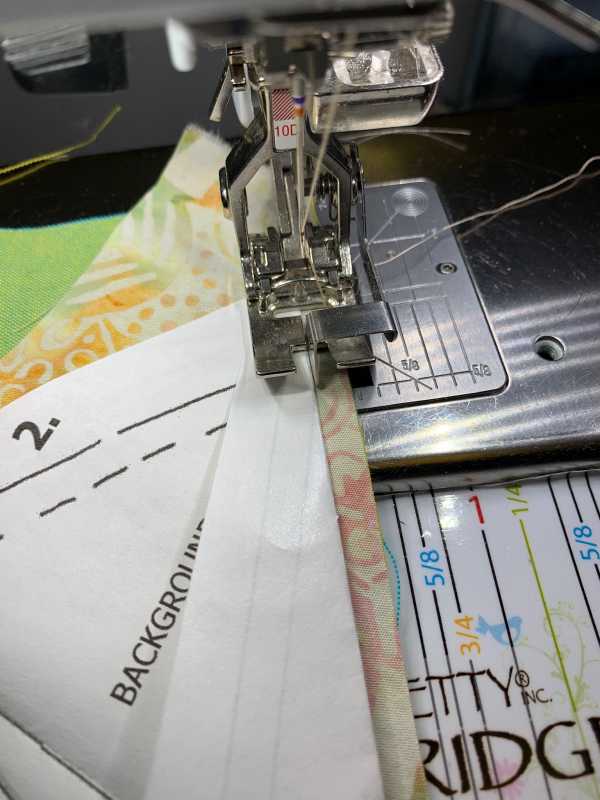
5. As pieces are added, they are pressed over, onto the freezer paper--the waxy side. The excess is trimmed 1/4" away from the line--using one of my favorite tools, the Add-A-Quarter ruler:


8. Trimming the outside curved edge is tricky with a rotary cutter. I used good quality scissors, I am a fan of Karen K Buckley's Perfect Scissors--to trim exactly 1/4" away from the dashed line, creating the seam allowance. You want the Compass points to be 1/4" away from the outside edge.

9. When joining units together that put more than 4 fabrics at one point, I always pre-check the center by machine basting, BEFORE sewing the center seam. Here are the two halves, ready to be sewn together:


13. Here is the way I pressed the back. The longest seams are pressed open--these are the seams that join the 8 wedges. Do what makes you happy:

The 10C/D foot is actually my favorite foot - after the 1/4" foot 97 of course. That is a great tip - I wouldn't have thought of it either.
ReplyDeleteRight!
DeleteThank you for making January 25 the new February 1. Appreciate the early release!
ReplyDeletePeople are zipping through this one—what will they do until March 1?
DeleteThis second Mariner's Compass really glows! I love the colors and the batik background.
ReplyDeleteI have made two Mariner's Compass blocks using that same method. It works wonderfully well.
Yes, this makes me want to start another 32 or 64 point Compass.
Deletefreezer paper is plastic coated not wax coated
ReplyDelete