
I have not been a fan of making face masks for the last year. But it is necessary and I will keep wearing mine in public until the virus is mostly contained. Even though I am fully vaccinated. Since we don't know what that means, or how long these first two shots will last, I'd rather be safe than sorry.
But I had not found a mask pattern I liked--and I tried at least a half dozen of them. It had to be easy to make, fast, but mostly it had to FIT. I recently saw a link to this one on the Kelly Cline Quilting Facebook page. Kelly made hers from old embroidered hankies and feedsack fabrics and it was really pretty. This one fits me, not Teddie, but you get the idea:

The 3D Fitted Face Mask pattern is on YouTube, originated by Maria, the Midnight Baker. She has several videos because she has tweaked the design over the last year. I suggest you start with the one labeled UPDATED, then review the earlier ones. They provide more info on the adjustable ear ties using beads, or you can use elastic.
UPDATED 3D Fitted Face Mask Pattern
The only problem I had with the videos was having to pause it or go back to get the measurements--the 8 minute video goes by quickly. So, to help you out, here are the measurements she provides:
ADULT SIZE: CHILD SIZE: X-LARGE/BEARDS
2 rectangles 7.5" x 10.5" 2 rectangles 6.5" x 9" 2 rectangles 9" x 11"
Trim corners 2" Trim corners 1.75" Trim corners 2.25"
Elastic 7-7.5" (2) Elastic 6.5" (2) 8-8.5" (2)
OR T shirt loops 9-9.5" (2) 7" (2) 10.5" t-shirt loops (2)
And 4 pony beads for the ear loops--the hole has to be large enough to fit two loops or elastic through.
Here are the adult rectangles with the corners trimmed--simply draw a mark 2" in from the corners and cut that triangle off. Have the fabrics right sides together. She recommends making two at a time for speed sewing and I agree. With the corners removed, sew all around the two fabrics with a 1/4" seam allowance, leaving an opening to turn right side out.

Turn right side out and press firmly, poking out all the corner points. Then just topstitch the two long edges, close to the edge. This is where making two at once speeds up the process:


 The
The 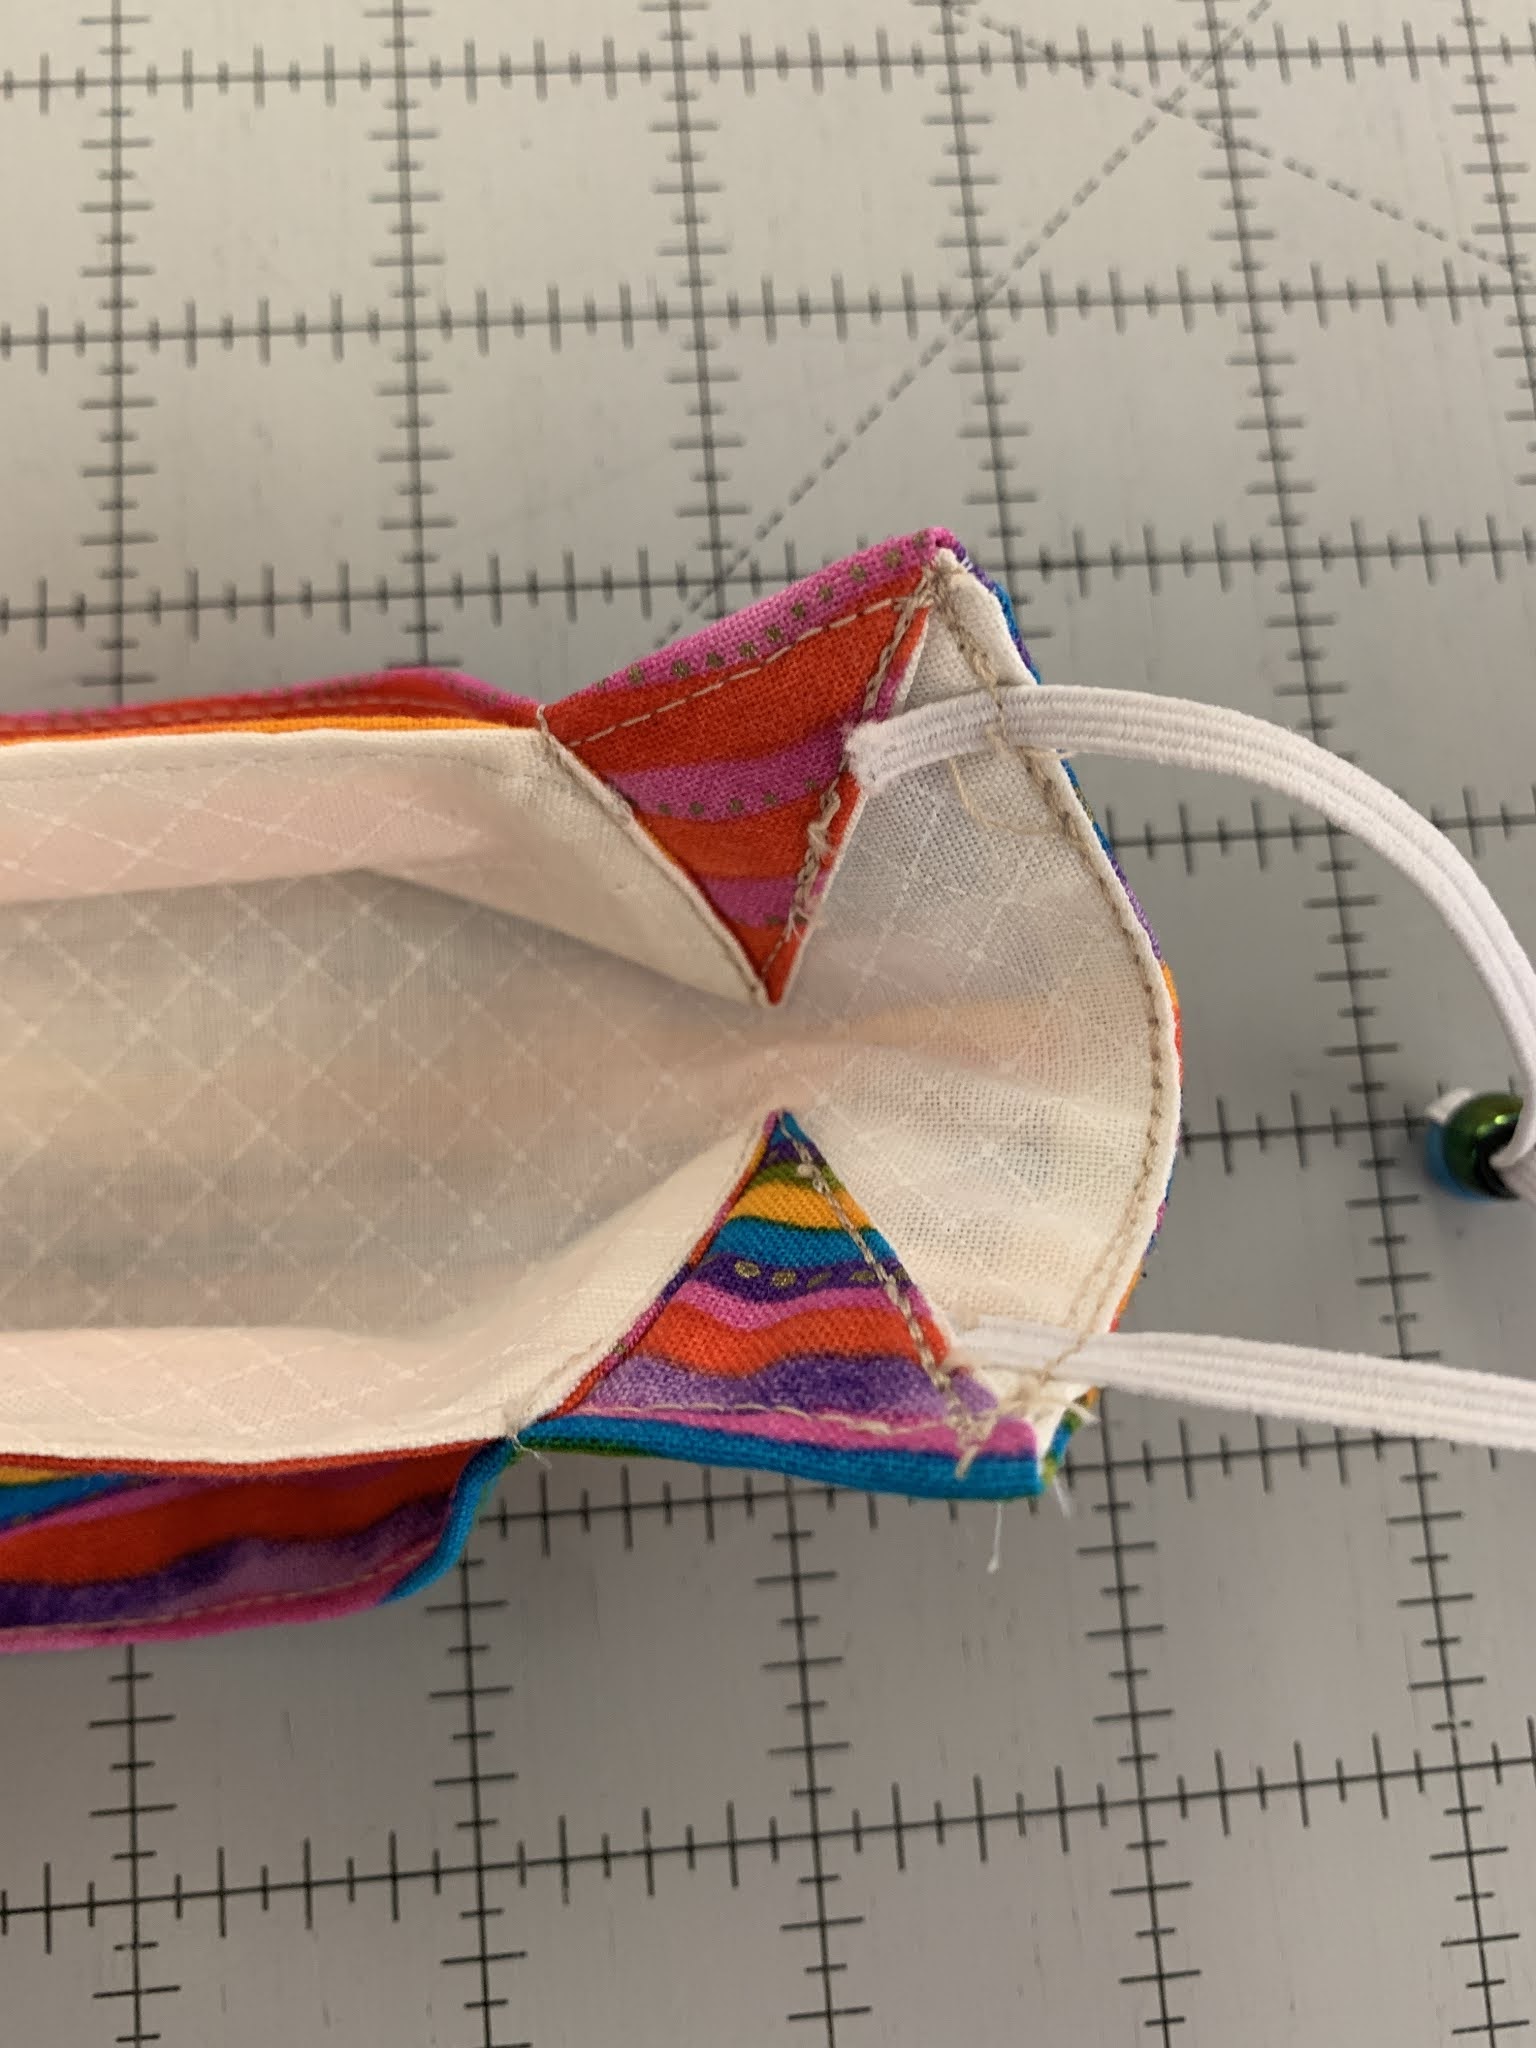
It looks like a great mask, but barring an emergency, I think I have retired from that job. Wish I had tried this pattern a year (and 524 masks) ago!
ReplyDeleteThis is the pattern that I’ve ended up with too ! I stitch my elastic on when I do the top stitching, and top stitch right round. Obviously this doesn’t help doing 2 together. Well done Janet on yours. I think I got to about 160 before getting totally fed up !
ReplyDeleteI have used and loved the masks from the Midnight Baker. I do insert a nose piece and a small piece of elastic in the chin area for a closer fit. I also have a middle layer of polypropylene fabric or 600 thread per inch cotton. The more unfiltered air you keep out the better! Retired RN and Quilter.
ReplyDelete