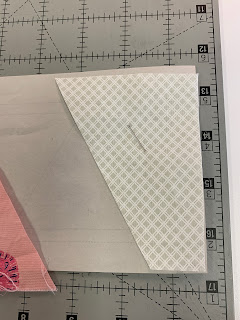
Showing posts with label paper pieced borders. Show all posts

Sunday, June 28, 2026

GAME ON! MONTH 7

Game On! is the 2026 Block of the Month quilt designed by Becky Goldsmith exclusively for THE QUILT SHOW: find Game On! information here. Join as a Star Member to get all the patterns and all the videos FREE. Membership is just $49/year and provides access to almost 20 years of shows and tremendous additional content. Join HERE


This month we add the fourth 3" border, the one at the bottom of the center. This is another one of those "good to know" borders, easy to make and interesting to use. Arranging colors makes the border flow.

The units are easy to paper piece. Simply start by figuring out your colors and keep the fabrics organized. 

Becky has a great tip to make it easier to get intersections to match well. After removing the paper, repress the seam allowances of EVERY OTHER BLOCK in the opposite direction they were pressed when paper piecing:

Now the seams at top and bottom will "nest" 


The intersections will be just where you want them with little bulk:


Be sure the 3" borders measure 36.5" long. I "measure as I go". Each pair needs to measure 6.5" wide. Two pairs sewn together will be 12.5" wide. There are six pairs--I check them all after joining them to each other. Finding the mistake as soon as I make it and fixing it then makes it much more likely the border will be 36.5" wide when complete. 

If the border is longer than 36.5",  measure each unit/pair to find the ones that are too wide and snug up that seam allowance. The FIRST PAIR will measure 6.25" when sewn to the next PAIR, allowing for the outside SEAM ALLOWANCE:


The pairs already sewn to other pairs need to be 6". It is very EASY for borders to GROW just a little with each seam. It is best for me to check each unit/pair as I create the border.

Next we make the four SMALL CORNER BLOCKS that will are used as you add the four 3" borders to the center. Becky shows two LOG CABIN options: a Log Cabin with a CORNER square and a Log Cabin with a CENTER square. 

You can use ANY 3" unit you like. I used Nine Patches for mine:


Here are some alternative ideas:


Once your borders are the right size follow the pattern instructions to add a Log Cabin or your choice of block to the LEFT and RIGHT sides of the TOP and BOTTOM borders to complete the center. 

Finally, carefully cut the narrow BROWN SASHING strips to the EXACT size of the center and add them. Good job! The MIDDLE is getting DONE!

The final 6" CORNER BLOCK also gets made this month. I had a little trouble with my first one. I sewed the wrong sections together:


I should have taken my own advice: WATCH THE VIDEOS, READ THE PATTERN! 

The second time was better. And I didn't trim the outside edges of the papers until the star was assembled. This allowed me to be sure my star was 6.5" and I had a 1/4" beyond each star point:


Another thing I tried to do was keep straight of grain on the outside edge of each section. This meant I usually placed the white fabric on the paper first, then added the blue star point:


Whenever I sew seams with ODD ANGLES or more than FOUR FABRICS coming together, I machine BASTE the seam first. It is much easier to remove basting threads and readjust if I need to:

Machine basting, long stitch set at 5.0


Check to see if you are happy with the intersections. If so, set the machine back to normal piecing length, 2.0 for me, and now sew the complete seam. Here I like this basting so I will complete the seam:


This is a good FIVE POINT STAR and a block I like. Paper piecing it works well for me. I use Freezer Paper so I can use the pattern multiple times. 

Next month we get started on the wider 6" Borders. This will be regular piecing--NO PAPERS TO PRINT!

Let's quilt.

Barbara


Sunday, May 31, 2026

GAME ON! MONTH 6

 Game On! is the 2026 Block of the Month quilt designed by Becky Goldsmith exclusively for THE QUILT SHOW: find Game On! information here. Join as a Star Member to get all the patterns and all the videos FREE. Membership is just $49/year and provides access to almost 20 years of shows and tremendous additional content. Join HERE


This month we make another 3" border and one more 6" Corner block. 


This border is comprised of 2 units--A and B--they are Reverse Mirror Images of each other. It is important to keep organized, especially with the white fabrics.

As always there are excellent instructions and Becky's Videos to guide you.

MY CUTTING SUGGESTION: The only cutting change I made was for the white fabrics, large and small triangles. To save time and fabric I cut 6 rectangles of white, 2.5" x 8.5". (You could make them slightly larger for more "insurance".)

Stack in 3 PAIRS. It is VERY IMPORTANT they be RIGHT SIDES TOGETHER.  Using a ruler with a 30 degree marked line, cut from the lower left corner up to the other side:


You now have 6 large triangles, 2A and 2B, 3 Left and 3 Right. And 6 small triangles, 4A and 4B, 3 Left and 3 Right.

After sewing each unit, trim carefully and join the units as shown in the PRINTS photo above. Or the SOLIDS  photo, as I have done with my SOLIDS version:


This Border is a great one--the Blue/Aqua center strips really make it flow and the large colorful triangles add a lot of interest. I liked it so much I decided it was perfect for my Star of Texas I've been working on, off and on, for many years:


The 6" corner block is easy too. Here are my SOLIDS and PRINTS versions. Feel free to use any fabrics you like should you want to make changes to the KIT selections:


Next month we make the final 3" inner Border and another 6" corner block. 

Be sure to Share Your Progress on the FORUM. We love to see how you are doing.

Let's quilt. 

Barbara

Sunday, March 29, 2026

GAME ON! MONTH 4

Game On! is the 2026 Block of the Month quilt designed by Becky Goldsmith exclusively for THE QUILT SHOW: find Game On! information here. Join as a Star Member to get all the patterns and all the videos FREE. Membership is just $49/year and provides access to over 18 years of shows and tremendous additional content. Join HERE

This month we move on to the narrow borders. Becky has used a classic triangle block in a unusual way:


The only cutting change I made was to the white background triangles. Instead of cutting rectangles 2" x 4.5", I cut them 4" x 4.5", in pairs, wrong sides together. Cut them into half triangles starting about 1/2" from the upper left to lower right. This puts close to straight of grain on the outside edge rather than bias:


If using a fabric with a motif you want to center it takes a bit of effort to figure out how to cut it. My  Zebra was carefully fussy cut so it was centered but I forgot about the triangle shape. Here you can see this won't fit without chopping off important parts: 


I cut a second Zebra and he fits better though he has lost his hind end: 

The rotation of the blocks just wasn't my favorite so I tried an alternate layout. My original plan to have all the points facing out would have put a lot of bulk at each seam so I tried this instead. It's still fun and different, just not as different as Becky's. This will go on the PRINTS KIT version when I get that made:


For my SOLIDS KIT version I designed a completely different paper pieced border. Let's call it BB's Border. Here it is on the left:


You are welcome to use it if you like. It is simple to draw--I won't be providing it already drawn. This works well using freezer paper so you only need 2 patterns for speedy sewing. Or you can use vellum or newsprint.

Start by drawing a 3" square, add seam allowances all around to have a 3.5" pattern. Draw a line from the top left corner to the lower center. Draw a line from the bottom right corner to the top center. Connect the top center to the left line, connect the bottom center to the right line. That's it, you have your pattern.

Because these are sewn as reverse mirror images, half have blue on the left and half have green on the left. I simply wrote those two colors on the paper--make 6 of each:


Cutting sizes are:

A1-- center diamond 2.25" x 3.75" (3.5" would work but I like insurance) Cut 12

A2 -- white triangles Strip 2.5" x WOF folded in half will make the 24 equilateral triangles needed, the photo below shows just a small strip of fabric to show the process. Start with a 60 degree cut on the end and alternate those cuts all along the strip. Cut 24

A3, 4 --outer colors, 3.5" x 4.5" cut in pairs, wrong sides together, 3 pair of each color, blue and green in my sample. Cut these exactly as shown in the diagram above for the original pattern:


This border has to be 36.5" including seam allowances when complete so it fits the center medallion. The best way to be sure it will be correct is to check as you go. After sewing 6 pairs, check that each is now 6.5" long. You want to find the mistake as soon as it happens, not when the border is done and is too long or too short:

BB’s Border

My variation of Becky’s Border

Then join the pairs into fours--check them--they should be 12.5" long. Join the three sections and check one more time. If the border is 36.5" long you are good to go! Add it to the left side of your center.

The other project for this month is one of the 4 larger corner blocks. I followed the SOLIDS KIT fabrics exactly with no other changes. 

NOTE: You could cut the white background pieces as I did above to put straight of grain, or close to it, on the outside edges. Cut in pairs, 4.5" x 3" or 3.5" (for insurance), wrong sides together, cut across on the diagonal, about a half inch in from the corners:

Set this aside until later when needed:


If you are a symmetrical kind of person, as I tend to be, you can make each of the narrow borders the SAME. It's YOUR quilt, YOU get to decide. For my PRINTS  version that is what I am doing. This is the border we do in MONTH 5, and is one of my Favorites:


IMPORTANT NOTE:  if you are using the Kits, either SOLIDS or PRINTS, be aware any changes you make to the original pattern MAY impact how much fabric there is left for future positions. This doesn't bother me as I can simply add additional SOLIDS or PRINTS in the future when I get there. IF YOU WANT TO BE SURE YOU HAVE ENOUGH: follow the pattern as written by the designer.

Next month we make the top narrow border and another of the larger corner blocks.

I look forward to seeing your progress on the FORUM.

Let's quilt.

Barbara


Wednesday, January 5, 2022

GPDU Month 1--Part 3

The beautiful center applique vase full of flowers is surrounded by the perfect Dogtooth Border. The instructions from Irene Blanck, the designer, is for needle turn hand applique. My Optional Alternative Techniques is for a paper pieced border. There is a Video for these borders in Month 1 Videos to help you.

Let's look at both methods.

 DOGTOOTH BORDERS BY HAND:

The pattern provides a template for the triangle. Cut a total of 24 colored triangles from a variety of prints, using a 3/8"seam allowance. Turn the two bias edges in. Cut 4 borders from background fabric, 18.5" x 3". Carefully place 6 triangles along the border, being sure the straight of grain edge is on along the bottom of the border. Glue in place, and hand applique down. 

NOTE: the tip of each triangle does not go all the way to the outside edge of the border. 

The excess fabric at the tip will be trimmed or folded back during the hand applique process. The pattern provided is a placement guide for the 6 triangles along the 18.5" background border. Join them where indicated and be sure your paper template measures 18.5" including seam allowances:

Make 4 corner blocks, following the pattern. Join a corner block to either end of the Top and Bottom borders. Join the Left and Right borders to the center applique block. Press toward the center block. Add the Top and Bottom borders to complete Month 1.

PAPER PIECED DOGTOOTH BORDERS: 


Some people find it difficult to get the hang of paper piecing. It seems "Upside Down and Backwards". You are sewing on a line on paper, the fabrics are UNDER the paper. Odd.  

I have written several times about the advantages of paper piecing. Here is one very detailed post about paper piecing--even though it is making a different kind of border, the principles are the same: Paper Pieced Border  If you are new to this technique or having trouble, there is a lot of info that will help.
 
In my Optional Alternative Techniques Instructions I explain how to DRAW this paper pieced border if you don't want to print the pattern which we are providing. It is quite easy to draw. It is also quite easy to print the paper patterns. The two pages in the Month 1 pattern section will generate 2 borders--your quilt has 4 borders so you will have to print them twice if using the PDF patterns provided. 

You need 24 colored triangles and 20 background triangles as well as 4 sets of partial background triangles for the outer edges of all four borders. I cut these oversize, from 4" strips. Then I cut 60 degree angles to make the triangles. See the VIDEO to see this process.

For paper piecing, use a small stitch, 1.5 works well for me. Be sure you are placing the triangles so the straight of grain will be on the outer edges, not the bias edge of  the triangle. Start on one end, join a colored triangle to a partial background triangle. Sew on the line, then press the colored triangle open. I like to use an Add-a-Quarter ruler to trim the colored triangle 1/4"beyond the next sewing line. This allows me to know where to line up the next background triangle.

Making 60 degree cuts to create triangles: 


Select the 6 printed triangles you want for a border: 


Place the back side of the partial background triangle to the back side of the paper pattern:


Align a bias edge of a printed triangle to the partial background triangle: 
Open and press the triangle: 

Use an Add-A-Quarter ruler to trim the triangle 1/4" from the next seam to be sewn: 
Stitch on the line: 


Before being trimmed: 


After all the sewing is done on the border strip, use an accurate ruler to trim exactly 1/4" away from the finished size line. I don't use the outer dashed line to trim by, I want to be sure I have trimmed exactly 1/4" from the seam line: 


Once trimmed, remove the paper and finish by adding corner blocks to the Top and Bottom borders. Follow the same instructions as above for the Hand Sewing method to complete your beautiful Month 1.

NEXT MONTH:   There are four vine borders with flowers and leaves, coming out of four baskets in the corners. This border will be surrounded by another Dogtooth Border, using the same size triangles as Month 1. Each outer border has 11 print triangles and will be 33" x 2.5" FINISHED. The Optional Alternative Techniques instructions provided in Month 1 has all the info you need to prepare these Month 2 Dogtooth Borders--in case you finish early and want something more to do! A paper pieced pattern for the Month 2 Dogtooth Borders will be provided in Month 2. 

Let's quilt.

Barbara