Showing posts sorted by relevance for query quilters scrap houses. Sort by date Show all posts

Sunday, November 23, 2025

CRANBERRY CHUTNEY AND LOCAL CLASSES

Each year around this time I share my recipe for CRANBERRY CHUTNEY. And each year at least one person says "This is now a "must have" on my family table!". I have been making it for almost 50 years. The holidays would not be complete without it.

You can always find this under my RECIPES tab above, but just to make it easy, here you go:


CRANBERRY CHUTNEY       
Barbara Black       

1 bag fresh cranberries, 12-16 oz                    1 cup water
1 cup sugar, can be less                                   1 cup onion, chopped
1/2 cup brown sugar, can be less                     1 cup apple, chopped
1/2 cup raisins                                                  1/2 cup celery, chopped
2 t cinnamon                                                    1/2 -1 cup chopped pecans
1 1/2 t ginger
1/2 t cloves
1/4 t allspice

Simmer cranberries, sugars, raisins, spices, and 1 cup water uncovered in 2 quart saucepan over medium heat, stirring frequently, until juice is released from berries, about 15 minutes.  Reduce heat; stir in remaining ingredients.  Simmer uncovered until thick, about 15 minutes.  Refrigerate covered or freeze.  

Batch can be doubled--use large saucepan.    NOTE:  I always double this--DO NOT DOUBLE THE SUGARS. Keep extra in the freezer.  This will last from Thanksgiving until Christmas.  I buy fresh cranberries in early November and freeze them for later use. 

Over the years, I've made a few changes, the best being to reduce the amount of sugar.  I doubled the recipe and FORGOT to double the sugar, and it was BETTER!  

About 10 years ago I added chopped pecans and that was a huge hit at my house, kind of makes it more "Southern".  The kitchen smells amazing while this is cooking, puts you in the mood for holiday food.  

People who don't like cranberry sauce like this, and I am always asked for the recipe--now I can direct folks here.  You can save it to your Pinterest Boards too--see on the right side.

And your house will smell scrumptious while it's cooking:


Currently, I am "on sabbatical"--meaning I am home until mid-March 2026. That gives me time to get lots done AND teach a few LOCAL CLASSES.  These are classes I teach all over the country and LOCAL FOLKS have been asking for a chance to take them here at home.

This is the ONLY TIME in 2026 these classes will be available.

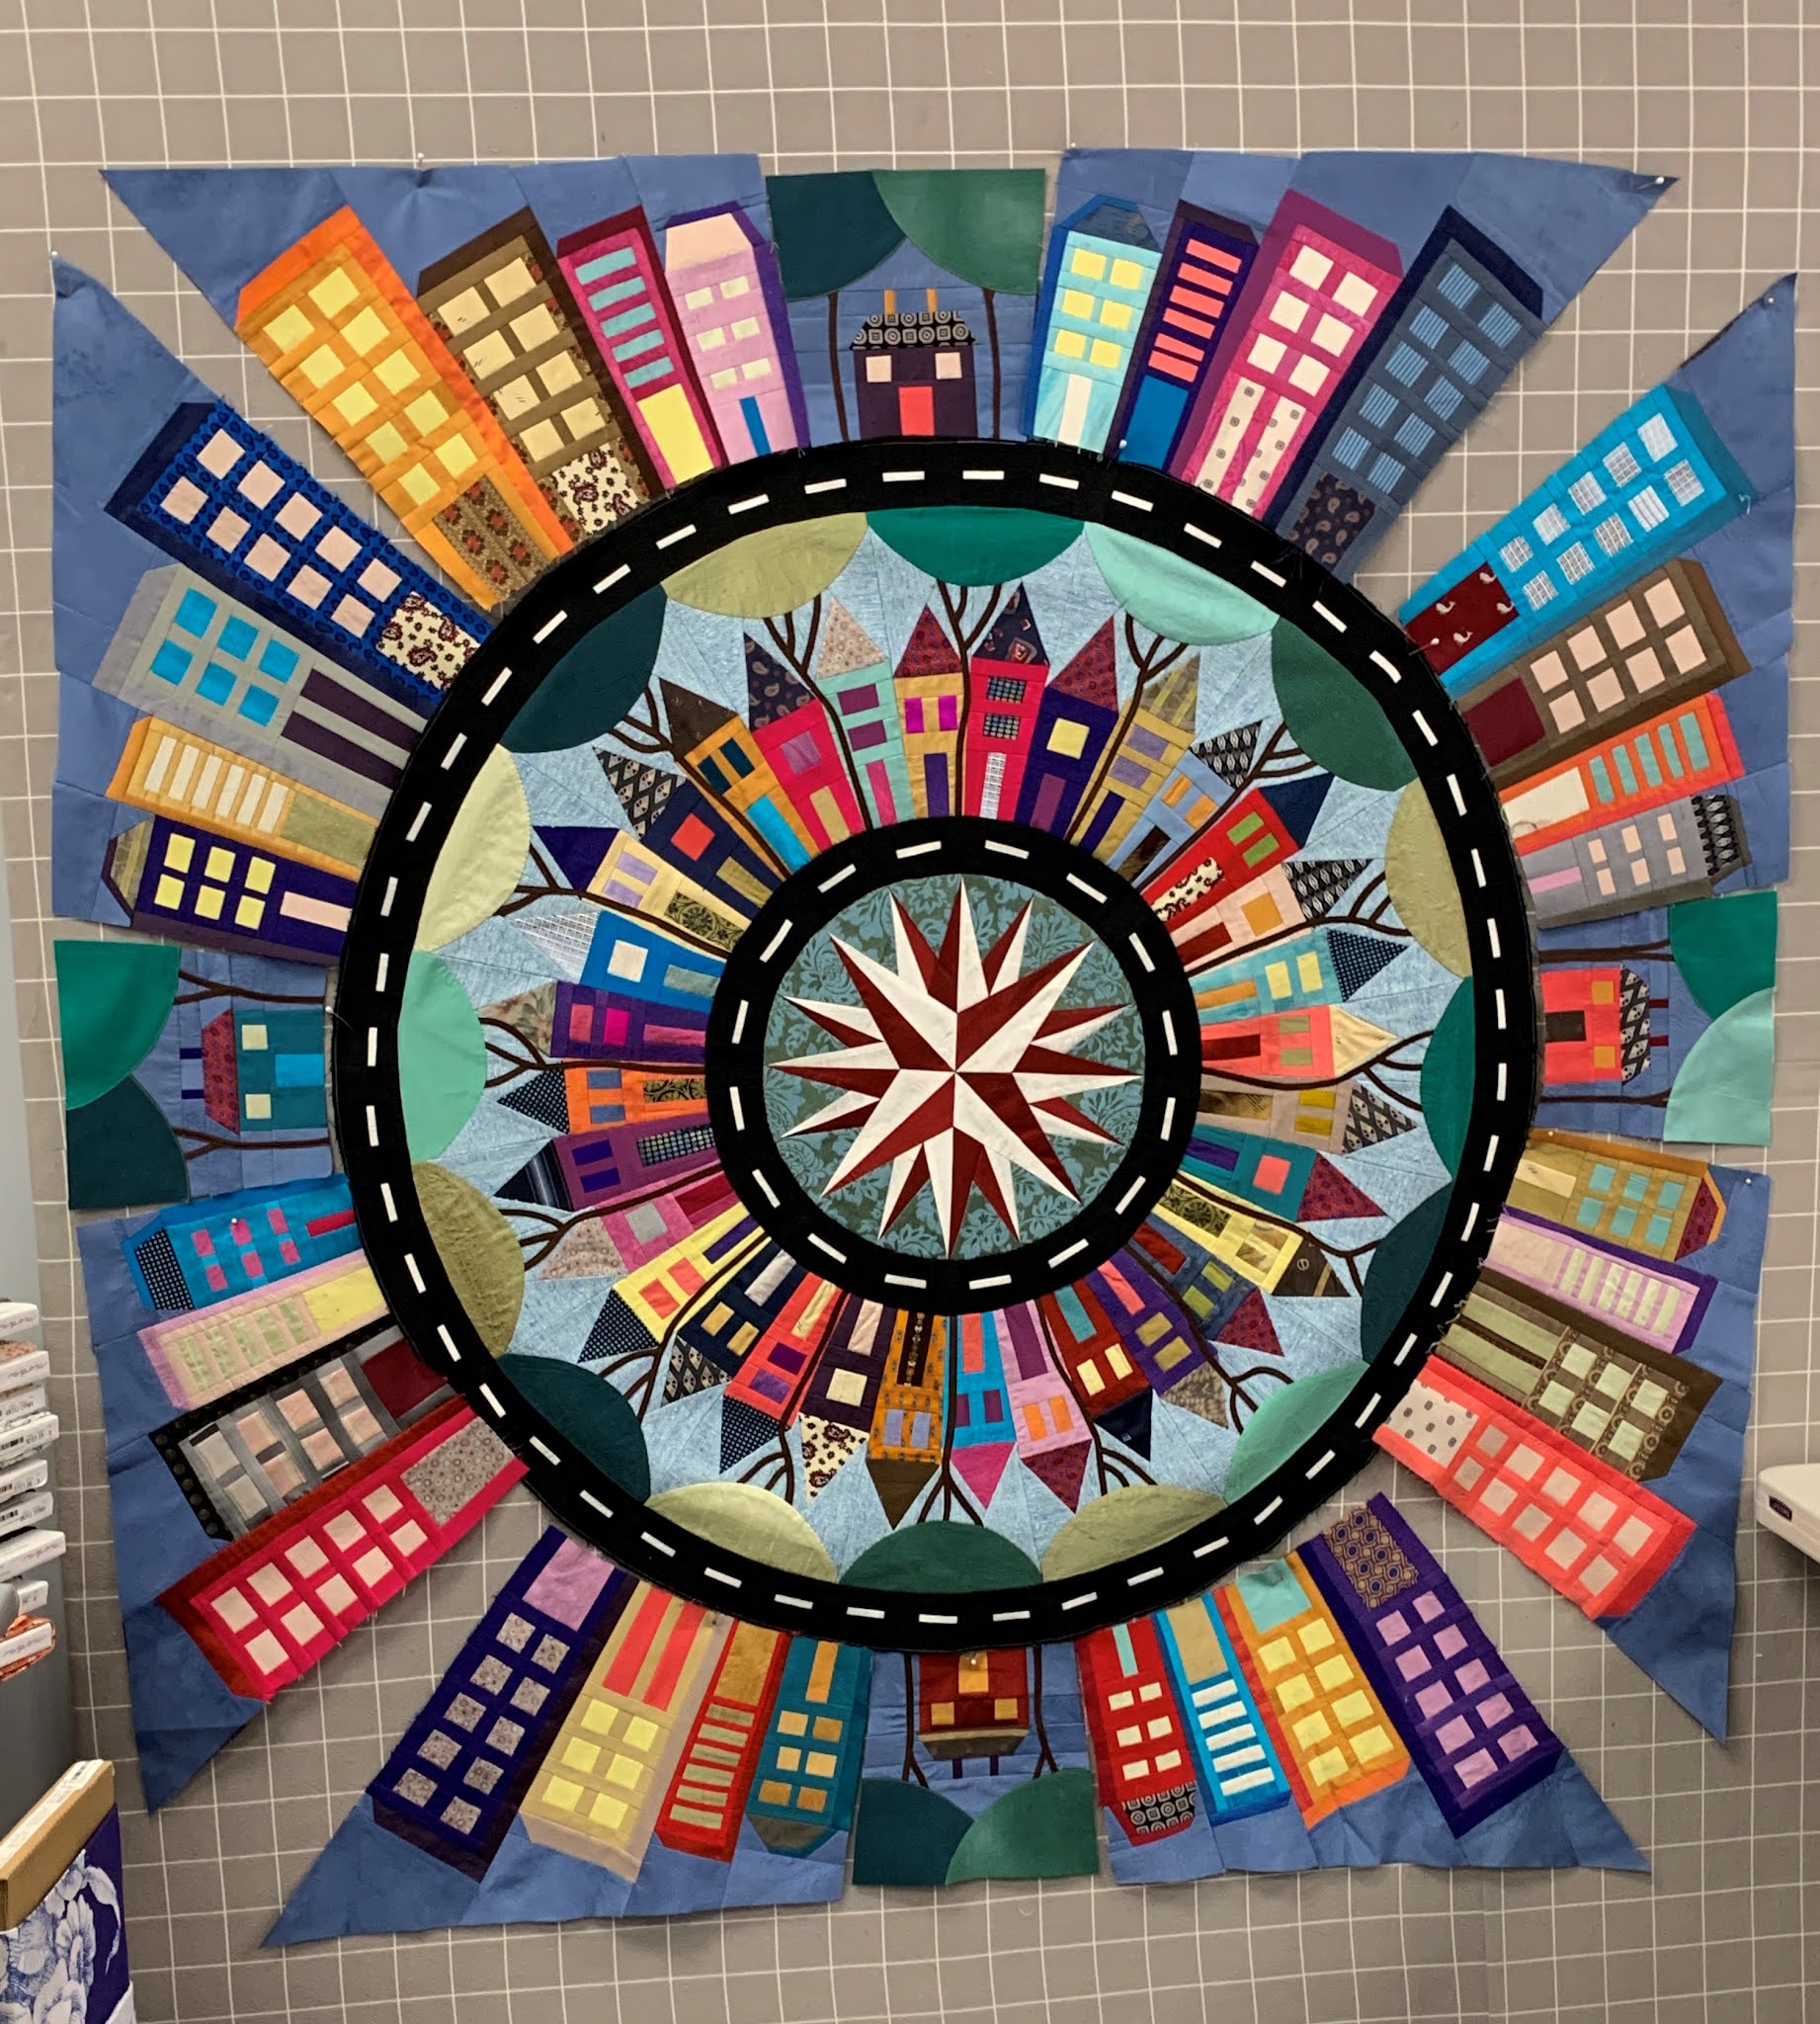
THE VILLAGE, AKA QUILTERS SCRAP HOUSES:

January 23, 2026, 10-4, Southern Charm Quilting. Register online here: SOUTHERN CHARM QUILTING


Take one of Barbara Black's most popular classes she teaches all over the country. Create your own neighborhood with houses, trees and stars. Learn paper-piecing for the Quilters Scrap Houses and Trees, and to quickly make Tiny Stars with points that don’t have to meet. Looking for a group project everyone will love? This is it! Sample is about 52”--you decide how large your neighborhood grows. The Class fee includes a detailed pattern, paper piecing patterns to use in class and patterns to make more copies for your personal use.


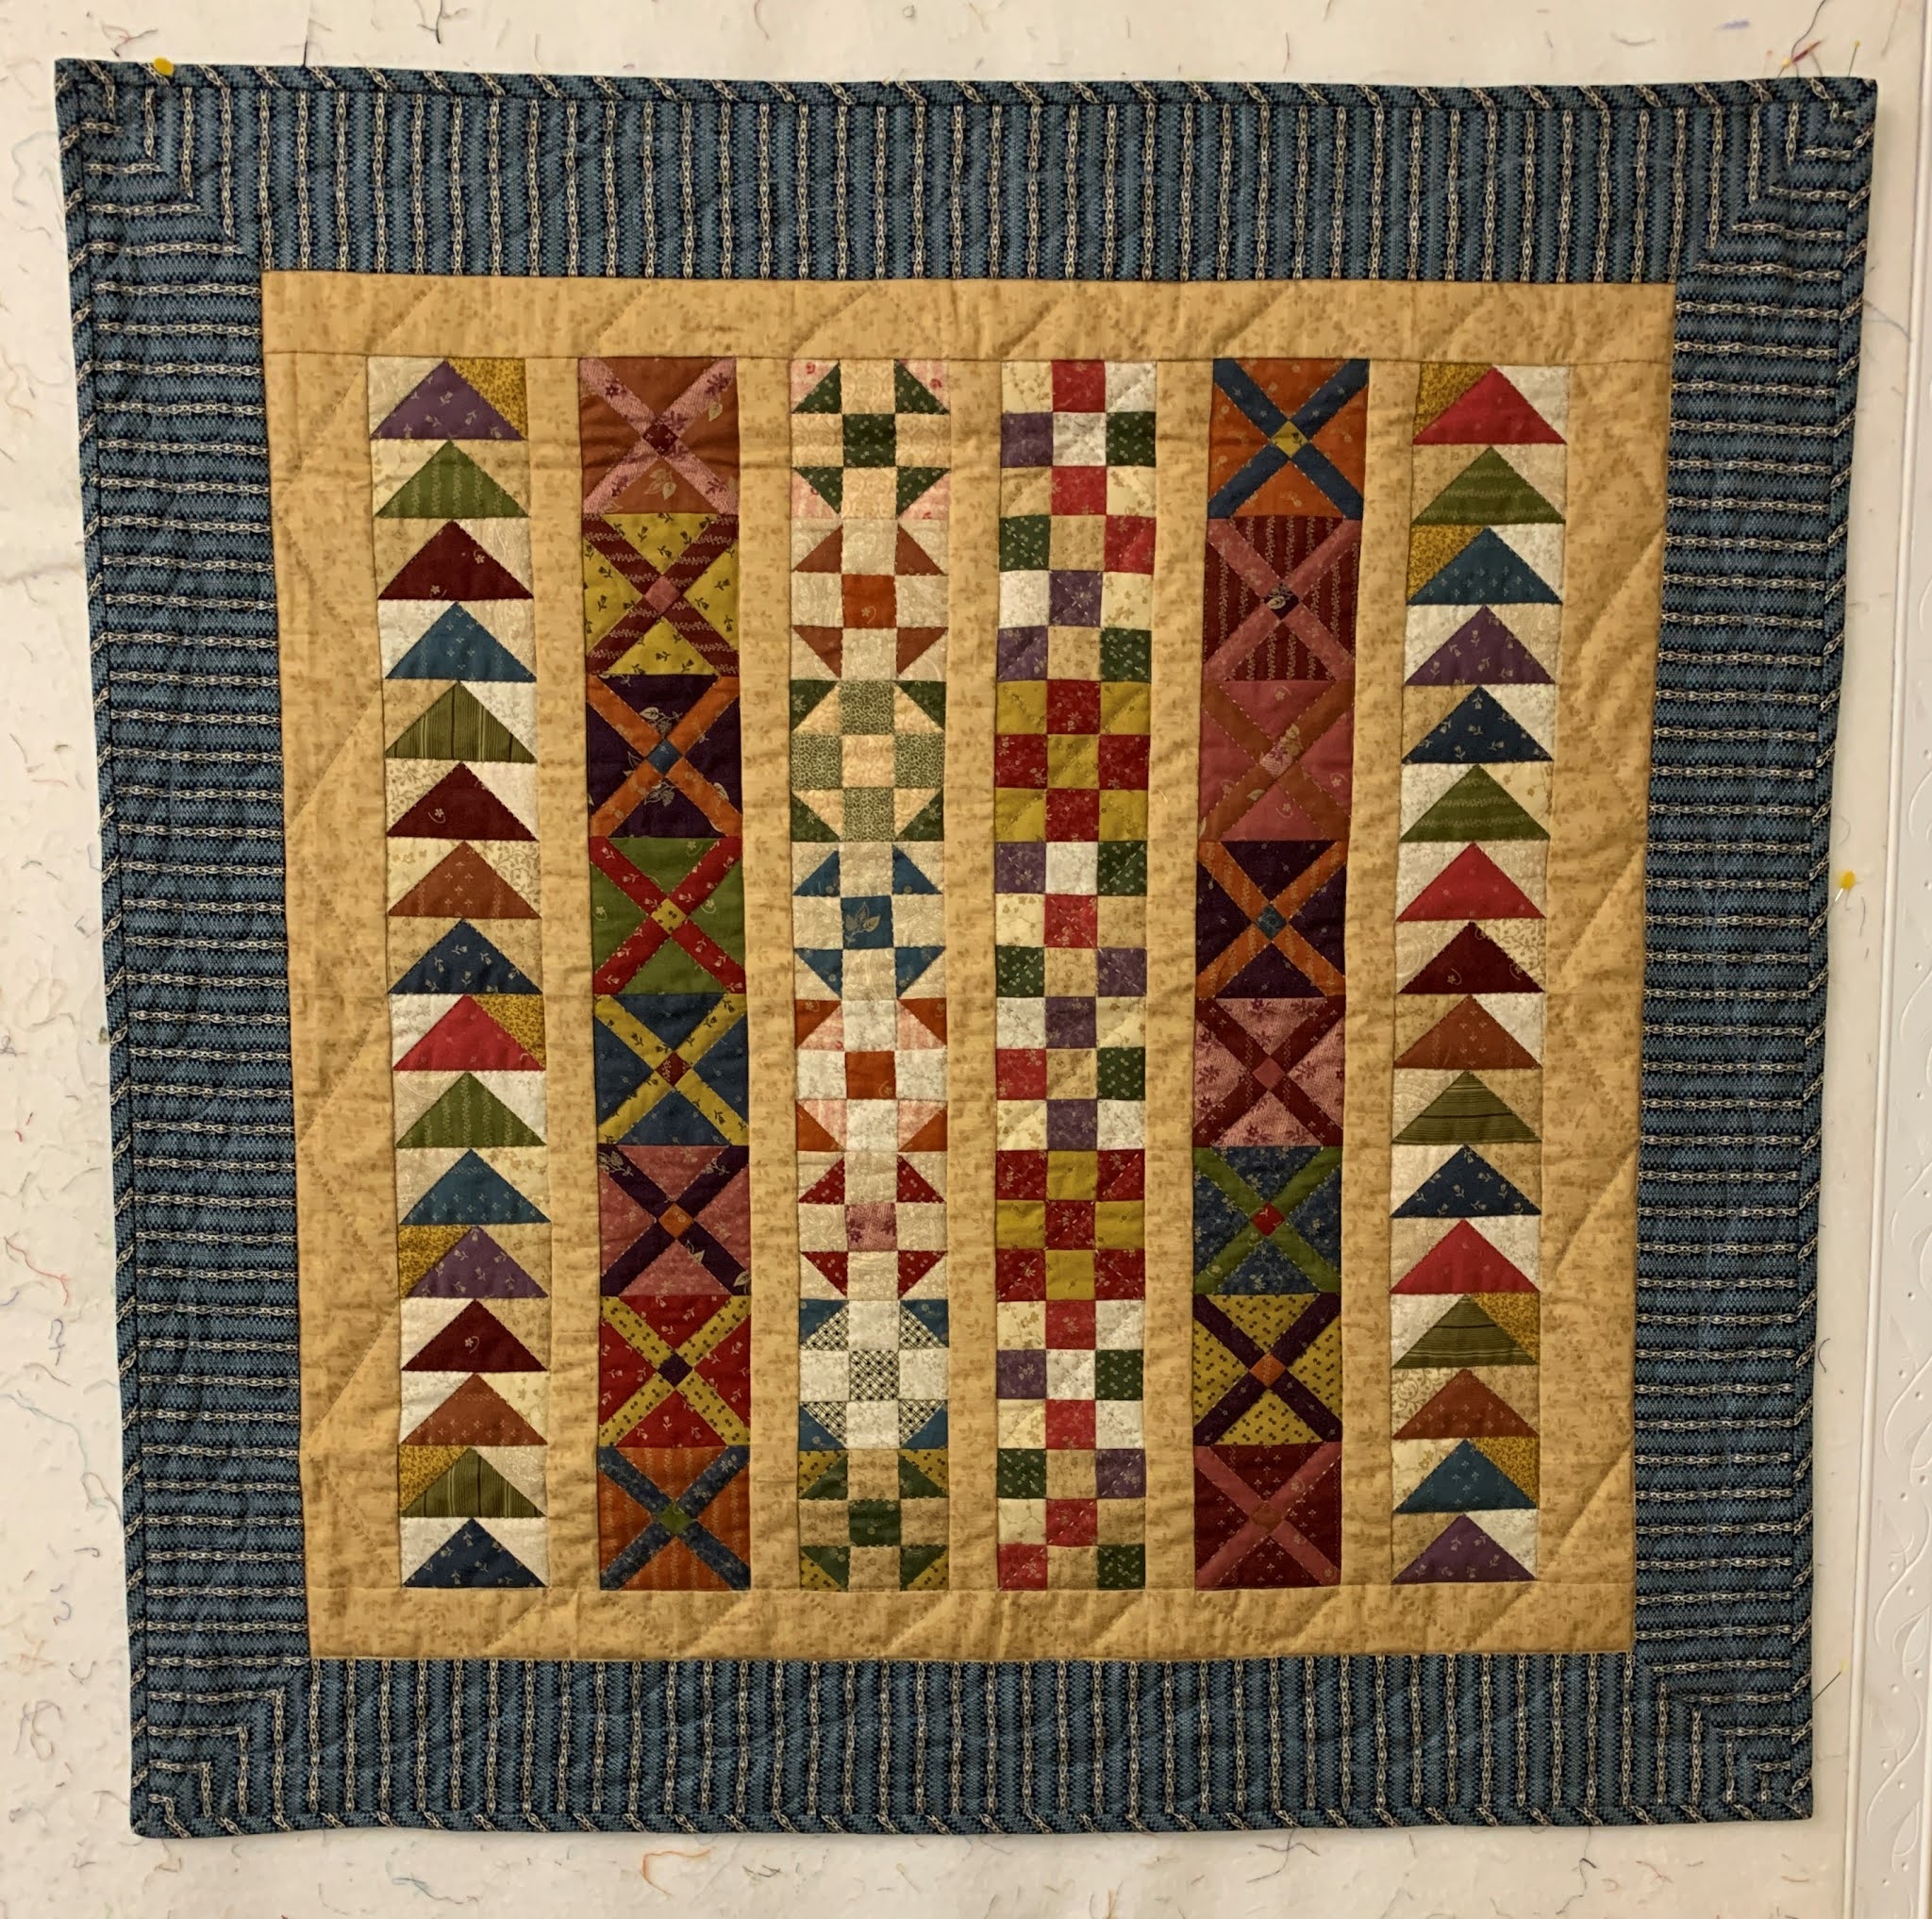
CHARMING SAMPLER:

March 5, 2026, 10-4, Southern Charm Quilting.  Register online here: SOUTHERN CHARM QUILTING

1800's reproduction fabrics

KAFFE CHARMING, contemporary fabrics


Now is your opportunity to take this very popular class Barbara Black teaches all over the country. Learn a variety of blocks in a small size, making them fast and fun! You will learn tricks that will improve all your quiltmaking going forward. Guaranteed to teach you a few things you don't already know. Class fee includes detailed pattern, paper piecing patterns to use in class and patterns to use later for your personal use to complete the quilt.

I hope to see you in these classes. They always fill when I teach them away from home. Don't miss your chance to join me for great classes AND sleep in your own bed.

And Happy Thanksgiving to all! There is always a reason to give thanks.

Let's quilt.

Barbara

Sunday, January 20, 2019

The Village

In 2018 I was involved in two swap projects, one was 5" paper-pieced houses and one was 4.5" stars. I wrote about the Quilters Scrap Houses here and the Tiny Star Blocks here.

Recently, when I should have been sleeping, I wondered what I could do with thirty 4.5" tiny stars. And then wondered what I could do with thirty-six 5" little houses. Two  more quilts to make. Wait a minute...

What If: they were combined into ONE quilt, stars and houses. I ran the numbers in my head--what do you know? Ten 4.5" stars = 45" of stars, 3 rows of 10 stars each could be made.  AND nine 5" houses = 45" of houses, 4 rows of 9 houses could also be made. No extra blocks had to be made--I had just enough--that never happens!  It was meant to be, here is "THE VILLAGE":


A much better photo will be achieved when this is quilted and bound--in the not too distant future. I was just so eager to see it up on the wall. Good to have another top finished for 2019.

After I made the rows of stars and the rows of houses, I thought the neighborhood looked a little sterile--it needed some greenery. So each row of houses got one paper-pieced tree on either end of the "street"--much better. When I write the directions, the trees will be added to each "street" before the rows are sewn together, so much easier. If only I had thought about the trees earlier.

This will make a great 3 hour class for guilds--in 3 hours you can learn to paper-piece the house and one tree AND learn the adorable Tiny Star--and how to convert that simple star into other easy-to-make sizes. They are so good for swapping because the points "float" and don't have to match, always good in a swap project.

Let's quilt!

Barbara

Sunday, August 19, 2018

Won't You Be My Neighbor?

NOTE: If you saw this last week when it was accidentally posted early--those numbers are not correct. This post has the correct measurements for the 6" block below


Recently, I've shown these adorable little house blocks on Facebook and Instagram and there has been a lot of interest. I call them Quilters' Scrap Houses:


Three of us are close quilting buddies and often make blocks to swap, or do round-robin quilts. While at a three-person retreat a few weeks ago we decided to make house blocks to swap. I took on the design job and set the "guidelines"--that would be "rules".  I wrote all the details of this project here.

In Electric Quilt 8 there are lots of house blocks. I found one that just needed a bit of tweaking, size, one chimney, not two, no ground, etc.  Here is our pattern:

This one is perfect for foundation paper piecing. There are four units to make, then you assemble a lower half, the building, and the upper half, the roof and the sky/chimney. Ours is 5" finished but could easily be larger or smaller.

What if you don't have software and want to make a pattern? Simply draw a square and make your own. Trace paper patterns for the block you drew--be sure you add seam allowances where needed.

Here is what my pattern looks like for the 5" block. Notice I printed it in reverse so the door will be on the left and window on the right when sewn:


What if you are not a fan of paper piecing and want to piece your block in the regular way? No problem, these shapes are basic and simple to piece.

How about a 6" block, pieced regularly? Here are the numbers:

Top Half: 
Top Row:  2 Sky rectangles cut 2" x 3", 1 Sky cut 1.25" x 1.5"
                  1 Chimney cut 1.25" x 1.5"
                   Join chimney/sky, add sky to both sides, unit should now be 2" x 6.5"

Second Row: 2 Sky triangles cut from 1 square 2 3/8"--note I'd cut the square 2.5" for insurance
                       Front Roof triangle can be cut from one square cut 4.25"--cut in quarters making the                             long side on the straight of grain--each square gives you 4 of these triangles.
                        Long Roof Triangle--cut rectangle 2" x 5.75". Create parallelogram by removing both                            ends with a 45 degree cut--be sure you are cutting in the proper direction
                         Join the front roof to the long roof, add sky triangles to both sides
                       Unit should now be 2" x 6.5"

Bottom Half:
Left House: cut 2 House rectangles 1.5" x 3.5", cut 1 house square 1.5"
                     cut Door 1.5" x 2.5"
                      Join door/house, add house rectangles to each side of door
                      Unit should now be 3.5" square

Right House:  cut 3 house rectangles 1.5" x 3.5", cut one of these in half for above/below window,                               trim them to 1.5" squares.
                        cut 1 Window 1.5" square
                        Join house parts to window, above/below, add house rectangles to either side
                        Unit should now be 3.5" square

Join the Top and Second Rows for the upper half of the block
Join the Left and Right House units for the lower half of the block
Join the upper and lower halves and you now have a Quilters' Scrap House that is 6"finished size.

5" on the left, 6" on the right

You can also Google "Quilt House Blocks" and you will find many blocks, in lots of sizes and lots of designs--find one you like if this doesn't suit you.

 I really prefer paper piecing and the smaller the better--I plan to make this baby in a 3" size too. But not everyone likes that method, so choose whichever you prefer.

This has been added to my Workshops offerings as a 3 hour class--just enough time to make a few and see the paper piecing process.

Let's Quilt.

Barbara


Wednesday, August 21, 2019

Won't You Be My Neighbor?

Recently, I taught a class for this fun quilt that used paper pieced house blocks I had swapped with two friends, and floating star blocks I had swapped with 14 guild members.

The class sample:


The students learned the basics of paper piecing with the 5" houses in the morning:


After lunch, they took on the cute tiny stars, 4" finished. Their work was fun and all of them learned something:


The instructions for the Tiny Stars are in this Tiny Stars blog post. They are great blocks for a swap since they are somewhat forgiving--the star points do not go all the way to the edge of the block.

The houses and trees I designed in EQ8. This makes a great all-day class. I keep changing the name of the class: "The Village",  "Quilters' Scrap Houses",  "Won't You Be My Neighbor?"  Which do you prefer?

Let's quilt.

Barbara

Sunday, July 20, 2025

Bayside Quilters of the Eastern Shore

 Recently I got to travel to the Eastern Shore of Maryland to teach for the Bayside Quilters of the Eastern Shore. It was a delightful trip that I enjoyed very much. There were no travel issues so that helps make a good trip even better.

I flew to BWI, Baltimore, where I was met by my contact guild women: Marianne and Lisa: 

Marianne and Lisa

In Atlanta waiting for the flight

During the more than one hour drive to Easton from BWI, my "tour guides" told me all about the area. We were a mile from Annapolis, we crossed the Chesapeake Bay Bridge, they pointed out where they both live. It was a good ride and I got to see the sights.

We got to the Tidewater Inn in Easton, an historic hotel, where we had dinner together. The hotel is lovely and in a great old neighborhood and I really enjoyed my stay there:


The next morning I got up early so I could walk, from 5:45-6:45 am, before breakfast. I didn't go fast because I kept stopping to take pictures. The area reminds me of the Philadelphia neighborhood where I grew up, in a home built in 1900. Here are just a few photos to give you a sense of the area:


Gardens are everywhere. Local restaurants grow herbs out front I am sure they use in their dishes. It was a beautiful way to start my day. 

I had breakfast at a little place nearby, Breakfast in Easton. It had been 50 years since I ate Taylor Pork Roll--growing up it was a breakfast staple:


The guild meets in the town of Trappe, not far from Easton. I was picked up early for that trip. Once the PowerPoint was all set for my lecture, I could mingle with the guild members. After the business meeting, my lecture was "My Joyful Journey", the story of my "one woman show" in Houston in 2021. It gives a chance to look back at the quilts I have made, mostly traditional, from the humble beginnings to four Best of Show quilts. The lecture was well-received. 

Ready to go to "work"

After lunch we had a 3 hour class on foundation paper piecing, The Village AKA Quilter's Scrap Houses. Everyone did well and all learned something:


Back at the Tidewater Inn that afternoon I met up with good friends who drove down from Philadelphia that day. Judy and I met in 7th grade and have been friends since then. She was my maid of honor. I have known her husband Mark just as long. 

We had a great dinner at Legal Assets, a block from the Inn. It was delicious. So good, there are no photos. It was just enjoyable to sit with old friends over a great meal. 

The next day the 6 hour class was Western Sun. Several students returned from the day before and several new students joined the fun. They all did well and all learned something:


Judy and Mark spent the day sightseeing and their assignment was to make dinner plans--anywhere was fine with me as long as there was seafood.  

After my day of teaching, the 3 of us drove to St. Michael's, where they had spent the day. We ate at The Crab Claw, right on the water: 


I love seafood and eat it every chance I get. Most of time, grilled or baked. But when on "vacation" and I have the option of fried, well, yes, that is what I want. That's why I walk at least an hour every single day. It was so good, a crab cake, oysters, shrimp, clam strips and rockfish. I left most of the potato--I can have a potato anywhere:

Waterman's Seafood Sampler platter

Mark and Judy

After dinner we had the most beautiful weather. Temperatures were in the 70's and humidity was low. We walked around the Maritime Museum grounds, where Judy and Mark had toured earlier that day. An employee who was leaving told us the grounds were open after closing so we were welcome to walk all around. 

It was the "golden hour" when the light is perfect for photographs. The water was soothing, it was just a wonderful way to spend some time. Here is a glimpse of the area:


A selfie of 3 people who all have short arms

After the 10 mile drive back to Easton we said goodnight and made plans to meet for breakfast the next morning in the hotel. After breakfast our adventure would take us to Philadelphia for a couple days. Stayed tuned, next week I'll tell that part of the story.

Let's quilt.

Barbara


Wednesday, October 6, 2021

Student Work and Class Offerings

 I spent some time with students last week at Sweet Home Quilting, a local quilt shop and INNOVA dealer.

In the morning, the monthly lecture/demo class met for Color My World. This runs all year, and allows those making the 2021 Block of the Month quilt for The Quilt Show to show off their progress in person and get specific help as needed. Great ideas come from this sharing experience.

Cyndi always has good ideas and she adapted the Little House in the City pattern to have fewer seams in the background. In the lower portion, she combined sections 1, 2 and 3 first, then added the one piece of background to either side. Very clever: 

On the left, is the original pattern, blocks made by my friend Pam. On the right are Cyndi's blocks, before the trees are added. 


Cyndi's Tall Buildings, ready for the Little Houses to be sewn in  place:
Paula's progress, made completely from silk, a lot of garment remnants and ties: 


As every fabric is interfaced, it's quite heavy: 


Beverly is making progress:

Beverly got help designing the Saturn V rocket pattern that is a highly recognizable landmark in Huntsville, AL. The pattern was the 2016 Row by Row block from Patches & Stitches, another local quilt shop. They still have this pattern available for sale:


By increasing the diagram on the pattern above by 200%, Beverly has an almost perfect size paper pattern. Here you see the original full size design and the design area for the Corner Skyscraper: 


For those looking for Lighthouses,  the Washington Monument, Windmills, etc.,  first search online for such patterns. You may find exactly what you are looking for and will only have to adjust for the size needed. The Seattle Space Needle is very similar to the Centrepoint Tower which will be provided November 1--it would be very easy to change the shape at the top of that pattern to create your own version of the Space Needle.

Mary-Louise hasn't let some medical issues keep her from making progress:


I have seen several photos of fussy cutting cute things in the windows and doors of these buildings:


In the afternoon, six students gathered to learn how to make Scrappy Trips,  a free pattern from Bonnie Hunter, available here, on her blog  This is Bonnie's version--I love that green border: 


A quick description of how to select fabrics, the size to cut, and how to get started had everyone ready to begin: 


Each student quickly got the hang of it and blocks started to  appear: 


In less than 3 hours each person had two blocks done, or very close, and declared this a great "scrap buster" quilt. It is good for donation quilts, or a Girl Scout/Boy Scout project or to teach someone who wants to learn the basics of making pieced blocks without much stress: 


Sadly, I had to cancel two local classes recently, due to lack of interest. If you are not interested in taking a local class at this time, I would like to know why. Some  have really gotten used to sewing at home, taking ZOOM classes. Some are not ready to gather in public spaces yet.  Maybe it's just lack of sufficient advertising. 

The classes were good ones I was eager to offer locally, and the couple people who signed up were disappointed the classes were canceled. I will try one of them again locally next year but the other will not be offered again as the sample quilt is a gift for a friend and I won't own it any more.

The one I will offer again, Charming Sampler, uses 5" charm packs and teaches a LOT of tricks for making 4 different blocks quickly, as well as paper piecing for those who want to give that a go. I also sneak in some "quilters math" on how to make these same blocks larger than the 3" used here. It has been a successful class the previous times I've taught it:


As I am starting to travel to teach again, there will be less time to offer local classes. If you see a class you are interested in locally, mine or other teachers', sign up or perhaps miss the chance on that project. This is true for all shops/guilds--support them when they provide learning opportunities whenever you can.

Let's quilt.

Barbara