Showing posts with label baby quilt. Show all posts

Sunday, August 23, 2026

DISAPPEARING NINE PATCH

 What to do with LEFTOVERS? Once I completed Game On! from the PRINTS KIT, a lot of fabric remained. 

Rather than put it in the closet with all its' friends, I cut a bunch of 5" squares and made a DISAPPEARING NINE PATCH QUILT. This is a very easy way to make a baby quilt or a charity quilt, fast, easy, interesting, a great use of 5" squares.

This is 39" square and will be used as a baby quilt the next time I need to give one of those to someone. Here it is, basted and ready to quilt:

There are many online videos/tutorials for this simple block. Here are the steps I used:

1. Cut a lot of 5" squares in various colors, light, medium and dark. Since I wanted 9 blocks, I cut 81 squares, 5" each.

2. Arrange 9 of them into a 9 Patch, being sure there is contrast among the fabrics. The four corners will remain whole, use your favorites in that position. The center will become 4 small squares, use something that cuts up well there. OR use the SAME FABRIC in the center of ALL your blocks--this provides continuity. The fabrics at North, East, South and West will become Rectangles.

3. Sew into a big 9 Patch. I pressed the top and bottom row to the left, the middle row to the right, so the seams nest with each other. That is my personal preference. Do as you please.

4. Cut into 4 quarters, placing the 2.25" line on the ruler on the seam that joins the first row to the middle row. Turn the two halves and repeat, to create 4 squares:


5. Play with a variety of block layouts to find your favorite. Sew into a FOUR PATCH:

Option 1

Option 2

6. Lay out all the blocks, I made 9 of them, to create a fun quilt top. Warning: you WILL rearrange them a lot before deciding which layout you prefer. It really doesn't matter:

On the table as I arranged and rearranged them

Final arrangement--can you FIND the block I used above for this demo?

Once you decide on the FINAL Layout: TAKE A PICTURE! You think you'll remember, you think you won't get something turned upside down but you will...

Because mine is 39" square, I won't add a border so the back can be made from one fabric, 1.25 yards. No piecing of the back is necessary.

One of my most popular WORKSHOPS in recent years is DISAPPEARING PATCHWORK. It's a little more complicated because we first make pinwheel blocks. I challenged myself to make a quilt in all NEUTRALS, it wasn't easy, but I am very satisfied with this. And it has been a really popular workshop:

Workshop Sample: DISAPPEARING PATCHWORK

At this point, I want to USE MY FABRIC, not store it, so this was a good way to use some of the leftovers from Game On! and have a baby quilt ready to go. It also makes a great quilt to practice MACHINE QUILTING on. 

I will show that when it's done.

Let's quilt.

Barbara

Sunday, December 24, 2023

QUILTY STUFF AND CHRISTMAS COOKIES

 Colder weather gives me lots of time for quilting and baking. Here is some of both activities.

1. Bean's Baby Quilt--all it needs is the binding hand sewn in place and a label. He/she is due March 23, 2024 and we are excited for a new grandchild. Baby shower is in late January and I will be ready:


I always quilt at least one heart into every quilt I make--can you find it?


Flannel Baby Feet on the back

2. Proposals for International Quilt Festival Fall 2024--I had such a great time teaching at Houston this year and the students were exceptionally gracious in their reviews that I want to do it again. The proposal process takes time so I jumped in and got it done.  Many hours are spent at the computer writing Class Descriptions and Supply Lists. 

Acceptance letters are received in late February 2024 so it will be a while before I know if I will be teaching.  My proposals include a few new classes, a couple that are hand work, a couple that sold out quickly this past year, and Sampler demonstrations. I love to attend Samplers so hope to be a presenter this year. Here is a teaser shot:


3. The 2024 Block of the Month for The Quilt Show starts January 1, 2024. The Show that features designer Jen Kingwell starts to air December 31, 2023 and is FREE TO ALL. I encourage you to watch it, you might get excited to join in. Jen does a lot of hand work and her instructions feature that. I am machine piecing as much as possible for speed.  

I have to work ahead so I am ready to write monthly blog posts and do the LIVE broadcasts each month--the first LIVE will go up January 1, 2024, noon central time. I will pre-record it as we are now spending the day with our family. So it will be "not so LIVE". The broadcasts are always recorded so you can watch when convenient. Find them HERE

Here is my middle so far--months 1-3:


4. Now that Pick a Petal is to this stage I have to make Antelope Canyon Dit Dot Evolution for an upcoming class at Southern Charm Quilting, a local quilt shop. Sign up now if you are interested. Please support local classes if you want to have them in the future. Shops and teachers depend on it:


5. Cookie Baking time is here. Just a few of my favorites. Find ALL the recipes up there in the RECIPES tab above:

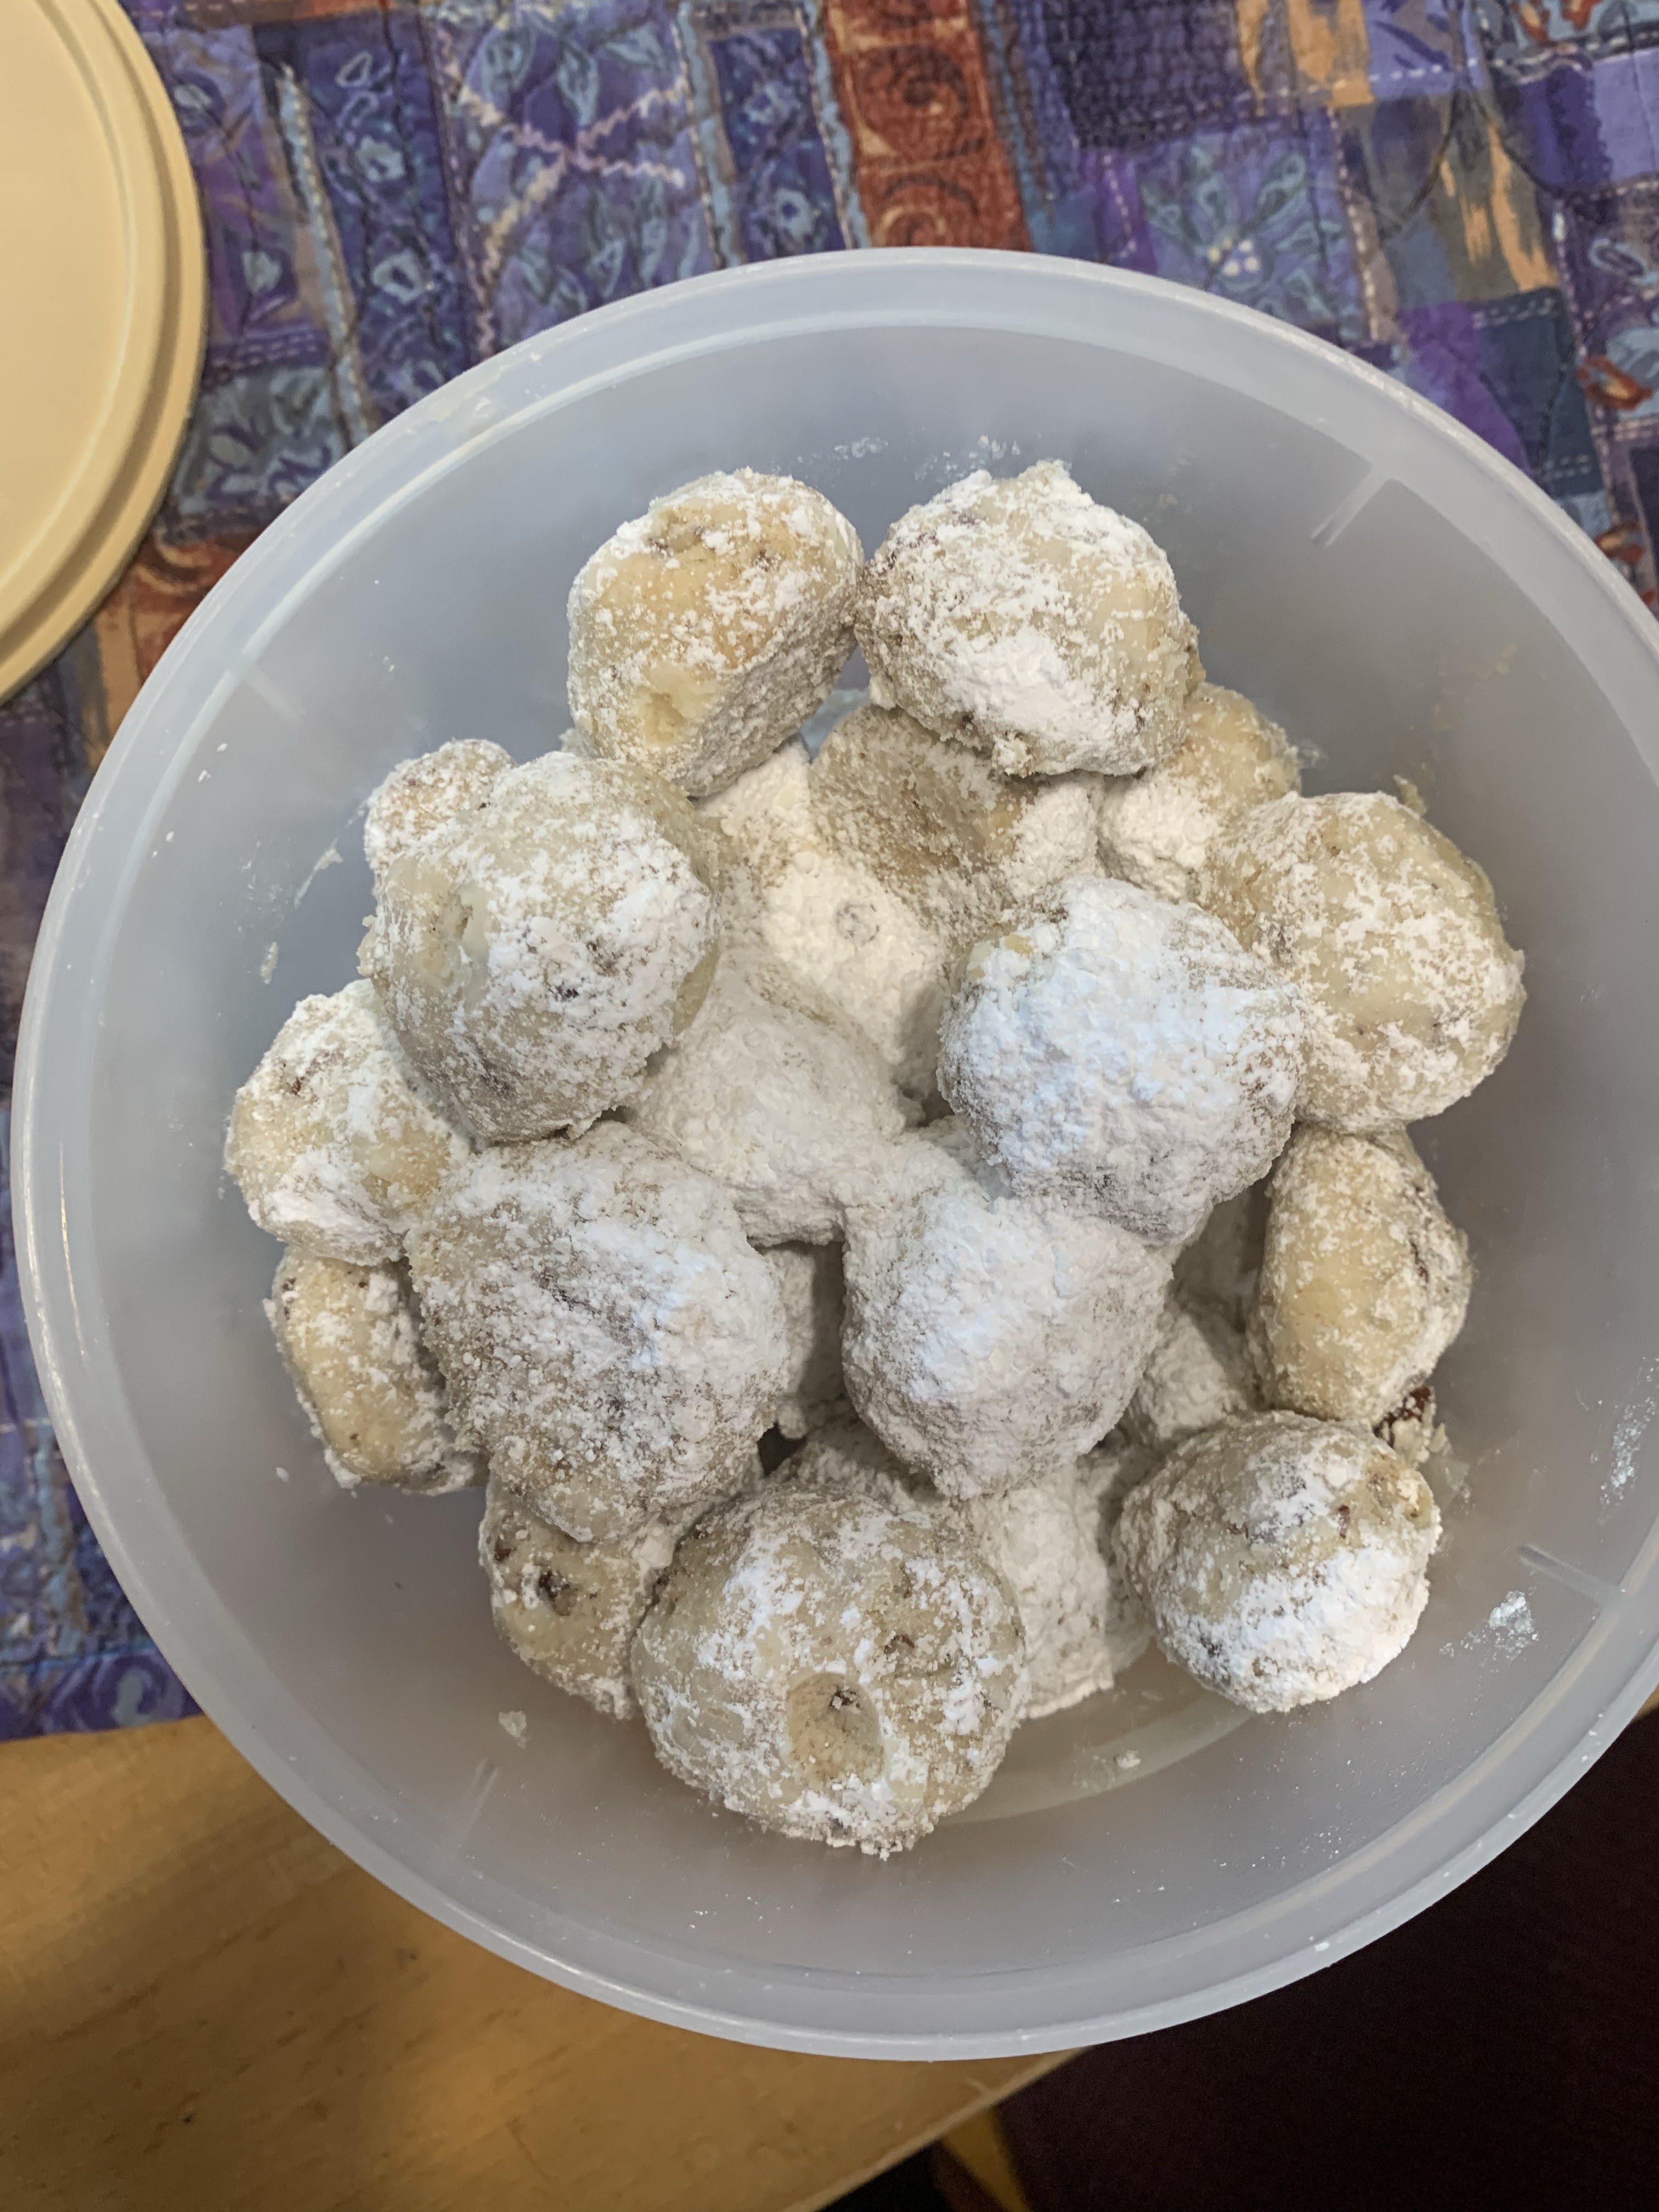
Mexican Wedding Cookies, aka Snowballs or Sandies


Cranberry Pistachio Biscotti logs before slicing 


Cranberry Pistachio Biscotti ready to eat--love these with coffee or cocoa


Forget 'Ems

Pumpkin Chocolate Chip Pecan

Old Fashioned Butter Cookies


I will probably make a few more batches--using cake mix is an easy way to make cookies. Red Velvet is up next...

Cake Mix Cookies


Merry Christmas, Happy Holidays, however and whatever you celebrate. My best wishes to you for a happy and healthy New Year!

Let's quilt.

Barbara

Sunday, December 10, 2023

BEAN'S BABY QUILT

There is a new grandbaby coming my way in March 2024. My son and his woman don't plan to know the gender in advance so, for now, the baby is called "Bean". 

Recently I got to work making the top and now it's time to quilt it. EQ8 has great alphabet letters for foundation paper piecing so that is what I used.

Ready to start quilting:


The back is "Baby Feet" in flannel, something I have been saving for many years for an extra special baby quilt:

Threads are white Bottom Line for the bobbin, and a pastel variegated King Tut, both by Superior Threads. 

The background is Confetti, made especially for The Quilt Show and only available from their shop, perfect for kids quilts: Confetti Squares, It also comes in black and white and Stars rather than squares. 


This is very similar to the quilt I made in 2015 for my first grandchild, Stella. Those blocks were pieced but when I couldn't find the patterns I was sure I saved, I looked at EQ8. Once I found these easy paper pieced letters I was in business:


Stella's quilt:


I did find these pieced Letters online--it's a FREE download from MODA Fabrics. One source is here: Spell It With Fabric. It's downloaded and saved now--BUT the paper piecing was fast and easy and the sashing is made as part of the blocks--super fast.

Now on to the quilting, stay tuned...

Let's quilt.

Barbara


Wednesday, April 13, 2022

AdventureLand Quilts

 About a month ago I saw a new quilt pattern on Instagram that was soon to be released by Suzy Quilts. I had not heard  of that company before but thought the design was simple and interesting. When it was released, I bought the PDF pattern, dug out a blue/white jelly roll and made the baby size at my Joyful Journey retreat.

The Baby size, about 41" square. I find after washing/drying, this one is a bit "wavy"--fine for a simple baby quilt but it would have benefitted from blocking--something I don't want to do for a "utility" quilt:


Easy enough, so I got out another jelly roll to make the Throw size, about 60" square. I couldn't handle the Kaffe Fassett fabrics side by side so I inserted a blue or green solid between the busy prints. After washing/drying, this one is much less wavy--could be better quality jelly roll strips: 

The instructions are clear enough. The directions to press all the seams open are not what I would do, IF I intended to stitch-in-the-ditch. You need to HAVE a DITCH if that is your plan. But I usually follow the directions the first time. The small blue and white one has seams pressed open but all the strips are stitched in the ditch as well as down the center of each strip. It would have been easier to do the ditch quilting had there been a ditch. The large white triangles are free motion quilted with paisley feathers, more or less.

For the larger quilt, I pressed the seams to one side, toward the prints, then first quilted in the ditch across the two center diagonals. Then I quilted "swirly circles" in two quadrants of strips, "swirly leaves" in the other two quadrants of strips, and in the large blue triangles I quilts "curvy cross hatch".  No marking, easy quilting, great way to practice free-motion or ruler work quilting. 

All in all, the quilt tops were quick to make and quick to quilt. Not likely to become a "go-to" pattern for me, but fun enough to whip up for something new.

A few "glamour shots":

Throw size, the front

Throw size, the back

Baby size, the front

Baby size, the back

To see a large number of these quilts, go to Instagram or Facebook and search for #advernturelandquilt or #adventurelandquiltsa   Wonderful fabric selection can really make this a beautiful quilt.

The pattern includes instructions for two additional bed sizes, twin and queen/full--those sizes use yardage as jelly rolls are not long enough.

There is a Sew-a-Long going on for this quilt at the moment--see the link above to Suzy Quilts.

Let's quilt.

Barbara


Saturday, November 11, 2017

Baby Quilts--Select Your Own

Over the years I've made a lot of smaller quilts, usually as class samples. Some of these are a good size for baby quilts. We are at the stage of life when our kids, nieces, nephews, and their friends are having babies. I've decided to let the prospective parents select their own baby quilt--from these that are done and ready.

This idea sure would have come in handy a few years ago when my husband came home from work to tell me he told a co-worker I would be happy to make baby quilt(s)--for her soon-to-be born twins! He did that frequently. Now I figure I am ahead of the curve.

And if they don't like these, they can put in a color request and I'll make something new.

In no particular order:

1. Opposites Attract  36" x 39"  UPDATE: Kallie and Corey have selected this for their wee one, due Ap


2. Black and White, It's a Challenge  34" x 34"


3. Hearts and Nine Patches 29" x 33"—UPDATE: this was sold to a friend


4. Strings A-Plenty 45" x 45"  This one is chosen--for Baby Edwards/Wasserman, due December 3, 2017.  UPDATE--Perrin Wasserman was born December 1, 2017.

5. Italian Shoo Fly #2 32" x 40"
6. Italian Shoo Fly #1  31" x 40"

7. Soft and Simple 26" x 31"

 8.  Trip Around the World  41" x 41"

9. Purple Boxes  39" x 47"

10. Bali Star  36" x 36"  UPDATE: this was sold to a friend

 11. Scrappy Trip 46" x 46"  UPDATE: this was sold to a friend

12. 3 Cheers for the Red, White and Blue  44" x 44" UPDATE: sold to a friend

While none of these are Heirloom quality, each will keep a little person warm or be good for floor use. Most are machine quilted, some in a rudimentary fashion as I improved. These are made to be used and used up, then tossed out. They can be machine washed and dried. Each will get a personalized label for the new, wee little one.

Jessica, you are up first. Do you see something you like?

Let's Quilt!

Barbara

Sunday, July 30, 2017

Bernina Q20: Ruler Work for Easy Quilting


I've made two quilts this week, both class samples for Fall classes.

The Creative Log Cabin was started about a week ago, using the 8" Log Cabin Trim Tool from Creative Grids:

It's about 55" square and is asymmetrical on purpose. I find that hard to do but really love other quilts that I see done that way so I forced myself to make this one off-center. My husband asked me when I was going to finish it when he saw it on the design wall--"It's crooked."

As I learn to do more ruler work I watch You Tube videos to see new designs and techniques. I came across an Angela Walters video while making the Log Cabin blocks that seemed to be the perfect way to quilt these blocks:

Square Spiral by Angela Walters. I liked how simple it was to execute, no marking at all, and my favorite ruler, The Line Tamer by Four Paws Quilting would work perfectly.

I did connect the X in the middle of the red square to the four sides of the red square when I noticed on the back that the X was just hanging there if  I didn't go around the red square. This involved backtracking on one line of stitching the red square and I did that pretty well most of the blocks--one start, one stop for each block:


The back:


I did a simple half circle Amish-style border design, one I enjoy hand quilting too. It was easy to stitch, using a 6" circle template--the only marking was a chalk line down the center of the border so I could place the template correctly. I took no time to figure out the corners so each is "unique":


I put the binding and sleeve on by machine then hand stitched it down on the back. It still needs a label, that is tomorrow's task.

Today I made another sample, a "Flip N Sew Throw", that is pieced and quilted at the same time:


Starting with one yard of back fabric and a crib size batt, I worked from the middle out, laying two strips right sides together, then sewing through all the layers: 2 strips, batt, and back. When both sides of the middle strip were sewn, I pressed them over onto the batt, then added the next two strips, on either side:

The Line Tamer ruler, placed so the needle is 1/4" from the raw edges
By using the Bernina Q20 sit down long arm machine, I had the speed of free motion and enjoyed the 78" of table space I have when both table extensions are in place. It only took a few hours to completely cover the batt/back. Fast and easy.
Working out from the white center strip

I only used pins to keep the strips in place until the ruler was put on top of that area 

This still needs a label--tomorrow. I applied the binding to the back, brought it around to the front, and stitched it in place by machine--fast and secure for a baby quilt:


These strips were cut 2" wide and no additional quilting is necessary--unless I want to add more. Some time ago I did a tutorial for this method, using wider strips because I needed a larger quilt for a relative going to chemo treatments:  Snuggly Cuddly Strippy Quilt. This project is great for charity quilts, baby quilts, wheelchair quilts, any time you need a simple, easy pattern. Just choose the batt size you want to cover, make a back that same size, and cut strips in your choice of width and length, to cover the batt/back.

The delightful Stella came to visit this weekend and we had fun with her. She is 26 months old and strings more words together than just 6 weeks ago when we saw her last, like "No, Pop Pop, no help, I do it!"  And she is a techno-baby:


She knows how to "swipe right", which icon is the Photos file, where she can find Instagram videos, it's scary-amazing. My husband erased 300 "photos" from his phone that she took, she's good with the Burst button. She rarely holds still for a photo with BB but I managed to grab one:


Now I'm on to a bed-size class sample, that's this week's job.

Let's Quilt!

Barbara