Showing posts with label pieced quilts. Show all posts

Sunday, August 10, 2025

SUNDAY LARGER QUILTS FOR SALE

 Last week I offered 10 small quilts for sale. Find that post HERE. Today there are larger quilts available for new homes.

Is there such a thing as TOO MANY QUILTS? Why, yes, there is. When the shelves are stacked full it's time to lighten the load. Here are a variety of quilts for sale, medium throw to bed size. Some are past class samples, some are original designs, some are patterns I tried out, some are just ready to find a new home.

Priced to move, most less than 5 cents a square inch. Shipping is extra. Payment can be cash, PayPal, or check (if I know you). I hope you find something you like. Comment below if you see something you want or send an email, easy to do through the link in my profile.

Here are 7 LARGER QUILTS  CLICK ON PHOTOS TO ENLARGE:

1. HUMMINGBIRD HOLLOW: 73" X 92", started by the late Janet Noever, a friend who planned hundreds of quilts in her long life. Machine pieced and quilted by me. Bed quilt or hanging. Includes hanging sleeve. $350


2. JANET'S HAPPY VILLAGE: 44.5" x 78.5" another started by the late Janet Noever. I completed it with machine piecing and quilting. A great kids quilt. The panel reads "HOME IS WHERE YOUR STORY BEGINS". Includes hanging sleeve. $250  SOLD


The BACK is almost as fun as the front:


3. AFTERNOON DELIGHT IN Red White and Blue: 47.5" x 67". Sampler blocks for Afternoon Delight year long quilt instruction. Machine pieced, raw edge applique, needle turn hand applique, substantial Ruler Work machine quilting, free motion machine quilting. Includes hanging sleeve. $300 SOLD


Detail shot:


4. HALF LOG CABIN:  60" x 76". One of my early quilts, 1995, machine pieced by me, hand quilted by a friend. A little minor fading on one corner, see detail. Includes hanging sleeve. $250 

detail of hand quilting and shows minor fading on the edge


5. PANDEMIC PARADOX:  47" x 47" My COVID Quilt. The words around the borders say "If Viruses were NEON GREEN, then all could quickly see, Who to Avoid -- this COVID Mess, and we would all be Free!" Just a fun project during the pandemic, using some of my favorite Batik fabrics and one pesky NEON GREEN in each group. Original Design. Machine pieced, needle turn hand appliqued, machine quilted with Ruler Work. This quilt has never been on display. Includes hanging sleeve. $150 


6. BITCOIN:  64" X 64". Totally scrappy quilt, pattern by Bonnie Hunter. Machine pieced and quilted by me. Great kids quilt or sofa throw or picnic quilt. $175.  SOLD

7. SPELLBOUND:  64" x 81". While this quilt looks simple it took a lot of time to make, cutting specific fabrics specific lengths and in 3 different widths. Pattern by Calico Carriage Quilt Designs, fabrics are blue and white Shibori dyed designs. Machine pieced by me. A wide variety of Ruler Work machine quilting designs were used by me for the quilting.  Includes a hanging sleeve. $375 SOLD


Detail shot


PLEASE SHARE THIS POST with everyone you know who might be interested. It is very easy to SHARE using the icons at the bottom of this post:

That's it for SALE QUILTS for a while. I am working on several new projects at the moment.

Let's quilt.

Barbara


Sunday, March 16, 2025

MY JOYFUL JOURNEY RETREAT #6

 After much preparation and planning, the recent Joyful Journey Retreat #6 is over. It was very successful, with 16 happy attendees, Wednesday to Sunday:

Red Rooster Retreat Center is in Crane Hill, AL, about an hour and a half from my home. Good GPS helps to find it:


You know you are there when you see the Red Rooster:


Here are the best things about a Retreat:

1. The FRIENDS--6 new quilters joined us this time and immediately felt welcome and part of the "Tribe". New friendships were formed. Old friendships were renewed.

2. The FOOD: any meal I don't have to plan, prepare, serve and clean up is a great meal to me. Just a few of the meals I indulged in:

At home, I might have one glass of wine a week. Here I drank the bottle--with a good bit of Sprite to offset the not-sweet-enough-for-me bottle I brought. No rotary cutting after imbibing...

The Menu board was fun to read in line for our meals

Chicken Broccoli Cheese in a delicious dough

Chicken Chimichanga with all the usual fixings for Mexican night

Breakfast--my favorite meal of any day

TRUTH: I came home up 8 pounds--thanks in part to dessert at every meal, which I rarely have. And I ate my weight in homemade Chocolate Chip Cookies that were worth every calorie--thanks, Kathy and Sue! It took 5 days at home, back on track, to get rid of those pounds.

I did power walk every day. The terrain is very hilly, and really steep in several places. An hour and a half of Hill Work, had me burning lots of calories. The day I did the most hill work my fitness app said I climbed 47 flights of stairs--most days it was 30 flights.

The first day was chilly so I was bundled up:


3. For me, the TEACHING. I want to spend my days teaching what I have learned as a quiltmaker over 40 years to those who want to learn. Most of the attendees opted to learn to make the Lone Star from the pattern Oh My Stars, completely optional. We spent the first full day on that and everyone got a star done:

My big one, 97" square, still working on the binding--Kris can attest it's heavy!
My small sample-- enough to learn the block. We also did an optional Tiny Star Swap, each of us got 60 stars to use as we choose later

Student Stars after day One--great job, everyone!


4. For everyone, the TIME AWAY from our usual daily duties to just be creative. The rest of the week everyone kept "pedal to the metal", getting projects done or farther along. Here are just a few of projects that we got to enjoy:

Suzie is working on English Paper Piecing, which she claims not to enjoy...

But she kept going--many of these little blocks were done. The book is Alice's Wonderland Sampler Quilt


Lori attended her first Retreat ever and was the first to hang a quilt over the rail--Two For One she started last year in a class I taught locally--I am teaching this next week in Austin TX and the week after at Empty Spools Seminar in CA


Cyndi's quilt inspired by Laurel Ridge just blows me away! 


Julie got her star done

Julie finished her version of Charming Sampler, the quilt I designed and taught at our FIRST retreat, March 2020. It has become one of my most popular workshops chosen by guilds all over

Julie really worked hard to get the first Quadrant of Full Circle done--this I taught to 6 willing "testers" at our Retreat in 2023. She is designing a lot of the arcs with a Pittsburgh theme--can you see the 3 Bridges that cross the 3 Rivers in Pittsburgh? Amazing work!


Glenda was the newest quilter. She chose to learn how to set in the star with Y seams when everyone else learned the "easy" way. 


Glenda also wanted to learn to bind a quilt herself. And so she did!

Janey, Suzie, Cheryl

Conna worked on a long time project--only borders left to go!

Sue made this for an Air Force Veteran--the rank insignia and the name tags are from the veteran's uniforms--sure to be a well-loved gift!


I tried to get photos of everyone:
Cyndi, Kathy, Lori, Sue

Susan, Beverly, Suzie, Maureen

Lisa got her star done!

Cheryl was at our first Retreat in 2020 then family life stepped in. I was thrilled to have her back. Here is the photo we got this year and at the first retreat.  We have held up well!


The Over the Railing shot:


All in all, it was a great 5 days. Lots of laughter, learning and love. Plans for next year are fluid at the moment. These wonderful women will get first chance of signing up for the next Retreat. And the waitlist is growing for any spots that may open. Who wouldn't want to escape from the day-to-day to sew to your heart's content?!

Let's quilt.

Barbara


Sunday, January 12, 2025

MY FAVORITE THINGS -- AND PEOPLE!

 As this posts I am flying west to Sacramento to Lecture and teach Western Sun to the Folsom Quilt and Fiber Guild.

In keeping with last week's post about Color and Fabric Choices, let's review an earlier post about a terrific class I taught 6 years ago, MY FAVORITE THINGS:

My Sample, still a top, 65" x 76"

Taught over 6 months as a Lecture/Demo class, the students met for 2 hours monthly and did all their sewing at home. Each month I taught a few blocks, different sizes, different techniques, they got to learn in person but play with their fabrics at home. There was much sharing of ideas and suggestions and the class was a big success. 

This became one of my Most Favorite classes to teach and some of my most Favorite PEOPLE!

Here are some of the projects from that class. You can really see how different the same quilts can look with different fabric choices:

Cyndi

Holly

Kathy

Phyllis

Sally

Suzanne

Let's quilt.

Barbara

Sunday, March 5, 2023

QUILTERS SELECT 60 DEGREE TRIANGLE RULER

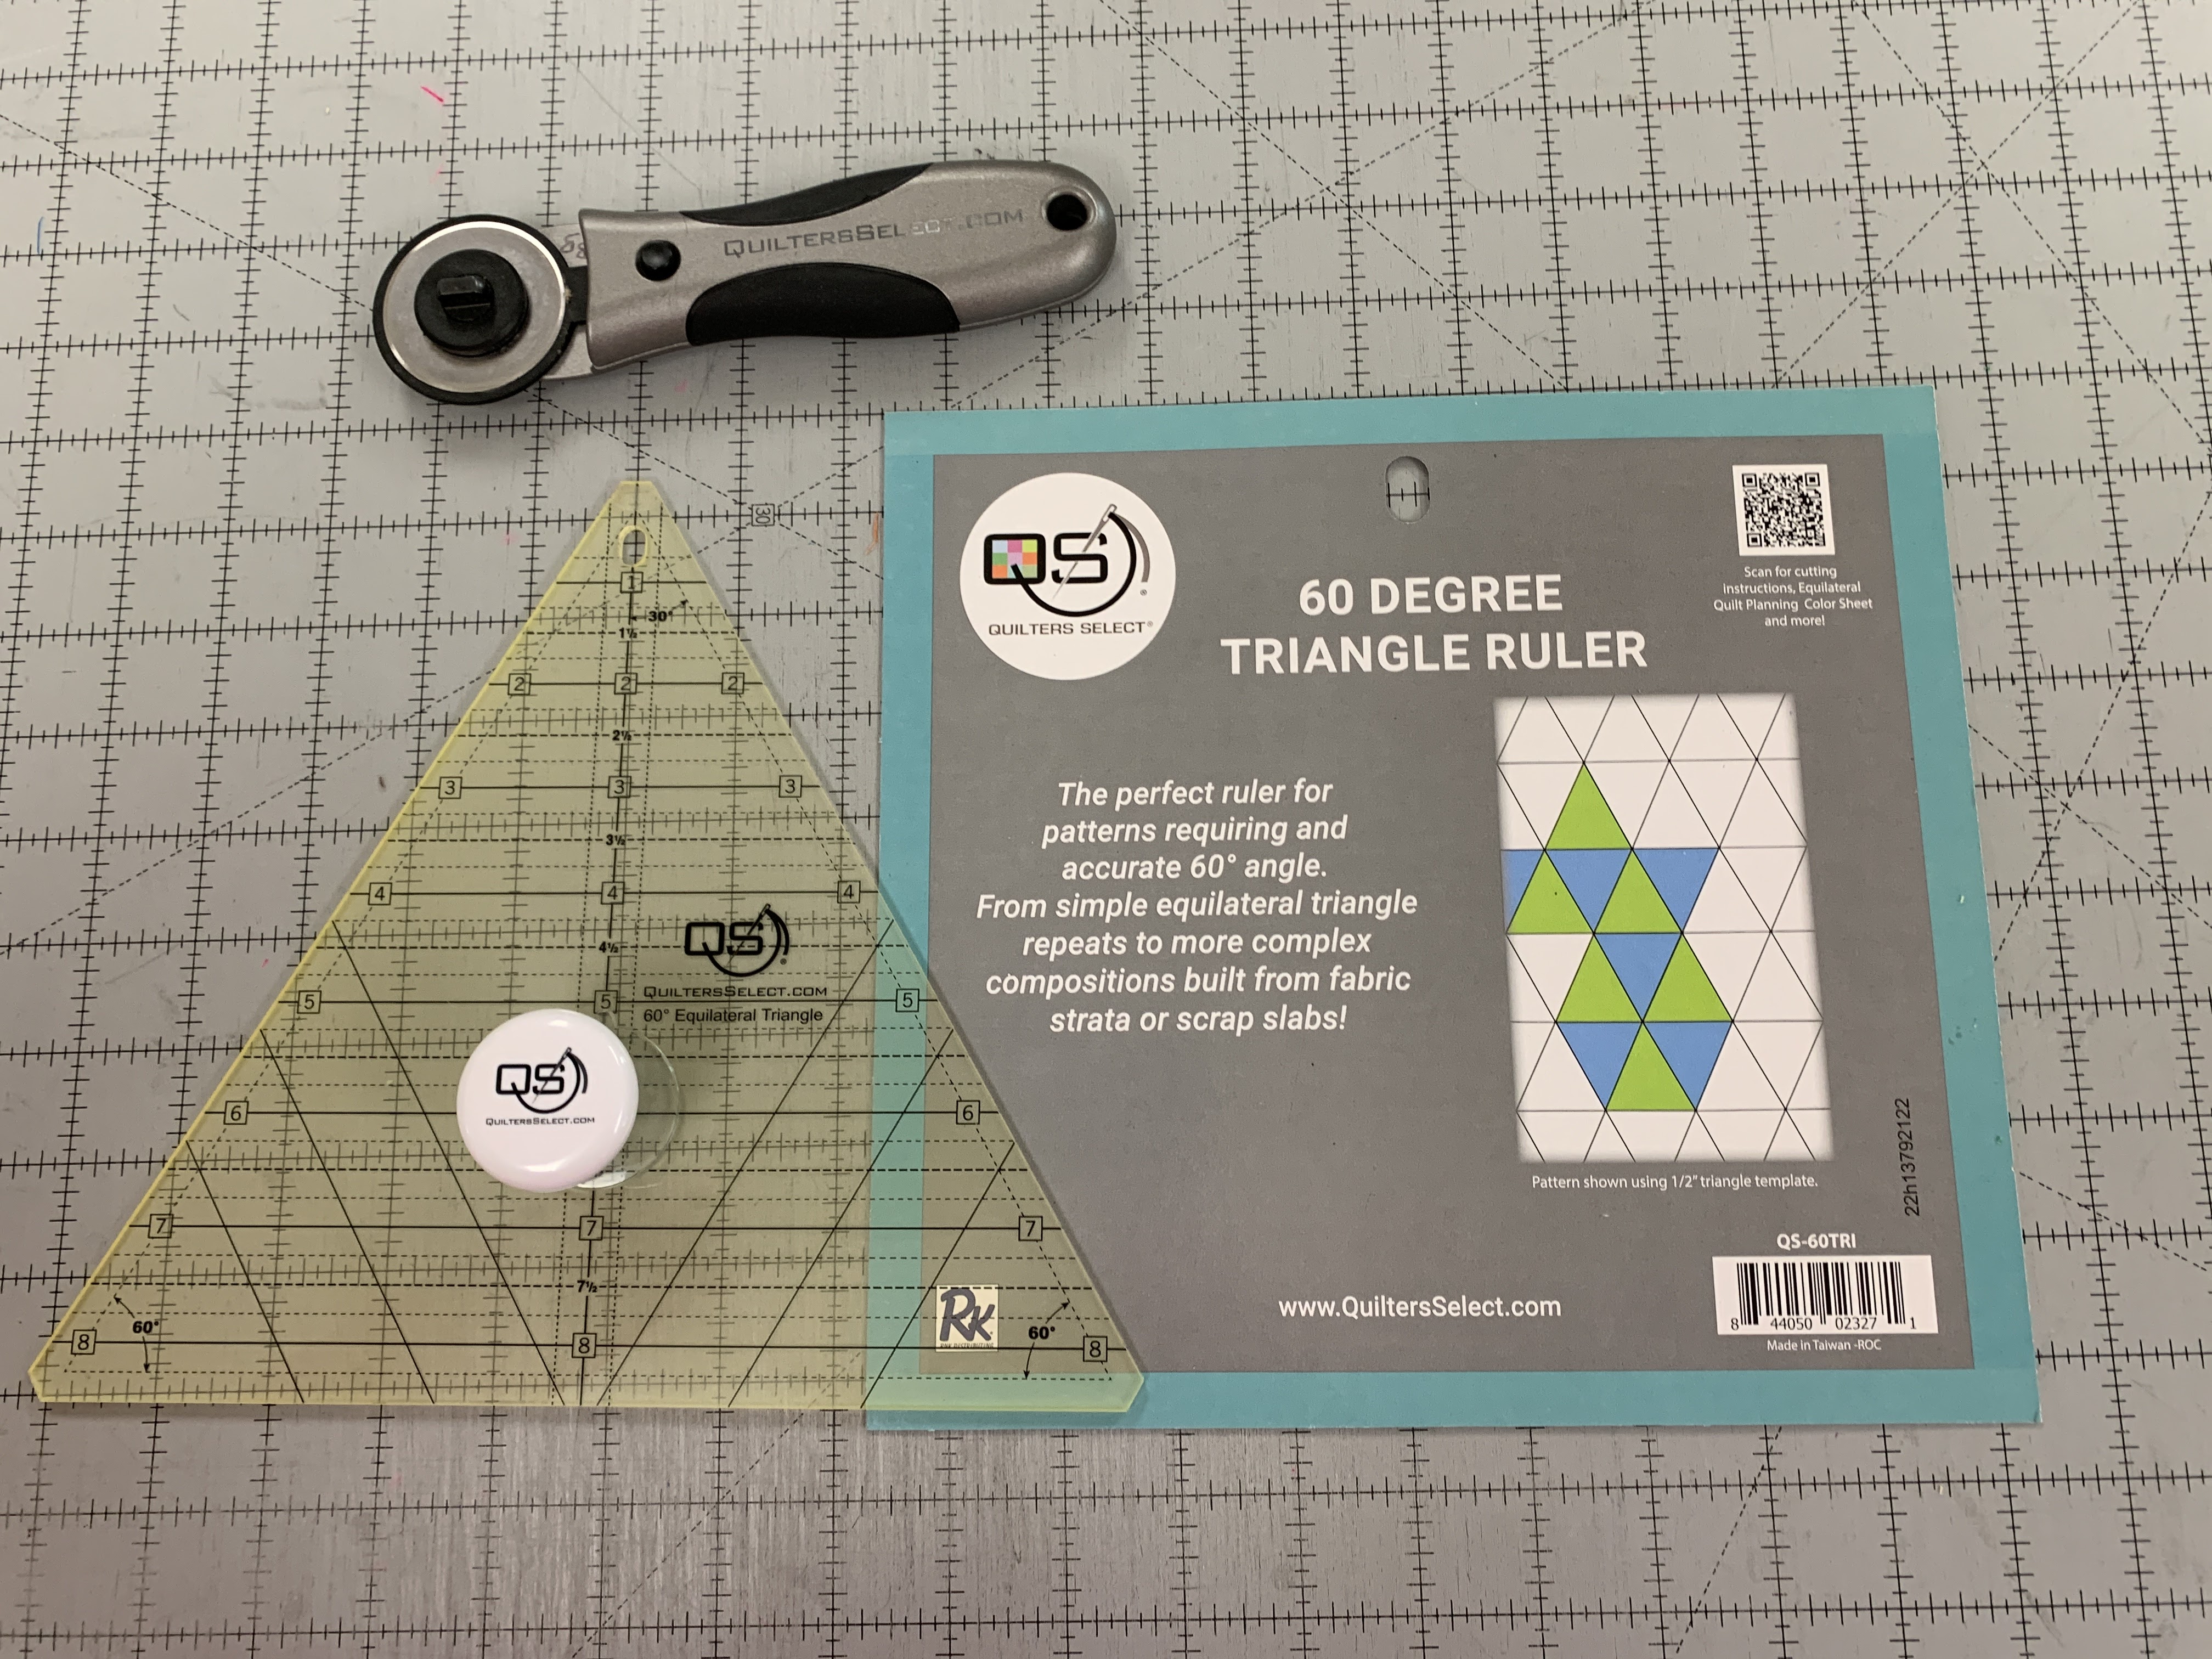
Recently I was asked to make two videos for Quilters Select rulers: the 3n1 Half Square Combo Ruler and the 60 Degree Triangle ruler. They sent me the rulers and I got to work. I wrote about the very useful 3N1 Half Square Triangle Ruler     HERE

The QR code on the package makes it easy to find the instructions and projects on the Quilters Select website. Using a fun knob handle on these rulers helps preserve the original non-slip coating. Our hands naturally have oils, maybe hand cream, maybe sanitizer. It really helps to preserve the coating by using a handle.

Let's take a look at the 60 Degree Triangle Ruler:

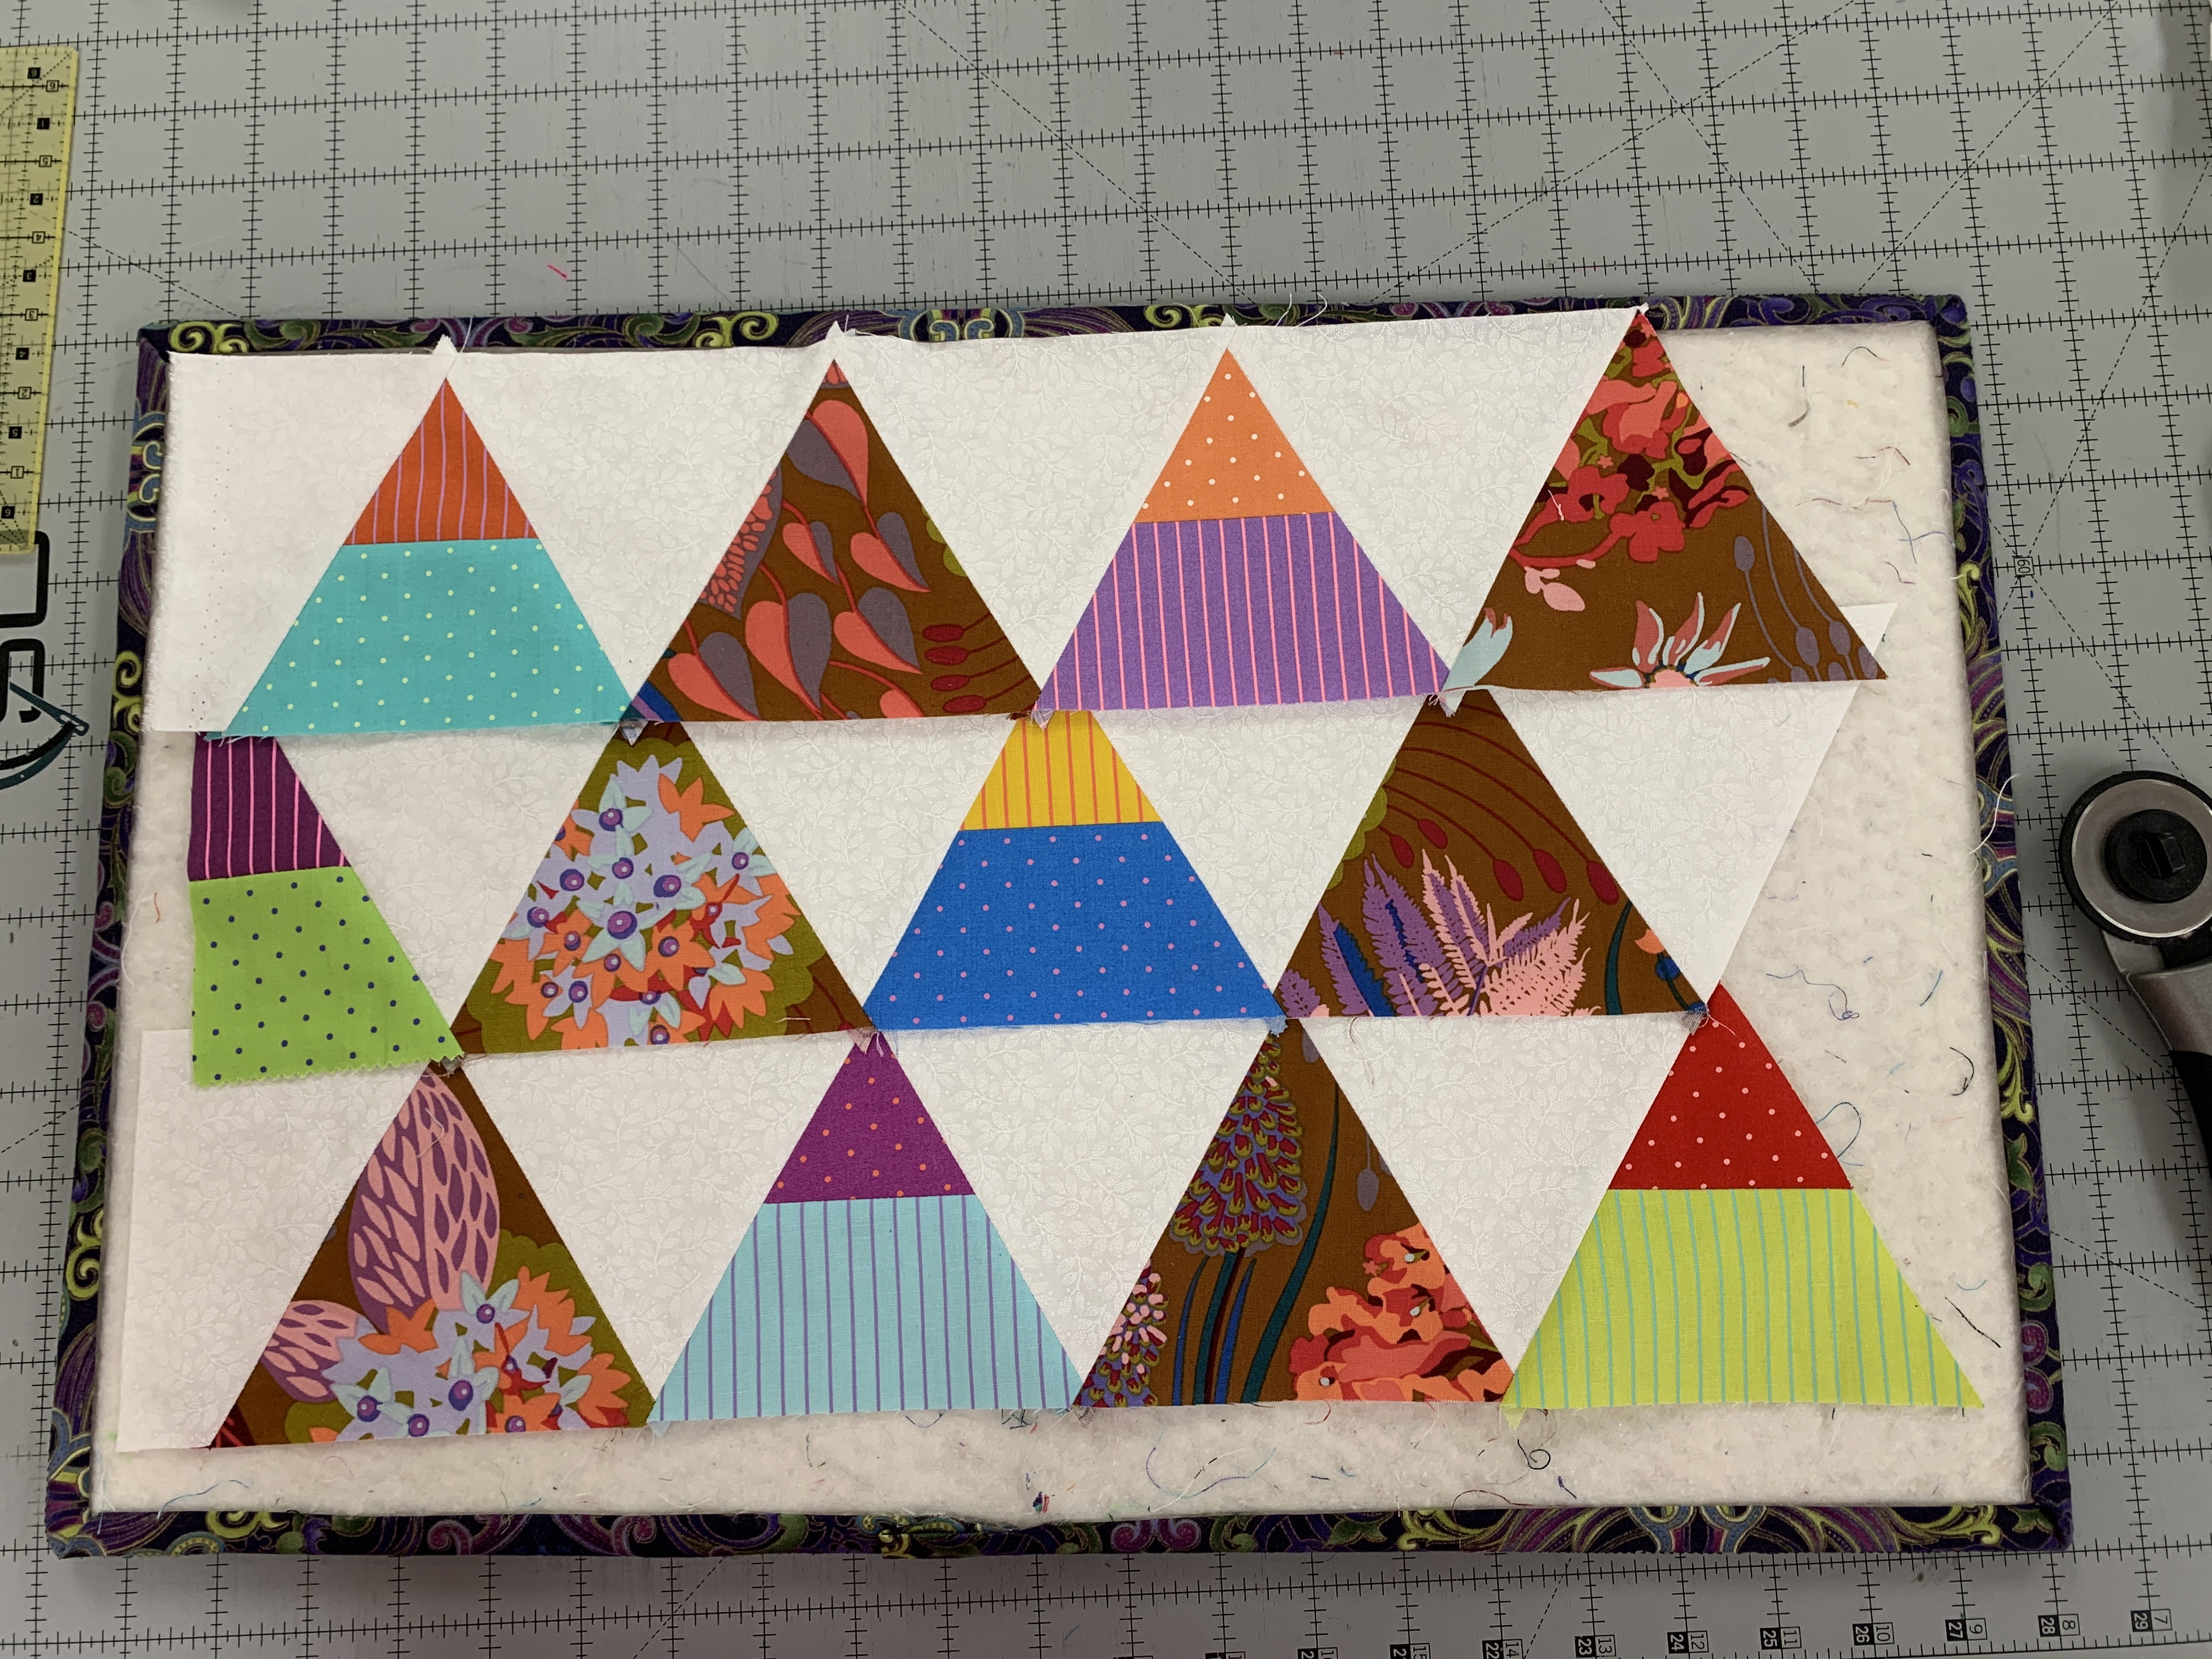
Most quilters are very familiar with squares, 90 degree and 45 degree angles. 60 degree shapes seem to have a reputation for being "difficult".  With quality tools, they don't have to be. Here is just one possible layout/design, using 60 degree triangles:

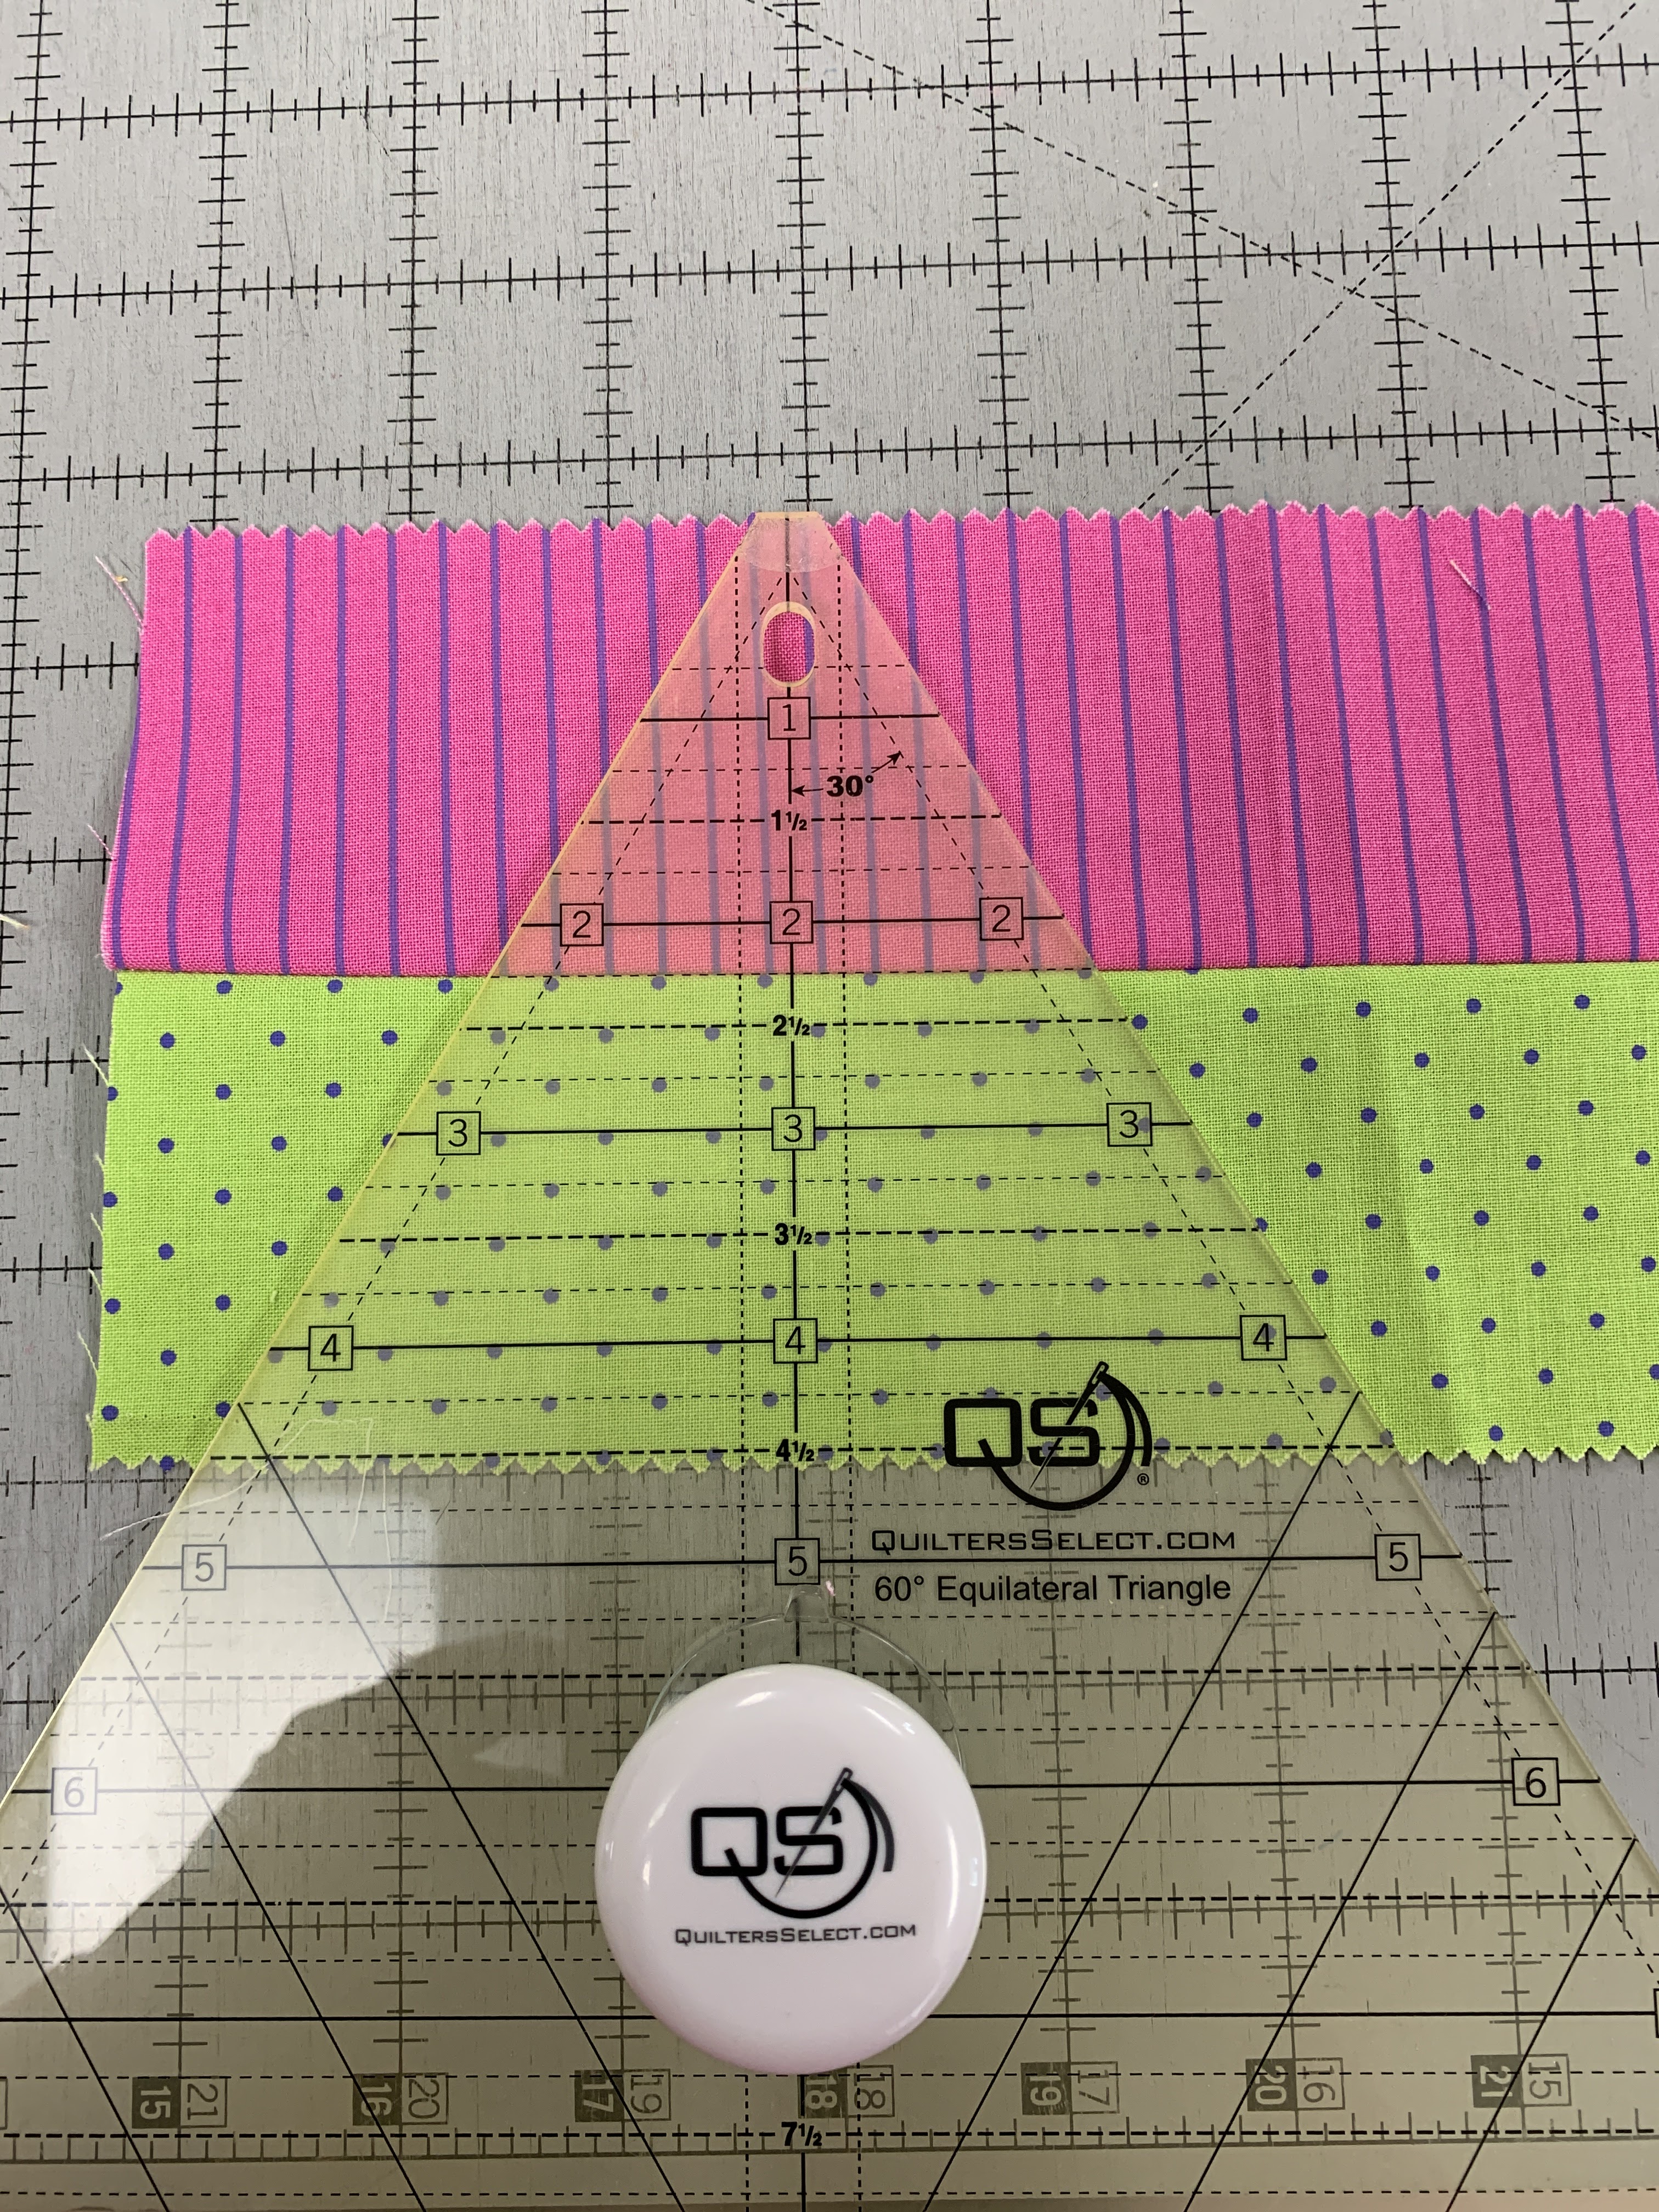
The math to use this ruler for quick and accurate cutting of 60 degree triangles is simple: What is the finished height of the triangle you want, from center point to the base? Finished means when the shape is sewn into the block. Add 1/2" to that measurement and that is the size strip to cut.

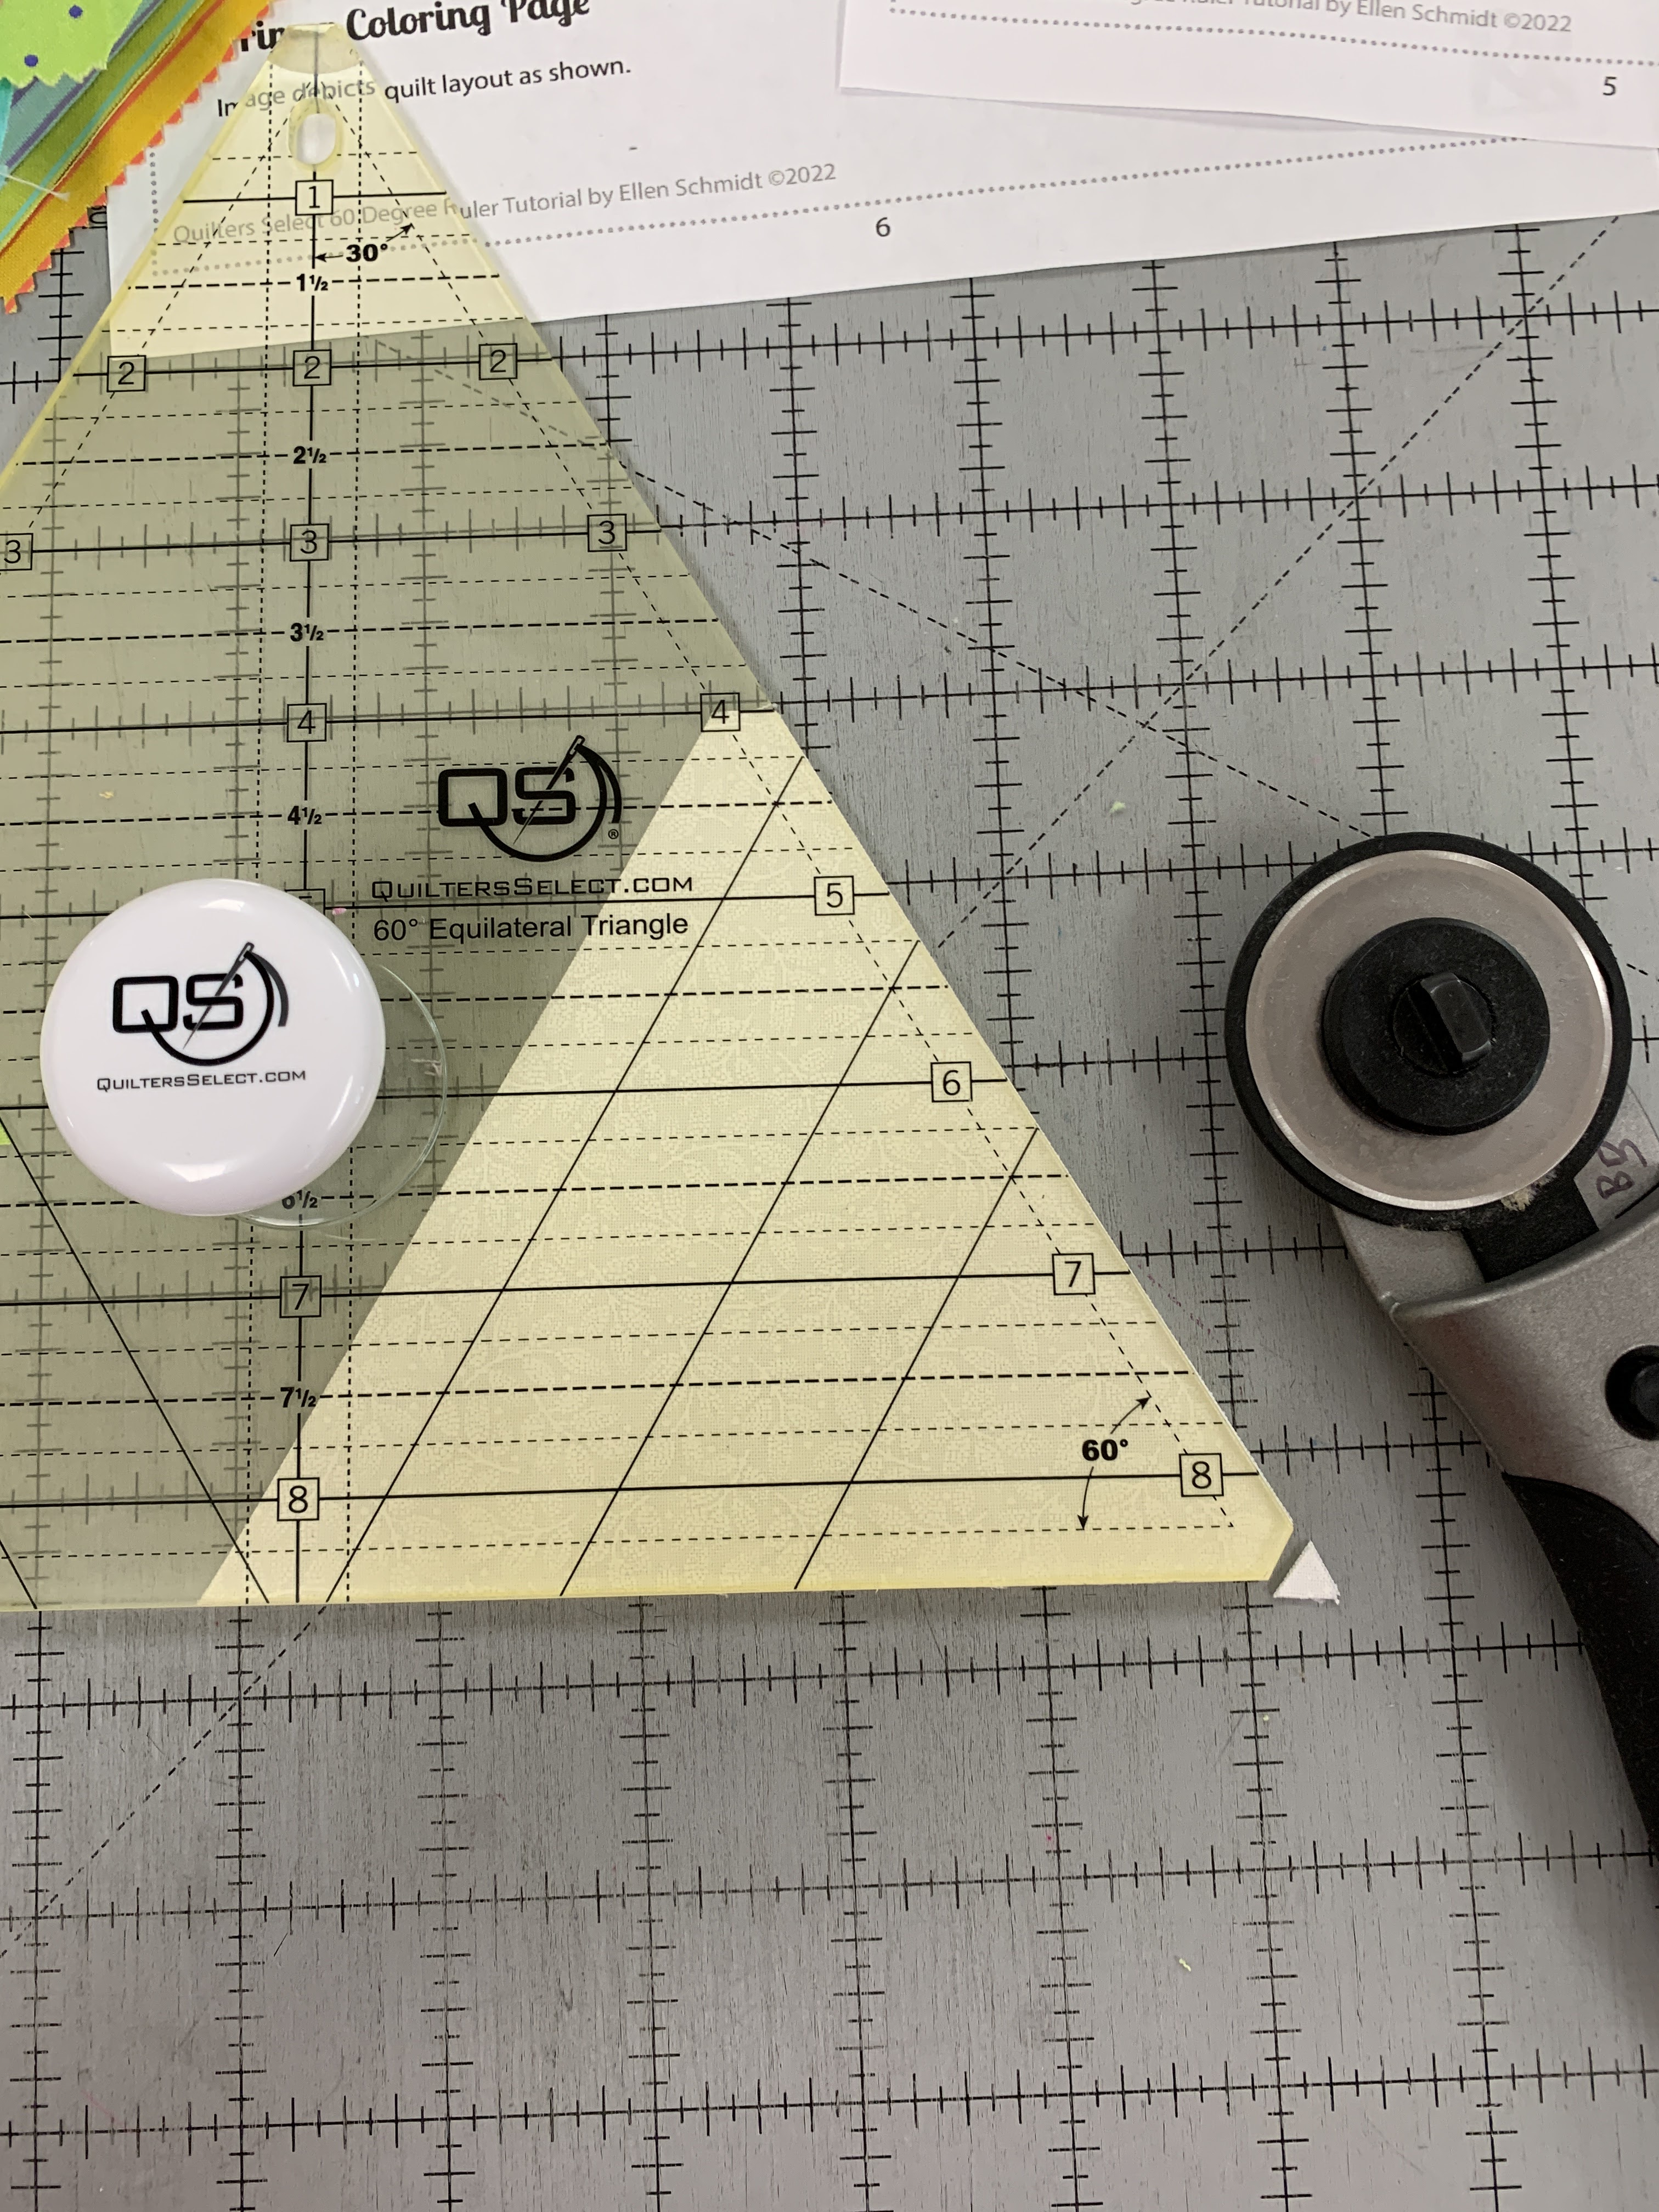
I started with leftover jelly roll strips, those are 2 1/2" wide. I joined two on the long seam and pressed it open. I could have trimmed it to exactly 4 1/2" but decided to cut first, trim second. Next time I will trim the strip to exactly 4 1/2" FIRST:


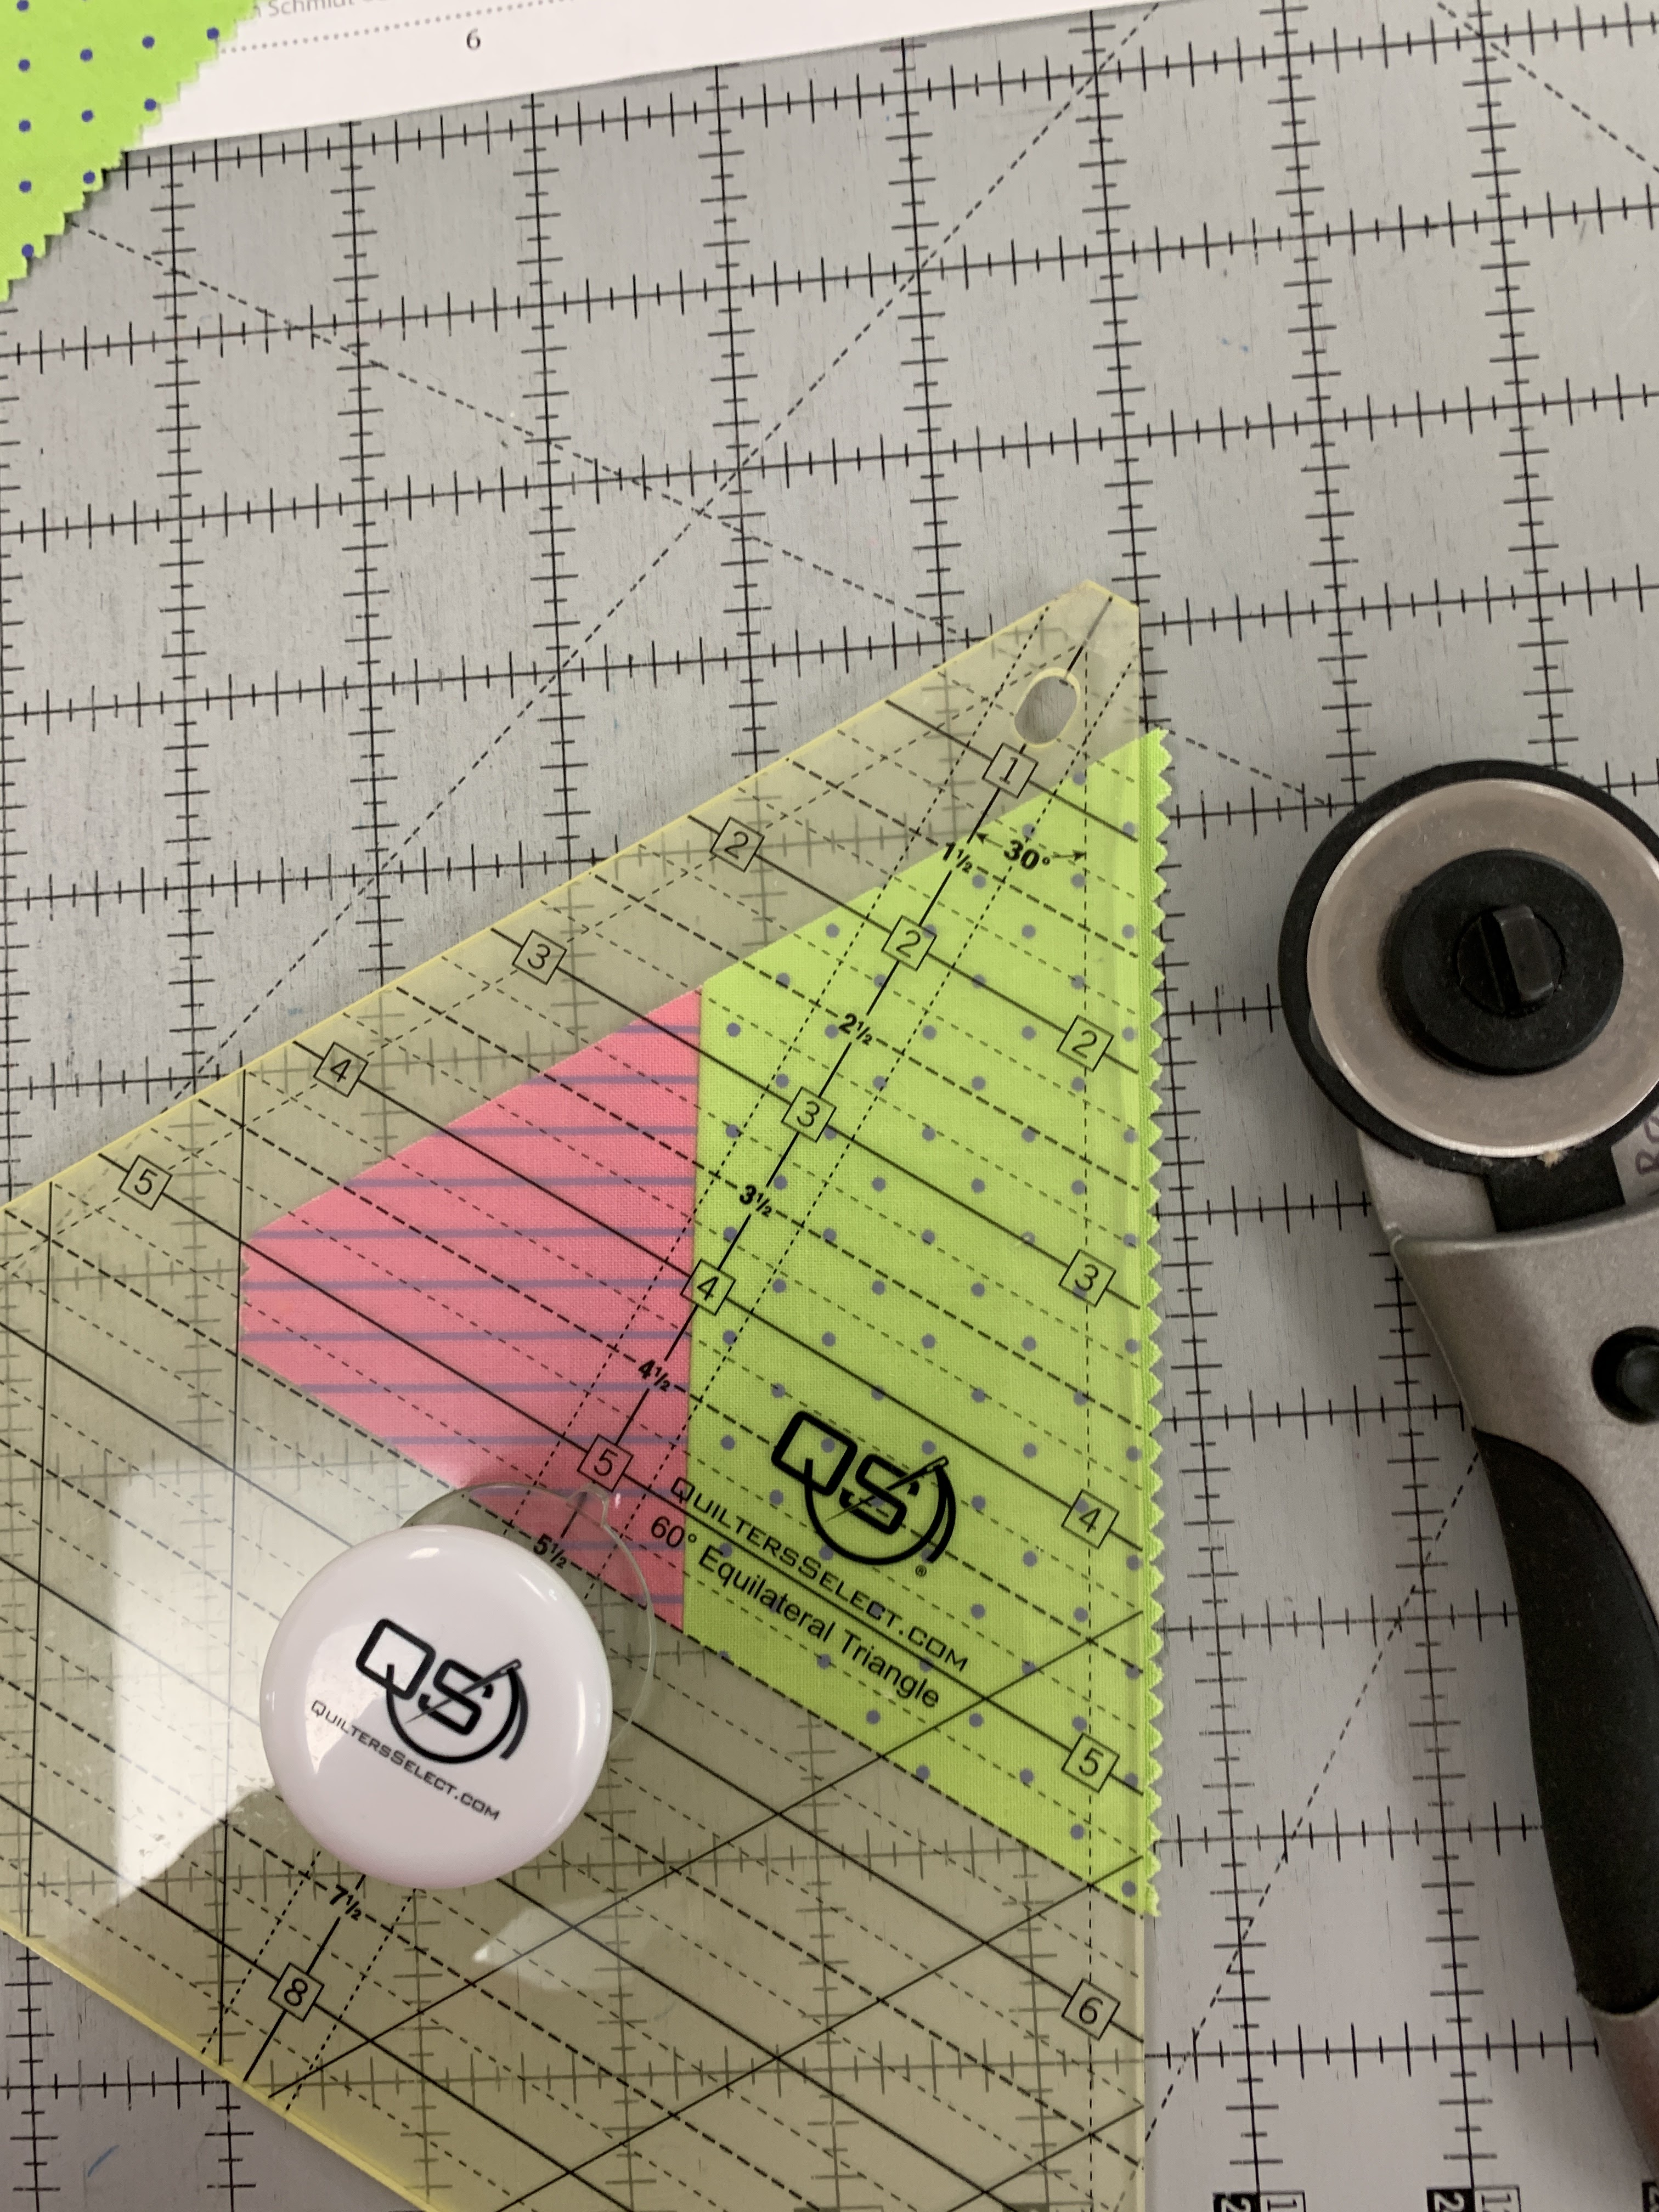
Because of the pinked edges, I made sure each triangle was exactly 4 1/2" high by using the line on the ruler that allowed me to cut the bottom edge, now the triangle is 4 1/2":


If you like, you can use the blunted corners of the ruler to eliminate the point. This does make it a bit easier to align the triangles EXACTLY where they go. If you are new to 60 degree shapes, I recommend this:

But because the top point is automatically eliminated during the cutting, placement for sewing is very easy. I found I didn't need to take the time to clip off the other two points. Here the underneath point on the left is still there:


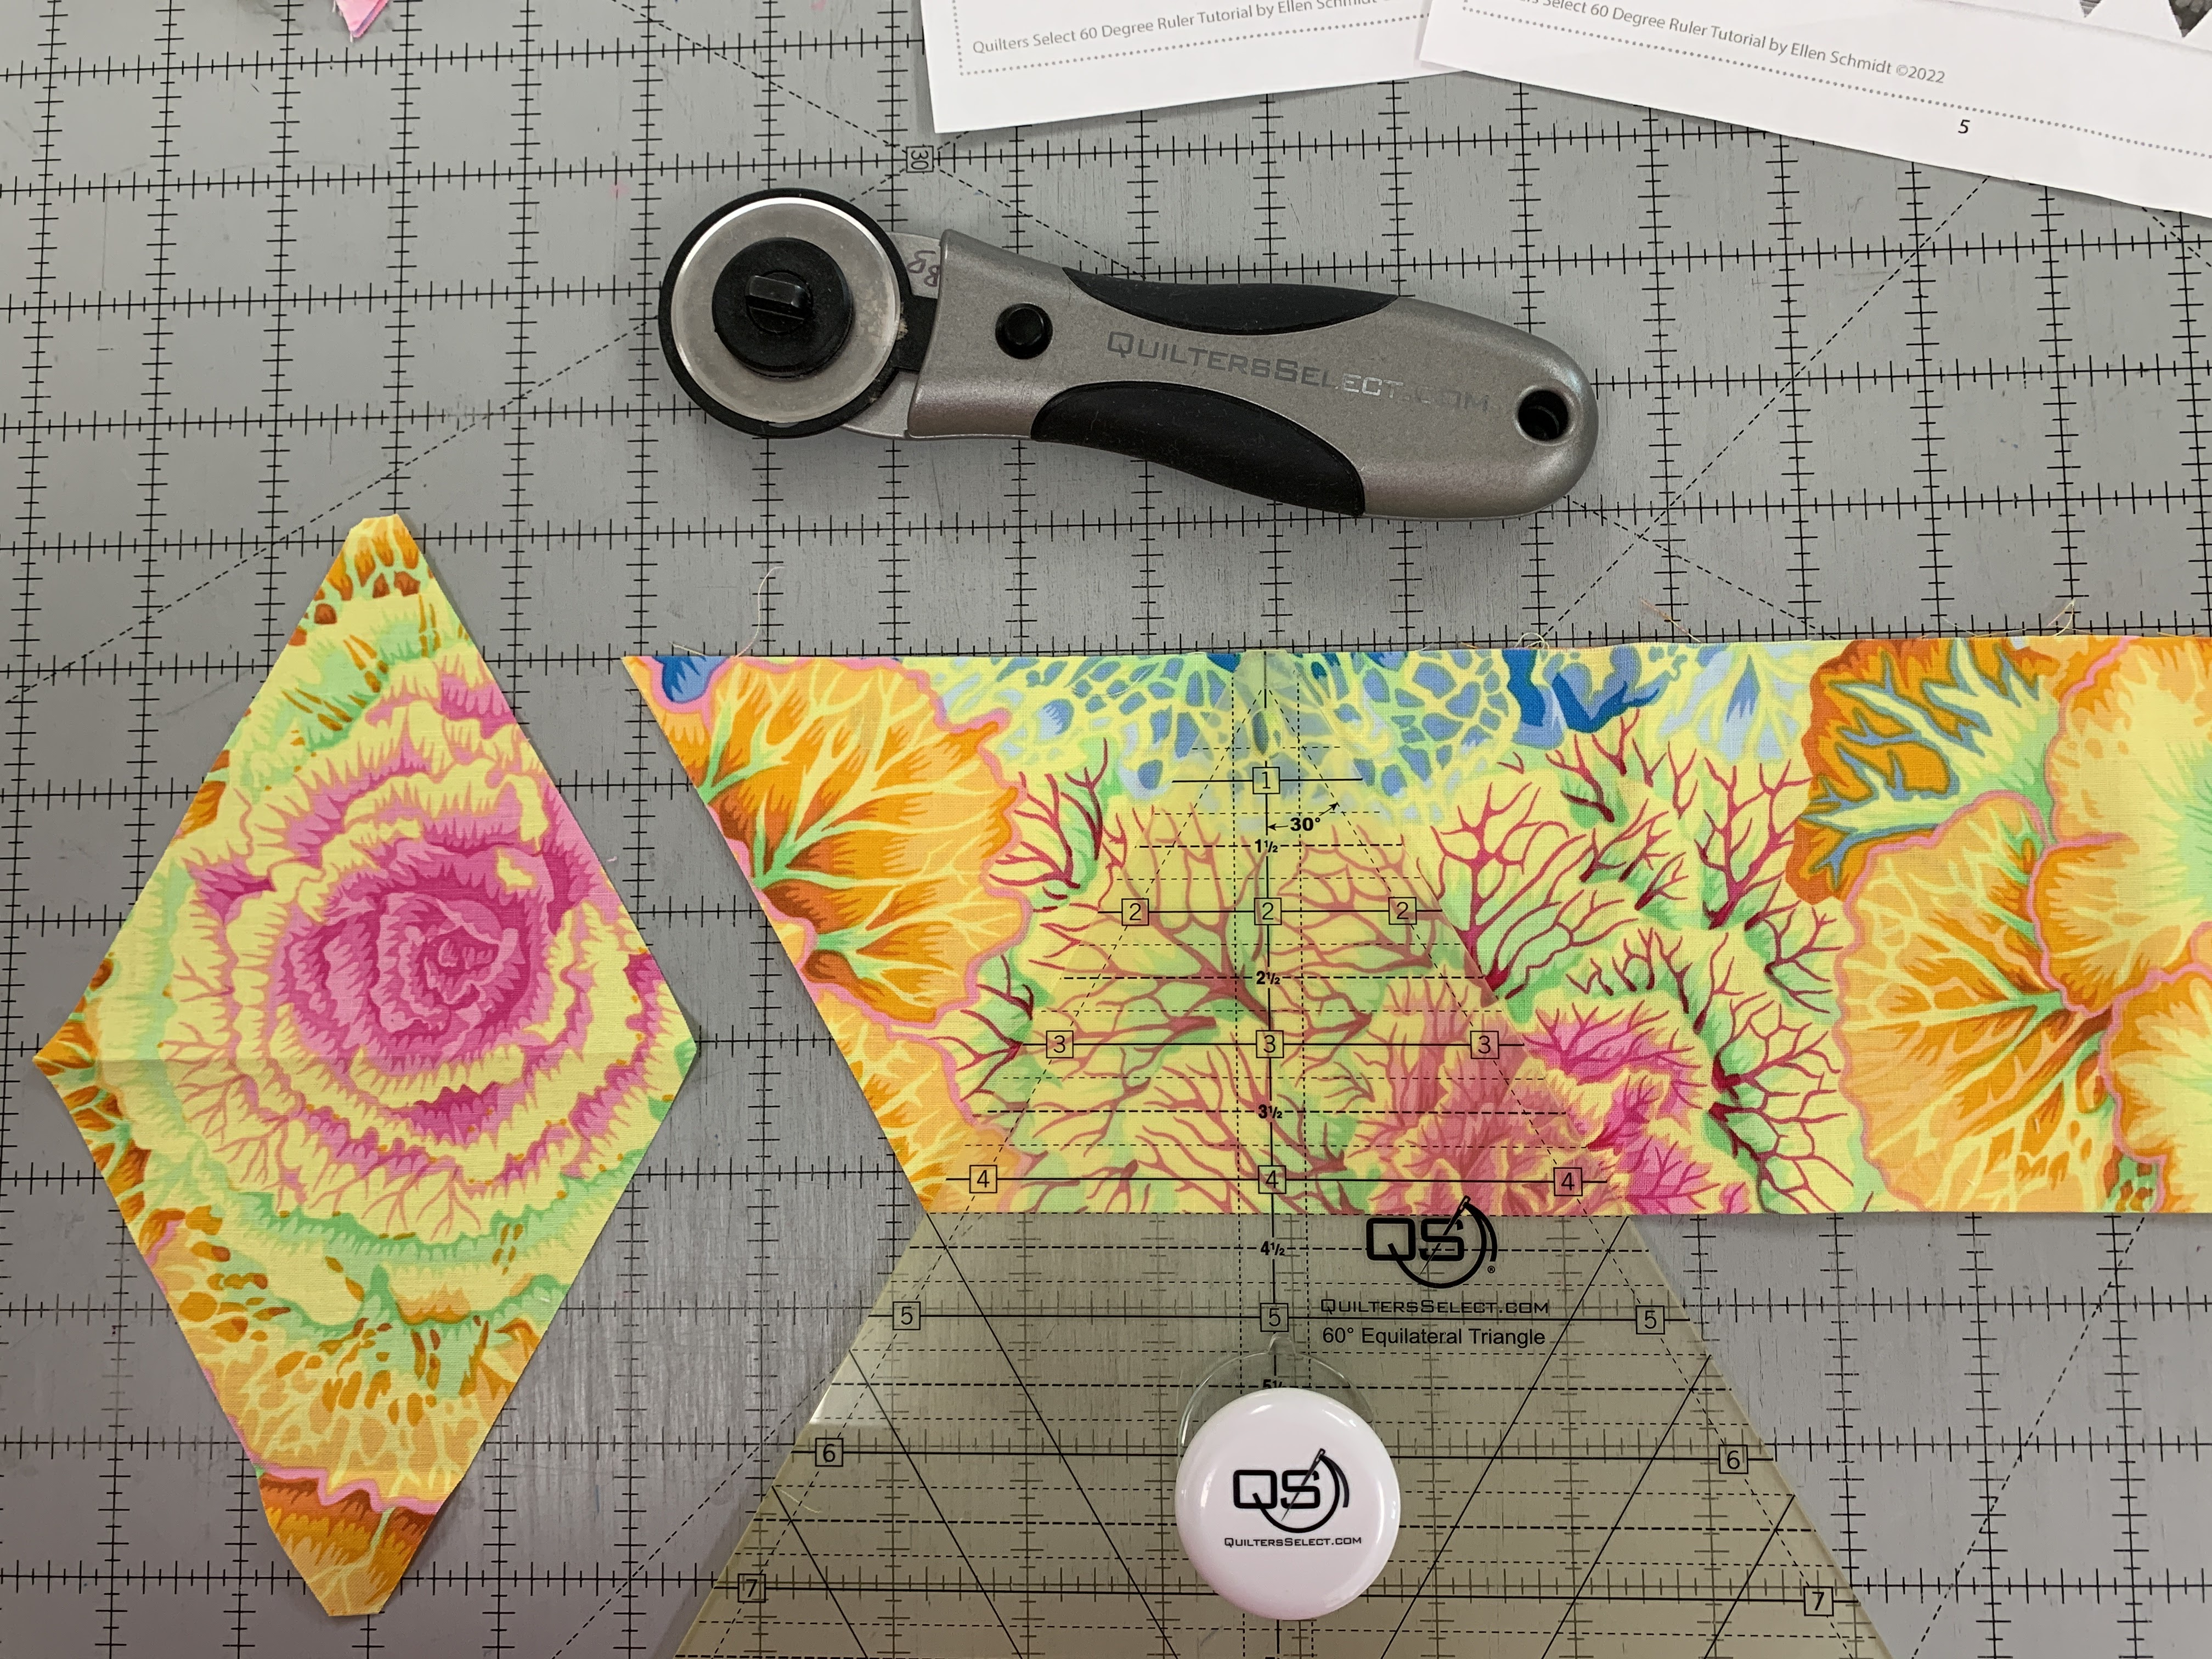
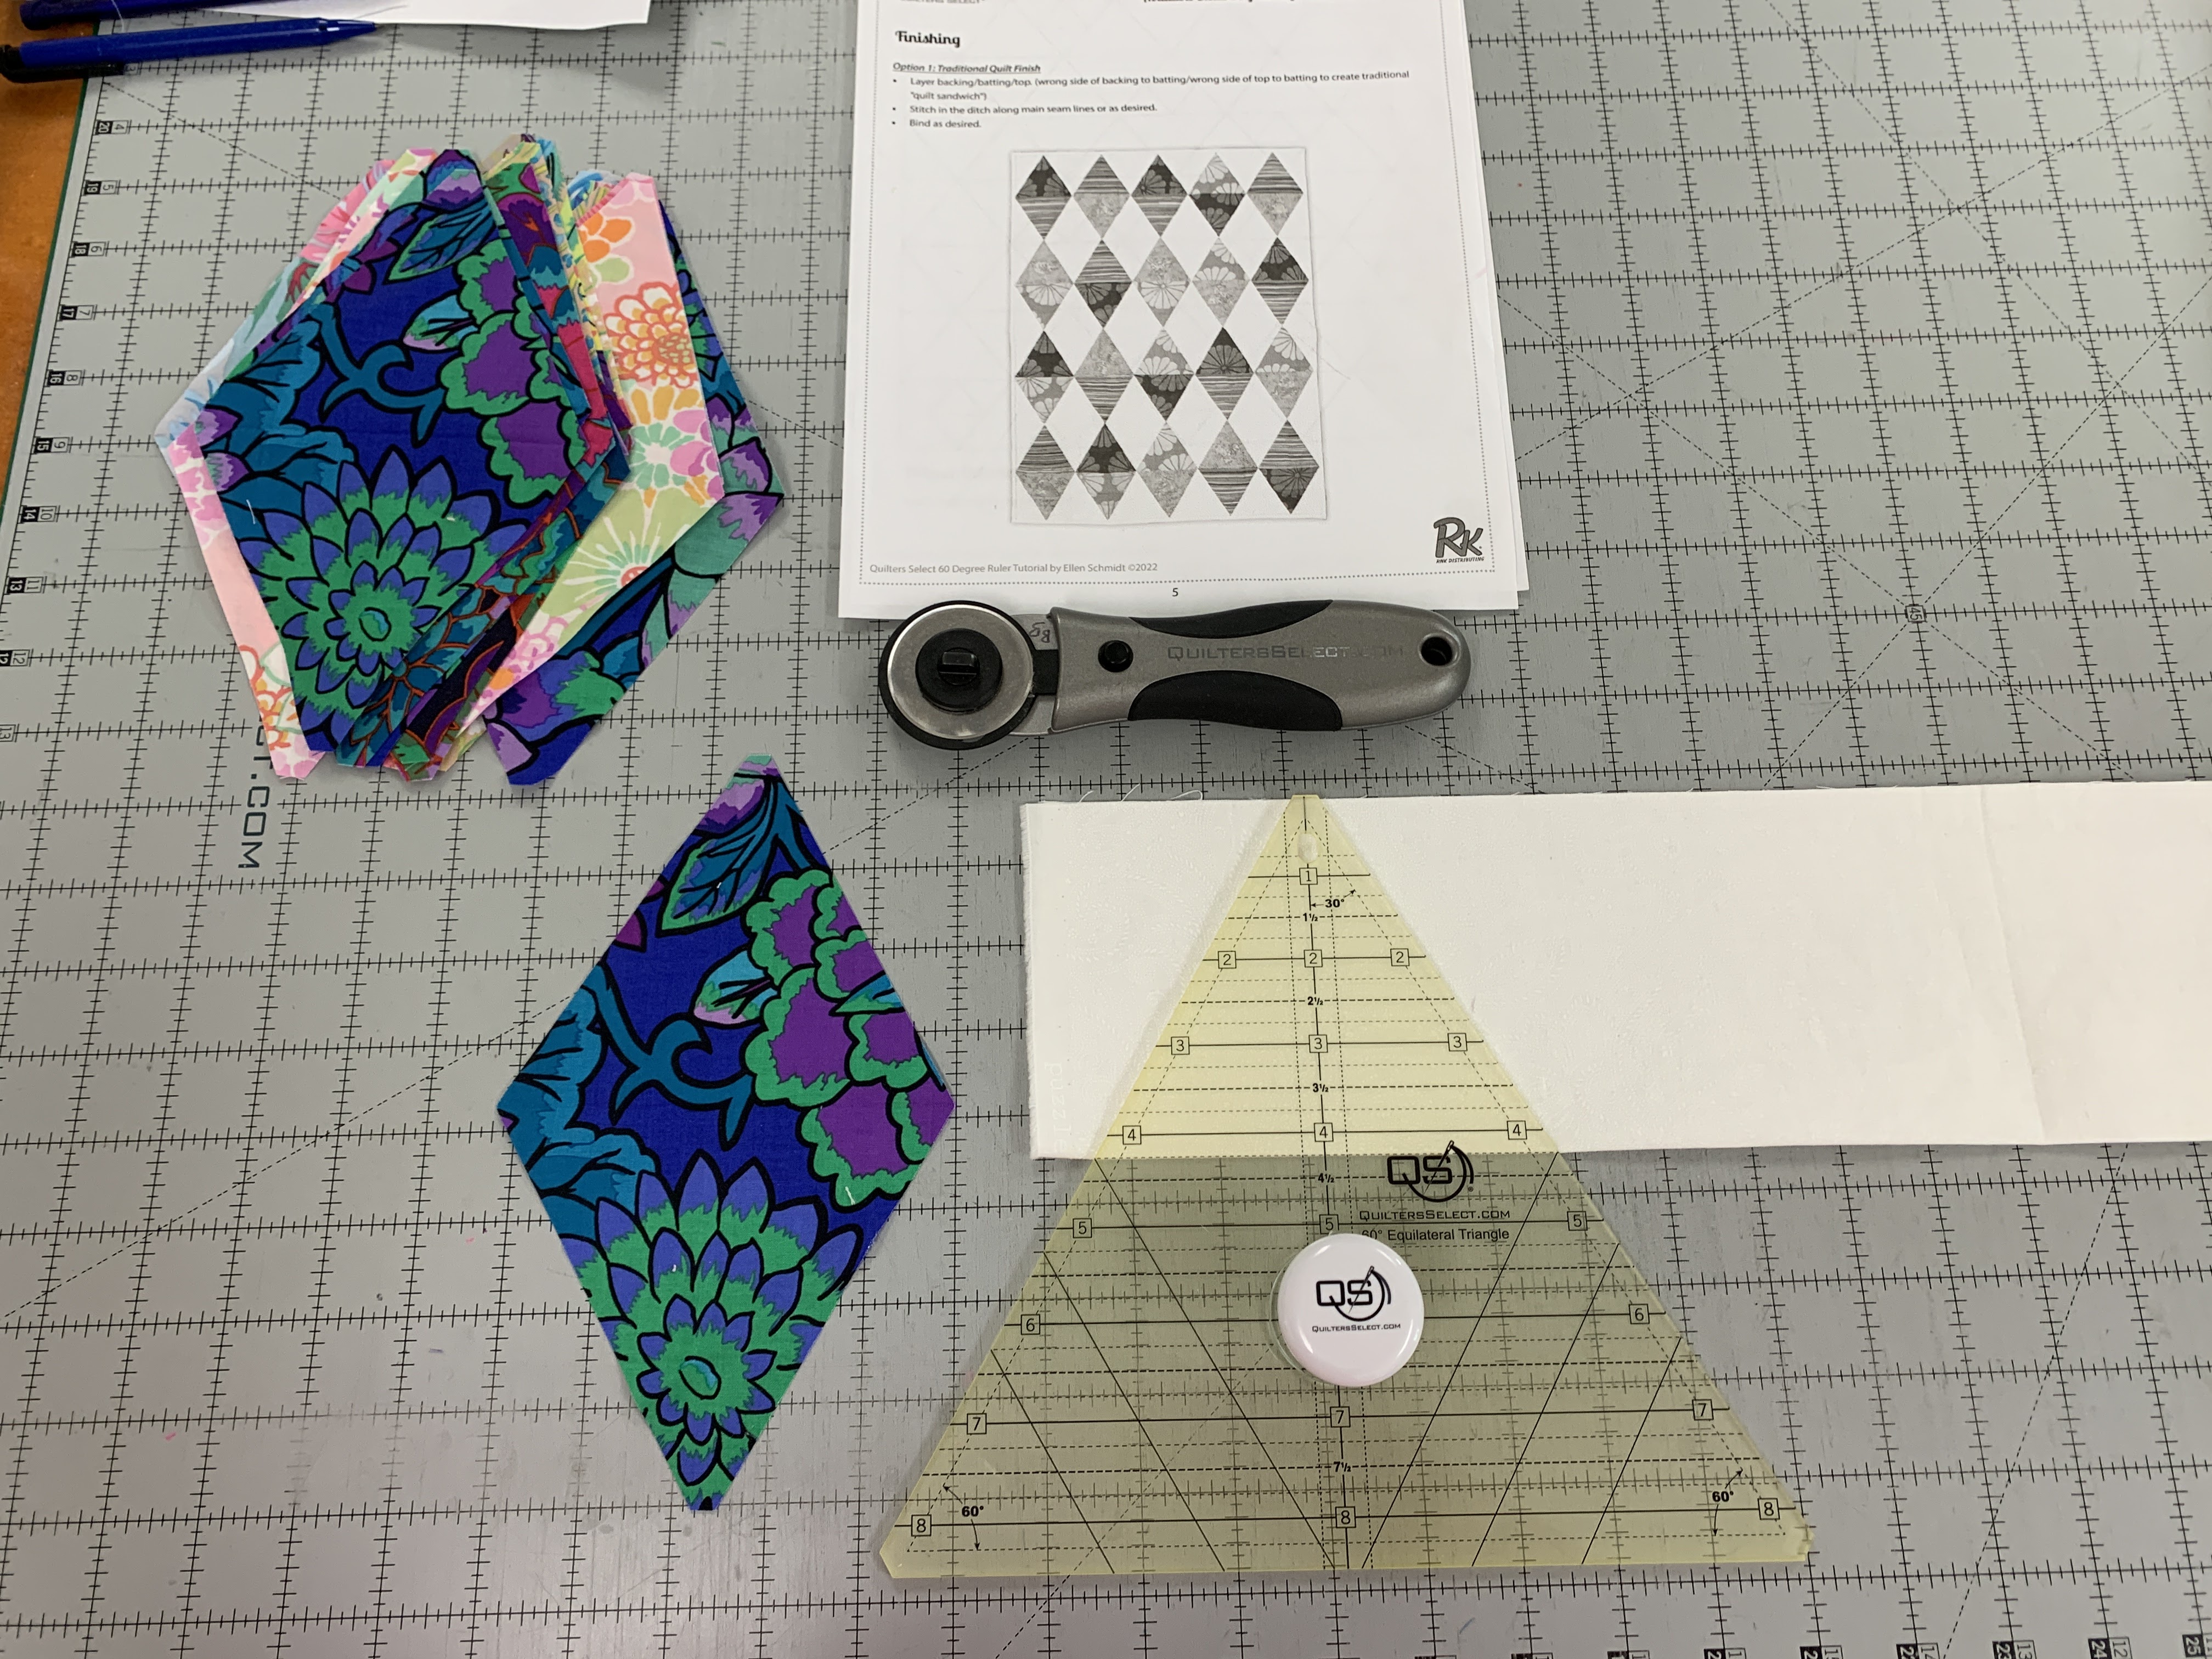
Now let's look at a 60 degree diamond. Again, the math is easy. What size diamond do you want, from top to bottom point? With these big Kaffe Fassett pritnts, I chose 8" finished. Add 1/2" to that--start with an 8 1/2" strip of fabric. 

Fold it in half, place the fold closest to you. Put the 4 1/4" line (half of 8 1/2")  on the fold of the fabric. Cut both sides, and like magic, you have an 8" finished 60 degree diamond:


Quilters Select website has instructions and diagrams and coloring pages, to help you in your design:

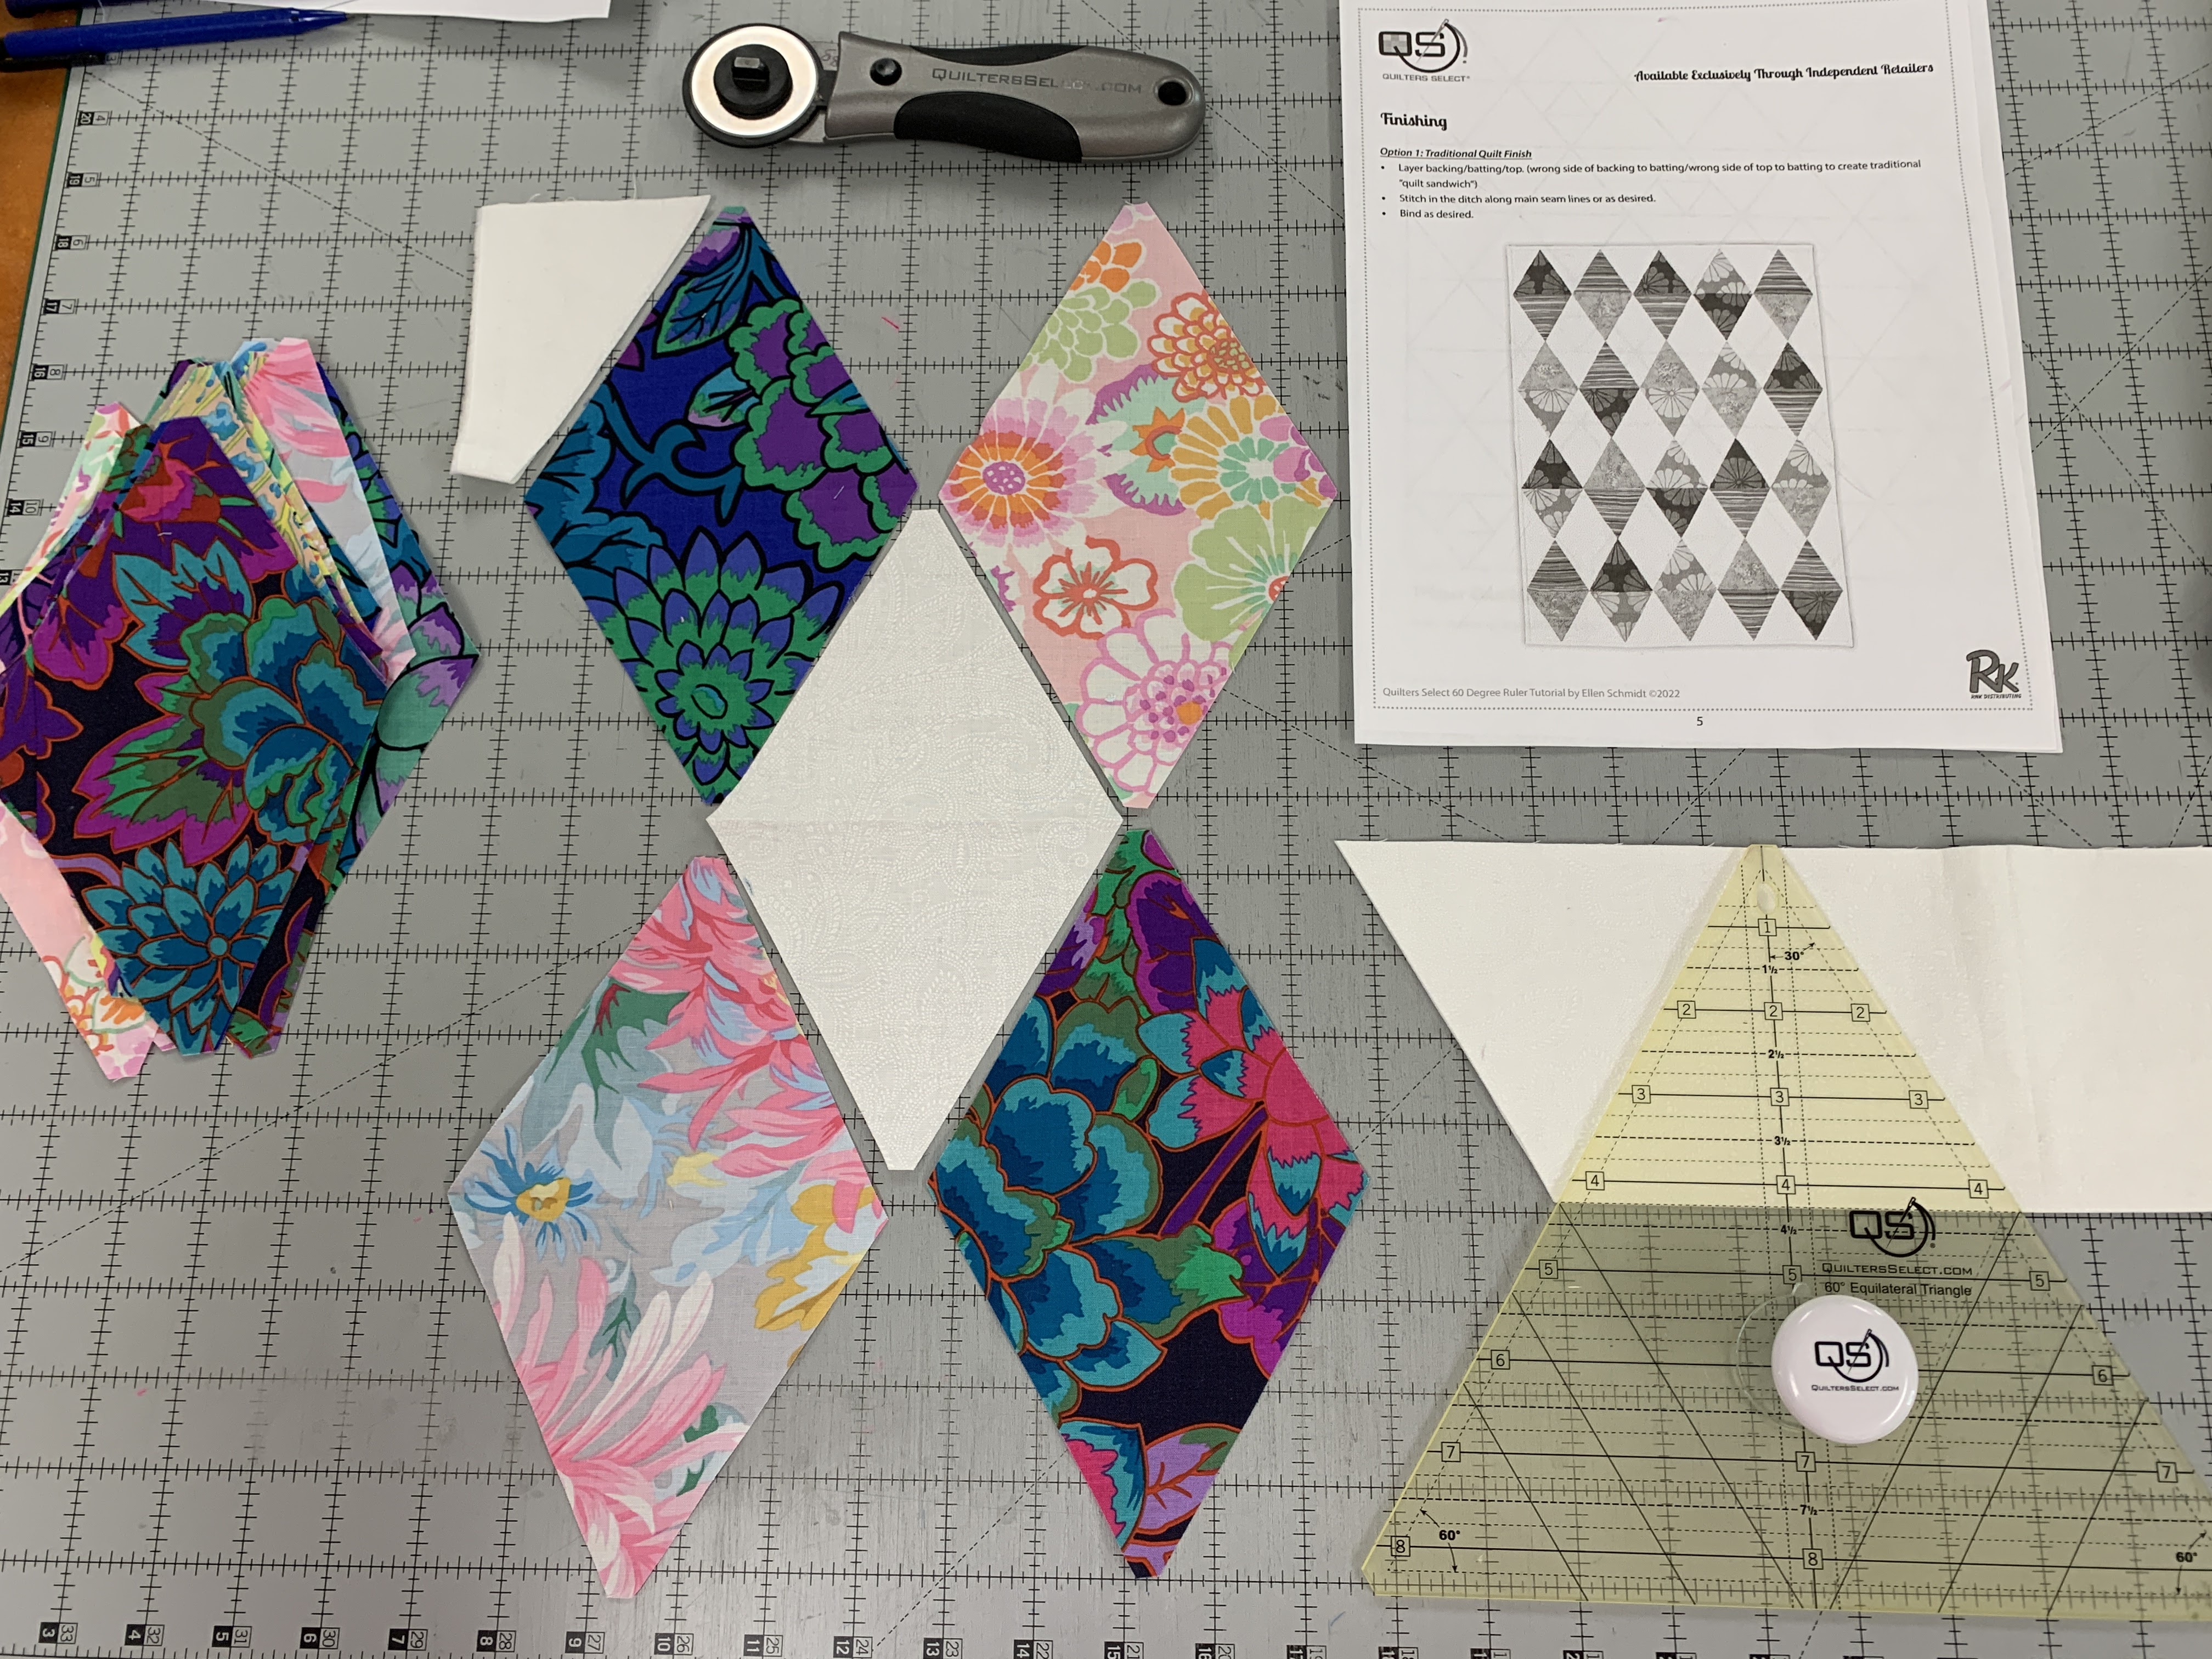
I cut a variety of diamonds from large prints, leftovers from an earlier project, AND white diamonds to use as "background". When I get a bit more time I will enjoy playing with all these on my design wall: 

Like any tool, it might take a few times using it to become fully comfortable with it. But this is a keeper in my studio. I encourage you to play with 60 degree shapes to see how easy they can be.

Find more information on the Quilters Select website: 60 Degree Triangle Ruler

Watch the videos HERE, they start at about 9 minutes in.

The Quilt Show Store has a special deal: buy both rulers and get a free Quilters Select Self-Erase Pen, another great tool. Watch for it here: The Quilt Show Store

Let's quilt.

Barbara