Thursday, December 8, 2016

Cleaning Up Leftovers and a Sneak Peek

After finishing Rajah Revisited:

Rajah Revisited

and Circa 2016:

Circa 2016 
 I have a big pile of leftover pieces, not really yardage, but chunks of many different fabrics, which were used or considered for both of those quilts:


To tame the chaos I decided to cut up all the chunks, the stuff not big enough to be folded and returned to bins in the closet, cutting into sizes I need for two or three ongoing projects.

First, I need more triangles cut for my Lifetime Quilt:


These require strips 1.75" wide and I use a Half-Square Triangle ruler to cut the pairs which finish as 1.25" squares.  More info on my process is here.  Some of the strips cut so far:


Then I decided to cut 1.25" strips for an eventual Log Cabin quilt, with blocks that finish at 5.25":


 AND, I decided to create a quilt for an upcoming Sew-A-Long that will begin in January 2017.  It will be a Teaching Tutorial, with 5 weekly posts that will take you from start to finish and teach things like:

How to Select Scrappy Fabrics OR Not So Scrappy
How to Perfect  Your Piecing
How to Make Two Different Blocks
How to Make an On-Point Setting
How to Float Your Blocks at the Border
How to Accurately Cut and Sew on Borders
How to Apply Binding for Hand or Machine Finishing

Here is your Sneak Peek:


Mine is 33" x 42",  but you can make yours smaller or larger, adjusting borders as you choose.  I guess it's the time of year that this one looks so Christmas-y.  I'll make another for step-by-step photos that will be completely different.  I hope you like it and will plan to join us in January 2017.

Having fabrics cut and ready for various projects is one of the ways I manage to get things done.  If I had to stop and prepare fabrics before I could sew, each time I wanted to sew, it would take a lot longer.  Because the fabrics are ready NOW, I can make use of even short amounts of time, sewing, not cutting or planning.  We'll talk more about those kind of tricks in 2017 too.

Let's Quilt!

Barbara

Saturday, December 3, 2016

UFOs, PHDs, PIGS, Ongoing Work

Whether you call them:

UFOs:  unfinished objects or
PHDs:  Projects Half Done or
PIGS:  Projects in Grocery Sacks

We all have  them--projects we start with good intentions that somehow get put on the back burner as something more exciting or more pressing has to get made.

Here are some of mine:


Diamond Jubilee--the quilt I intend to make to celebrate my 60th birthday--which happened two years ago.  This one is getting moved up the list, eventually...


I finished this top yesterday.  The hexagons are 1" and where made from a pack of 5" Charm squares, cut into quarters--the 2.5" squares fit the paper very well.  This was started at International Quilt Festival, Long Beach, CA 2009. For some reason, I didn't take any handwork with me and, of course, that was a mistake.  The great vendor, Cotton and Chocolate had a brilliant marketing plan:  They sold a "kit" packed into a plastic travel bag with their name and address on it, that included a Clover Desk Needle  threader, best notion ever, a spool of thread, a package of needles, and your choice of a packet of Paper Pieces shapes for English Paper piecing.  You purchased your choice of a MODA charm pack and they cut the 5" squares into 2.5" squares for you.  Sucked me right in.  All you needed to be sewing was a pair of scissors and they would be delighted to sell you those too, if you needed them.  They now include a Glue Pen for fast and easy basting of fabric to paper and today they even have a kit for machine sewing the hexagons, here.  This became my "take along" project for years until I finally buckled down to finish it.  Up next, it gets machine quilted. And, yes, I applique'd the hexagon top to the striped fabric borders; no way I was finishing it with the traditional hexagon zig zag edge.

Another favorite I am eager to return to:


Patriotic Pineapple blocks.  I really love this and lots of fabric strips are cut and ready, but, alas, it's not on the wall currently.

Today I took down my Lifetime Quilt to make room but here is what it is starting to look like:


This is my Leader/Ender lifetime project--I can't die until I finish it so I'm sewing it slowly...  Each half square triangle is 1.25" finished. Shown here are 5 blocks, each 20" square.  See the link above for step-by-step photos of my process.

Stella's Splendid Sampler needed more room so I  rearranged the design wall:


Only 16 more blocks to go, 8 weeks left.  I'm ready to see the end of this one.  The patterns are all free currently and available at The Splendid Sampler. A book is being printed for release after the project ends in early 2017.  It was more challenging than I expected but it's fun being part of a Facebook group of almost 24,000 members and who knows how many more who signed up with email.  Pat Sloan and Jane Davidson must be overwhelmed and amazed at the interest their little project has generated.

When Stella's Splendid Sampler comes down, here is what is going UP:


Sue Garman's Ruffled Roses--the Block of the Month quilt for The Quilt Show, 2011.  I still love it and am determined to finish it in 2017.  I wrote about my Turned Edge Applique' method here.  Having it prominently displayed on the design wall will be just what I need to get this one done. Guessing it will take me about two months to finish the top.  The pattern is still available from Sue's website:  here.

There are more projects I need to get back to, of course, but this is probably enough for 2017.

Let's Quilt!

Barbara

Thursday, December 1, 2016

Rajah Revisited

It's December 1 and I just finished the October borders for "Rajah Revisited", the 2016 Block of the Month from The Quilt Show.


Next up are the final outer applique' borders.  Two are cut and await hand applique'.  I don't have enough fabric for the final two though I have something close.  If my local shop has the fabric, I'll buy enough to finish.  If not, the close one will be used.  The women on the ship didn't run to their local quilt shop for fabric, they used what they had.  Works for me.

 Here is  info from the website about this quilt:

It was sewn by women convicts on board the ship Rajah traveling from England on April 1841 to the penal colony of Van Diemen's Land-now known as Tasmania.  The original quilt measured at approximately 128" x 128", but this version is recreated it in quarter scale with fabrics from the designers' stash. The designer, Leesa Siegele,  used many different scraps, imagining that's what might have happened when the original quilt was being made.  She followed the colors of the original quilt loosely, and tea dyed fabrics that didn't look old enough.  

The entire twelve month set of instructions for this quilt will remain available for members until December 31, 2016.  There is so much great information on The Quilt Show and the BOM alone is worth the $42.95 annual membership.  Every two weeks a new 1 hour show is released and I always learn something from each one.  You can be an Basic member for free but being a Star member is the best use of your time and money--in my opinion.  No connection to TQS other than being a perfectly satisfied paid member since the inception of the show.  The 2017 Block of the Month is a Sue Garman design, another fantastic medallion quilt I must not start--until I finish the 2011 quilt she designed, Ruffled Roses.  2017 is the year to finish that one, see my progress here.

Of course, I'm still plugging away at Stella's Splendid Sampler.  Block 84 was released today--I'll make it tomorrow.  Then just 16  more to go:


Let's Quilt!

Barbara


Saturday, November 26, 2016

Bernina 630 For Sale UPDATE:SOLD


Are you ready for a GREAT sewing machine?  My Bernina 630 Artista Platinum Quilters Edition Machine is for sale, INCLUDING a wonderful solid cabinet.  ALL ORIGINAL EQUIPMENT is included along with these extras:

  BSR Bernina Stitch Regulator for effortless free motion quilting
  Single Hole Stitch Plate for excellent 1/4" stitching
  Walking Foot with Three Soles for super-straight quilting lines

The cabinet is solid and fits the 630 perfectly.  You will love Bernina's Hands-Free sewing with the presser foot lifter.  This machine has been serviced yearly and is in perfect condition.

In addition, I will provide ALL the guide classes you want, for as long as you want.  There are many features to this machine that you will love using.

Many beautiful quilts have been created on this quilt--that mojo comes with the machine for free!!

I have moved up to another Bernina and need to make room for her.  This is your chance to find out why "Nothing Sews like a Bernina, Nothing".  Here are reviews/information on this machine:

Sewing Machines Plus
Bernina
SewingInsight.com

Note: this machine does not have the embroidery module but you can add it should you want that.

I want to sell this locally, not ship it.  You will need a truck to move the cabinet.

PRICE REDUCED:  $2500.00

More photos:


Let's Quilt!

Barbara


Each One, Teach One

Back in the summer I became interested in having a "sewing date" with a child, showing her the fun of creating something from fabric and thread.  I reached out to the mother of a former client to see if her 8 year old daughter would be interested.  She was and so the day before Thanksgiving we finally made it happen.

Here is Lyla Z, using "Ruby" the red Featherweight, to make a pillowcase:


She quickly understood the simple directions I gave her, only needed instruction on the machine's operations once, how to go backwards, how to start and how to stop, etc.  Once she got the line of stitching started, I moved over to my machine and just let her go, no hovering.  I did the pressing--she did all the pinning and sewing.  Her finished project:


After that, I gave her a choice, make two more pillowcases for her brothers or do "something" else.  She was ready for "something else".  I gave her a stack of 4" squares, put a piece of batting on the design wall and let her go.  Here she is designing a quilt:


Again, I showed her how to flip one square on top of another, pin the pairs, stack them and chain sew the pairs together.  She quickly got the process, sewed the chain, snipped them apart, put them back on the wall, and continued on.  I was surprised that she completed the whole top in the time we had.

For the backing fabric we went "shopping" in my closet and like any good quilter, when she saw a sparkly, purple peacock fabric that she loved, she got real excited and wanted that for the back.  I layered the batt, back and top, showing her how to place the back and top right sides together with the batt on the bottom.  She questioned that at first then said, "oh, after you sew it the back will be right sides out!".  Yes, she gets it.  I did the sewing all around the outer edge, leaving a 6" space for turning.  Lyla told me she has made a few pillows before so she knew how to turn the quilt right sides out.  She had not used a chopstick before to poke the corners out, she liked that tool.

It was almost time for her mom to return so I was going to quickly sew the open seam closed with my machine when I got a chance to show Lyla what NOT TO DO:  I sewed my finger--breaking off the tip of the needle inside my index finger.  A tissue stopped the bleeding but it was going to take my husband and some tweezers to remove the broken needle.  Her mom arrived, we chatted for a few minutes then I had "surgery" to remove the needle, more than 1/4" long, that was buried in my finger tip.  No problem, "Doctor Will" likes to do these things and peroxide and a band-aid had me good as new the next day.

Lyla's mom was very impressed and surprised at what Lyla got done.  Lyla told  me she has done some hand sewing on her pillows so she will hand-sew the opening on the quilt when she gets home:


We both had a good time and I learned a few things about working with a child:

1. Two hours is enough, especially the first time.  Lyla was tired at the end of the 2.5 hours.
2. Have fabrics cut and ready to sew--the 3 pillowcase fabrics were prepped before she arrived.
3. Have a second project ready--playing with the squares on a design wall was a good way to occupy her for a bit.
4. Provide only as much instruction as the child can absorb, a little at a time.
5. Mom went shopping--the child will do better without "help" from her parent.  She was eager to show me what she could do.

I hope you can reach out and teach a younger person.  We know the joy of creating a useful item from fabric and thread, let's pass that on to future generations.  I learned to sew in Girl Scouts and Home Ec and caught the bug early.  Sadly, there is not so much of that being taught in schools today.  But kids still want to make stuff with their hands.  Help them learn.

Let's Quilt!

Barbara

Monday, November 21, 2016

Thanksgiving Week--Cranberry Chutney

This is a favorite week for me, especially if I am not traveling so I am not concerned about weather.  We desperately need rain here, not much since April 2016 and we are down more than 12 inches.  We might get some good rain mid-week and that will be wonderful.

My favorite recipe, one I HAVE to make any time there is turkey or ham on the menu is Cranberry Chutney.  I grew up with Ocean Spray jellied cranberry sauce from the can, the kind that has those can lines on the sides when you open both ends of the can and push the roll of sauce onto a plate. About 40 years ago I followed a Cooking Light Turkey dinner complete menu, making all the dishes shown, and THIS is the one recipe that has stuck around:


CRANBERRY CHUTNEY       
Barbara Black       

1 bag fresh cranberries, 12-16 oz                    1 cup water
1 cup sugar, can be less                                   1 cup onion, chopped
1/2 cup brown sugar, can be less                     1 cup apple, chopped
1/2 cup raisins                                                  1/2 cup celery, chopped
2 t cinnamon                                                    1/2 -1 cup chopped pecans
1 1/2 t ginger
1/2 t cloves
1/4 t allspice


Simmer cranberries, sugars, raisins, spices, and 1 cup water uncovered in 2 quart saucepan over medium heat, stirring frequently, until juice is released from berries, about 15 minutes.  Reduce heat; stir in remaining ingredients.  Simmer uncovered until thick, about 15 minutes.  Refrigerate covered or freeze.  Batch can be doubled--use large saucepan.    NOTE:  I always double this--DO NOT DOUBLE THE SUGARS. Keep extra in the freezer.  This will last from Thanksgiving until Christmas.  I buy fresh cranberries in early November and freeze them for later use. 

Over the years, I've made a few changes, the best being to reduce the amount of sugar.  I doubled the recipe and FORGOT to double the sugar, and it was BETTER!  About 5 years ago I added chopped pecans and that was a huge hit at my house, kind of makes it more "Southern".  The kitchen smells amazing while this is cooking, puts you in the mood for holiday food.  People who don't like cranberry sauce like this, and I am always asked for the recipe--now I can direct folks here.  You can save it to your Pinterest Boards too--see below.

Saturday I taught a fun class--they wanted the recipe when my daughter-in-law sent me a message asking for it during class.  Here are the "Southern Super Star" quilts under construction:

Donna D--half the middle and one quarter star points

Holly R--one quarter middle, one quarter star points

Dahlia K--one quarter middle, one quarter star points, almost
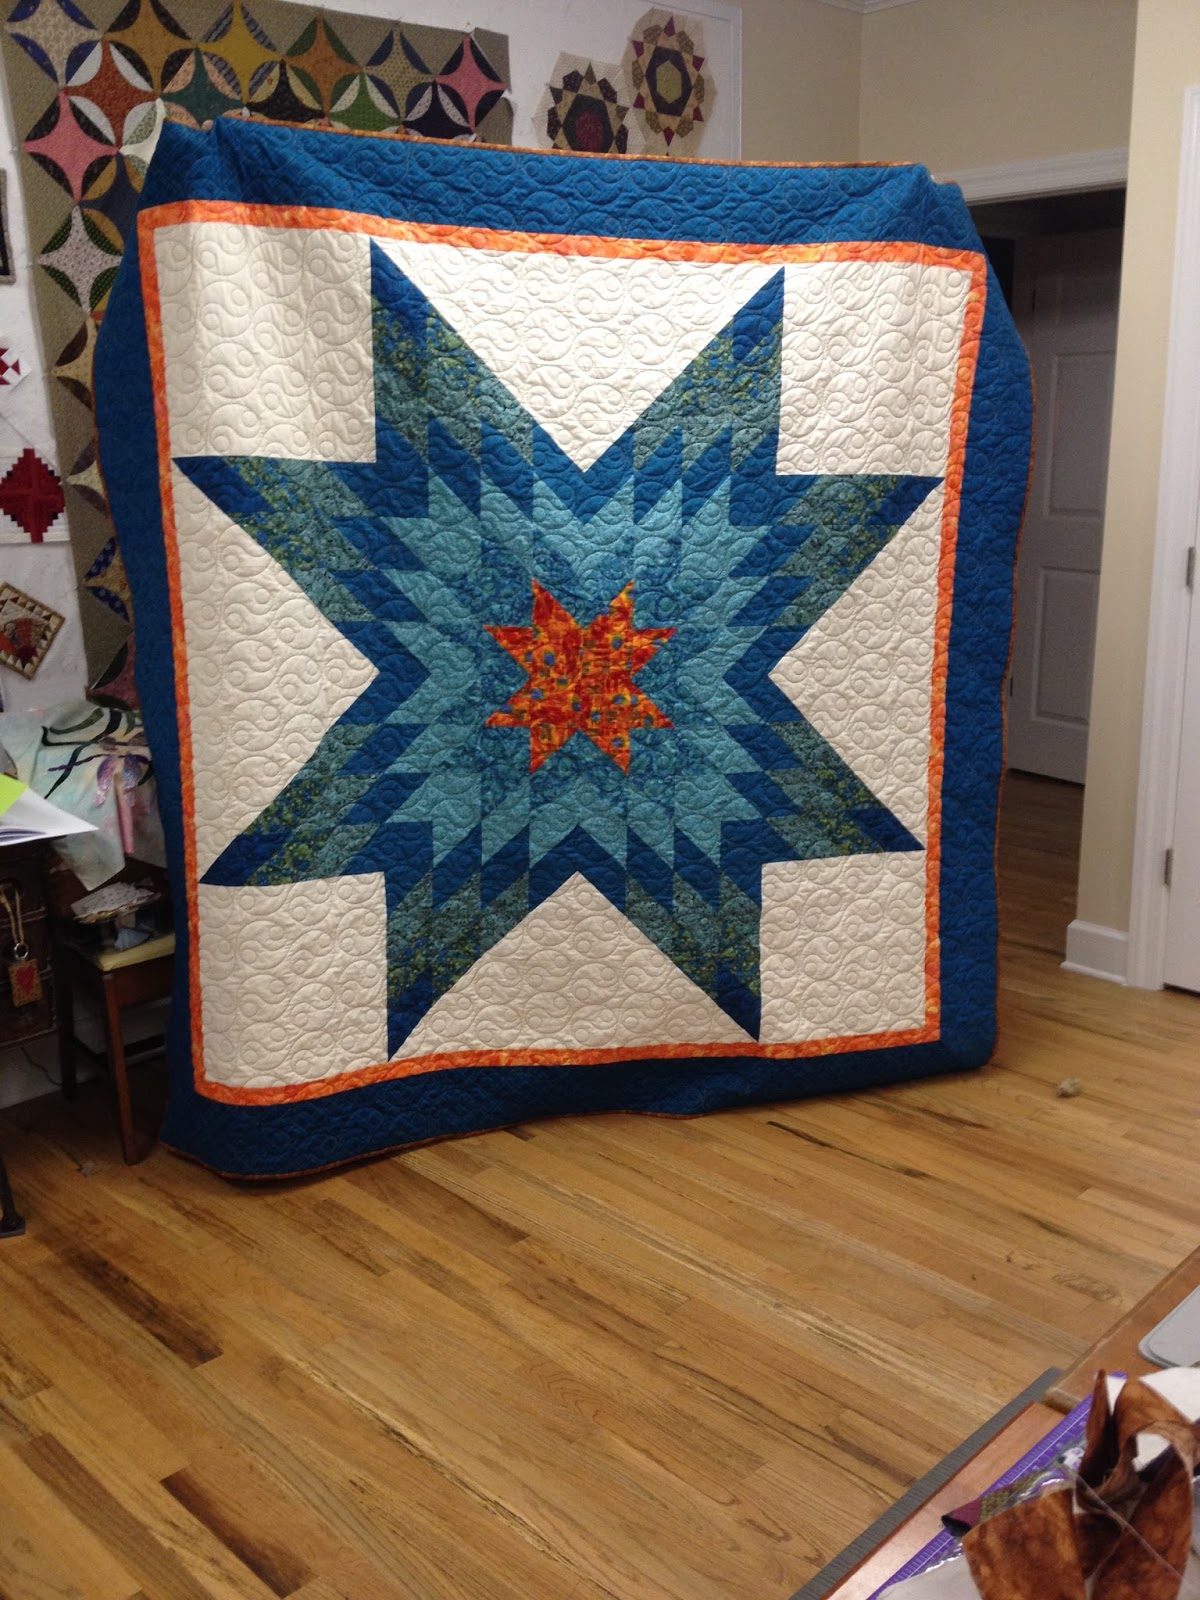
All three students worked hard all day and can now finish their tops at home.  We spent the last half hour of class time considering various border options, square or rectangle, you decide.  This is a class I enjoy teaching a lot and this quilt is my "go-to giveaway" quilt because I can make the top in a weekend, the cost of edge-to-edge longarm quilting isn't prohibitive and I can shop in my closet for the 8 fabrics needed:

Outside Tip:  1/4 yard
Second:          1/3 yard
Third:            1/2 yard
Fourth:          5/8 yard
Fifth:             1/2 yard
Sixth:            1/3 yard
Center:          1/4 yard
Background:   1 3/4 yard--buy 2 yards for border options

Borders are extra--unless I know for sure what I want for the borders, I wait until the star is done then shop in my closet.  Here are some previous quilts I have given away:


The pattern is from Calico Carriage Quilt Designs.  It is also available as a single pattern but the book provides several sizes and great directions and is moderately priced, I recommend the book.

Happy to say I am all caught up with Stella's Splendid Sampler, 81 blocks done:


The top 5 rows are sewn together, rows 6-8 are sewn together and row 9 is just getting started.  Blocks are released each Sunday and Thursday--this began February 14, 2016 and will conclude in February 2017 when 100 blocks have been released.  The patterns are free for now and a book is underway, for Spring 2017 release.  This project is organized by Pat Sloan and Jane Davidson--they used over 80 additional designers to provide many different techniques.  There are 23,697 followers on Facebook currently and more than that who follow on the internet here.

What will I do when this is done?  Finish a few more long-term UFOs that have taken a backseat for too long.

Have a Happy Thanksgiving, surrounded with those you love.  My husband and I will go to a restaurant but Friday I'm getting a rotisserie chicken so that cranberry chutney can be enjoyed.

Let's quilt!

Barbara

Thursday, November 17, 2016

Moving Along

After being gone almost two weeks, I had 6 Splendid Sampler blocks to make, to catch up.  Here is row 71-80, with one exception:


Block 75 is an embroidery block  I printed on the computer and will hand-stitch as time allows.  Hopefully, it will be done by this weekend so I can join this row to the previous 7 rows.

Saturday I'll be teaching Southern Super Star at Patches & Stitches, the local quilt shop where I have taught for 28 years:


I'll get a better photo this weekend--it's quilted now and looks great.  The pattern is Southern Stars from Calico Carriage Quilt Designs.  It is my go-to giveaway quilt for high school or college graduation.  I can make the top in a weekend and edge-to-edge quilting on this approximately 75" square quilt is not too expensive.  It looks great custom quilted but that ups the price more than I want to pay for a giveaway.  Students have fun in this class and get at least half the quilt done in the all-day time frame.  This one is mine--every time I  wanted to teach it I had to be sure I had one available as the sample so now there will always be one ready.

Here are a few more Houston International Quilt Festival photos:

Jodi Barrows gave a lecture featuring a lot of her family quilts and told their stories.  Here is what NOT to do if you don't want a hole in the center of your quilt:


DO NOT fold your quilts in half, and in half again, and leave them this way forever.  Fold them "burrito style" or in thirds, or rotate the folds every six months.  If you would like to see more of Jodi's quilts from the lecture, go to my friend, Lori D's blog:  Humble Quilts.  She took lots of photos of many of the Education Department classes, forums, and samplers so you can get a good look at all the many things you can do and learn at Festival when you venture up to the third floor.

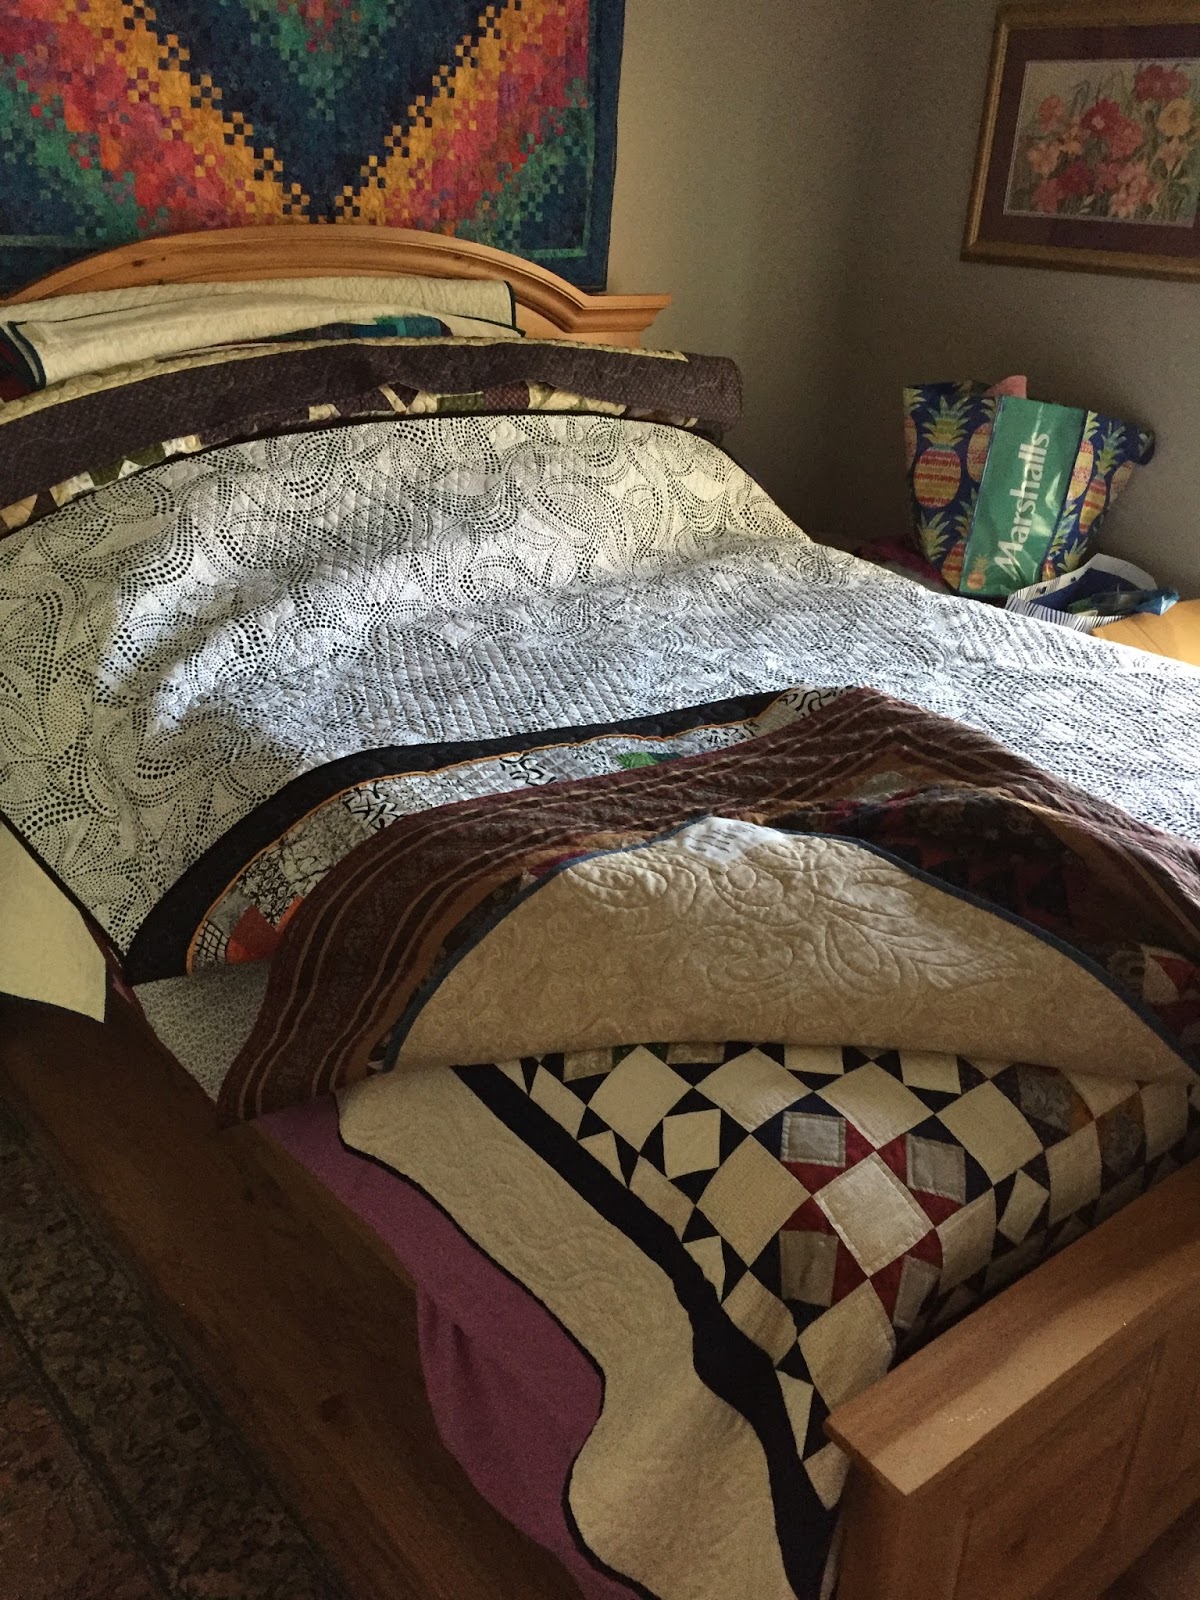
If you have a spare bed that is rarely used, as I do, lay out the quilts flat--I put the top one back side up because of light from the window. There are works in progress, some tops, some waiting to be quilted, and some are rolled up across the pillows:


I call this bed the "Archaeological Dig" because you will go back in time digging down through the many quilts on this bed.  When I do need to clear it for guests, it takes a bit of time and I just dump them on the studio floor until the guests leave.  We do keep another guest room ready at all times so you are always welcome!

Here is the one pattern I bought at Festival and am eager to get started on:


It's called Star-A-Day Quilt from Somerset Patchwork from Australia.  These are 3" hand pieced Lemoyne Stars--the pattern suggests piecing one a day for 365 days to have all you need for this large bed quilt.  As I plan to teach this Summer 2017, I think that will be my plan starting January 1, 2017--I'll have half done by then.  They are quick and easy to piece--I'll just cut out the pieces as I am working on other projects that use reproduction fabrics.

I also fell in love with this one but they sold out of this pattern long before I stopped at the booth 15 minutes before the show closed:


Hexagon Star-A-Day. also hand pieced.  Both patterns include the adorable little window templates for easy marking of both the sewing and cutting lines:


I always have a handwork project ready so I can make use of the time I have to get things done, don't you?

Tonight is our monthly guild meeting and in honor of Veteran's Day the panel will be made up of several guild members who are military veterans.  We've been asked to tell how our military service has impacted our quilting.  I've been thinking hard on this for the past month and I'm not sure I can make a link between the two, other than that being in charge is something I'm accustomed to which might explain why I've been so active in this guild for 28 years.  And when there is a hard job that needs to be done, you send in the Marines, right?

All members are encouraged to bring red, white and blue quilts for Show and Tell.  Here are the two I have packed to take:

Strippy Stars
Red, White and Blue Circle Star
I hope you have a wonderful Thanksgiving Holiday.  It will just be my husband and I this year, he is pushing to go to a restaurant so we don't have dishes and pots and pans to clean up.  I love turkey leftovers so I'm not convinced that is what I want to do.  Better make up my mind soon...

Let's quilt!

Barbara