Showing posts sorted by relevance for query Paper piecing. Sort by date Show all posts

Sunday, June 21, 2020

Freezer Paper Foundation Piecing

Learning a new technique is interesting. Having the time to explore a new technique is priceless.

I have been a fan of "paper piecing" for years--where you sew through paper patterns, using a tiny stitch, then remove the paper when done  and sew the units together to make a block. In teaching this, I find that quilters either love it or hate it.

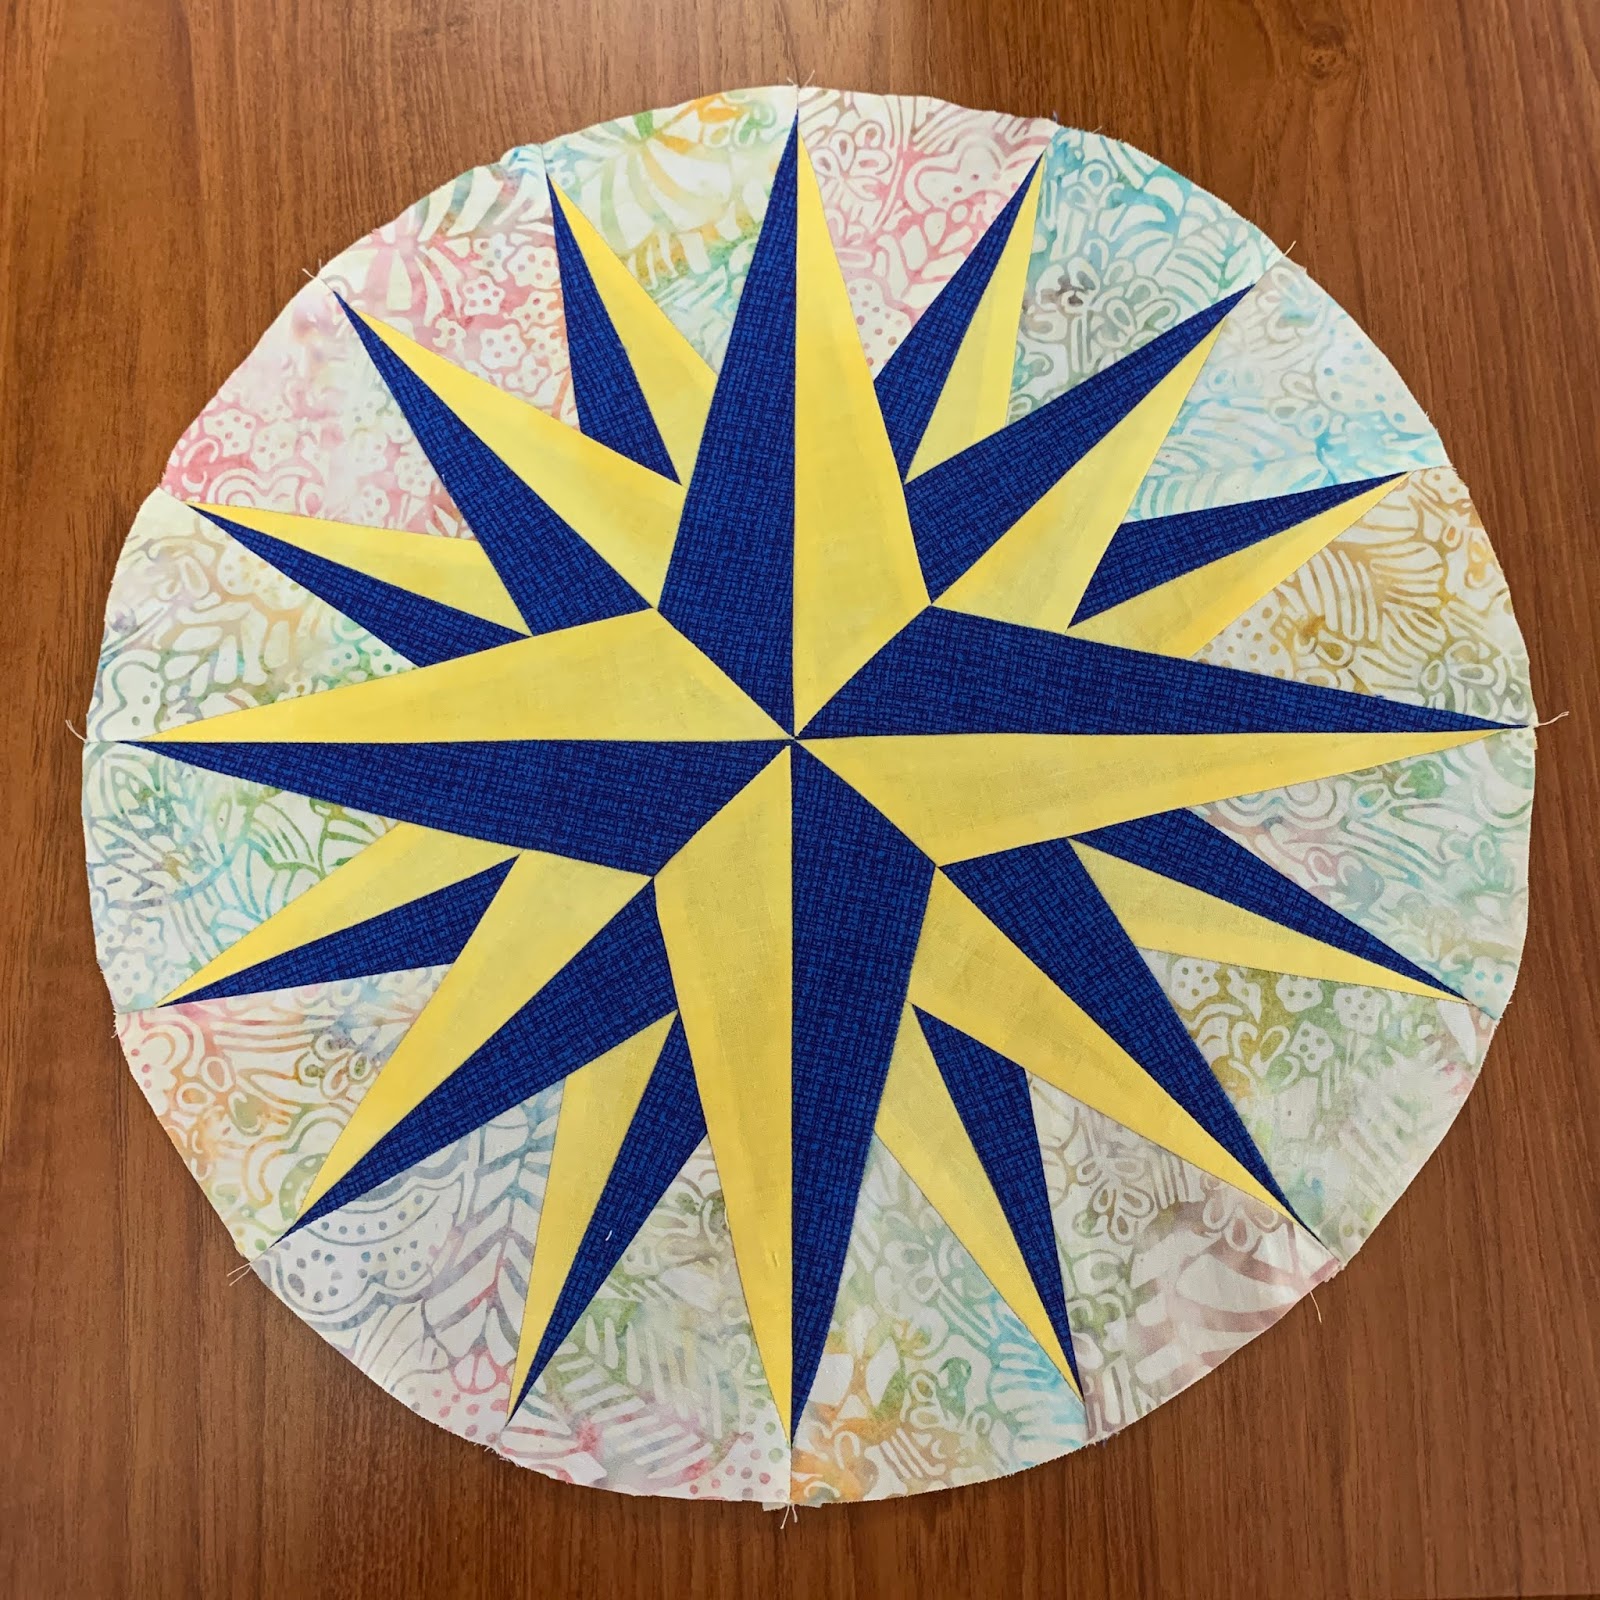
Center of a gift for a sailor

The plus side of paper piecing is ACCURACY. With complex patterns like Mariner's Compass, you can get sharp points fairly easily.

The down side to paper piecing is REMOVING THE PAPER, and those tiny stitches are challenging to remove when we make a mistake--and we ALL make a mistake, from time to time.

I am learning to Foundation Piece on Freezer Paper patterns. The exact same method as regular paper piecing, except the pattern is printed on the matte side of Freezer paper and you DO NOT sew through the paper.

I have known about this method for years but never tried it--I was perfectly content with "regular" paper piecing.

Here are the basics--I will have a detailed Tutorial when time permits. I am enjoying learning this so thought you might like to see it too.

As usual, the fabrics are cut into over-sized pieces or chunks.


The first fabric is pressed to the waxy side of the freezer paper, securely. The second fabric is placed on top of the first fabric, right sides together, using the standard 1/4" seam allowance:


Sewing with a regular length stitch, just beside the fold of freezer paper:


See how the stitches are just along the paper, not through it: 

 As pieces are added, they are pressed over, onto the freezer paper--the waxy side. The excess is trimmed 1/4" away from the line--using one of my favorite tools, the Add-A-Quarter ruler:


Each fabric is added in turn until the paper is covered with all the fabrics needed. When the pattern is completely stitched, you carefully remove the unit from the Freezer Paper--and the paper is ready to be used again! A real bonus if doing a block with many of the same units. I used the two paper patterns to make the 8 units needed, 4 of each. So I only had to print 1 sheet of Freezer paper to get ALL the patterns needed for this 14" block:


The 8 units are sewn into four sections of two units each. Here are 4 units sewn into 2 quarters, then joined to make a half block:


 Two halves, ready to be joined into a circle:

The best tip I give quilters when making blocks with places where many seams come together, like Lemoyne Stars and this Mariner's Compass, is to machine baste that center first. I turn the stitch length up, to 5.0 here from my usual 2.0. I baste stitch about an inch on either side of the center:


I open it and take a peek--if I am happy with it, I turn the stitch length back to normal and sew the entire seam, stitching right over the basting stitches. If I think I can do better, it is a snap to pull out those basting stitches and try again. I was satisfied with this:


Here is the back of the Compass:

On Wednesday, I'll show you a few ways to create a background for this Compass.

UPDATE: Here is the link to the BACKGROUND post:

Mariner's Compass Background

Let's quilt.

Barbara

Wednesday, January 23, 2019

Paper Choices for Paper Piecing Quilt Blocks

I love Paper Piecing, especially complex blocks. Currently, I am making two Sizzle quilts, so I am getting lots of practice. I have written about paper piecing before--if you want lots of tips for this technique, Read this Tutorial.

The paper I use for piecing has to have certain qualities:

It has to be easy to print on a home printer
The ink cannot smear once dry
It has to be easy to sew on
It  has to be easy to press the sewn fabrics flat
It has to be easy to remove

I am testing 3 different "vellum" papers on a Sizzle block:


 Here are my results:

1. C&T Simple Foundations Translucent Vellum Paper--this is the product Becky Goldsmith recommends and it is included in the Accessory Kit for the Sizzle quilt, the 2019 Block of the Month for The Quilt Show.

   This is the medium weight of the 3 papers I am testing. It works well, is easy    to  run through my printer, the ink doesn't smear, and tears off pretty easily. It curls just a bit but not enough to be a problem.

2. Master's Touch Tracing Pad, 25 lb., 9" x 12"--bought at Hobby Lobby.
This is the thinnest of the 3 papers I am testing. I had to trim to 8.5" for the printer. Even though I separated each of the 8 sheets from the stack to "un-stick" them, each time I printed 8 copies, one page stuck to another and I had to re-print that one--and had one page printed on regular paper. The ink also smeared a bit even days after printing. It curled the most of the 3. It was easy to remove.

3. Vellum Paper Value Pack, bought from Amazon online. Amazon
This the thickest of the 3 papers I am testing. It printed easily, the ink did not smear but the thickness of the paper made it difficult to press the fabrics as they were added. It took a hard press to get the fabrics as flat as possible, without having a pleat at the seam. It was more difficult to remove than the other two papers, I really had to pull the paper away from the stitches.

I know a couple people who like to use lightweight tracing paper. They have to print one page at a time since the thin paper does not feed easily in their printers. This would be inconvenient for me--the printer is on the other side of the house from my studio where my computer is.

So, for now, I am sticking with the C&T vellum paper. It does what I need it to do and is dependable.

If you search online for "vellum" be aware there are many weights and levels of transparency. Much of the vellum I saw online was being marketed for Wedding Invitations--the little page that goes between the fancy papers. Those are most likely too thick and not transparent enough for paper piecing quilt blocks, especially complex designs like these.

This is half of a Sizzle Block, showing where a lot of seams come together. You can see it is important that the paper work well with this kind of project:

Paper Piecing allows for the kind of precision I just could not get with regular piecing. Here is the center of that block, finished:


If you have a paper you love, please let me know about it.

Le'ts quilt.

Barbara

Wednesday, March 1, 2017

Halo Star Medallion--Month 3

This month we add a border of 4" Evening Star blocks, each with a "stagger strip" attached, and a floater border between the stars and the middle of the quilt, already completed.


Here are some tips that I hope will help you with this month's steps.

1. Decide--will you paper piece the stars or piece them the regular way?  Sue's directions are for paper piecing.

If you will be paper piecing, print the foundation patterns, being certain they print the correct size. Each star block is 4" finished; with the 1" finished stagger strip added, each star unit is 4.5" x 5.5" unfinished. The small corner squares are 1" finished--use that as a guide.  

If you will be sewing your stars the traditional pieced way, you get to decide if you want to cut the pieces the exact correct size OR do you want to make Oversize geese, then trim them to size?  I have a detailed tutorial on making four geese at once, just enough for each star, and making them oversize--allowing you to "trim to perfection"--find it here:  My Flying Geese Tutorial.  These geese units (the star points) finish at 2" x 1".

I tried both methods, timing each one, and while the paper pieced block took 30 minutes and the traditional pieced block took 20 minutes, my precision was better with the paper piecing method.  So that's what I did.

2.  Tips for Paper Piecing:  I wrote a tutorial for Month 1 that includes lots of tips, on things like the paper, thread, how to press, etc.  If you haven't read that, you can find it here:  Paper Piecing Primer--Halo Star Medallion Month 1.  I used plain newsprint, inexpensive and already cut 8.5" x 11".  My thread of choice is Masterpiece or Aurifil.  NO STEAM in the iron, we don't want pulp.

4.  Fabric Selection:  now you can play in your fabric, selecting lots of pieces for your star points and centers.  I returned to the background fabric I used for Month 1--I changed to a different background for Month 2--but you'd have to get awfully close to tell the difference.  I have a stack of 8 background fabrics that will work their way into this quilt, all very similar.  For star points and centers, I picked 8 fabrics from the stash I put together for this quilt, some I'll use again a lot and some that might not appear again--they just had to look good with my focus fabrics.  Don't sweat the small stuff!
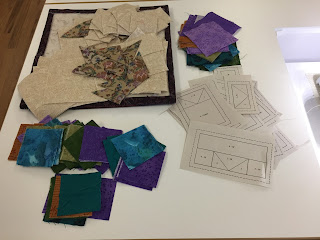
Backgrounds, Centers, squares for star points, focus fabric star points cut into triangles, some paper foundations ready to go
4.  Making the Stars:  Cut out the four paper foundations needed for each block, trimming close to but not on the outer dashed line.  Wider margins just get in the way.  Select the center and star points for the block, cut the squares for the points in half, cut the large background square into quarters, and you're ready to go.

After placing the star point triangles in the wrong place more than once, I had to figure out where they should really go. Put the "butt" side of the background triangle on the "butt"side of the paper, then place the first star point triangle so the outer corner of the triangle (on the lower right)  is in line with the corner you can just see on the upper left--the newsprint is light enough to see through.  When I lined up the star point triangle with the bottom of the background triangle, as you normally would in traditional piecing, the star point didn't fit to cover the space it had to cover.  Once I moved it up, like this, it fit every time.


I chain pieced the four units, flipped open the first star point triangle, then added the second star point triangle, again lining up the purple corner with corner on the paper:


Make all four units, finger pressing firmly during construction.  Press all four units with a hot, dry iron before trimming.

5.  Block Assembly:  Here is what I did.  When making the stars, I paper pieced all the units, four per block, then trimmed each unit carefully.  To trim, I placed the 1/4" line on my ruler on the solid line on the paper foundation, and cut exactly 1/4" from that line, creating a precise 1/4" seam allowance on each unit:


Remove the paper after you have each unit trimmed.  Here three of the units have the paper removed, one is trimmed and ready to have the paper removed:


6. Pressing of Seams:  I discovered the best way for me to press the seams was the center row IN to the center, and the top and bottom star point rows, out, toward the solid squares, the "path of least resistance".  Of course, I figured that out after making the 7 stars for the left border--when joining those 7 star units, it became obvious this was the better way to press so I re-pressed those 7.  This allows the units to "nest" a bit as you join them together. The "stagger strip" is automatically pressed down during paper piecing construction.  Here the paper is still on so you can see the units. I took the paper off before joining the four units into one star block unit:


7.  Lay out the Stars:  however you like, moving the various fabric combinations around until you're happy with them.  If you have a camera that happens to also make phone calls, use it to snap a shot when you're satisfied with the layout. Here you see the final border, the bottom one, laid out with the other three borders already sewn together.  Be CERTAIN you add the additional, longer "stagger strips" to the top and bottom rows, according to the instructions.   I ran out of background fabric at the very end--my bottom longer stagger strips are a different fabric than all the rest, don't tell:


8. Sew the Borders: I pressed the seams open on the star units, that worked best for me.

9.  Floaters:  use the instructions in the pattern to measure your sewn borders and the middle of the quilt you finished last month.  My sewn borders were 1/4" longer than the perfect measurement.  I don't know why, they SHOULD be perfect, but all 4 borders were 1/4" longer so I simply used those measurements when figuring out my floaters.  Lucky for me the middle was ALSO 1/4" bigger than perfect so my floaters remained 1/2" finished, 1" cut.

10. Joining Floaters and Star Borders:  Cut the floaters from fabric parallel to the selvage for stability.  Carefully cut them the size you determined they need to be.  I cut two at a time so both left and right floaters will be exactly the same size, then I cut the top and bottom, two at a time.  Don't get your measurements mixed up.  I pressed the Floater with the Right side out and I pressed the middle of the quilt with the Wrong side out.  At the centers, I place a pencil mark in the seam allowance indicating the middle of both the floaters and the quilt.  I do the same with the star borders.  This makes it very easy for me to see the mid-point of each when pinning them.  I pin the middle, each outside edge, and then use additional pins along the edges, about a dozen pins at this length:


It is not a race to see how fast you can sew the various borders on--slow and steady will allow your borders to be as straight as possible.

I pressed ALL seams toward the Floater--it is 1/2" wide so has just enough space to contain both seam allowances.  I like how the seam allowances seem to fill out the floater just a bit.  Sue's instructions say to press away from the center.  Do what works best for you.

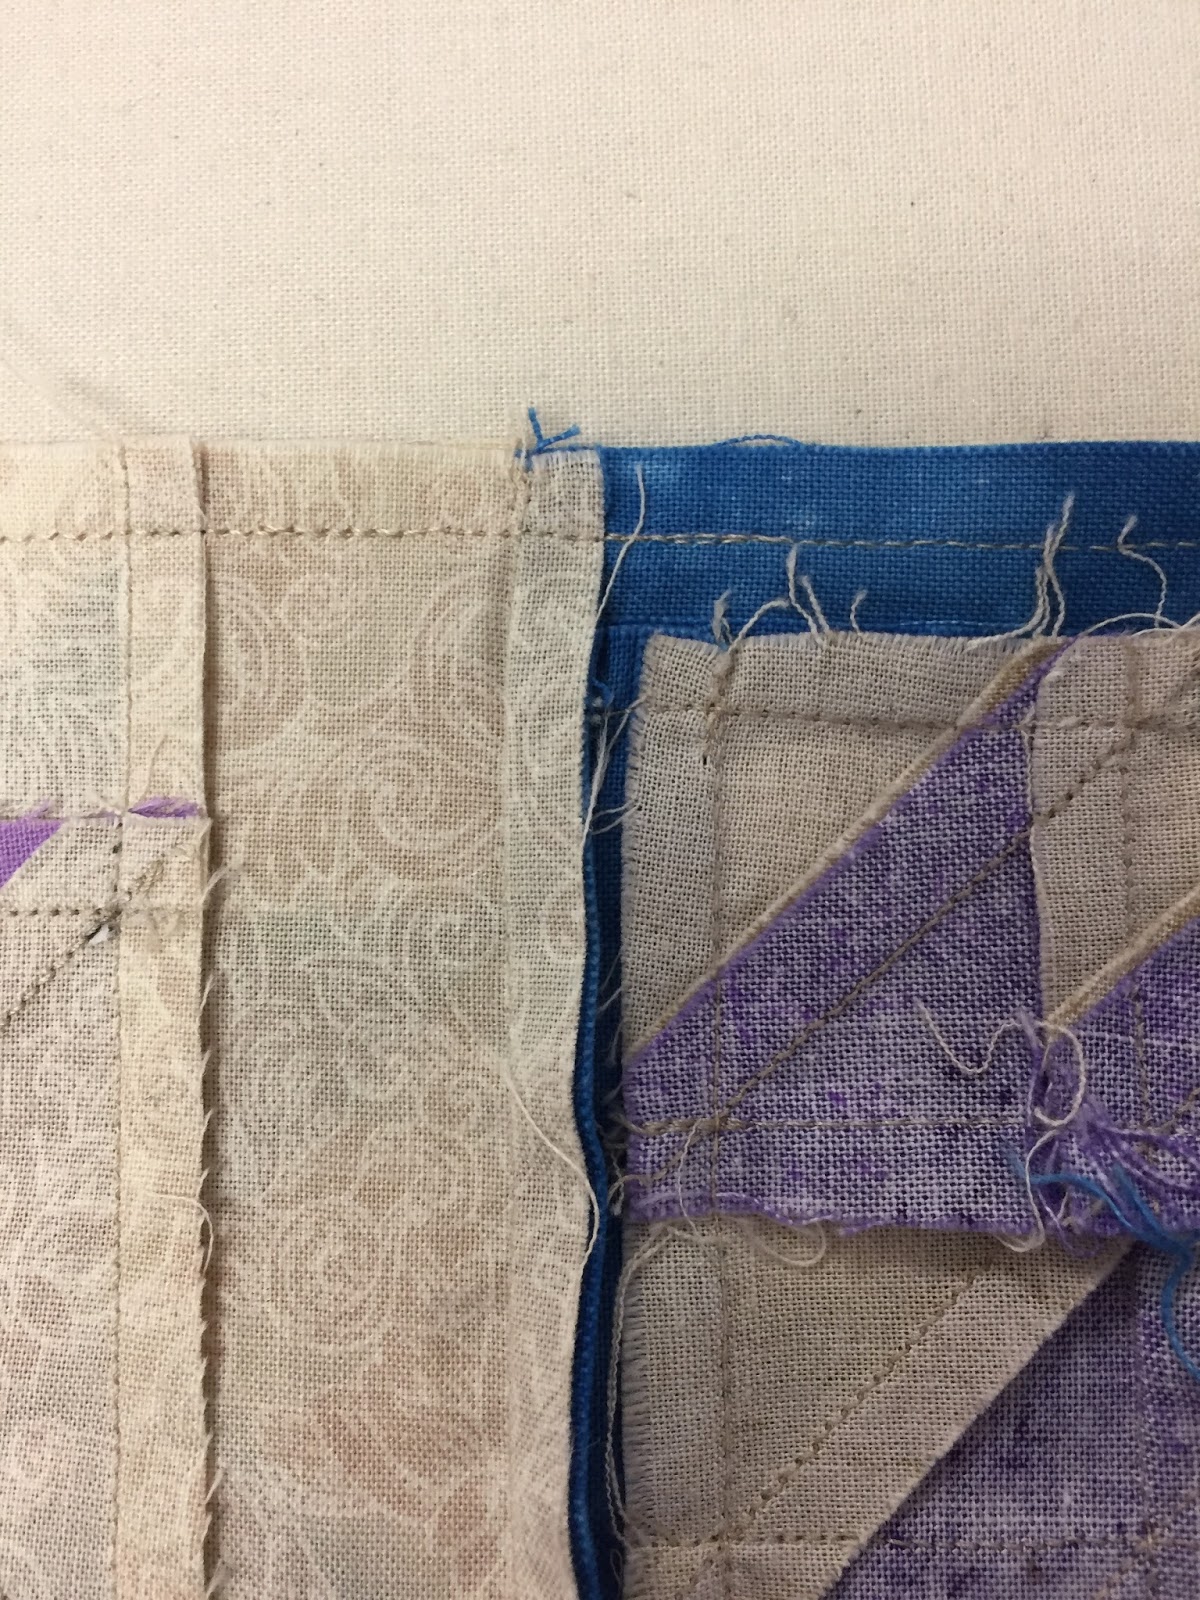
11.  What could go Wrong?  Sew with seam allowance sides facing you so you can keep the seam allowances flat.  Occasionally, there are seam allowances on the bottom you can't see and sometimes they get "wonky", a technical term:


Fix this as soon as you see it, probably while pressing the seam flat. Your finished quilt will be better for it.  This is NOT a quilt police thing, it's a "how can you make the best quilt possible" thing.  You are putting a LOT of work into this project and it deserves your best efforts.  I confess--this happened to me 3 TIMES this month, and I was careful with pinning and sewing.  NO BIG DEAL, just unstitch a few stitches and re-sew the problem area so it is FIXED:


While pressing all your floaters and borders after sewing them on, watch for threads that have been sewn through to the front of the quilt.  Gently pull to remove or carefully cut them off at the surface--it is a lot easier to do this now, rather than after the entire quilt is done.  You want a nice, neat quilt.

That should hold you for now.  Next month we tackle those curved flying geese units.

Let's Quilt!

Barbara

Wednesday, May 31, 2017

Halo Star Medallion--Month 6

This month we make sawtooth borders--the reward for doing all those wonderful curved flying geese:


Mine are totally scrappy, using the fabrics I used in the curved flying geese.

I know some people really do not like paper piecing. This border is one you can easily choose to piece in the regular fashion. I did that with the left border. Then I used paper piecing for the right border so I could choose which method I preferred for the top and bottom borders--more on that later.

Here are some tips for piecing the half square triangles (HST) by regular piecing. There are several different methods you can use, I'll show you what I did. IF you are making the HST from only one fabric, it would be faster to use a grid method to create a bunch of them at one time. I will discuss using a HST ruler and how to make HST from squares--there are detailed photos of both those methods on an earlier blog I did for our Sew-A-Long, earlier this year.

I like to use a half-square triangle ruler; there are several brands. The one I use is from Creative Grids, CGRT45. The advantages to this method are:

1. It uses less fabric--for 1.5" finished HST, strips are cut 2".
2. It is easy to check completed sizes as you sew.
3. It's not paper-pieced, important if that is not your "thing".

The disadvantages:

1. It may be slower.
2. The seam allowance is critical.
3. You make the units, then sew them into a border, two different steps.

Here I have 2" strips of a lavender and background, placed Right Sides Together. With this ruler you place the line that corresponds to the cut size of the strip on the bottom--each ruler has it's own instructions, some use the finished size of the HST, so be sure you know which line to use with your ruler:

Ready for the first cut

Ready for the second cut

Two HST ready to be chain pieced

The blunt edge on the top makes it easy to feed through the machine, no point to get "eaten" and saves a bit of trimming. I cut lots of these units, then chain piece them in one long chain:

"Chain, chain, chain..."

A bunch of HST chain pieced

An easy way to separate the units--a Clover thread cutting disc set in a child's wooden block

A new tool: Sunflower Quilts thread cutter, new to the Market


Pressed toward the darker fabric and ready to trim


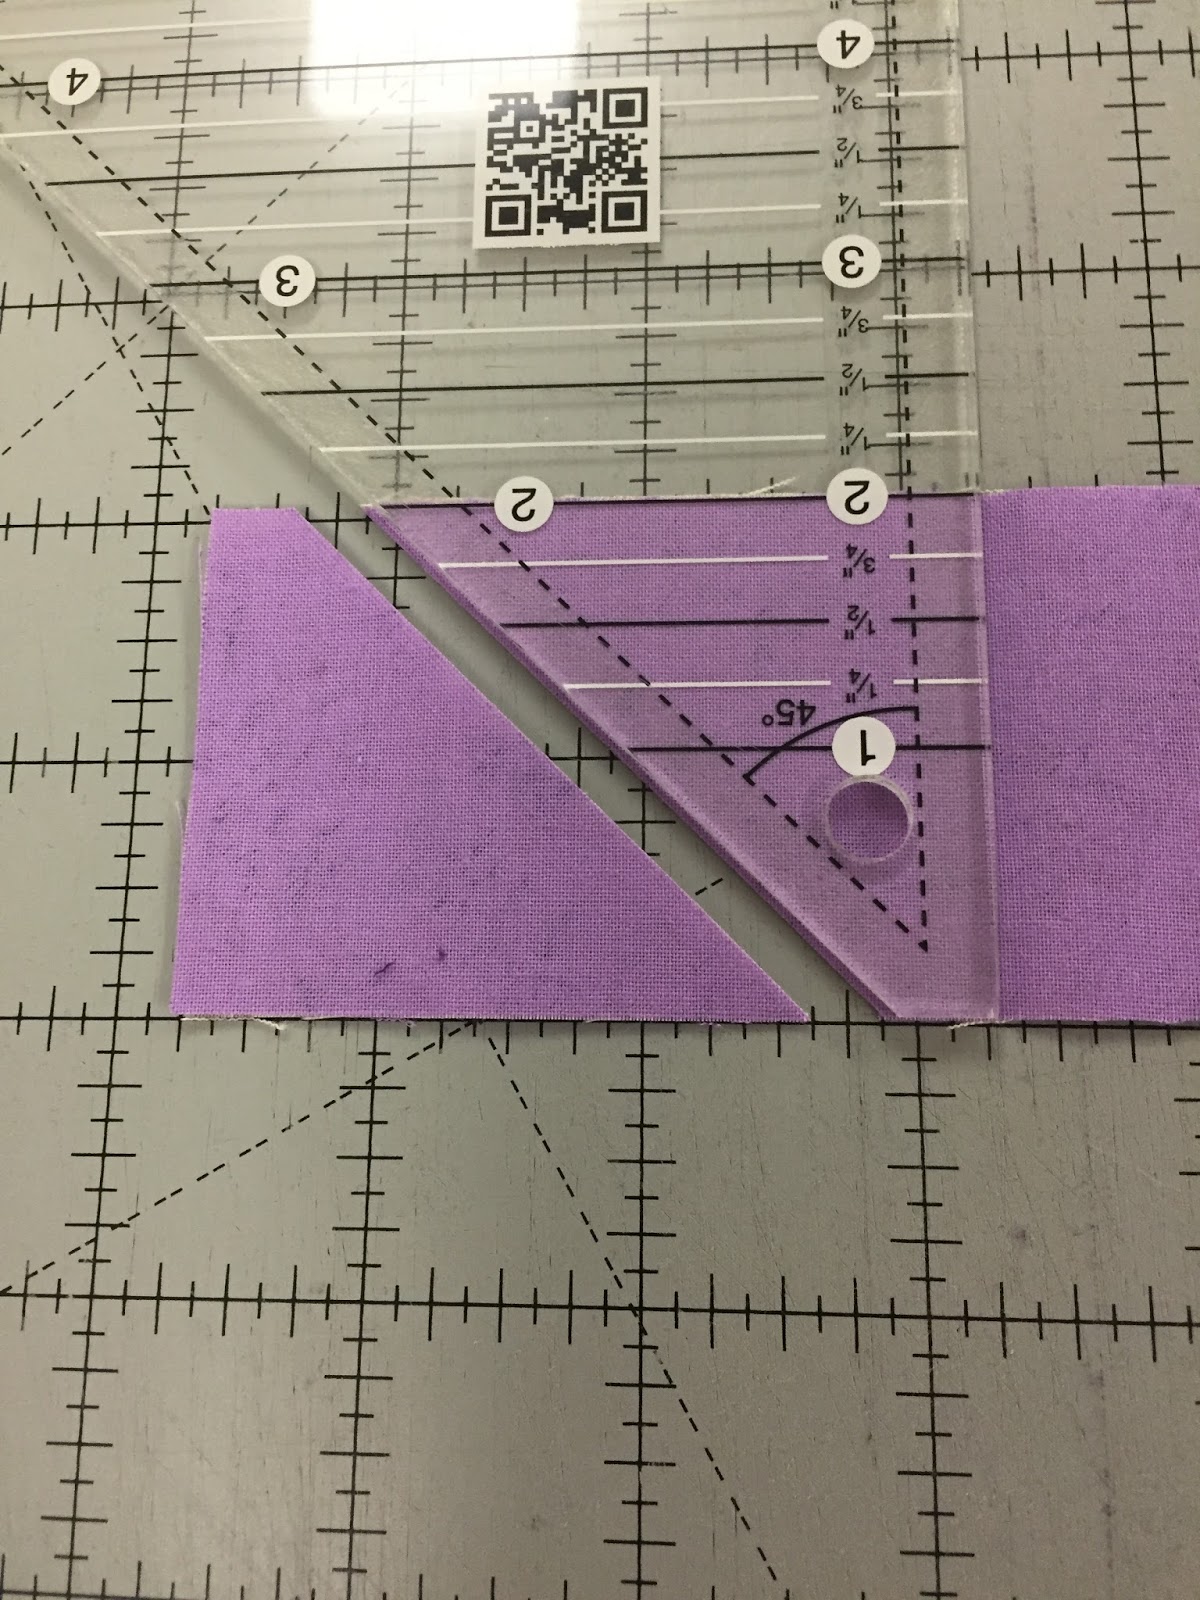
I use a very scant seam allowance with units this size, more than an 1/8", less than a 1/4". It works for me. That makes these units a tad bit larger than 2" so I get to "Trim to Perfection". Above is the first trimming, below I have rotated the unit 180 degrees and trimmed the other side:


A bunch of perfect 2" unfinished HST
With the HST ruler, if you cut the strips EXACTLY 2", and sew EXACTLY a 1/4" seam, and press EXACTLY flat and square, in theory, your units should need no trimming. That's more perfection that I want to perform, I am happy to make the units slightly bigger and then trim them to the perfect size.

Once you have 34 HST you are ready to sew them into the Left border:


Here is the most important tip:  As you make pairs, check to be sure they are 3.5" unfinished. You will see quickly if your seam allowance is too narrow or to wide. Then join those pairs into units of 4--these should be 6.5", check to be sure. Then two units of 4 become 12.5".  Remember, if they are NOT THE RIGHT SIZE NOW, they will not miraculously become the right size in the next step:

Two HST = 3.5" 

Eight HST = 12.5" 

When all 34 are joined together your border should measure 51.5 (34 x 1.5"=51" + .5" seam allowance).  I was zipping right along, checking as I sewed the units, then got too sure of myself and stopped checking.  The border was 52" when I got done. I used a ruler to see where the culprits were, then snugged up four seams and Voila':


Perfect!

I did not keep track of how long this process took, only whether I liked the method. To compare, I did the right side border by paper piecing.  The advantages of this method:

1. As the units are sewn, the border is also being sewn, it's one step.
2. If the papers are the right size, the border units should be accurate.
3. It is easy to lay out the fabrics I wanted in each position.

The disadvantages:

1. Some people just don't like paper piecing, it's upside down and backwards--that's OK.
2. It requires a good bit more fabric.
3. Taking out those tiny stitches when you make a mistake is tough.
4. Seam allowances among the HST may be different sizes, that bothers some people.

If you want detailed instructions, with step-by-step photos, go back to Month 2.  That sawtooth border was 1" finished but the process is the same.

Let's talk about what SIZE to CUT the triangles. Sue's instructions say to cut squares 3", then cut those in half.  First, I started with 2.5" squares because I had 2.5" strips left over from the curved flying geese. That was TOO SMALL. The "drop-dead, has to be sewn perfectly" measurement for cutting 1.5" finished triangles from a square is 2 3/8" squares. So, 2.5" squares leave only 1/8" extra and when you cut the square in half, that means each triangle is only 1/16" larger than the space it has to fill on the paper.  Not good. I found I was a lot happier with squares cut 2.75". The larger the square, the more waste you have but being too small is just not fun. You decide what size to cut the squares, just make them bigger than 2.5"--and 3" works just fine.

One paper unit of 6 HST sewn

Trimmed

Paper has been removed and unit should measure 9.5" 

Join units of 6 HST with a 1/4" seam
Join 2 units of 6 HST--they should now measure 18.5"

Once you have all 6 paper pieces made, the paper removed and the units sewn together, your side border should be 51.5". Mine was so I was good to go.

What I decided about the two methods:

1. I was more accurate with the paper piecing.
2. I was faster with the paper piecing.
3. I am willing to "waste" a bit of fabric to achieve the accuracy I wanted.

So, I also did the top and bottom borders by paper piecing.  That's why there is chocolate AND vanilla--you get to decide which method you prefer. My motto, in life and in quilting is "I want the fastest method that gives me the result I want.". For me, with this border, it is paper-piecing.

IMPORTANT NOTE: Sue changed her design, replacing the top and bottom corner pieces with ONE WHITE SQUARE, instead of a half-square triangle, probably to make them the same as the Month 2 half-square triangle borders. We were not able to change her pattern so here is my workaround for pages 7 and 9, the bottom unit on the right hand side of the pages:


The top and bottom borders have 35 HST and ONE white square--they should measure 54.5" when sewn together, including the seam allowance.

Whichever method you choose to sew the sawtooth borders, when all four are done, you are ready to follow Sue's directions on page 3 to determine the size your floater borders need to be. They join the center of the quilt to these borders, filling in the space needed. Another name for these borders is "Coping Borders"--they help us "cope" with the different size borders.

Next month we will be making Pinwheel blocks for the next border. One of the members of my small group, the Halo Sunday Sew and Sews, said she really doesn't like Pinwheel blocks. I'll give you some alternative suggestions for the next border if you want something different in that space.

Let's Quilt!

Barbara


Sunday, December 28, 2025

GAME ON! Month 1

Game On! is the 2026 Block of the Month quilt designed by Becky Goldsmith exclusively for THE QUILT SHOW: find Game On! information here. Join as a Star Member to get all the patterns and all the videos FREE. Membership is just $49/year and provides access to over 18 years of shows and tremendous additional content. Join HERE

Prints or Solids, the choice is yours. Buy a KIT or use your own fabric: 


In Month 1 we make the center star points. Becky uses vellum for the foundation paper piecing, sewing through the paper. I will show how I use Freezer paper, not sewing through the paper, so the freezer paper foundations can be used many times.

If you are new to Paper Piecing, I suggest you follow the pattern instructions as written. 

I provide TIPS that may help. They are supplemental to Becky's instructions, use them if you wish.

TIP 1: Watch all the VIDEOS for each month before you begin. Month 1 has 4 of them, each about 7 minutes long. Becky shows you in detail exactly how to prepare the foundation papers, how to place the fabrics for successful piecing and all the steps she uses for making this quilt. Watch them FIRST before you begin.

TIP 2: READ the 18 page GENERAL INSTRUCTIONS in Month 1. There is a lot of detailed sewing instruction in there for Month 1. 

TIP 3: If you are new to paper piecing, know that fabric pieces are cut slightly larger than necessary to allow for proper placement. lt would not hurt to cut this month's pieces 1/2" LONGER than the pattern says. For example, piece 1 is cut 7" long. Cutting it 7.5" long gives just a little bit of insurance. Piece 2 is cut 5.5" long, 6" is a little more forgiving. 

I suggest you cut ONE set of fabrics the size called for before cutting them all. Sew the first Star Point to see if you are happy with the sizes of each piece. If so, cut them all that size. If you would like a little bit extra, cut the next set a half inch longer, to see if you like that better. 

PLEASE NOTE: the CUT SIZES IN THE PATTERN WORK FINE--some people just like a little  bit more fabric for insurance.

TIP 4: if using Freezer Paper, be sure to use small dabs of glue to adhere the wrong side of the fabric to the wrong side of the paper. If the fabric comes off the paper before you have finished sewing the entire unit it is a challenge to put it back on exactly where it goes. This is not a problem when sewing through the paper as with vellum but there are places where dabs of glue help with the vellum too.

TIP 5: if sewing through the paper as the pattern instructs, it is essential you decrease the stitch length--1.75 is the largest I would do. When tearing off the paper at the end you  don't want to have the stitches get distorted or come open. Smaller stitch length is essential. This makes it harder to un-sew should you make a mistake. And you will, at least once. Have a good stitch ripper on hand.

The ADVANTAGE to using Freezer Paper is the patterns can be re-used multiple times. There is no difficulty removing the paper as it separates off completely when the unit is made. There is no need to lower the stitch length, the standard 2.0 length for piecing works well for me. 

Here is my technique with Freezer Paper. If you want more information about this process see my TUTORIAL here:  Freezer Paper Foundation Piecing 

Use dabs of glue to secure fabric to paper. 

Put the wrong side of fabric 1  to the wrong side of the Freezer paper (FP). Fold the FP back on the SOLID line. This is the SEWING LINE. Put fabric 2 right sides together to fabric 1, being sure to center it. Stitch right along the fold, slowly, not sewing on the paper nor away from the paper: RIGHT ALONG THE FOLD OF THE PAPER:

Fabric 2 placed RST on Fabric 1

Fold FP back so stitches can be sewn right against the fold


Sewing right along the folded edge of the FP


TIP 6: The NUMBER ONE MISTAKE students make as they learn foundation paper piecing--they FORGET TO TRIM.  The process is:

SEW--join fabrics 1 and 2
FLIP--flip fabric 2 UP, the only way it can be flipped
PRESS--use a DRY IRON  to completely press fabric 2 flat on the seam against the paper foundation
TRIM--fabric 2 is oversized and MUST BE TRIMMED, before adding fabric 3

Here I am using vellum so you can see the issue. Fabric 2 has been sewn, flipped, pressed, but NOT YET TRIMMED. There is excess fabric 2 beyond the seam allowance that joins fabric 2 to fabric 3:


Use the Add-A-Quarter ruler and a postcard to TRIM FABRIC 2 exactly 1/4" beyond the sewing line:

Place fabric 3 centered on fabric 2, sew, flip, press, trim. 

Fabric 3 has been sewn to fabric 2 with a perfect 1/4" seam allowance. Fabric 3 is slightly oversized, so it is now ready to be TRIMMED: 

After trimming fabric 3, repeat for piece 4. Be sure to check the placement of each fabric to be added to be certain it will cover the area on the paper it needs to cover.

After adding fabric 4, TRIM the long side where fabric 5 joins fabrics 1-4:

Fabrics 1-4 sewn, ready to TRIM for fabric 5


When adding fabric 5, it is very important to place it so it will completely cover the area fabric 5 needs to cover. Fold the FP back to be sure it fits. Fabric 5 is placed face up on the mat, the FP with 1-4 in place is placed on top of fabric 5--by folding the FP piece 5 back I can clearly see fabric 5 will cover the area it needs to cover for fabric 5 on the pattern:


Once Part one is complete, follow Becky's instructions to use a quality ruler to trim 1/4" beyond the solid lines on all sides. With FP, you simple peel the fabric off the paper and use the FP again for the next unit. With Vellum, Becky leaves the paper on until AFTER the Center Block is almost completely sewn.

For Part two, Becky has an excellent video showing how to place fabrics 6 and 7 to achieve the very acute angle:

Piece 6 is wrong side up on the mat, the FP pattern is placed so it is completely covered by the fabric:  

Use the Add-a-Quarter to trim piece 6, ready to join piece 7:


Fold the FP pattern back, place fabric 7 under fabric 6, RIGHT SIDES TOGETHER, you can clearly see the white fabric 7 piece will cover the area it needs to cover: 


Sew the seam joining fabrics 6 and 7. Press toward fabric 7, use a ruler to trim 1/4" away from the SOLID LINES, and Part Two is ready to sew to Part One. 

TIP 7: Because I am using Freezer Paper, the paper is gone from both Parts One and Two before I join them. I work with positioning pins to be sure I have the two units where they need to be once joined.

IMPORTANT: Because I removed the paper I NEED to see where the long point goes so I can join it properly to the larger unit. Very Simple: I use a good ruler and mechanical pencil to draw short lines (about one inch long on both sides) at the very tip of the white fabric 1/4" in from the raw edge--this shows me exactly where to put the POSITIONING PIN:


I machine BASTE about 1" on either side of this important spot, turning my stitch length very long, 5.0 or longer. It only takes a few seconds to sew that inch or two, check it, and, if it's not as perfect as you want, pull out the basting stitches, realign the seam, and try again. This is a FIDDLE PLACE: fiddle with it until it looks as good as you want it to. I was happy with this so I turned the stitch length back to 2.0 and sewed the entire seam: 


TIP 8: While Becky shows where it is essential to back stitch on the pattern, I found it also helpful to backstitch at the outer edges of each seam. It is particularly helpful in Month 2, when we make the four CORNER BLOCKS.

Ask Questions on the Forum. Show your Progress on the Forum. We are eager to see how you play with Game On!

Let's quilt.

Barbara