 |
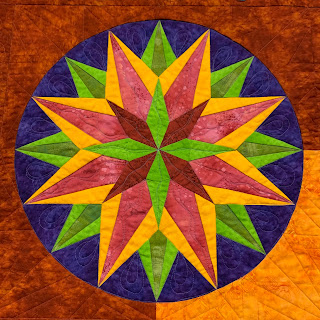
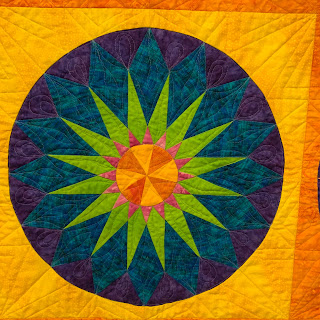
| SIZZLE--HOT! |
Let's talk about assembly of the top. It's pretty simple:
1. Sew 9 blocks together into rows, 3 x 3
2. Add Left and Right borders on the sides
3. Add Top and Bottom borders--Done!
Now it's time to quilt. I did this one myself on my Bernina Q20 Sit Down Longarm. I pin-basted it with safety pins, using my dining room table, doing first one side, then the next.
I selected threads that would blend with the various fabrics. I used a tan Bottom Line thread for the back, that blended completely with the back fabric:
When I am quilting my own quilt, I make a test "sandwich" of the same back and batting and several of the fabrics in the quilt. This allows me to test the thread and tension before working on the quilt. This one is pretty skimpy, I recommend a larger "sandwich":
While in Denver in August taping The Quilt Show, I was able to see and photograph both the Cool and Warm versions made by Becky Goldsmith. The Cool was quilted by Becky and the Warm by Angela Walters. This gave me a few ideas for quilting designs.
First, I stitched in the ditch between the rows of blocks. This helps to stabilize the quilt and quite a few of the pins can be removed as this step is done.
Second, I stitched around the large circle of each block. It took me until block 6 to realize I had to SLOW DOWN--I took out quite a lot of the stitching as I veered off course going around the circles. If doing this on a domestic machine, with feed dogs, I would have been more successful from the beginning. Once I slowed down and kept my hands close to where I was stitching, things were much better.
Now it was time to add more quilting to each block. I love ruler work so chose then whenever possible and appropriate:
 |
| Stitching in the Ditch where the border meets the quilt |
 |
| Ideas for the Background |
For the purple wedges that are along the outer circle edge, I wanted to use a design that was easy to quilt and would be continuous around the the block. All 9 would be done the same. Here is what I decided to do:
As I went around the circle, I used the ruler to go down the right side of the wedge, then did a double loop from the point up toward the outside of the wedge, then I used the ruler to move up the left side of the wedge, back to the curved outside edge. If you are really good at free motion, you could do those straight lines without a ruler.
The most important decision was how to quilt the yellow/orange/rust backgrounds. In the photo above you see the path I selected. Here is the result:
I used white school chalk to make marks at the places I needed to hit. To keep it continuous, the center line was stitched up then back out so I could keep going.
When the first pass was done, I decided it needed more quilting so I did a second pass that echoed the first and traveled in the ditch. Yes, that puts a good bit of stitching in the ditch in places, but you can't see it unless you really look close. And that beats starting and stopping all the time.
Each block got additional quilting, some ruler work, some free motion, depending on what I felt it needed. Some were better than others, some I kept adding to, usually after thinking I was done. The next day I would realize more quilting was needed.
For the Borders, first I echoed each applique' shape. Then I filled in with swirls and loops, all of this with thread that closely matched the rust fabric. Then I used thread that matched the applique's and did some decorative stitching on each shape.
All in all, it was fun, I was pleased with my quilting and the overall quilt is one of the best I've ever quilted myself. The entire job took less than 20 hours over 5 days.
Here are shots of each block:
Feel free to quilt yours however you like.
Finishing the quilt requires binding, adding a sleeve and a permanent label. I have written about these topics before. And there are many videos online that show these important steps. My links:
Finishing and Binding and adding a Sleeve
Adding a Permanent Label I am a believer that every quilt needs a label, just do it.
The label I put on mine, showing the back fabric:
When my Sizzle--Hot! was completely done, I machine washed and dried it with a Color Catcher--if it was going to bleed I wanted to find out before giving it to my friend. That got rid of the chalk marks and left it soft and cuddly. She likes it and I am happy she will enjoy it.
Next up for me is quilting Sizzle--Cool. I will do the backgrounds the same but have a few other quilting motifs in mind for this one:
 |
| Pin basted, ready to go |
 |
| Test sandwich, ready for thread and tension adjustments |
Let's quilt.
Barbara


Hi Barb, looks great! Where did u get the large square of plexiglass? Nancy
ReplyDeleteLowe’s—they will cut it to the size you want, mine is 18” x 24”. Put a border of painters tape around the outside edge to prevent running off the glass with the marker.
DeleteBarbara, thank you for all your instruction! Are the videos downloadable too?
ReplyDeleteI don't believe so but I've been told the videos won't go away.
DeleteThank you!
DeleteThanks for all your posts. I'm just starting to quilt mine, and having your thoughts and ideas is very helpful!
ReplyDeleteThank you!
Delete