Showing posts with label quilt labels. Show all posts

Sunday, January 19, 2025

CHANGE THE SIZE OF YOUR QUILT

 I am often asked for help by a quilter wanting to change the size of a quilt pattern. Perhaps it's too big. Perhaps it's too small. How do you increase or decrease a quilt to be size you want?

Let's look at Laurel Ridge, the 2025 Block of the Month quilt designed by Lynn Wilder exclusively for THE QUILT SHOW. As designed the quilt is 90" square:

For some people, this is too large and they want to make it smaller. How do you convert a pattern from LARGE to SMALL?

1. Make the blocks smaller: this works with larger blocks, say 10" or larger, but these blocks are only 5". Making them 2.5" finished would be quite a challenge. 

2. Make fewer blocks. Because this quilt is a Medallion-style, it makes sense to keep the middle the same and work out until the quilt is the size you want. 

I played around with EQ8 for some possibilities. The middle would remain the same as the original pattern. I didn't draw it, you can imagine it there. This quilt is 52" square with a 1" border on the outside. It can easily be enlarged with more or wider borders:

More borders, now it's 62" square:

Let's add another row of blocks. The blank spaces are for the applique yet to come. I am replacing those blocks with pieced blocks so will save that REVEAL for a few more weeks. It is 62" square now, an outer border would easily enlarge it:


What if you don't want a square quilt? Add additional borders on the top and bottom to lengthen it. Now it's 74" x 80":


Your first decision should be the finished size of the quilt. Once that is set, more or less, play with a variety of options until you say "Aha! That's just what I want"!

Here is one more example. For many years I planned to make this quilt, designed and made by Catherine Butterworth, who lives in Australia:


I called it "Diamond Jubilee" and expected to have it done by MY Diamond Jubilee--my 60th birthday. That was more than 10 years ago and here is what I have today:


It may get a little bigger, and a pieced border is definitely in the plan:


None of this is set in stone just yet. Why did it get smaller? I no longer need another King or Queen size quilt. This has been incubating for so MANY years it is just time to get it done. While I still love Catherine's original, my blocks just aren't speaking to me any more. So my current plan is to have three more Feathered Star blocks, then decide on block placement, sashing color, pieced borders--style and colors--and then get this one DONE in 2025. Finished is better than perfect.

If you have a pattern you like, don't be afraid to "tweak" it a bit to make it your own. Always be sure to credit the original designer on the label--you DO PUT A LABEL on ALL YOUR QUILTS, RIGHT??!!

I am a stickler for LABELS:  here is my TUTORIAL: QUILT LABELS--DON'T LEAVE HOME WITHOUT THEM  

Let's quilt.

Barbara


Sunday, August 15, 2021

Sunday Stacks

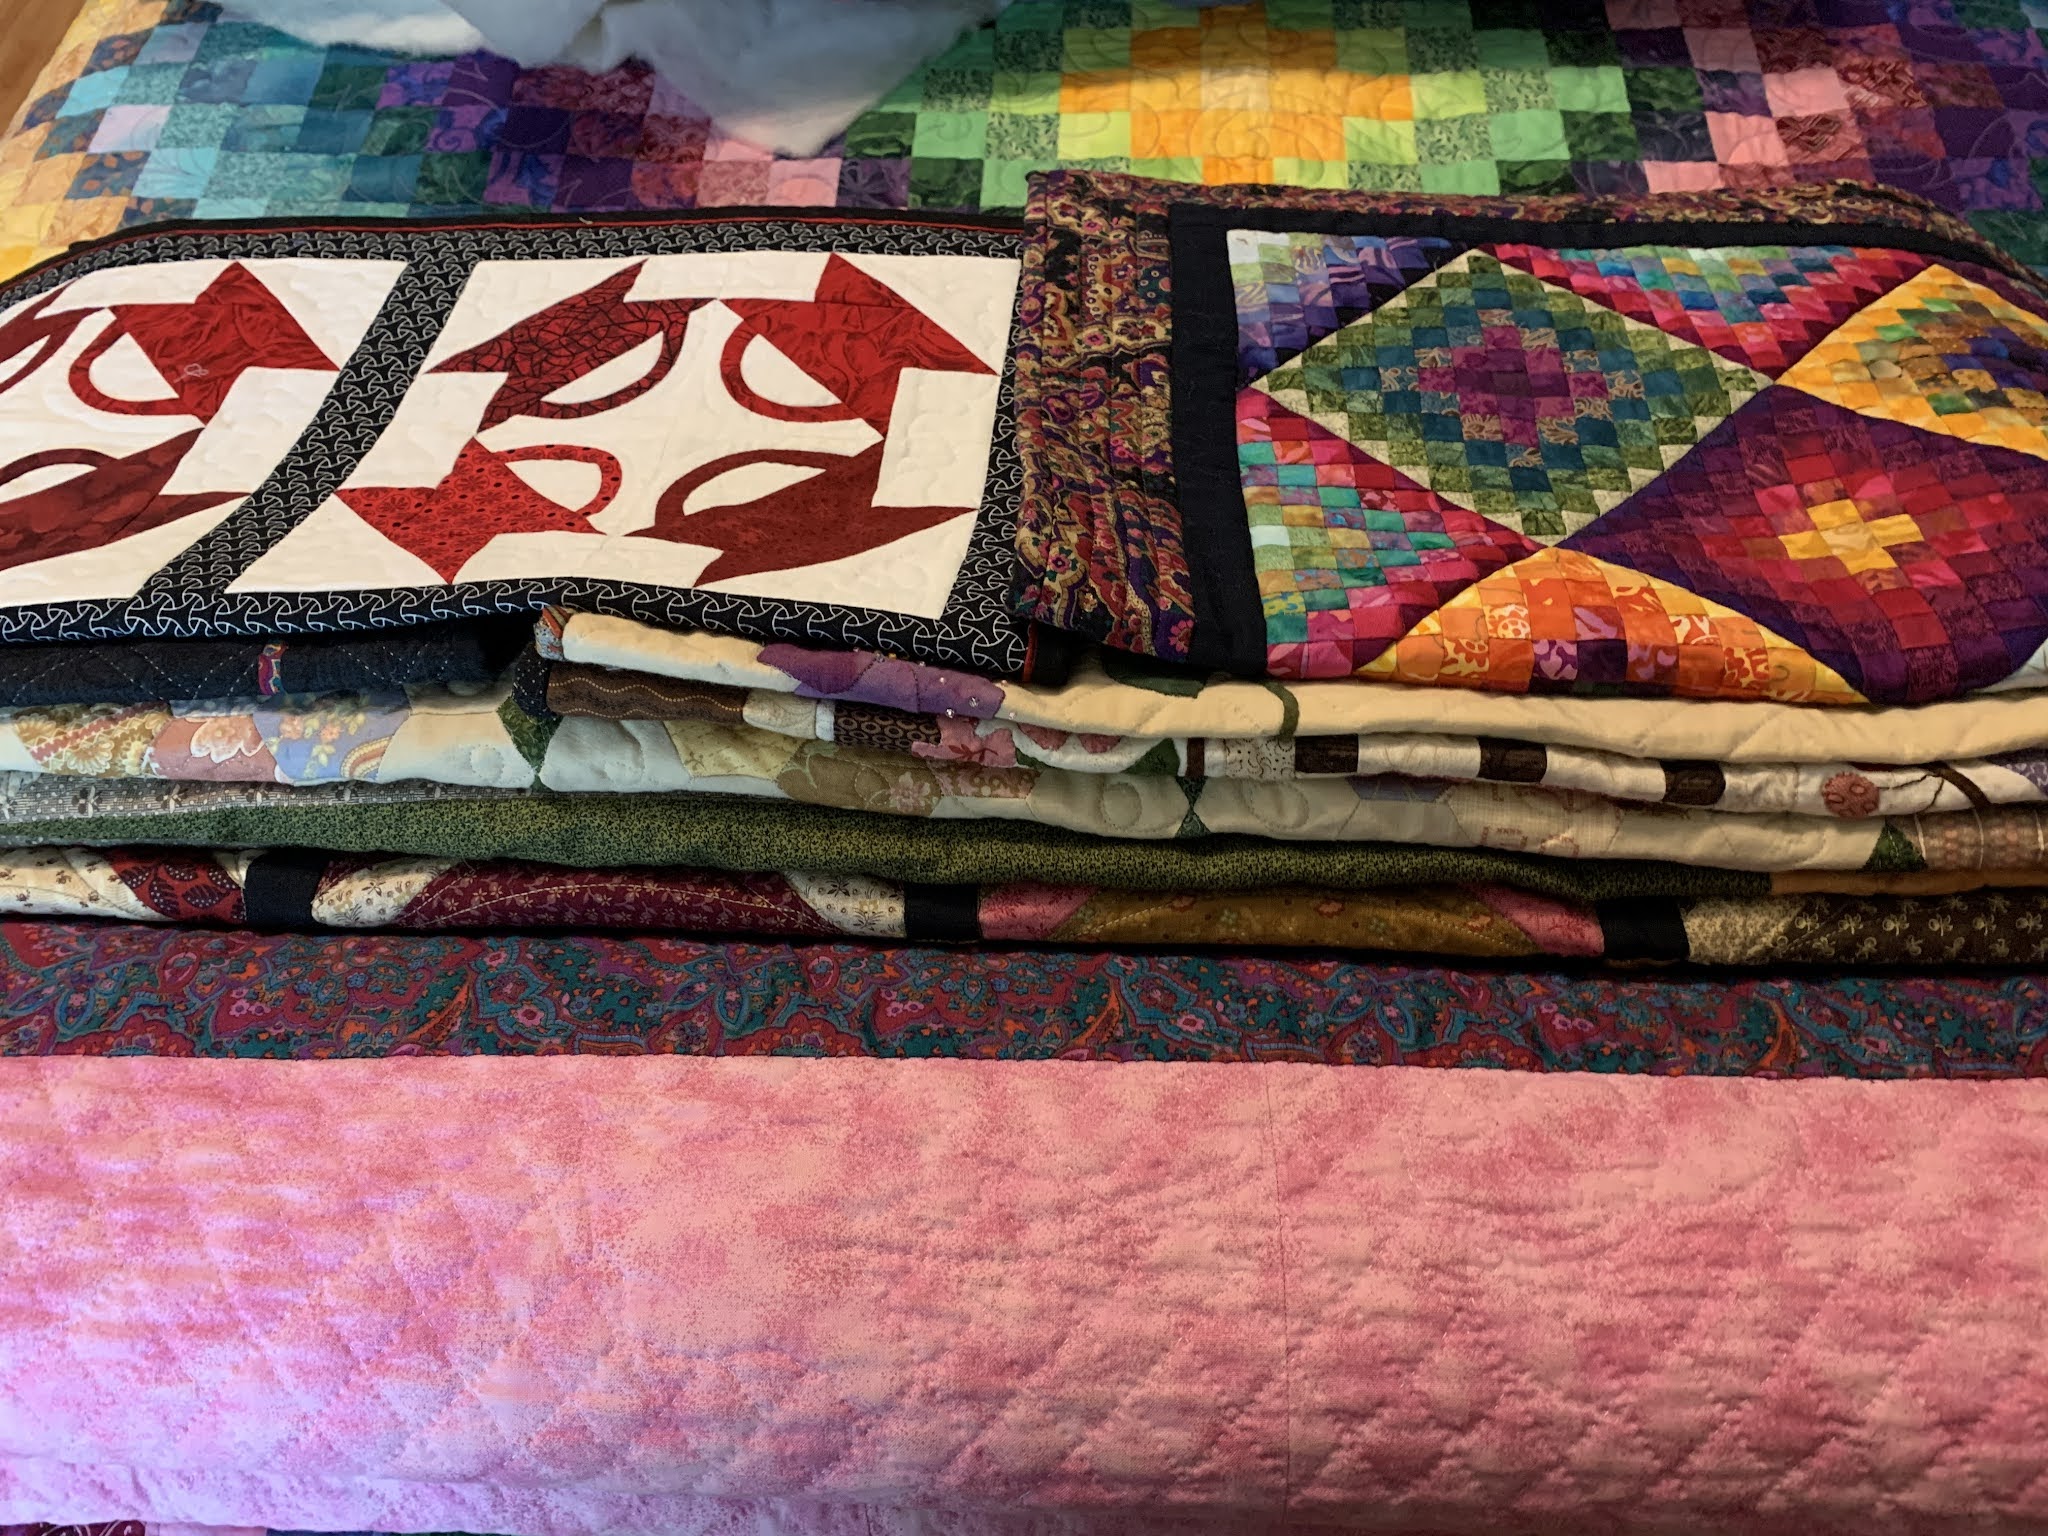
 The wonderful Linda Collins from Australia started posting a photo on Instagram and Facebook each Sunday she calls "Sunday Stacks". As you would expect--a stack of quilts, usually with a theme or reason for being cuddled together.

Today, I have two Sunday Stacks. The first is quilts basted and ready to be quilted.

The large one on the bottom is the king-size Western Sun, 110" x 110"--I have to clear the decks when I start to quilt this one. Western Sun

Next up is Hummingbird Hollow, a variation of Afternoon Delight--it is about half quilted but had to be put away so I could work on more pressing projects. Hummingbird Hollow

On top of that is 9 Patchalong 2.0--Natalia Bonner has a free sew-along starting in September, I learn so much from her, and this is a simple 9 Patch quilt to be used for that project. 9 Patchalong 2.0

Next up is a simple top I made from a charm pack--I had forgotten I made it. The plan is to really play with a variety of quilting designs to increase my skill. 

Finally, the Kool Kaleidoscope is all set and ready for quilting--this too, will get lots of interesting designs in the various colors/sizes of fabric. Kool Kaleidoscope


This other Sunday Stack features the quilts I am taking to Dallas with me later this month for taping The Quilt Show. Since the majority of my larger quilts are in Houston for my Special Exhibit, I had to dig deep to find pieces that will complement the program: 


One thing I do that really helps me in the finishing process, is to prepare the binding and sleeve for each top as I get the top made. Sometimes it is years before the top gets quilted and having the binding all set means I don't accidently use that fabric for something else OR forget where I put it. Once the top is done, I know what size binding I need so can prepare it. The fabrics are still out on the table so I won't have to dig them out later. With the binding made, the fabrics can be safely put back in the closet.

Once I have a backing selected, I prepare the sleeve right then too. Yes, I put a sleeve on every quilt I make, from small wallhangimgs  to king-size bed quilts. I am not the person up late the night before the quilts are due for exhibition still sewing the required sleeve in  place--my sleeve is part of the finishing process for every quilt. 

Bagged and labeled, bindings and sleeves usually: 


See posts/Tutorials I have written on the finishing process here:


Quilt Labels--I also make a permanent label for each quilt, and if wool batt is used, I say "air dry only"

Let's quilt.

Barbara

Sunday, December 6, 2020

Time for Gifts

I spent Thanksgiving weekend working on small gifts--Mug Rugs. These are fun to make and fast to finish:


Finished, they are about 8" x 10", the perfect size for a cuppa and a cookie or two:


Isn't this great fabric!?  "Live the Life you Imagined", "Do What you Love and Love What you Do". Wish I had lots more of it. Janet had a great eye for fun fabrics:

Several times this year I have written about my friend, Janet, who passed away from a stroke this past February. All the fabrics used for these mug rugs were from Janet's stash. She even made all the "Beach Cottage" houses. When I got these at the Estate Sale for Janet's belongings, I knew they would be perfect gifts for a special group of women.  

Janet continues to inspire many of us. One of the Sunday Sew and Sews shared a label for the quilt she made for her son and his bride. It includes a quote from Dr. Janet Noever that Donna says she will now include on all her gifted quilts going forward. "When you sleep under a quilt, you are covered in love."  

Labels should tell the who, what, when, where and why of a quilt. Donna got it all covered:


Several of those who bought quilt tops at the Estate Sale have now finished them and are enjoying the work of Janet's hands in their own homes. I have seen several featured on Facebook. Janet's legacy lives on in these completed quilts. 

When you give a quilt to someone you love, your Legacy lives on.

Let's quilt.

Barbara

Sunday, December 1, 2019

Sizzle--It's a Wrap!

We have made it to December and Sizzle is coming to an end. My Warm version is done and gifted, it now lives in Texas:

SIZZLE--HOT!
VERY IMPORTANT NOTE: If you are not done, and that's OK, BE SURE you download/print/save ALL the instructions by December 31, 2019. After that date they are ALL removed from The Quilt Show and become the sole property of Becky Goldsmith, the designer. Any you are missing you will have to purchase directly from Becky when she has the pattern available for sale. That's the legal, contract, and copyright rules and we have to abide by them.

Let's talk about assembly of the top. It's pretty simple:

1. Sew 9 blocks together into rows, 3 x 3
2. Add Left and Right borders on the sides
3. Add Top and Bottom borders--Done!

Now it's time to quilt. I did this one myself on my Bernina Q20 Sit Down Longarm. I pin-basted it with safety pins, using my dining room table, doing first one side, then the next.

I selected threads that would blend with the various fabrics. I used a tan Bottom Line thread for the back, that blended completely with the back fabric:


When I am quilting my own quilt, I make a test "sandwich" of the same back and batting and several of the fabrics in the quilt. This allows me to test the thread and tension before working on the quilt. This one is pretty skimpy, I recommend a larger "sandwich":

While in Denver in August taping The Quilt Show, I was able to see and photograph both the Cool and Warm versions made by Becky Goldsmith. The Cool was quilted by Becky and the Warm by Angela Walters. This gave me a few ideas for quilting designs.

First, I stitched in the ditch between the rows of blocks. This helps to stabilize the quilt and quite a few of the pins can be removed as this step is done.

Second, I stitched around the large circle of each block. It took me until block 6 to realize I had to SLOW DOWN--I took out quite a lot of the stitching as I veered off course going around the circles. If doing this on a domestic machine, with feed dogs, I would have been more successful from the beginning. Once I slowed down and kept my hands close to where I was stitching, things were much better.

Now it was time to add more quilting to each block. I love ruler work so chose then whenever possible and appropriate:

Stitching in the Ditch where the border meets the quilt

For each block, I used a piece of plexiglass and dry erase marker to "audition" free motion designs I wanted to try:
Ideas for the Background


For the purple wedges that are along the outer circle edge, I wanted to use a design that was easy to quilt and would be continuous around the the block. All 9 would be done the same. Here is what I decided to do:

As I went around the circle, I used the ruler to go down the right side of the wedge, then did a double loop from the point up toward the outside of the wedge, then I used the ruler to move up the left side of the wedge, back to the curved outside edge. If you are really good at free motion, you could do those straight lines without a ruler.

The most important decision was how to quilt the yellow/orange/rust backgrounds. In the photo above you see the path I selected. Here is the result:


I used white school chalk to make marks at the places I needed to hit. To keep it continuous, the center line was stitched up then back out so I could keep going.

When the first pass was done, I decided it needed more quilting so I did a second pass that echoed the first and traveled in the ditch. Yes, that puts a good bit of stitching in the ditch in places, but you can't see it unless you really look close. And that beats starting and stopping all the time.

Each block got additional quilting, some ruler work, some free motion, depending on what I felt it needed. Some were better than others, some I kept adding to, usually after thinking I was done. The next day I would realize more quilting was needed.

For the Borders, first I echoed each applique' shape. Then I filled in with swirls and loops, all of this with thread that closely matched the rust fabric. Then I used thread that matched the applique's and did some decorative stitching on each shape.

All in all, it was fun, I was pleased with my quilting and the overall quilt is one of the best I've ever quilted myself. The entire job took less than 20 hours over 5 days.

Here are shots of each block:


Feel free to quilt yours however you like.

Finishing the quilt requires binding, adding a sleeve and a permanent label. I have written about these topics before. And there are many videos online that show these important steps. My links:

Finishing and Binding and adding a Sleeve

Adding a Permanent Label   I am a believer that every quilt needs a label, just do it.

The label I put on mine, showing the back fabric:


When my Sizzle--Hot! was completely done, I machine washed and dried it with a Color Catcher--if it was going to bleed I wanted to find out before giving it to my friend. That got rid of the chalk marks and left it soft and cuddly. She likes it and I am happy she will enjoy it.

Next up for me is quilting Sizzle--Cool. I will do the backgrounds the same but have a few other quilting motifs in mind for this one:
Pin basted, ready to go

Test sandwich, ready for thread and tension adjustments
I hope you have enjoyed this year-long journey. We have Becky Goldsmith to thank for a wonderful design, and The Quilt Show to thank for giving it to us for FREE!

Let's quilt.

Barbara

Sunday, February 17, 2019

Label Your Quilts--the Future Will Thank You

Putting a label on our quilts is something most of us know we "should" do but a lot of us don't take time to do it. Recently, the topic of labels has come up in classes and on Facebook groups so we should discuss it.

Last Fall I was interviewed by the Quilt Alliance as part of their "Go Tell It At The Quilt Show" project. Amy Milne, the speaker at the guild meeting, stressed several times the need to label and document our work. They have several projects to document and protect quilters' stories for the future:

Quilt Alliance

About a year and a half ago I wrote a detailed blog on how I make permanent labels of all the quilts I make. Rather than reinvent the wheel, I send you there so you can see the steps I take:

Quilt Labels--Don't Leave Home Without Them

Here is a blog TIP: I found this post very easily--in the upper left of the blog is a small box with the orange B blogger symbol to the left and the magnifying glass that means "Search" to the right. I typed in Labels and every post I've written and tagged "labels" comes up. This is the first one that appeared.

Another TIP: there is a Tutorials page with a direct link--the button is on the bar with various pages, like my teaching calendar out of town. The Labels blog is one I show as a Tutorial. Most of my step-by-step posts get added as a Tutorial.

So, if  you are looking for things  on my blog you have seen before or you think I may have written about the subject, use the Search box or the Tutorial button--you may just find what you are looking for. You can always Google the topic, I show up there too but this is much more direct.

Here are a few more label photos:

The fanciest label I ever made. When the quilt has a WOOL batt I make certain that care instructions are clearly marked on the label. My husband thought I was giving this quilt away when he saw the label--"No, but I'm not going to live forever" was my response:


This quilt is hanging on the living room wall so the photo is not so hot. If there were more room on the label I would add that it was Best of Show 2011 Fanfare HQH show, juried in to Paducah 2012, featured in the book 500 Traditional Quilts and included in the 2014 Special Exhibit of 500 Traditional Quilts at International Quilt Festival Houston. Maybe it just  needs a second label:


Give credit to the designer if the work is not original:


Give credit to the quilter if you did not quilt it:


Labels ready and waiting. Two are for quilts I plan to finish this year--hope I don't have to change the date. Three are for quilts made in the past that did not have labels--I discovered that omission when I was doing my "The Journey" series of blogs last year. It's time to get them sewn on those quilts:


And, my all-time favorite label. The photo won't hold up to years of washing, colored inks won't last, but the black ink printing should be fine for years to come:


Please label your quilts!

Let's quilt,

Barbara

Sunday, August 5, 2018

Spellbound--It Needed More Quilting

When deciding on quilt designs for our quilts, several factors are considered:

Use--is it a show quilt or a utility quilt?
Batting--what is the minimum space un-quilted recommended by the manufacturer?
Deadline--how soon does it have to be done?
Quilt "Worthiness"--how much time does this quilt, for it's intended use and/or recipient, deserve?

I know I almost always err on the side of too little quilting. Usually a deadline is pending and this shop sample just has to be done. Sometimes, I'm over this particular quilt and it just needs enough quilting to get by.

Rarely, have I added more quilting and wished I hadn't but from time to time I have wished I had added more after the quilt was complete--that can be done but rarely is. Done is done.

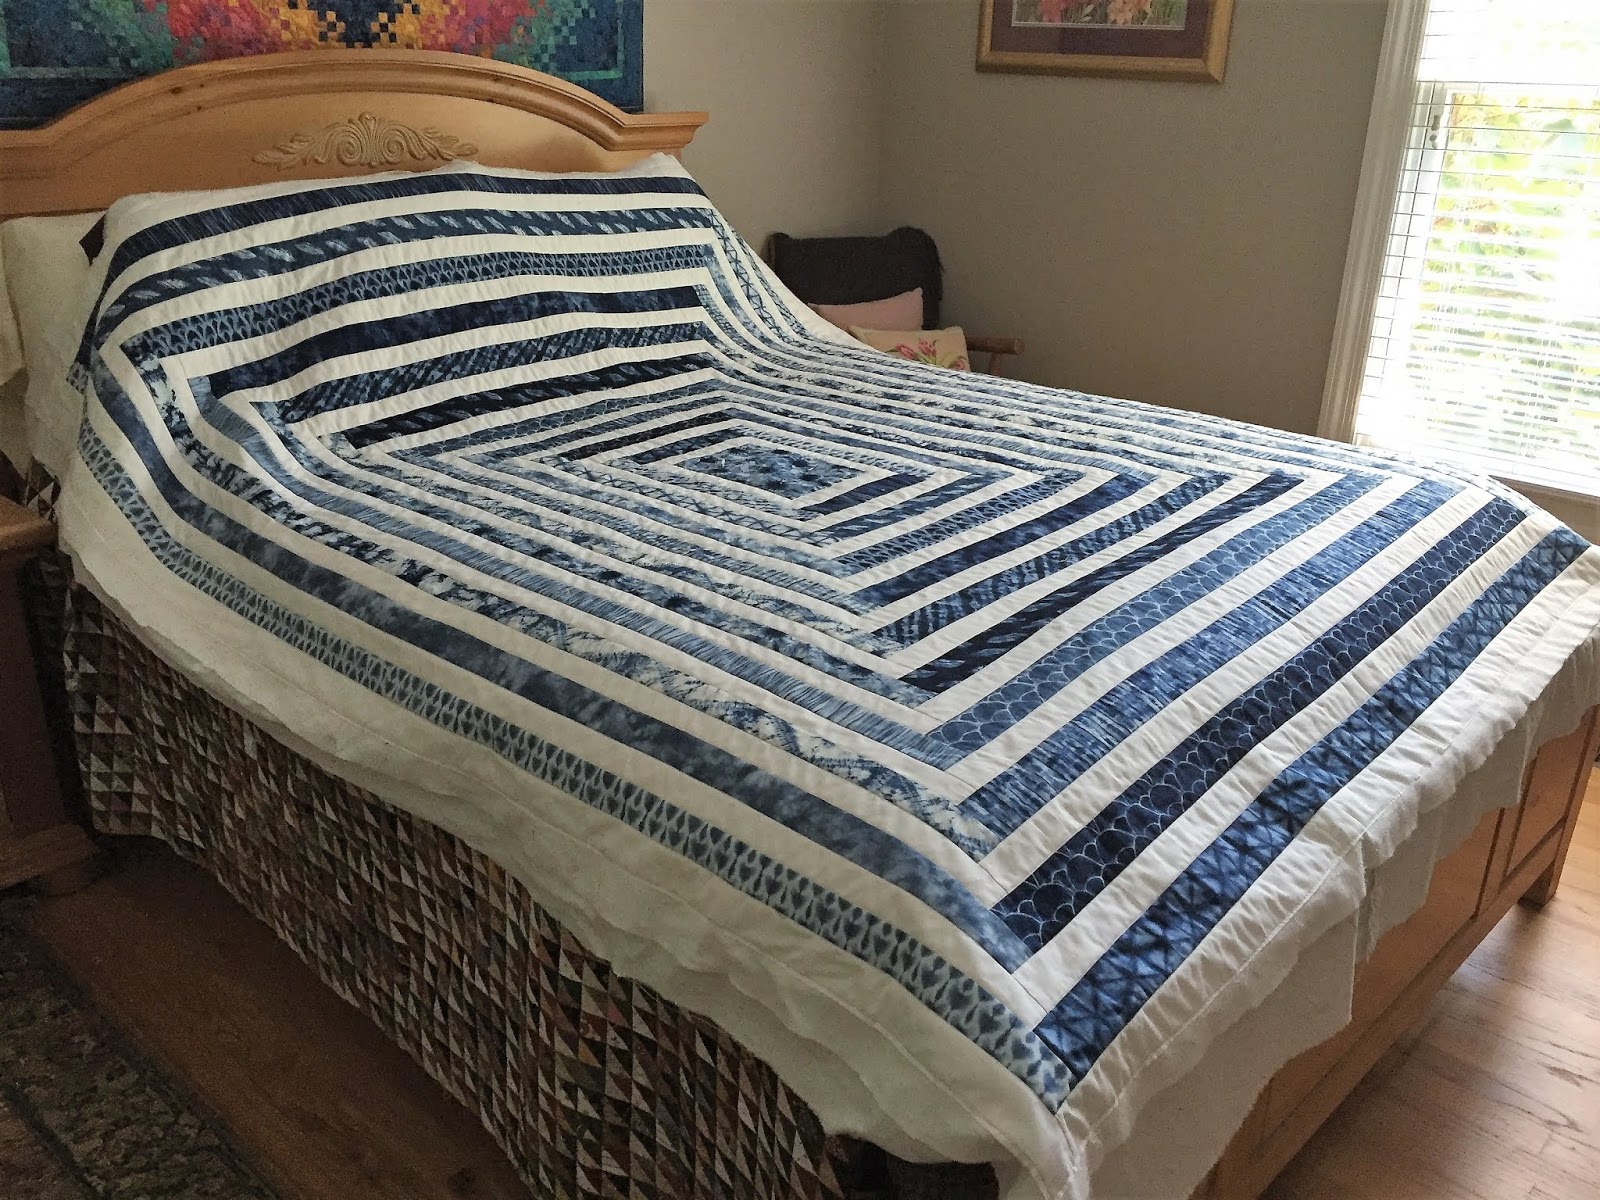
Spellbound is a great pattern from Calico Carriage Quilt Designs I first discovered at Spring Market in St. Louis in 2017. I took lots of photos of the quilt hanging in their booth, bought the pattern and secured the fabrics--two jelly rolls of a Shibori design by Debby Maddy for MODA. Here it is at Market:


When I got the top done, I decided I would first stitch in the ditch along all the seams, using white thread top and bottom, as the back is a very light white/floral fabric. Here it is "resting" after all the stitch in the ditch was done:

Next I used navy blue thread top and white bottom for the decorative stitching in the blue bands. This took a bit of tension tweaking, each time I changed bobbins, or started each day. Machine tension in quilting is so important and can be frustrating to achieve. The Bernina Q20 Sit Down Long Arm rarely has tension issues. No problem with Bottom Line in the bobbin and MicroQuilter 80 weight polyester in the top, both by Superior Threads. All I had to do was quilt.

 I always make a "practice piece" as soon as the top is done and when it is "sandwiched"--using the exact same backing, batting and leftover fabric pieces from the top. Since it can take me years to actually quilt a top, doing this at the same time the quilt is basted is a timesaver--no more searching through fabric bins to find that backing fabric leftover, or pieces from the top, and what was this batting? Now the practice piece is made and stored with the basted quilt, waiting for me. It doesn't have to be pretty, just functional. Here is the piece from Spellbound:

When all the blue bands were quilted, I declared it done and added the binding and sleeve to the trimmed quilt. I also make the binding as soon as the top is basted, deciding what fabric I want for the binding and getting it done. The sleeve is made from the back fabric and I either make the back 9" extra long for the sleeve or go ahead and make the sleeve while preparing the back.

Here it is just after I put the last blue quilting stitches in place:
During the hours spent hand-sewing the navy blue binding to the back side of the quilt, I kept thinking I might need to quilt the white bands too. I looked at the photo of the original quilt, in the Calico Carriage booth, and could clearly see the white quilting really added a lot.

BUT the sleeve was already sewn into the binding, that's how I always do it. If I was going to quilt the white bands I had to do that BEFORE I stitched the sleeve in place along the top edge of the quilt and before I attached the printed label I made to the back. Did I want  to double the quilting? No. Did the quilt NEED me to double the quilting? Yes.

For the white thread, I switched to Glide--it has a bit of shine and is certainly thicker than the 80 weight MicroQuilter. It behaved beautifully.

I started on the outside edge, at the top where the sleeve is, pulling the sleeve out of the way and coming up with a design that would fill the space but not catch the binding or any of that sleeve. To make matters just a bit more challenging: the vertical white bands are 1.25" finished and the horizontal white bands are 1.5" finished. Both blue bands are also different sizes but that stitching hardly shows and because they are wider, it was easier to come up with designs to fill the spaces.

The top design I did with a ruler and I loved how it looked:

That helped me decide I would use the same design all around the four sides of the quilt, selecting a different design for each round of white. I alternated between ruler work designs and free motion motif designs, looking at designs I like and have saved--mainly in the many books I have or on Pinterest.

It only took a few hours to quilt all the white bands and I was so glad I put in that time. Here is the quilt just after the last white stitching was completed. Much better:

All that was left was to hand-stitch the sleeve down and sew the label on:

Sleeve ready for hand-stitching

Label ready for hand-stitching


As you can see, sometimes I make the label prematurely, or with wishful thinking. All it took was a permanent Ultra Fine Sharpie to add 2018 to the expected date of 2017 and now it's accurate.

I have written in detail about bindings a few times--find specific details here in this Tutorial and here where I explain adding a sleeve and the quilting process.

And now here is the finished quilt, ready to show off at the next guild meeting and then get installed at Huntsville Sew & Vac where it will be a one-day class October 5, 10-4. The pattern seems pretty easy, I  thought I would zip right through it but it took me over a week to complete the top. There are important tricks to staying organized with this one--students will learn those tricks.

My Spellbound 64" x 83"
It is not easy to get good photos of the quilting--this is the best I could do. I am SO glad I quilted the white bands--it really shows there:


Let's Quilt.

Barbara