Showing posts with label machine quilting. Show all posts

Friday, December 1, 2023

HOMEWARD BOUND -- THE QUILTING

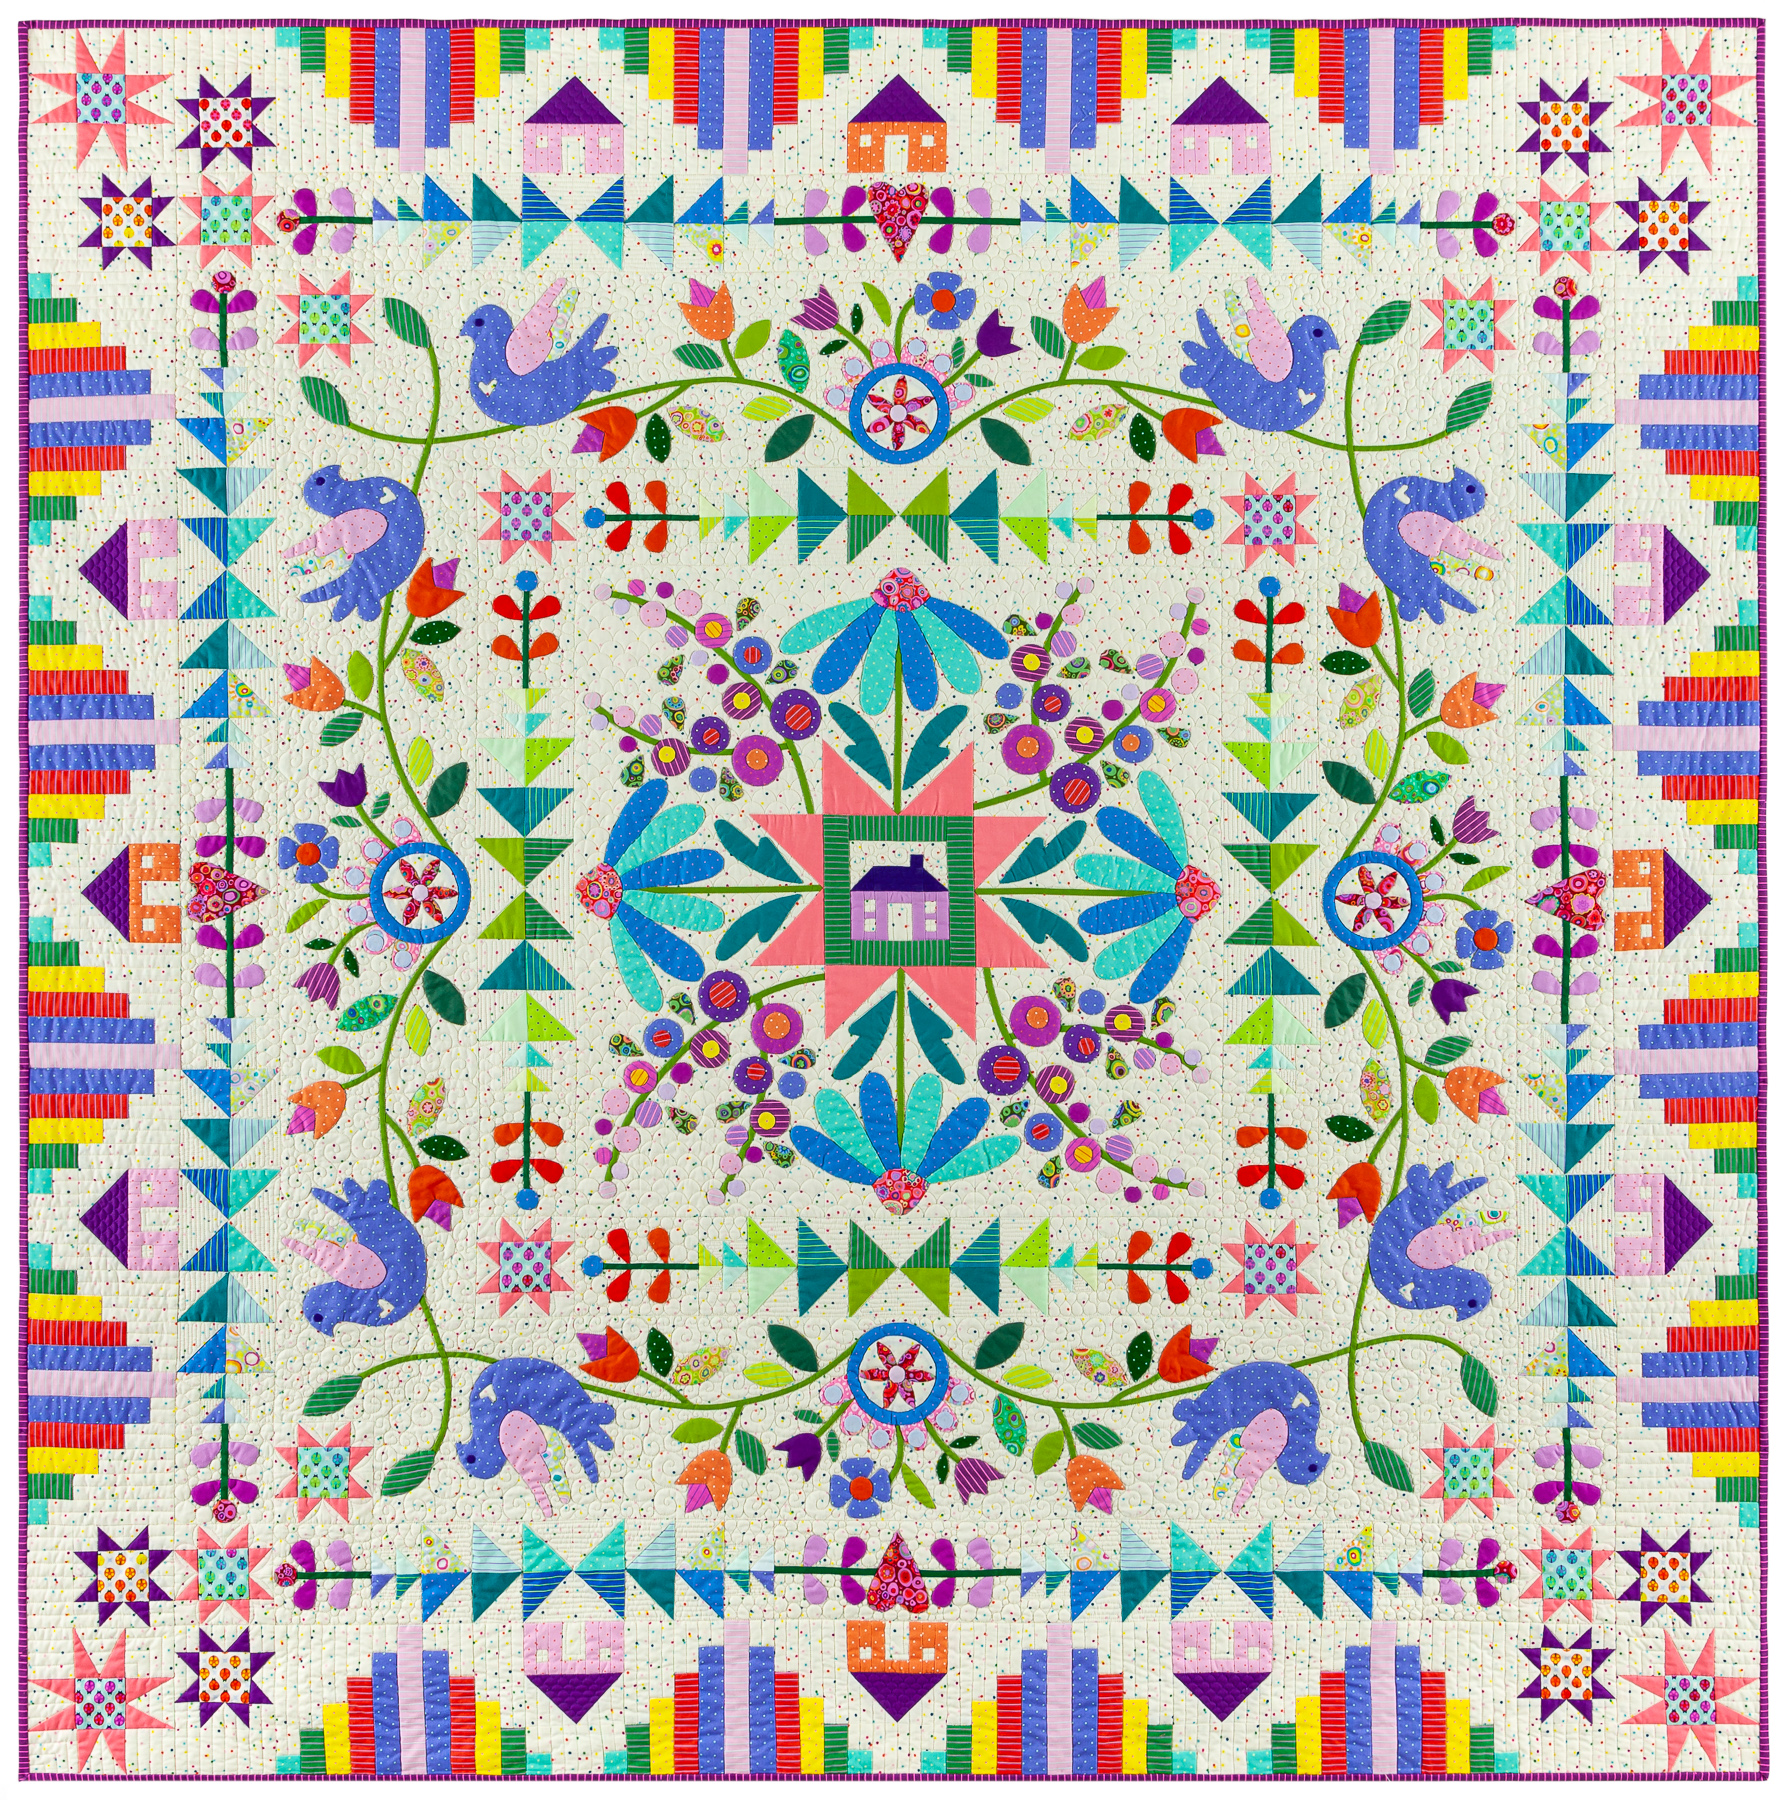
 We made it to the end of the 2023 Block of the Month quilt for The Quilt Show! Let's talk about how you might want to quilt it.

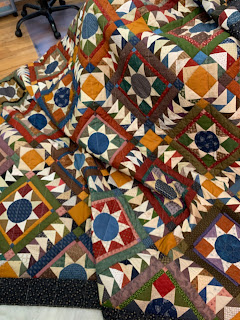
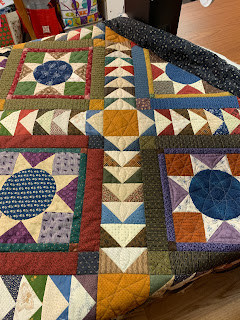
Here are a few photos of Sarah Fielke's quilt, showing some of the quilting. It was custom longarm quilted by Australian quilter Kat Jones:


I sold my top to Alex Anderson. She will have it longarm quilted and I will be eager to see how it is finished. 

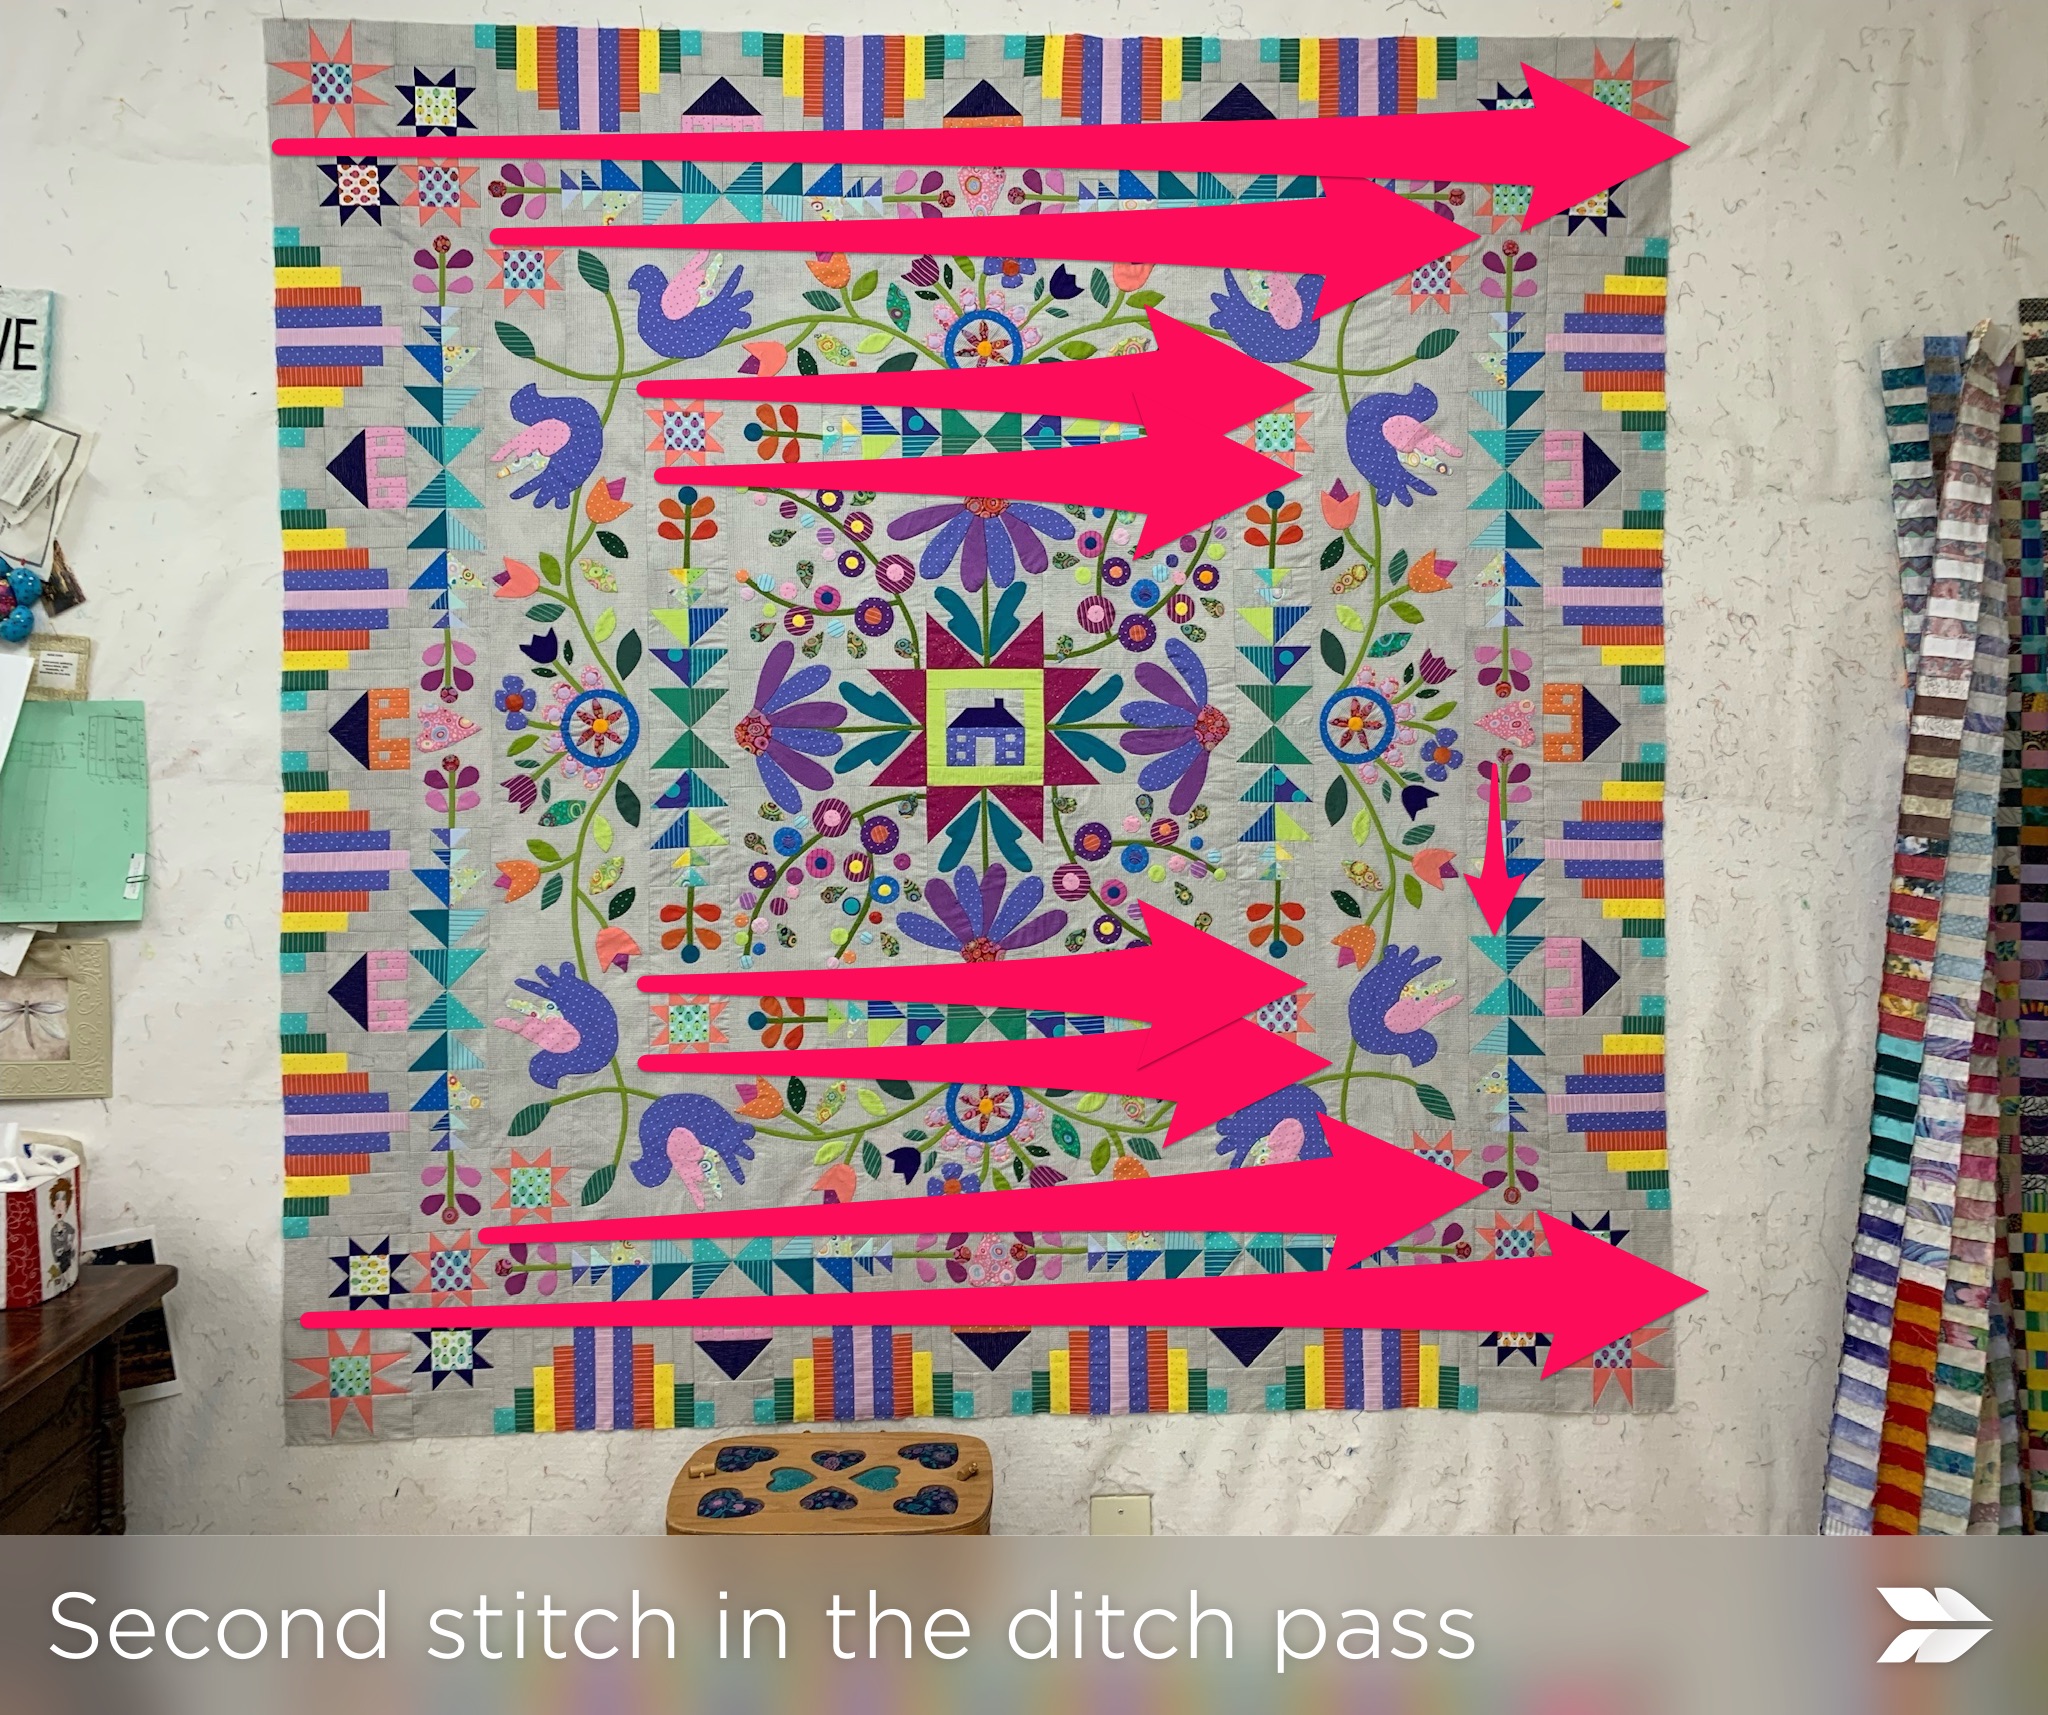
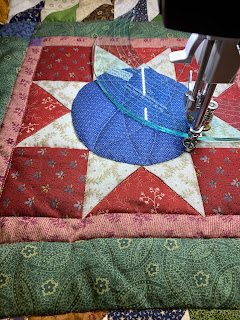
If I were quilting this quilt myself, here is how I would do it, using the Bernina Q20 sit down longarm. First, I stitch in the ditch along the lines of construction. 

Top to bottom first: 


Left to Right next:

This stabilizes the quilt, allows the removal of lots of pins, and gives areas for free motion quilting around the applique motifs. This step is done with a Line Tamer Ruler, my go-to for all straight line quilting.

I use a fine thread for this step, either Quilters Select 80 wt or Microquilter by Superior 100 wt thread, in a color that blends with the background. On this quilt I would use light gray. Bobbin thread is Bottom Line by Superior in a color that blends with the backing fabric.

If I wanted the free motion quilting to show, I would use a thicker thread for the decorative quilting. My favorites are So Fine 50 wt by Superior, Quilter's Select 60 wt., or Glide if I want some shine. Thread color is the most important factor for me as I don't want my stitching to show, I'm just not that good at it. 

This is essentially how I quilted Garden Party Down Under, the 2022 Block of the Month quilt. See my detailed blog post about quilting that one here: Quilting Garden Party Down Under

I have written MANY BLOGS about machine quilting and Ruler Work. Use the SEARCH box on the left above, the orange B space. Type in Ruler Work or Free Motion Quilting to find them. 


This quilt can be quilted edge to edge if you don't want to do or pay for Custom machine quilting. Look what good friend Margo did with her Homeward Bound. Simple is sometimes perfect:


Here are more images I took from the photos posted on our Forum: MONTH 12 -- Show Your Completed Top Here!:

Renee:


Patricia B:
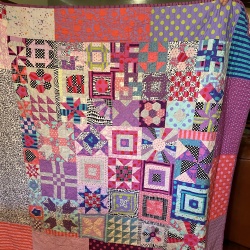

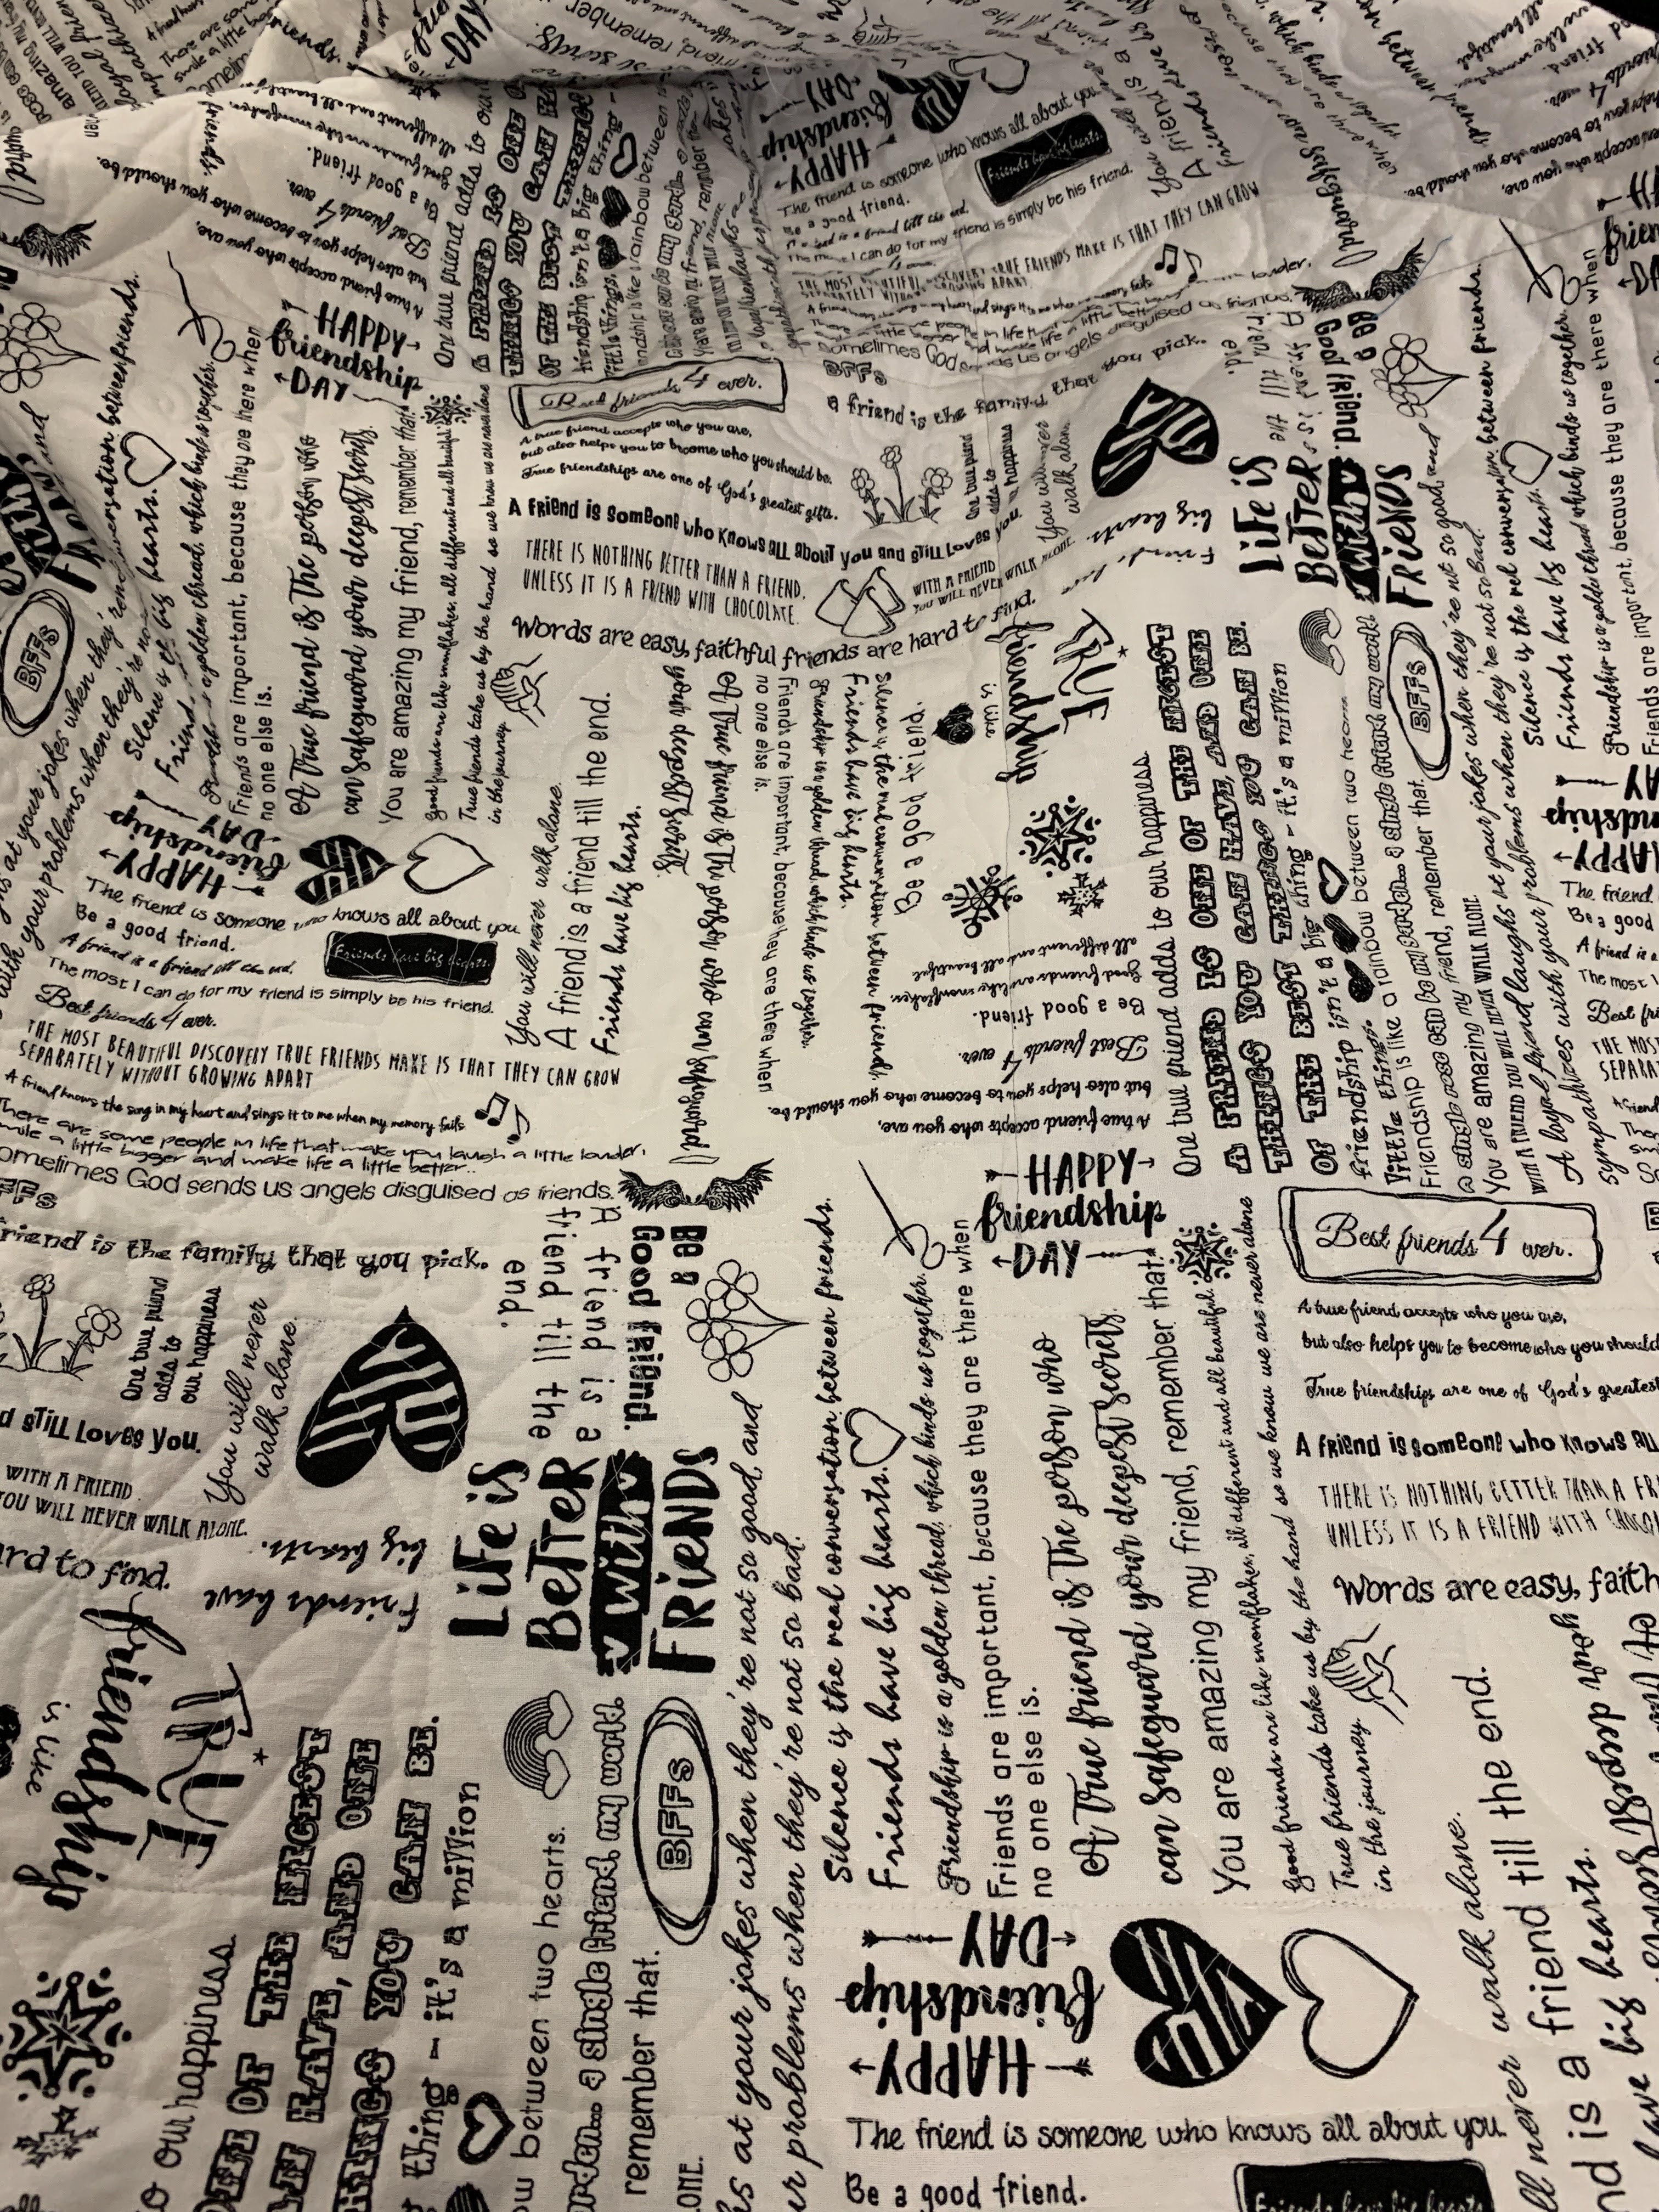
I LOVE this pieced back made from "orphan" blocks--it hides everything

It will be fun, interesting and educational to see how everyone quilts this quilt. Please post it on the FORUM when you are done. And we will  be watching for photos of these quilts hanging in Shows with RIBBONS on them, it is sure to happen.

PLEASE ADD A LABEL TO YOUR QUILT! Yes, I am shouting. It is so important. It tells the who, what, why, where, and when of the quilt. Be sure to add the name of the pattern and designer, Homeward Bound by Sarah Fielke. And the name of the quilter if you didn't do the quilting. Find my blog about making labels here:  LABELS-- don't leave home without one

And the last, most important reminder: NOW is the time to save/download all the patterns if you haven't started or any you haven't gotten to yet. After December 31, 2023 all rights return to the designer and no one can give those to you. It is easy to download them all HERE: HOMEWARD BOUND PATTERNS.

If you are not yet a STAR MEMBER of The Quilt Show, now is a great time to join. For $49 for one year you can get ALL of HOMEWARD BOUND and will be ready for PICK A PETAL beginning January 1, 2024:

You also get access to over 500 Shows, all 15 years of The Quilt Show, and everything that comes with being a Star Member--including a 20% coupon for one complete order in the Store. So much bang for your buck--join us in this worldwide quilting community: JOIN TODAY

Let's quilt.

Barbara


Wednesday, November 30, 2022

GARDEN PARTY DOWN UNDER -- QUILTING IDEAS

Many people have gotten their Garden Party Down Under top finished and are starting to think about the quilting process. See some of these tops on the Forum topic: Show Your Completed Top Here, you do not have to be a Star Member to see quilts on the Forum.

Here is mine, made in 2021 with the help of 8 of the beloved Sunday Sew and Sews. This photo was taken on the set while taping The Quilt Show in August 2021:


I quilted it on my Bernina Q20 sit down long arm machine. Here are some detail shots:


The Back--a busy print hides a lot of things better left hidden, and thread changes if there are any:


Resting on the spare bed after all the quilting was done:


A variety of thread colors and weights. The majority of the quilting was done with Superior's Microquilter in white on the top, and Bottom Line in the bobbin. Accent colors were used on the vases and larger motifs: 

I love ruler work so I often develop continuous designs using rulers that move nicely across the quilt. Using a circle I was able to move from one end of the diamond borders to the other, then go back in the opposite direction, creating a flowing curving design that complements the diamonds: 


See the same design used on the Dogtooth borders around the center:


Here is my basic process when quilting:

1. Good basting is imperative. I use safety pins and most often baste on my dining room table. I tape the back firmly to the table, wrong side up, using painter's tape at the top and bottom. Clamps are used to hold the edges securely to the left and right sides of the table. The batting is laid on top of the back, followed by the top, right side up--it helps to have another set of hands to spread out the batting and top. After pinning the middle, I untape/unclamp the quilt, and slide it to one side, retape/reclamp then pin that side. Repeat for the opposite side. After all the pinning, check to be sure you have no puckers/pleats basted into the back--they have to be fixed. I tend to get them near the corners. 

2. Make a small test "sandwich" with the same back and batting and some of the top fabrics so you can test the thread color and tension before you begin. I write a note for tension setting for each thread so I can get it correct each time I work on the quilt. This project took almost two weeks to quilt, a few hours a day.

2. I used Microquilter thread in the top and Bottom Line in the bobbin, white in both, for the majority of the quilting. The first step is to quilt straight lines from top to bottom, starting at the middle of the quilt. I pretty much follow the seam lines the same way the top was constructed. This serves to stabilize the quilt, allowing some of the safety pins to be removed. My favorite ruler for straight quilting is the Line Tamer by Four Paws Quilting, a great ruler. 

3. After all the straight line quilting was done in all directions, I thought about how to quilt each block. I If the background fabric had a good design, I followed that--like swirls or straight lines. If I needed to create a design, I played with a piece of plexiglass and a dry eraser marker to "audition" designs directly on the quilt--be sure to wrap the edges in painters tape so you don't overshoot the edge of plexiglass with the pen--a disaster you don't need. Designs can be tried out, erased and more designs tried again and again until you like what you see: 


4. Very little quilting was required on the motifs since most are small. The vases are large and need some quilting to secure them. I played with the plexiglass, drawing curvy shapes on the vases to try to give the vase some "round" dimension. While quilting the background of each block, I got close to the appliques, echoing them to help them stand out.

5. The borders were perfect for using a circle template (ruler) to create curving designs that move from one end of the borders to the others. 

6. The two small "floater" borders were the perfect place for some circles. I freehand quilted them: 


I  have written about my quilting process several times before:


Ruler Work -- the Basics   this is a long post and has LOTS of information.

UPDATE--on the December 2, 2022 LIVE broadcast I was asked about the corner flowers and my label. Here is the corner flower, with simple echo quilting on the background and around the shapes:


I make permanent labels for all my quilts. Find my TUTORIAL for LABELS HERE  My label:


This is one of my most favorite quilts. I love the fabrics. I love the design. l am happy with the quilting. And I LOVE the friends who helped me make the top:


You can find some photos of the quilting on Irene Blanck's quilt in our Gallery of Quilts: Monthly Guide . These photos were used for the Monthly patterns. Irene's quilt was quilted by Australian Longarm quilter Rebecca Rae. Find her on Instagram as @astitchnline_machinequilting.

Remember. the patterns for GARDEN PARTY DOWN UNDER are only FREE FOR STAR MEMBERS until December 31, 2022. After this year, the designer regains the rights to the patterns and you will have to buy them from her.

If you join The Quilt Show now, you can still download/save all 12 months of Garden Party Down Under and be ready to jump right in to the 2023 Block of the Month quilt, Homeward Bound, beginning January 1, 2023: 

Let's quilt.

Barbara

Sunday, January 30, 2022

What Am I Working On?

 My guild quilt show is coming up the 3rd weekend in March, 2022. My entries were submitted some months ago. Now it's time to finish two of them.

I figured I would need two weeks to quilt and finish my biggest quilt--it's 110" x 110". This week I've put in 20 hours over 4 days and I'm about a third of the way done. So, it's more likely to take 3-4 weeks. Fortunately, I am caught up on other jobs and am home to do all this quilting.

A few shots of the process: 


Mostly Ruler work, with some Free Motion quilting . Working out the designs took a little time and once I started, I adjusted the plan to add more quilting in places. While working on this I am thinking of how to quilt the border. It's 4" wide and can handle some pretty, curvy quilting. I still have plenty of time to think about that.

Stay tuned.

The BIG news is I will be teaching on a Quilt Cruise for Stitchin' Heaven in 2023--March 11-18. Sailing on a big ship in the Caribbean. More information to come on that in the future. Last year's cruises were canceled but we are back to quilting at sea again and I am excited! I hope some of you will  join us.

Let's quilt.

Barbara


Wednesday, December 1, 2021

COLOR MY WORLD--THE QUILTING

This wraps up the 2021 Block of the Month quilt for The Quilt Show with Alex Anderson and Ricky Tims. Designed exclusively for The Quilt Show by Australian designer Wendy Williams, the entire 12 month series is available FREE for Star Members until December 31, 2021. After that date, all rights return to the designer and the patterns can then be purchased from her. 

Let's talk about the quilting process. I quilted mine myself and found it an enjoyable task.

THREAD: 

First, I gathered a wide variety of threads for quilting--from Microquilter (100 wt) for Stitch in the Ditch,  to Quilters Select 80 and 60 wt for decorative quilting. Color was the most important thing to me in selection of thread:


While basting my quilts, I always make a small practice sample with some of the same top and back fabrics and the same batting. This allows me to be sure the tension of the various threads is correct before stitching on the quilt:


1. STITCH IN THE DITCH: 

Wendy Williams' top was quilted by Australian longarm quilter Katherine Jones. Wendy suggests outline quilting all the various components of the quilt--we call this Stitch in the Ditch. 

Here is my finished quilt:

The first thing I did was Stitch in the Ditch around all major components--the Mariner's Compass circle, the outside edges of the Roads, the outside seams of all the Small Houses and Tall Buildings and Skyscrapers. This created "Bones"--areas of the buildings which will ultimately get more quilting--in the windows and doors, for example.

I love to use rulers for straight line quilting and the Line Tamer by Four Paws quilting is my most favorite ruler for that purpose:


All straight lines were quilted with this ruler: 


Here you can see how I outlined the tree trunks and stitched between all the buildings: 

For Stitch in the Ditch, I used Microquilter thread, by Superior Threads, a 100 wt polyester thread. Color  #7025, a gray/green blended beautifully with the many colors in the quilt. In the bobbin for the entire quilting  process I used Microquilter, color #7026--a tan. I knew there would be many places I would "travel"--move from one place to another, stitching on top of previous stitching, so this fine thread would be perfect for that process. I spent two days doing all the Stitch in the Ditch with these two threads:


On the third day, I used Quilters Select #739, a dark charcoal 80 wt thread, to stitch along the middle of the Roads. I also used this dark thread to quilt the Eiffel Tower: 


Once all of the stitch in the ditch was done, it was time to play with the buildings. I matched thread colors as closely as I could and used Wendy's photos on each months' patterns as a guide for how to quilt the doors and windows. Designs I really liked, I used frequently. 

Here are a few closeups. The skinny lines on the long windows were a favorite and I did them a lot--free hand, no ruler. The X's in light blue windows were done with ruler: 


The various roofs got a variety of quilting--this crosshatch in the yellow roof of Little House in the City was a favorite. For the tree tops, I played with several designs before settling on simple swirly spirals--one color green thread worked for both tree tops: 

For the Mariner's Compass, I liked the feather design used on Wendy's quilt, free hand for the feathers, the ruler for all the straight lines around and through each point: 


As I was quilting the various buildings, it occurred to me, I could also quilt the straight lines I had decided to use in the outer border--before all the rest of  the quilting was done. All the "bones" were done, the stitch in the ditch was finished, so I went ahead and used the Line Tamer ruler to quilt the outer border. That allowed me to put the sleeve and binding on and use my night time hours to hand stitch the binding in place. As I was under deadline to get this done, it was good to use all the time I had for the entire process--quilt during the day, hand stitch the binding at night. Here is the simple outside straight line quilting on the border, using Microquilter color # 7025:


All in all, I spent 6 days quilting this and was very happy with the results. I was done ahead of schedule for the taping in Dallas, TX in August 2020. 

At the taping I got to see Wendy's quilt up close. Before that I had only seen a few photos. The longarm quilter added a great touch to the outer border--she quilted HOUSES in it. They are hard to see in the photos but were a very interesting touch in real life. Her lines are also much closer together than mine. I could have gone back and added more but it was done so, no more lines for mine:


UPDATE: I was asked for a few detailed photos of the back of mine so here they are:


And last, but certainly NOT least, please add a permanent label to your finished quilt. I have written about labels before: QUILT LABELS. Here i s mine for Color My World:


It is particularly important to note WOOL BATT--so the quilt is less likely to be thrown in a hot dryer--with potentially sad consequences.

I hope this gives you some ideas how to quilt your Color My World. And when it's done, please post a photo on the Forum: BOM 2021 Your Finish Here  It is so fun to see so many of these, many with special touches that really make this design the maker's own!

Looking forward to the 2022 Block of the Month quilt--a very different design, but a beautiful quilt. I hope you'll join us on the Journey.

Let's quilt.

Barbara