
I have been a fan of "paper piecing" for years--where you sew through paper patterns, using a tiny stitch, then remove the paper when done and sew the units together to make a block. In teaching this, I find that quilters either love it or hate it.
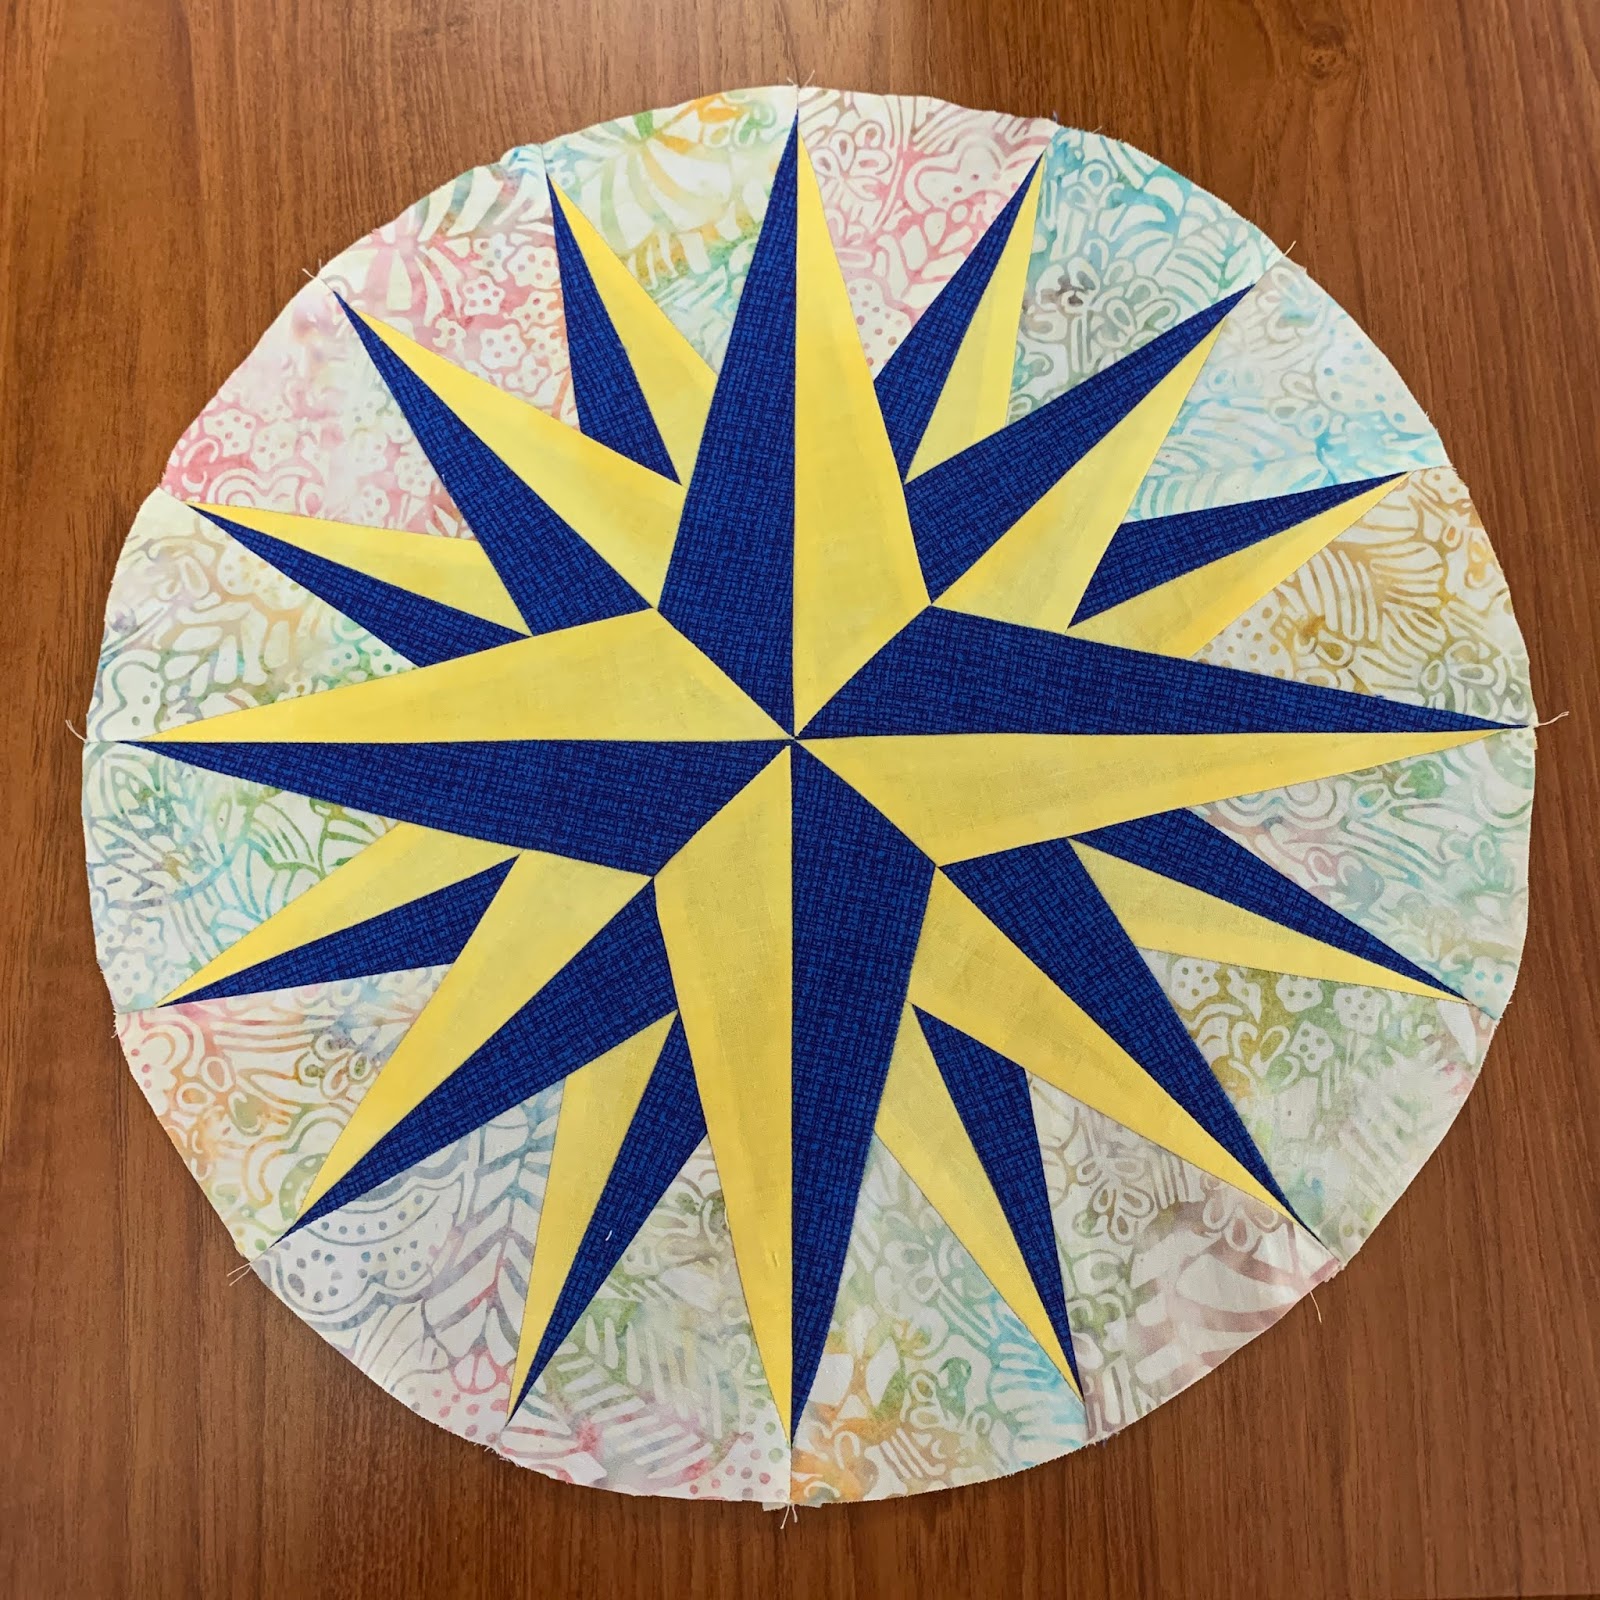 |
| Center of a gift for a sailor |
The plus side of paper piecing is ACCURACY. With complex patterns like Mariner's Compass, you can get sharp points fairly easily.
The down side to paper piecing is REMOVING THE PAPER, and those tiny stitches are challenging to remove when we make a mistake--and we ALL make a mistake, from time to time.
I am learning to Foundation Piece on Freezer Paper patterns. The exact same method as regular paper piecing, except the pattern is printed on the matte side of Freezer paper and you DO NOT sew through the paper.
I have known about this method for years but never tried it--I was perfectly content with "regular" paper piecing.
Here are the basics--I will have a detailed Tutorial when time permits. I am enjoying learning this so thought you might like to see it too.
As usual, the fabrics are cut into over-sized pieces or chunks.

The first fabric is pressed to the waxy side of the freezer paper, securely. The second fabric is placed on top of the first fabric, right sides together, using the standard 1/4" seam allowance:

Sewing with a regular length stitch, just beside the fold of freezer paper:

See how the stitches are just along the paper, not through it:

As pieces are added, they are pressed over, onto the freezer paper--the waxy side. The excess is trimmed 1/4" away from the line--using one of my favorite tools, the Add-A-Quarter ruler:

Each fabric is added in turn until the paper is covered with all the fabrics needed. When the pattern is completely stitched, you carefully remove the unit from the Freezer Paper--and the paper is ready to be used again! A real bonus if doing a block with many of the same units. I used the two paper patterns to make the 8 units needed, 4 of each. So I only had to print 1 sheet of Freezer paper to get ALL the patterns needed for this 14" block:

The 8 units are sewn into four sections of two units each. Here are 4 units sewn into 2 quarters, then joined to make a half block:

Two halves, ready to be joined into a circle:

The best tip I give quilters when making blocks with places where many seams come together, like Lemoyne Stars and this Mariner's Compass, is to machine baste that center first. I turn the stitch length up, to 5.0 here from my usual 2.0. I baste stitch about an inch on either side of the center:

I open it and take a peek--if I am happy with it, I turn the stitch length back to normal and sew the entire seam, stitching right over the basting stitches. If I think I can do better, it is a snap to pull out those basting stitches and try again. I was satisfied with this:

Here is the back of the Compass:

UPDATE: Here is the link to the BACKGROUND post:
Thank you Barbara! I have always wondered how paper piecing with freezer paper works. I wasn't interested in learning because I didn't think removing freezer paper would be that easy!! OMG you DON'T sew through it! Looking forward to what tips you have on this process.
ReplyDeleteI think I could learn to love this method! Thank you, Barbara!
ReplyDeleteThank you! Marilyn Marks
ReplyDeleteI have always wanted to make a Mariner's Compass quilt and maybe with your guidance I will! Thank you!
ReplyDeleteBarbara -- THANK YOU for revitalizing this use of freezer paper for foundation piecing complex units. I learned this originally from the Queen of the Mariner's, Judy Mathieson, and as I recall, another advantage of this 'fold back' method is that you can control the direction of seam allowances and press back, under the just stitched edge by gently lifting the freezer paper and ironing (after trimming). This can be very useful because it sometimes works better for later construction or reducing bulk for getting really sharp points, or distinguishing 'foreground vs background', etc.
ReplyDeleteCheers and be well
I had not thought out that but you are correct--that is a possibility, when seam allowance direction makes a difference. Another advantage!
DeleteThanks for giving Judy the credit - she was the master! I also took her class - game changing. She doesn’t get enough credit!
DeleteI love doing FPP - and would really love a tutorial on this method. Will be watching for it. Thank you Barbara.
ReplyDeleteThat is a very cool method. I had not seen it before. Thanks for sharing.
ReplyDeleteThis is the method I learned when I made my first Mariner's Compass, using a Judy Mathieson pattern, and I think I did a tutorial for it on my blog--a hundred years ago. I have made two compasses using this method, and I really liked it. Now I need to do something with those two compass blocks that have sat in my sewing room for years. LOL Maybe you will inspire me. :)
ReplyDeleteJust tried out. Life changing!!
ReplyDeleteI started using this method about 8 months ago and love it. My biggest hurdle was in printing the patterns. I only have a laser printer and can't print using freezer paper, so I print on regular paper and us a glue stick to secure the paper to the fabric. I pre-fold the lines to make it easier to see where to place the glue. So far, this has worked for me. I do add small touches of glue if I think things are coming undone. Overall, I love this method and will never go back to sewing on top of the paper!
ReplyDeleteI have read you can lightly iron the freezer paper to a piece of copy paper and run that through a laser printer. Not sure I would be willing to risk it but if it worked, you might like it better. Your workaround sounds fine. I use glue once much of the wax is gone from the freezer paper.
DeleteDo you have to adhere something to the waxy side of the freezer paper before running through the printer. Also, Just a fix for next time, the above instructions never said to fold the freezer paper back before stitching. Just saying. Thanks
ReplyDeleteI don’t with an ink jet printer.
DeleteI use a piece of baking parchment on top of, or under depending on which way the waxy side is facing, as the wax does not stick to the parchment. This means you don't have to try to iron with the tip of the iron, you can press the whole piece.
ReplyDelete