Showing posts with label The Quit Show. Show all posts

Sunday, July 19, 2020

Alex Anderson's Mystery Quilt

During this time of Staying at Home, and Quilter's Quarantine, Alex Anderson has posted on Facebook Live three times a week, mostly to help all us quilters stay connected and productive in these uncertain times.

First, a confession: Alex is a friend and I work for her and Ricky Tims on The Quilt Show, helping with the Block of the  Month quilts and other assorted tasks. So I an not an unbiased observer. BUT I have been a Star Member of The Quilt Show forever, handing over my money the first day I could, in 2007. Best money I can spend on quilting--I have learned so much and made many friends, worldwide, through our connection on The Quilt Show.

Many people have "found" Alex for the first time or for the first time in a long time with her Facebook Live posts. If you don't do Facebook, the great news is all of the videos are recorded and available on You Tube--Alex and Ricky Live

Starting tomorrow, Monday July 20, 2020, Alex will be teaching a Mystery Quilt, featuring some Kaffe Fassett fabrics along with lots of solids. Just so you know--Kaffe is pronounced like "Safe". You are invited to play along--I know you will learn things, have fun, and it's FREE.

Here is a Kaffe Brassica fabric, the kind Alex loves to use. This is not the one she is using for her quilt, just a colorway I really love:


Recently, Alex said quilters basically work in one of two ways. Some like to have a pattern, all fabrics in hand, and know exactly what they are making before they begin. Others just start and see what happens. Alex and I are in that later camp. Here is that process:

1.Come up with an idea
2. Select fabrics you want to play with
3. Start
4. Use a design wall to help you make decisions as you go

You can start at any time. Watch the videos and when you get inspired, start. The videos are all posted on YouTube whenever you want to watch.

Alex is calling this a Mystery Quilt because she doesn't know what it will look like until it's done--neither will you. Just use fabric you love and all will be well. If you just can't work that way, watch all the videos and when the Mystery Quilt is done, whenever that is, you can decide if you want to make it. Then Start.

For The Quilt Show members, we have a Forum topic where you can ask questions, post photos, and enjoy the process more with like-minded friends. This is especially helpful for those who don't do Facebook:  Forum--Kaffe Mystery Quilt--Learn with Alex

Here is a fabric pull for this project by JudySews, I found it on the Forum. These fabrics make me swoon:


Here comes my sales pitch again: The Quilt Show provides so much bang for your buck. Currently, they are offering a Stay At Home Special, 6 months for $19.95 or 12 months for $39.95. This offer is good for new Star Members AND those who want to  renew. You get access to ALL THE SHOWS FROM THE BEGINNING--that's 13 + years. The current Block of the Month pattern, Aftternoon Delight by Sue Garman, is FREE--an $80 bonus. And so much more. The four Master Classes, available right now for members, feature some of the best advice on Piecing and Applique--a chance to refresh our memories on all that great info available on the shows.

I hope you will take a look at both www.thequiltshow.com and Alex and Ricky's Playlist on YouTube. So much terrific content--plenty to get you inspired and productive.

Which type quilter are you? Have to know what you are making ahead of time? Or someone who takes an idea and gives it a try?

Let's quilt.

Barbara

Sunday, March 1, 2020

AFTERNOON DELIGHT--Month 3

This pattern is the Block of the Month pattern for www.thequiltshow.com,  available FREE throughout 2020 for STAR members of The Quilt Show. Join Now to enjoy all the content available to STAR members as well as this wonderful pattern.

Here we are at Month 3, two more Shoo Fly blocks and 4 more applique blocks. If your Shoo Fly blocks are all complete, nine total in this quilt, remember not to cut all the fabrics listed in the Cutting Instructions as some of that is for the Shoo Fly blocks. The same is true if you have cut all 40 applique block backgrounds, 8" each.

THREAD:

I've been asked what thread I like for applique. The most important factor for me is color--I want to match the appliques as closely as possible. My favorite brands are spools of Quilters Select 60 wt, a polyester, Aurifil 50 wt, a cotton, or Bottom Line 60 wt, a polyester. The pre-wound bobbins of Quilters Select 80 wt. and Bottom Line 60 wt. make it easy to have a wide variety of colors on hand--I use them in the top of my machine, with a neutral in the bobbin:


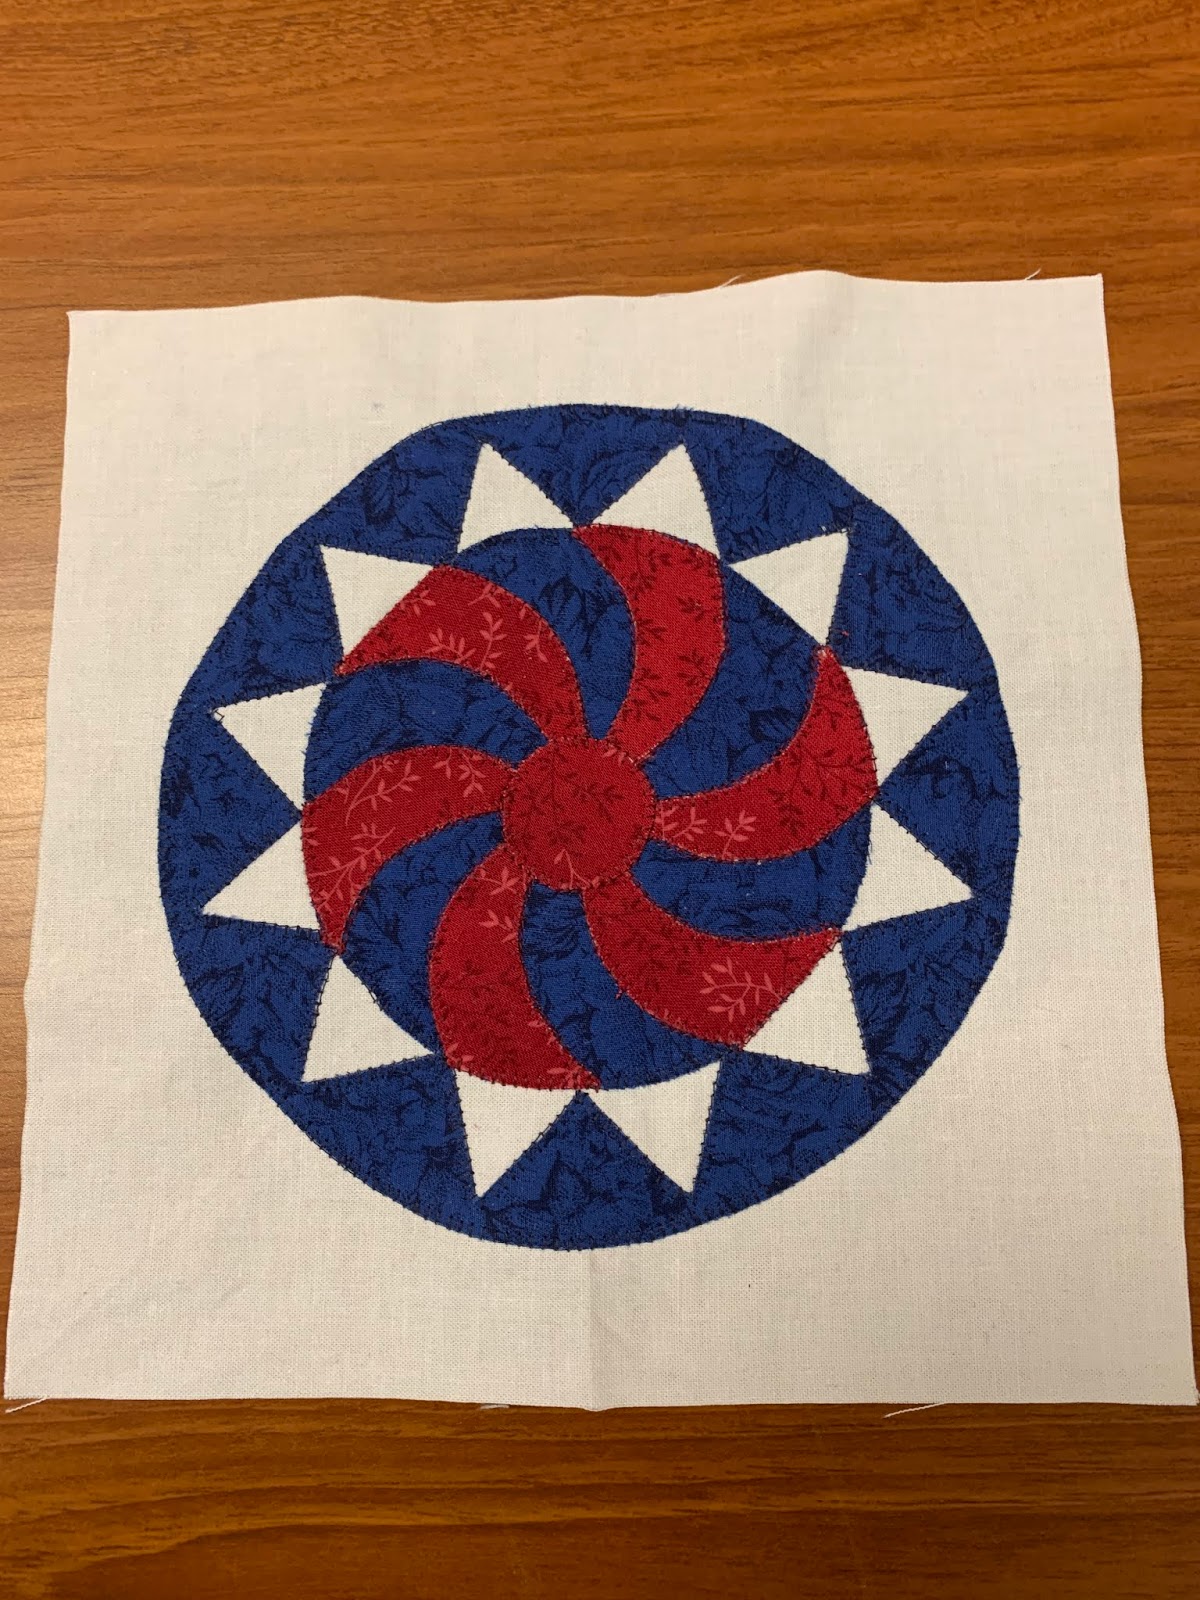
TWIRLY BALLS APPLIQUE BLOCK:

Sue Garman loved this block she called "Twirly Balls". So much that she designed several quilts with them like this one:  Twirly Balls and Pinwheels
And this block and variations of it appear 3 times in Afternoon Delight.

It is not as hard as it might appear. Here is how I made mine:

1. After printing the pattern on Quilter's Select Print and Piece Fuse Lite, I drew the horizontal and vertical lines with a pencil:


 I rough cut the outer circle, leaving a narrow margin around the circle and the inside sawtooth area. Using a red pencil, I marked every other "TWIRLY" so I would know which of them to use:


The large circle was fused to the back of blue fabric, twirlies to the back of red fabric. NOTE: if you want block to “twirl” in the same direction as the pattern, put paper patterns on the FRONT side of the Red fabric:

Pieces are now carefully cut on the lines--this is raw edge applique:


 I used a Fabric Glue pen to secure the blue circle to the background:

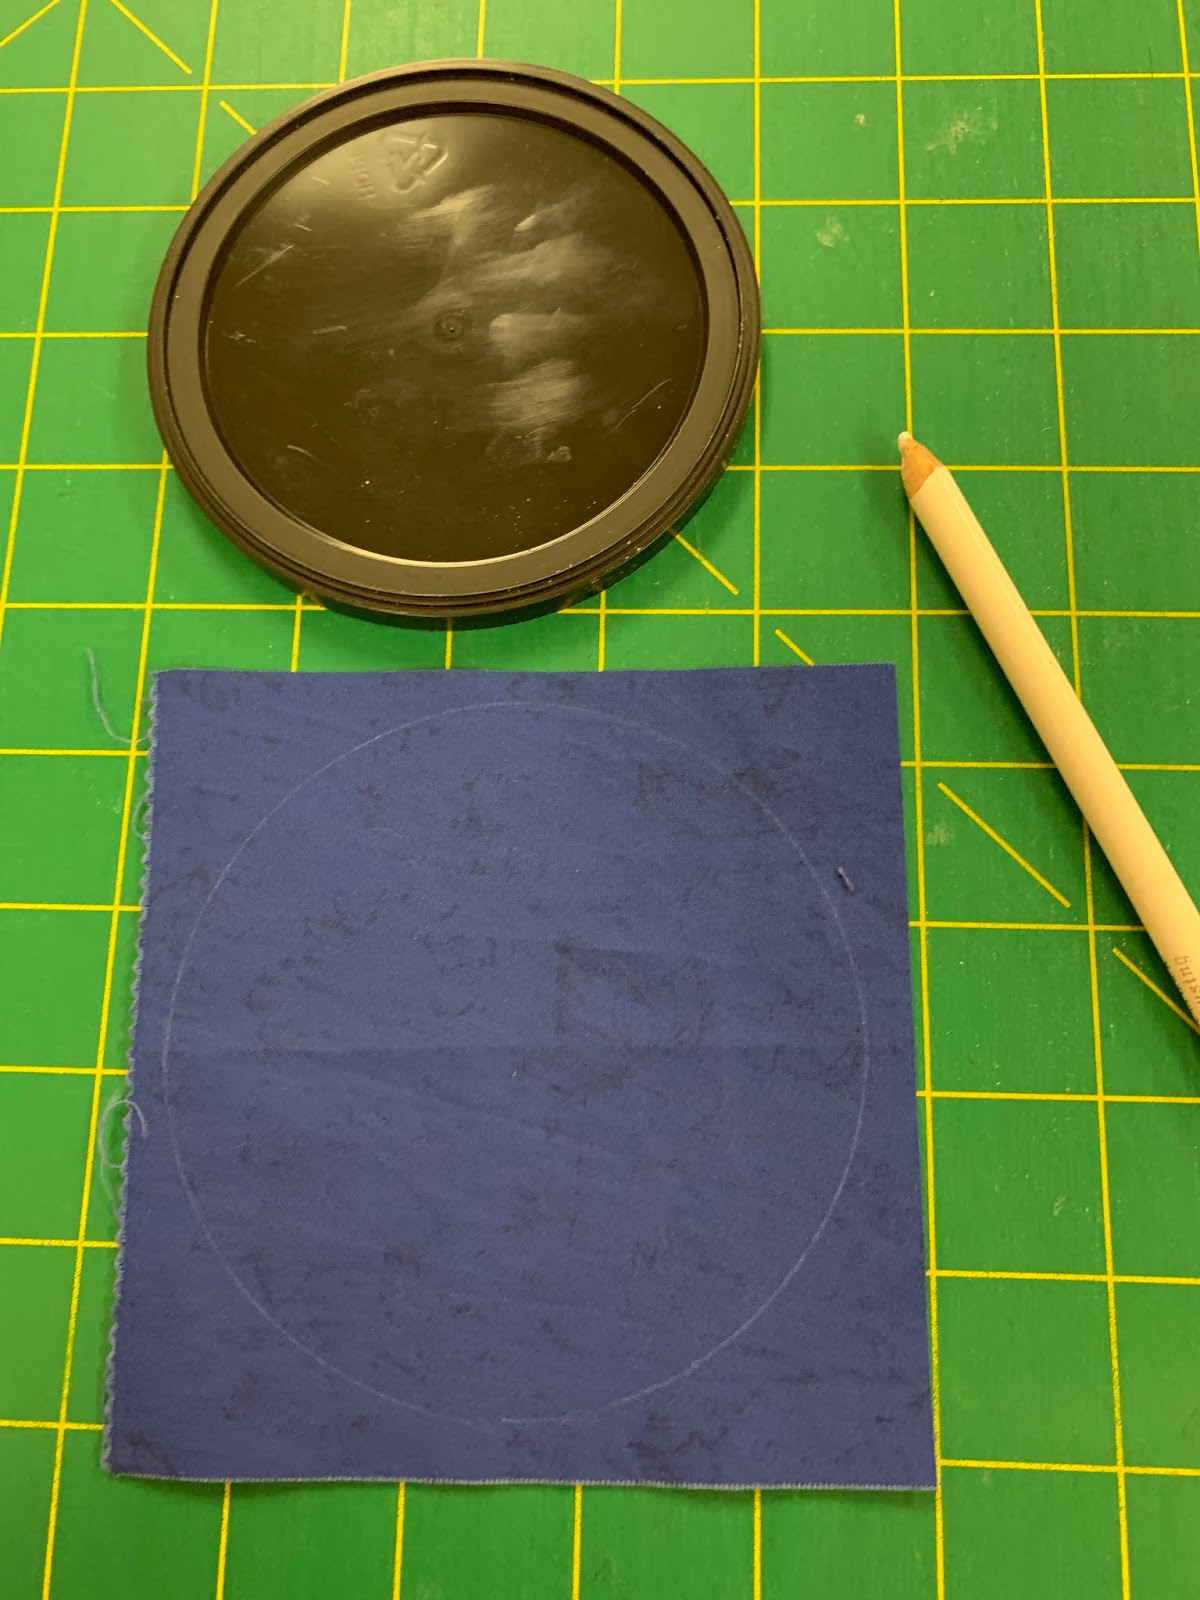
I didn't want to print a second pattern for the inner blue circle so I looked around my kitchen. Amazing--the lid from a container of unsalted cashews was the PERFECT size. Using a white chalk pencil, I traced the lid on the back of more blue fabric:

I carefully glued the inner circle on the background, with the lightest touch of glue stick:

Then I placed the red "twirlies" and center circle on top of the blue center circle to be sure it was all going to fit. Looks good to me.

NOTE:--the "twirlies" spin in the opposite direction of the pattern sketch since the pattern is applied to the back of the fabric, making it the "reverse mirror image":

Using matching blue thread, I used a blanket stitch on the outside edge of the circle, then around each sawtooth , then around the center blue circle, one start, one stop:

Using the fabric glue stick, I secured the "twirlies" to the blue center circle, then stitched them with red thread using the blanket stitch:

After all the "twirlies" were stitched, I added the center red circle with glue then stitched it to complete the block:

After soaking the block in warm water to remove the paper, the block was ready to be trimmed to 7.25" unfinished.

This was one of the fastest blocks to make so far!

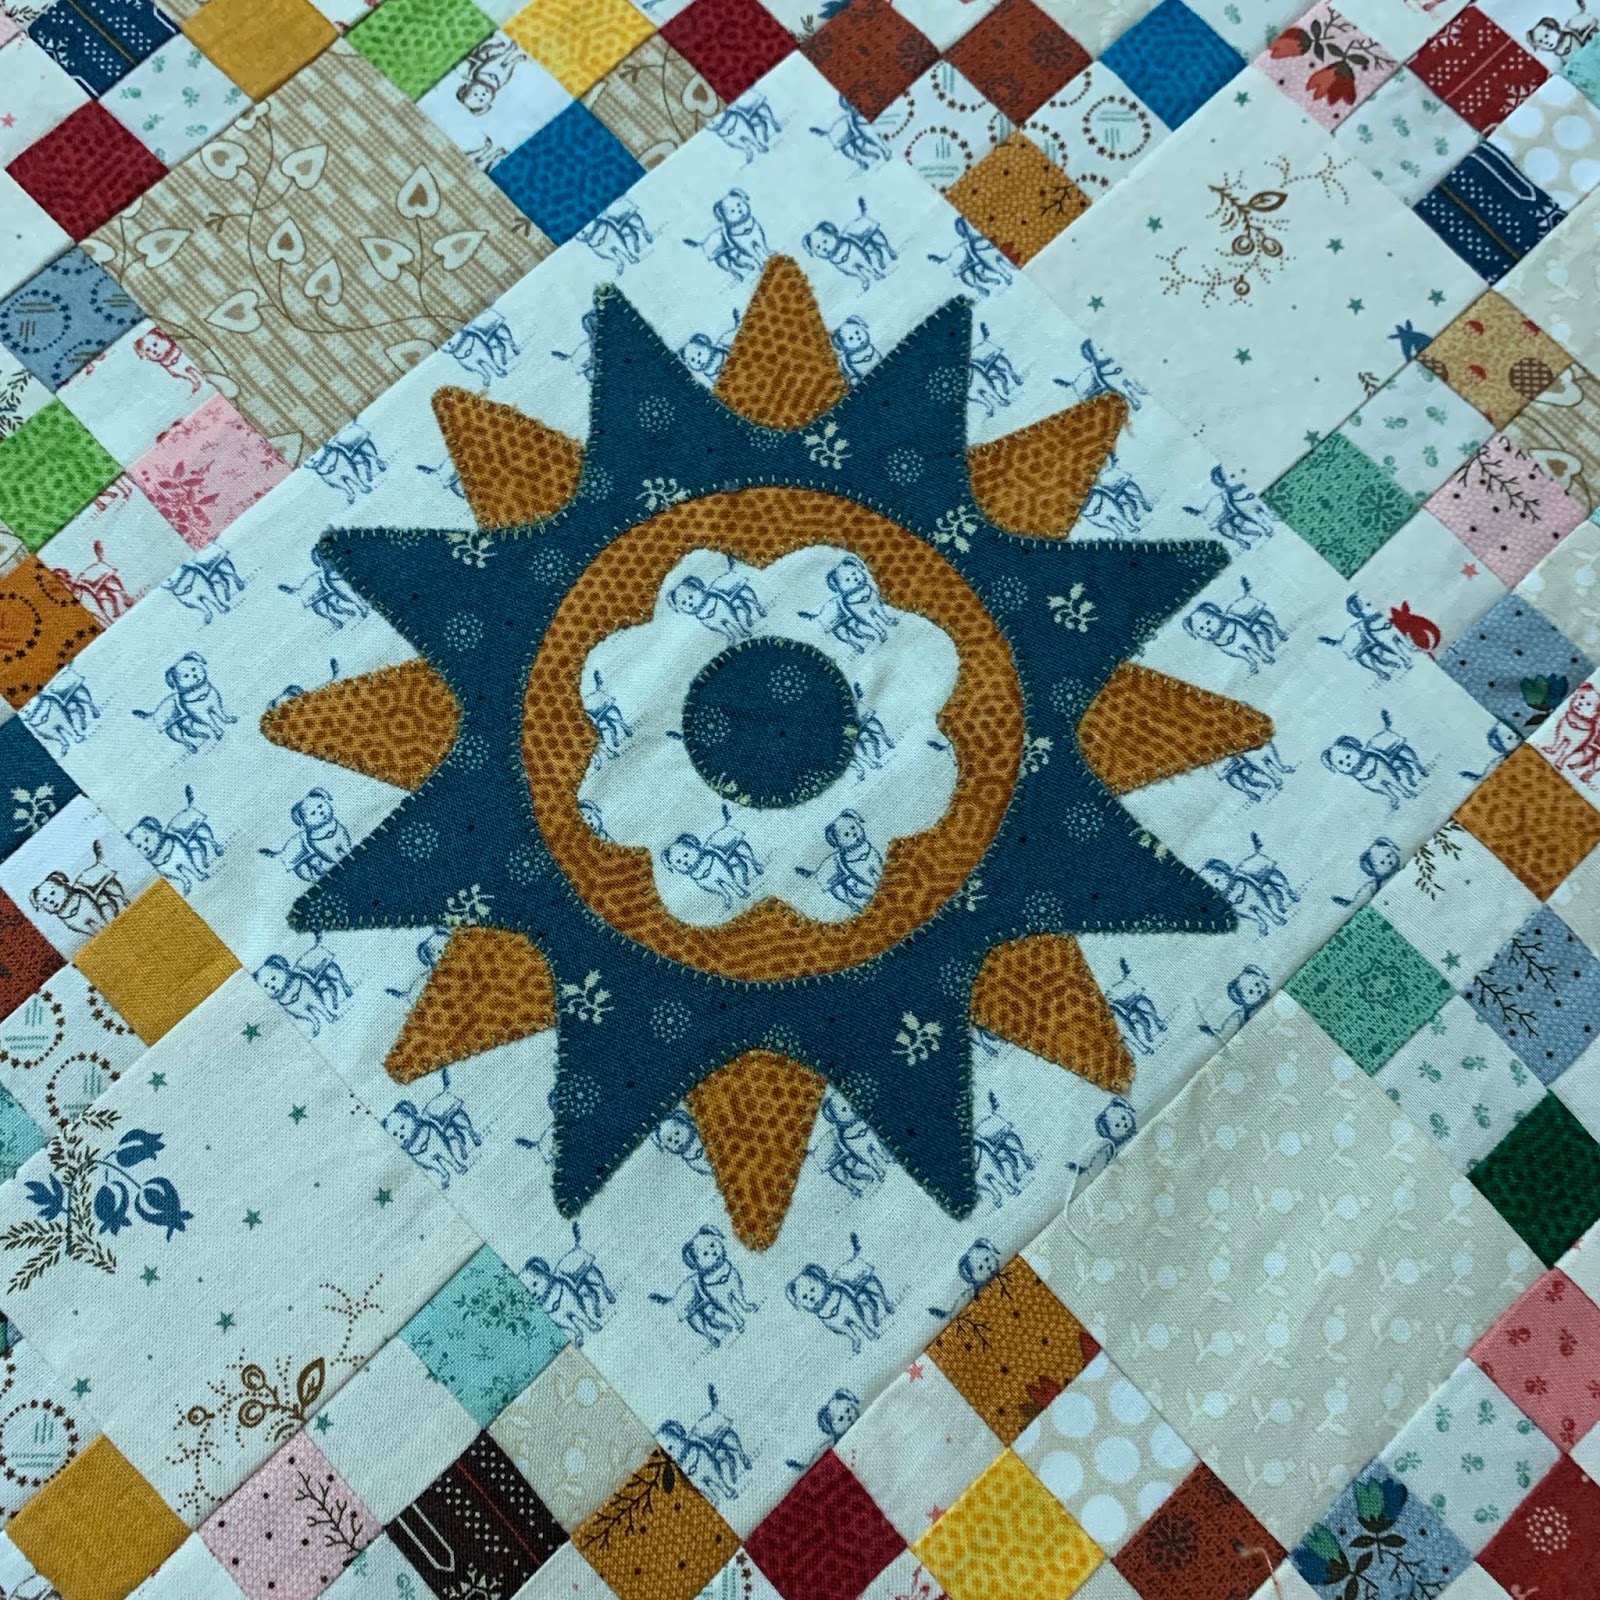
Here are the applique blocks from my Sample Quilt:
Block 9

Block 10

Block 11

Block 12
My Demo Quilt is almost done--I am using red, white and blue fabrics. And it will be a much smaller version, only 6 Shoo Fly blocks, 24 Double 9 Patch blocks, and  9 applique blocks--I will show the top next month.

Here is my Block 11--note I omitted the small circles. I may still go back and add them, but, then again, I may not:

Let's quilt.

Barbara

Wednesday, May 22, 2019

Sizzling Along

While I'm on the road teaching, I thought I would show you all my completed Sizzle blocks so far.

The Cool Kit blocks are calm and pretty:


The Combo Cool/Warm blocks I am making from my stash are more dynamic:


This is not the final layout of either quilt, I just threw them up on the design wall for their photo op.

It is not too late for you to start this project. The patterns and all instructions are FREE for all of 2019 to Star Members of The Quilt Show.  Join Today Get 365 days of great shows and lots more great information and this pattern is FREE, until December 31, 2019. Print your patterns and get started.

Be sure to see my Sizzle blog the first of each month all this year for tips and tricks.

There are also excellent videos with the designer, Becky Goldsmith. You will learn a lot!

Let's quilt.

Barbara

Wednesday, May 1, 2019

SIZZLE---Block 5

This is the  2019 Block of the Month from The Quilt Show. This quilt pattern designed by Becky Goldsmith is FREE to Star Members. Join today  to be part of the fun.

READ all the DIRECTIONS and WATCH all the VIDEOS.
See Previous Posts:

Block 1  Tips there apply to this month also
Block 2
Block 3
Block 4


This month we work on on another block that has mostly straight narrow strips of fabric. One little twist--the Top and Bottom Diamonds are mirror images of each other. As Becky says, "the paper does the work"--just be sure to keep your fabrics numbered and organized:


Let's start with the Wedges, they're easy:

Fabric 1 is darker than Fabric 2. I placed them right sides together, and carefully aligned the center line on the wedge with the pair--keeping the raw edges lined up with the dashed line. BE SURE you have Fabric 1 under the paper where Fabric 1 goes--it would be very easy to get the two fabrics mixed up:


NOTE: there is not much extra length so be sure the back side of Fabric 1 completely fills piece 1, including the seam allowances.

Also, the stiletto is pointing to the tip of the Wedge--the circle at the tip does not apply to this seam, it is for the seam that joins this wedge to a diamond later. You can tell that because there is a straight solid line that goes all the way through the seam allowance to the outside, past that circle. Sew this first seam all the way to or just past both seam allowances, outside to outside.

Here the first two fabrics are trimmed, waiting for the two "wings" to be attached:

Here the wings are in place, the right angle edges were trimmed with a rotary cutter and ruler and the curved edge was cut with Karen Kay Buckley scissors--I love how well them cut these curves, no slipping, and I am sure the cut is correct. If I tried to cut this curve with a rotary cutter, I am not certain I could get it this perfect, so I am sticking with the scissors. Braveheart Becky has no trouble using her rotary cutter, I salute her! Do what works for you.


On to the Diamonds:

As with the Wedges, put Fabrics # 1 and 2 rights sides together. Be sure the back side of Fabric #1 is placed on the paper, under the Fabric #1 location. And be sure it completely fills the space of Fabric #1, including seam allowances:


The strips are narrow so you will have very little excess to trim away after sewing each seam. These are easy and sew together quickly.

 I made a Top and Bottom half of the Diamonds at one time--not all the tops then all the bottoms. Making only one top and and bottom each time, insured I would not accidentally sew two Tops or two Bottoms together. This is what you want:

 NOTE: when you sew the Top and Bottom halves together, this is one long seam, outside to outside, NOT stopping at the Circle. The Circle is used when this Diamond is sewn to a Wedge. When you trim these, be sure to trim the little spots at both ends--this makes it easy to align the two halves:


Press 4 of the Diamonds with the center seam going UP, and 4 of them with the seam going DOWN--this will be very helpful when constructing the full circle. Add a Wedge to the Right side of each Diamond:


What could possibly go wrong? What NOT to do:

Fabrics are lined up correctly--BUT I sewed on the WRONG seam line

Going in the WRONG direction--sigh...
As usual, make two halves, join them together, remove all the paper, add the Block Corners and Block 5 is done. By now, this finishing part is probably something you understand and are able to do without much thought. Pin, stitch slowly, keeping the two edges aligned, and there you go!

See you next month when we make Block 6--you are really going to like that one.

Let's quilt!

Barbara

Sunday, March 3, 2019

Join the Audience

Now it is your turn to watch my show on The Quilt Show. Join the Audience:


For this week only, March 3-March 10, 2019, if you are not a Star Member, please use this link to watch show #2405--lovingly referred to as "My Show":

Show # 2405--My Show

Usually, only Star Members can watch the current show. Membership costs $49/year and I have written many times about why I think this is quilt money well-spent--check this out if you need to be convinced:

What The Quilt Show Offers You

There are always 4 FREE shows available for Basic Members to watch. These help you see all the content you can expect on the one-hour shows that premiere every two weeks. To become a Basic Member, you Join Free and create a profile. You can always become a Star Member later--go to Shop and Purchase a Membership.

PLEASE feel free to share this blog post with the link to every quilter you know. It is a great way to see what The Quilt Show offers and they might learn something. At least I hope they will have a laugh or two. Quilting should be fun!

Let's Quilt,

Barbara

Sunday, February 24, 2019

Today is the Day

Today I am the "Guest Artist" on The Quilt Show with Alex Anderson and Ricky Tims. We taped last August in Denver, that sure seems like a long time ago. They tell you to bring the quilts that "tell your story" so I did.

NOTE: If you are a Star Member of The Quilt Show, you can watch the show now:  "My" Show  If you are not a Star Member, next Sunday I will have a link for you--the show will be free for you from March 3-10 with the link.

On Set:


Hello, Old Friend--this quilt was on loan from the Corporate Collection of  Quilts Inc, Red and White--By the Numbers:


One of my Favorites, A-Round With My Friends:


 Another of my very most Favorites, Pieces of the Past:


Stars in a Time Warp, yes, another Favorite:


If you are a Star Member of The Quilt Show, meaning you are a subscriber--the fee is $49 a year--you can watch the show today and for as often as you want for the foreseeable future. If you are not a Star Member, I will have a Code and Link for you next Sunday, March 3, which will allow you to see my show FREE for one week, March 3-10. You will only get the Link here on my blog on March 3. I hope you will want to watch.

Long before I started helping out with the Forum for The Quilt Show, and a few other little jobs, I became a fan of the show. It is a world-wide quilting community, like a really big guild, and there is so much content on the site. Of course, there are new hour-long shows every two weeks--I have watched them all and go back to some of them from time to time. But so much more. I wrote about why you should seriously become a Star Member here: What The Quilt Show Offers You

By the time you see this Blog, I will have watched "my" show--maybe even getting up really early to see how it looks. I might be just a little nervous to see myself...

The time on set flies by, and I know there is really good editing. The Staff and Crew are top-notch professionals--they make it look so easy. The camera crew works for several TV shows you would know, including with Oprah, so they know their stuff.  And the tapings happen at a first-class Film Production Studio in Denver, a very large facility.

In front of "Joyful Journey", probably my most Favorite:

With Shelly Heesacker, Producer Extraordinaire
The shows are taped before a live audience. Here is where they will sit:

It was interesting to see that part of the show, how the audience is kept entertained during the several hours it takes to get everything ready to tape. And, off camera, they got to ask me questions.

Alex and Ricky are friends of mine--have been for years. Still, it was never on my "bucket list" to be a guest--it simply never crossed my mind. BUT, when they ask: "Would you like to be a Guest on the Show?" there is only ONE answer: "Of course!"

My 15 minutes of fame perhaps. I  hope you enjoy it.

Let's Quilt,

Barbara

Wednesday, October 3, 2018

Get Ready to SIZZLE!


Recently, the 2019 Block of the Month for the The Quilt show was announced. Sizzle is a quilt designed by Becky Goldsmith, of Piece 'O Cake Designs. It features nine 20" blocks that are paper pieced with Becky's terrific, easy method and four applique' borders. And it is FREE for Star members of The Quilt Show--join now if you are not a current member, so you can get ready to SIZZLE with us.

I want to encourage you: IF you love this quilt and want to make it, you CAN! Becky will provide wonderful videos to show you her process, step-by-step. throughout the year. I will have a Blog Post on the first of each month, showing my progress and that of the Sunday Sew and Sews--yes, they are on board too. It is NOT a quick, slap-it-together quilt project, but it is one that will teach you so much if you take the time to READ the directions and WATCH  the videos.

Kits are currently available while supplies last from The Quilt Show Store. The Cool Kit is for me, those colors are just so beautiful. Of course, I love the Warm one too, so if I had time to make two, I'd get them both.

Now the Fabric Requirements  have been published so if you want to use your own fabric, you can start getting your palette together. Introduction--Fabric Requirements

 Just for fun, I have pulled fabrics from my stash to create a possible palette. One of the things about this design that is different from how I usually work is, the fabrics are all SOLIDS. I have a substantial stash of prints, but not a lot of solids. Here is what I came up with, all the fabrics just have to "read" as solids. The white background is only a possibility, the Warm quilt does not use a white. The Cool quilt uses 3 white to gray backgrounds:


One of the things you can do NOW to get ready is to prepare a Notebook, a place to keep all the pages of Instructions and Patterns you will print. Now you can print the Fabric Requirements--there are two, one for Warm, one for Cool--pick the one you prefer and print that, they are about 8-9 pages and the colors will  help you select your own, if you choose not to use the Kit:

3-Ring Binder--mine is 1.5" wide size

We will have General Instructions, Applique' Instructions, and Patterns in addition to the Fabric Requirements pages

Monthly Tabs help me stay organized

At the end of the Fabric Requirements, you will find the suggested NOTIONS for this project. It lists specific products by  name, making it easy for you to get the exact item Becky recommends. You may already have some of these items that are similar. You can try them to see if you get a good result or buy the recommended products.

For example. Becky recommends using Translucent Vellum paper. I agree--you need to be able to see through the printed patterns to place the fabrics correctly. While I prefer to paper-piece with newsprint, for this quilt I will use Vellum. I bought two to try. This tracing pad came from my local Hobby Lobby--it was on 50% discount that week, making it worth the need to trim the  pages from 9" x 12" to 8.5" x 11". We will need 71 pages so it would take two of these 50 sheet pads for the quilt:


 This package of paper came from Amazon, 100 sheets, 8.5" x 11". This is enough for the quilt:


I test printed a Block with each paper. Neither smeared, and each is thin and very easy to see through. Once I can start sewing, I will test each and decide which I prefer--I really expect it to be a toss-up. The pattern is designed in eighths that fit on one page, so we will print 8 copies of each pattern each month:


Other notions on the list apply to the applique' borders--these appear after the nine blocks are completed, so there is no rush to buy those notions right now. If you do needle-turn applique', as I like to do, your supplies will be different.

Plan now to watch the show, premiering December 30, where Becky will show you how easy this can be with her method. The pattern for Block 1 will be available January 1, 2019--as always, the first of each month we get a new pattern.

My last TIP--be sure you have printer paper and ink on hand January 1--the General Instructions are comprehensive--about 30 pages. I think you will want to print them rather than looking at your computer frequently for that information. It is your "Instruction Book" for this paper-piecing process.

I hope you will join us on this year-long journey while you make a wonderful quilt. Why not find a few others in your area who want to work together--having a group is fun and a great way to learn a new technique.

Let's quilt!

Barbara