
Here we are at Month 3, two more Shoo Fly blocks and 4 more applique blocks. If your Shoo Fly blocks are all complete, nine total in this quilt, remember not to cut all the fabrics listed in the Cutting Instructions as some of that is for the Shoo Fly blocks. The same is true if you have cut all 40 applique block backgrounds, 8" each.
THREAD:
I've been asked what thread I like for applique. The most important factor for me is color--I want to match the appliques as closely as possible. My favorite brands are spools of Quilters Select 60 wt, a polyester, Aurifil 50 wt, a cotton, or Bottom Line 60 wt, a polyester. The pre-wound bobbins of Quilters Select 80 wt. and Bottom Line 60 wt. make it easy to have a wide variety of colors on hand--I use them in the top of my machine, with a neutral in the bobbin:

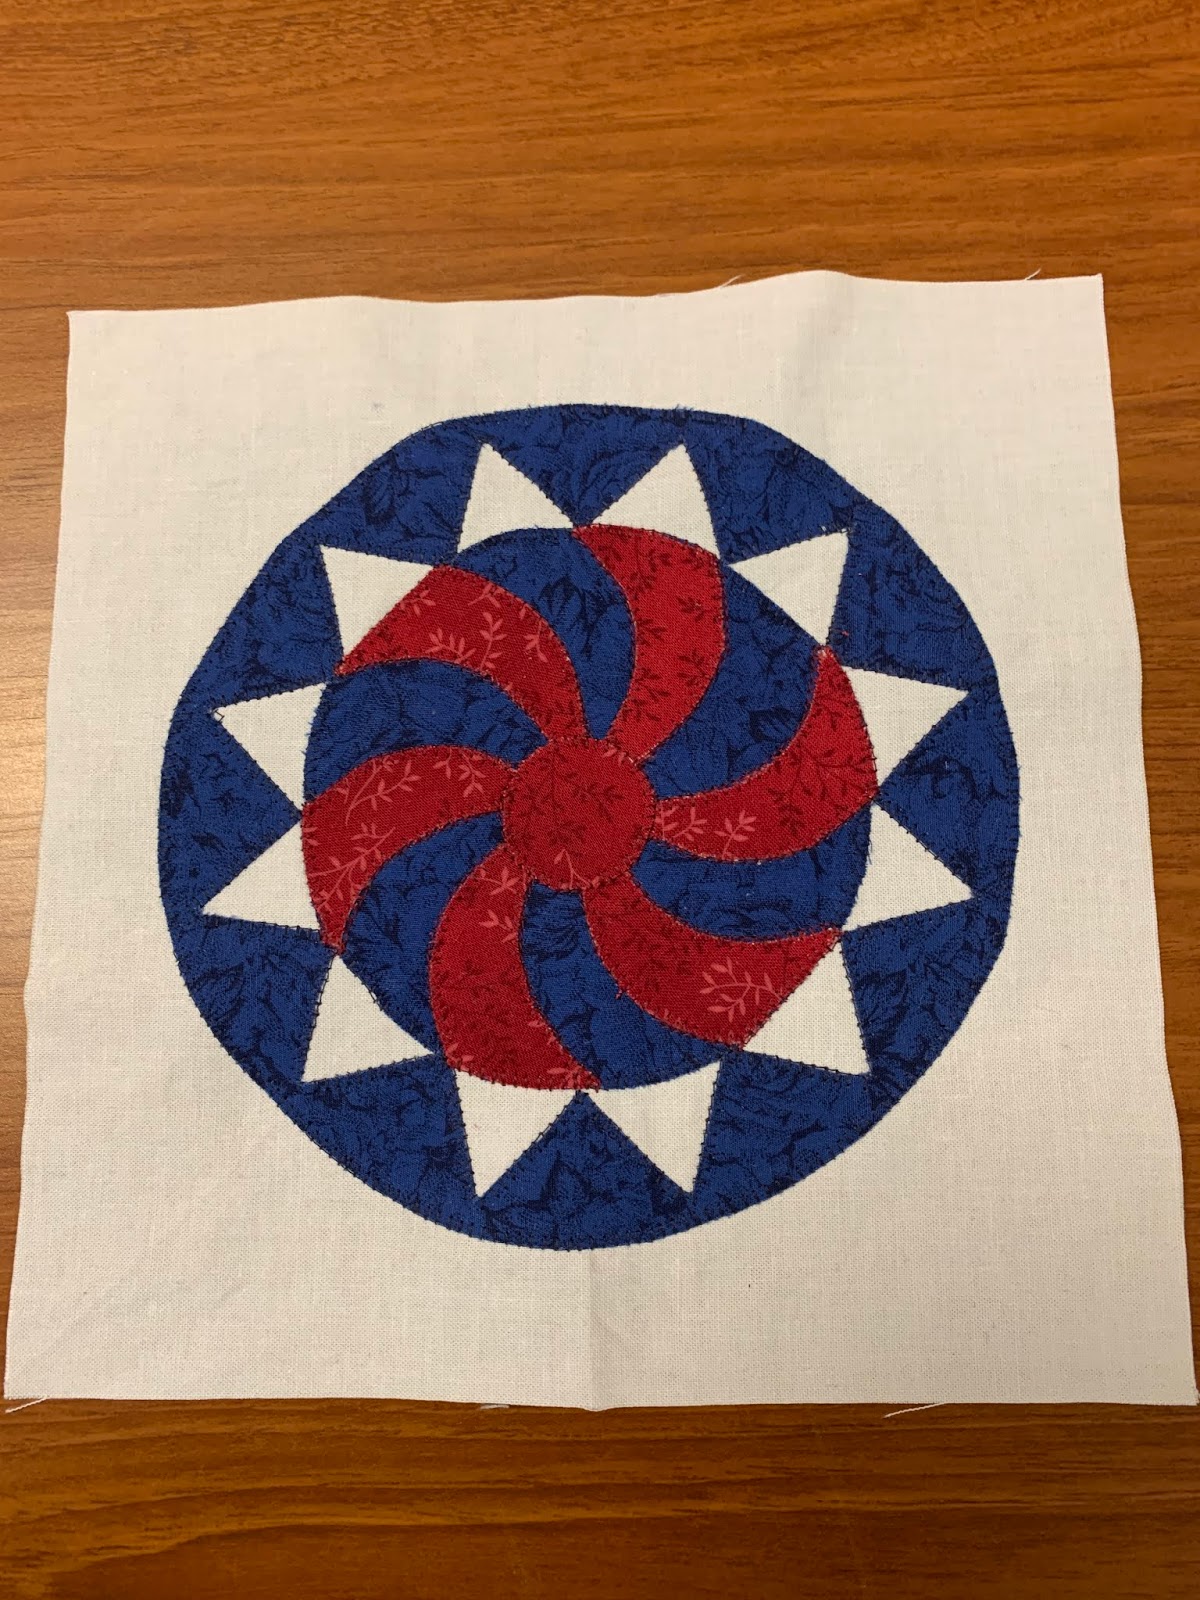
TWIRLY BALLS APPLIQUE BLOCK:
Sue Garman loved this block she called "Twirly Balls". So much that she designed several quilts with them like this one: Twirly Balls and Pinwheels
And this block and variations of it appear 3 times in Afternoon Delight.
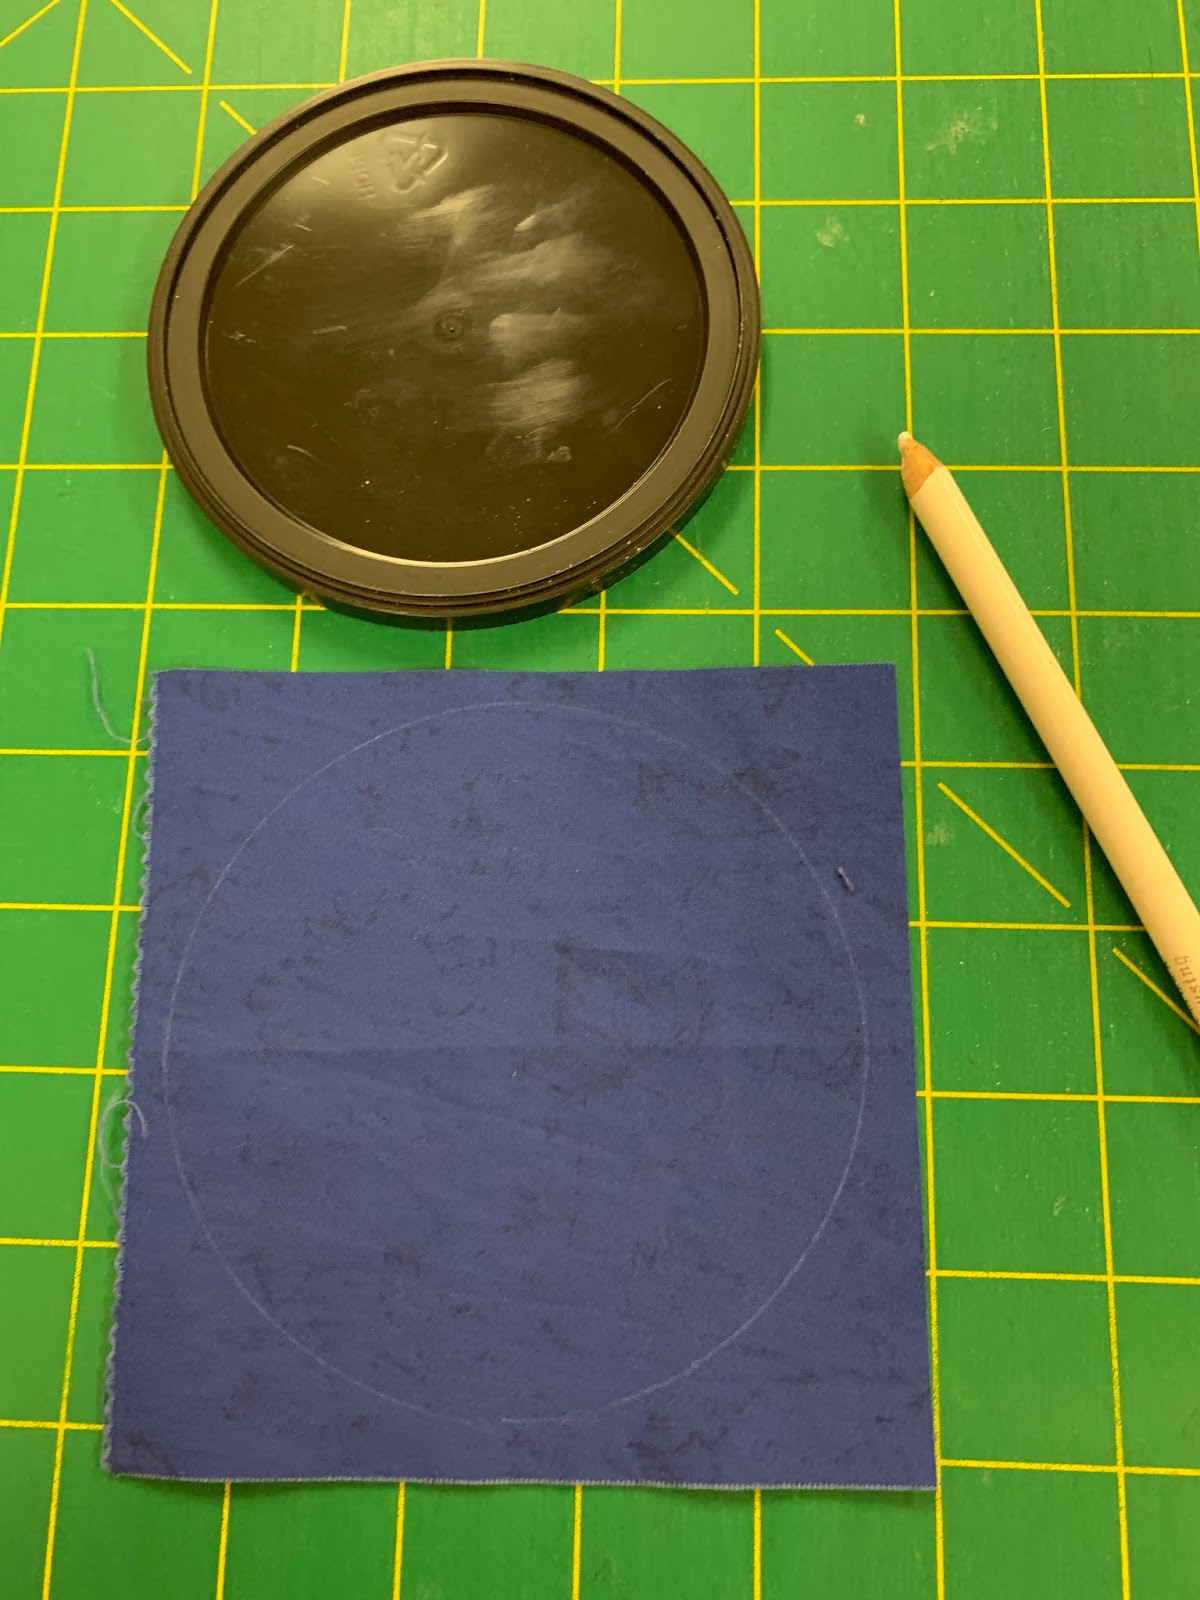
1. After printing the pattern on Quilter's Select Print and Piece Fuse Lite, I drew the horizontal and vertical lines with a pencil:


The large circle was fused to the back of blue fabric, twirlies to the back of red fabric. NOTE: if you want block to “twirl” in the same direction as the pattern, put paper patterns on the FRONT side of the Red fabric:

Pieces are now carefully cut on the lines--this is raw edge applique:


I carefully glued the inner circle on the background, with the lightest touch of glue stick:

Then I placed the red "twirlies" and center circle on top of the blue center circle to be sure it was all going to fit. Looks good to me.
NOTE:--the "twirlies" spin in the opposite direction of the pattern sketch since the pattern is applied to the back of the fabric, making it the "reverse mirror image":


Using the fabric glue stick, I secured the "twirlies" to the blue center circle, then stitched them with red thread using the blanket stitch:


This was one of the fastest blocks to make so far!
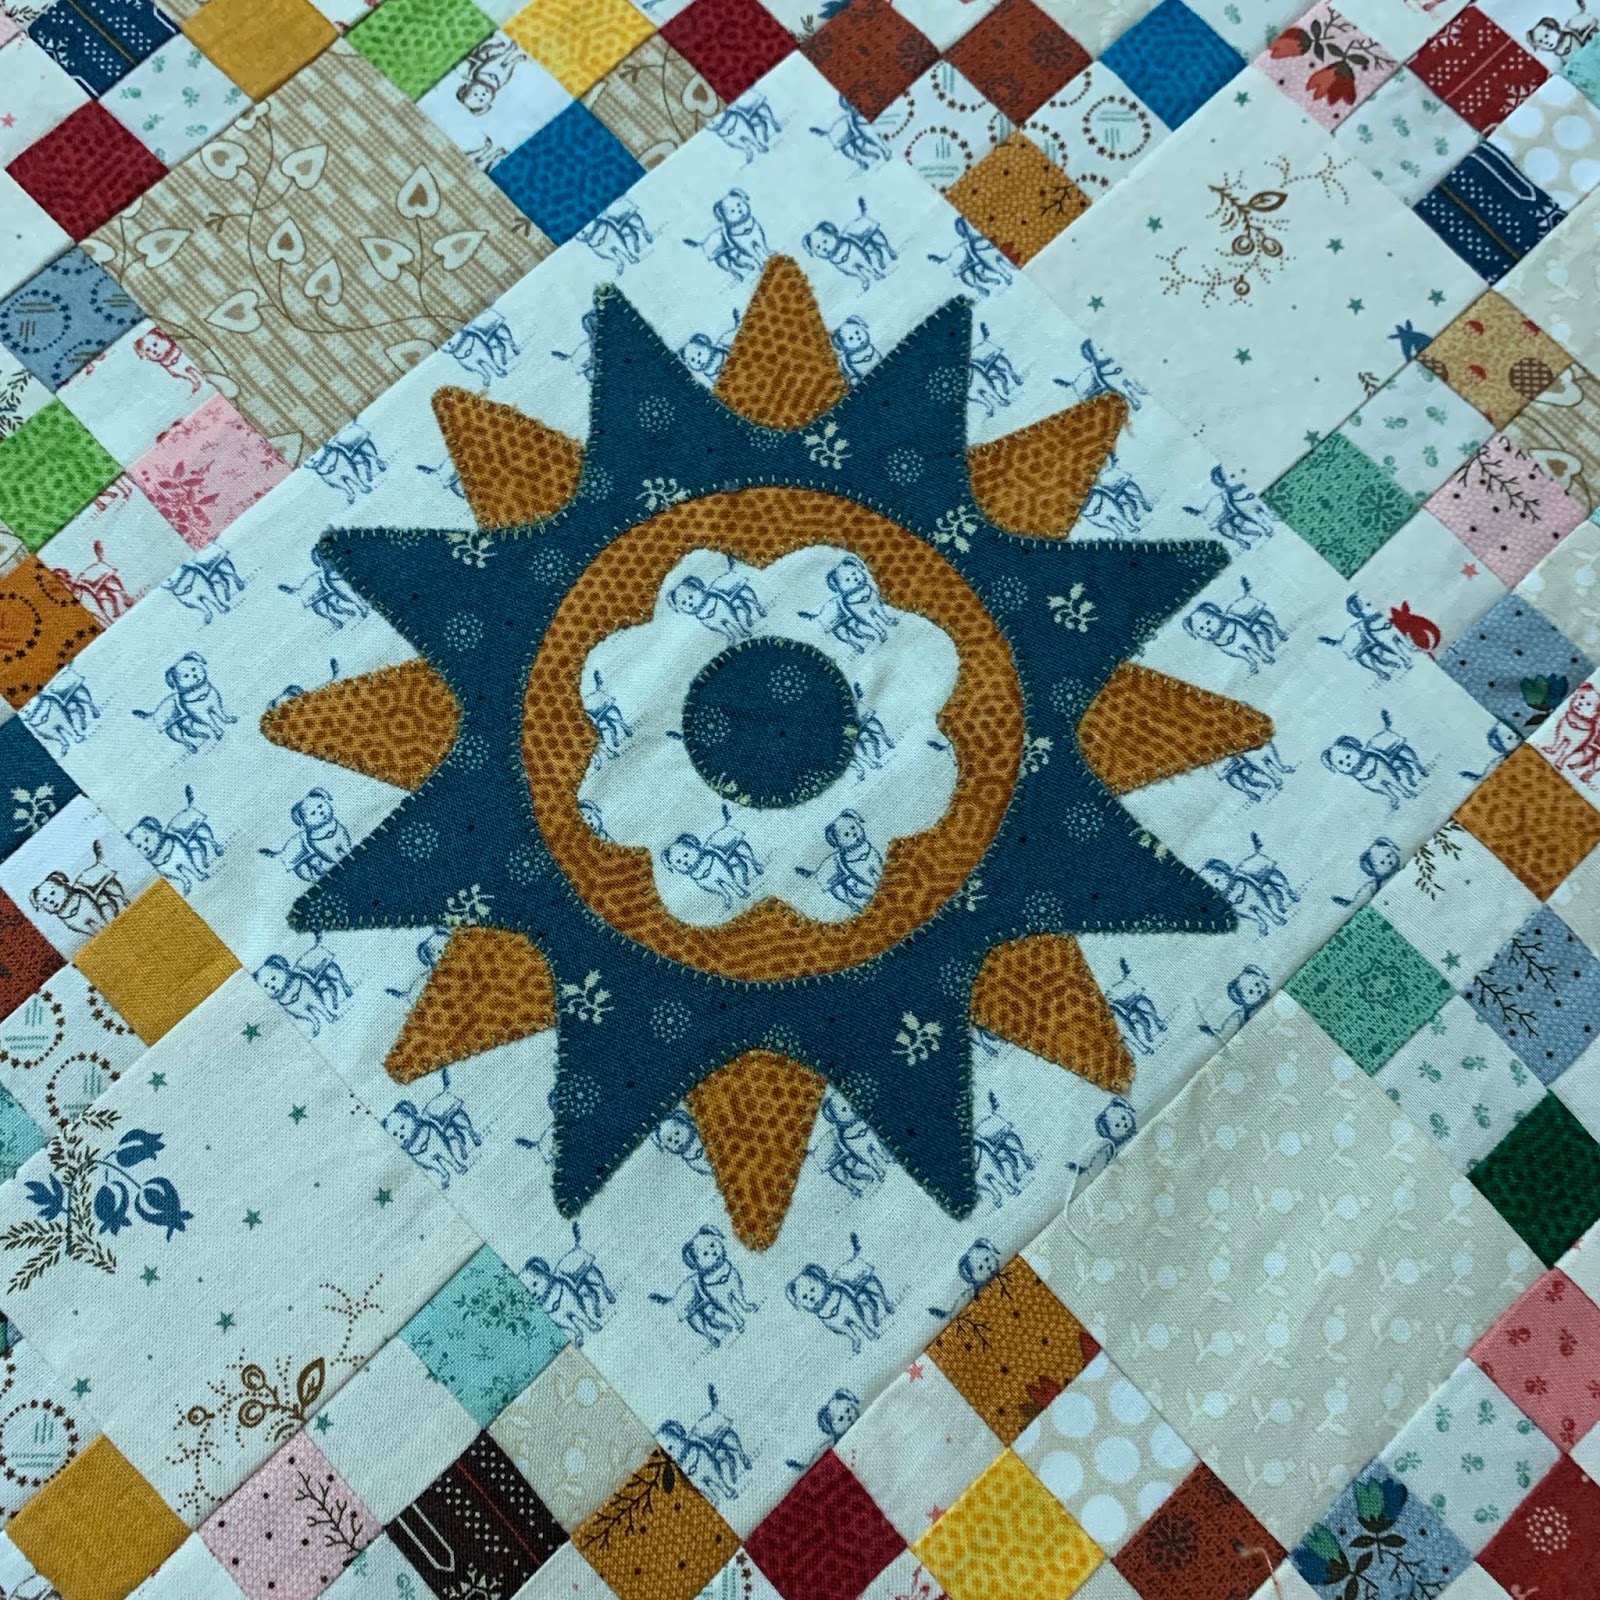
Here are the applique blocks from my Sample Quilt:
 |
| Block 9 |
 |
| Block 10 |
 |
| Block 11 |
 |
| Block 12 |
Here is my Block 11--note I omitted the small circles. I may still go back and add them, but, then again, I may not:

Barbara
Thank you for the points on the reverse mirror image. I was wondering house I was going to fix that.
ReplyDeleteBarbara - Where can I get the set of assorted Quilters Select 60 wt bobbins? All I can find are sets of one color. Would love to use this thread for my hand applique.
ReplyDeleteMy pre-wound bobbins are 80 wt. available at The Quilt Show Store:
Deletehttp://store.thequiltshow.com/Blended-Colors-Bobbin-Set-p/qs-brng4.htm
Thanks! (The blog says they’re 60 wt but 80 is even better)
DeleteI updated that. QS does not have pre-wound 60 wt.bobbins.
DeleteHow can I print out your directions/hints? Just want the important information, not the side bars...
ReplyDeleteIf I print from my phone I can select the pages and I only get the text, not the side bars. Same is true with my Ipad. From my computer I get everything.
DeleteVery clever construction method.
ReplyDeleteIs the Quilters Select Print and Fuse only a one-sided fusible product? I was confused by your use of a glue pen to place the pieces if it is 2-sided fusible. Also suggestion of putting the pieces for the twirly on the front side of the red if it is fusible?
ReplyDeleteYes, it is one-sided.
Delete