Showing posts with label applique blocks. Show all posts

Friday, May 30, 2025

LAUREL RIDGE -- MONTH 6

Laurel Ridge is the 2025 Block of the Month quilt designed by Lynn Wilder exclusively for The Quilt Show.  Star Members have FREE access to the patterns starting January 1, 2025. Made in two colorways, the complete patterns are excellent. You will love making this quilt. Lynn supports the pattern instructions with Videos too. 

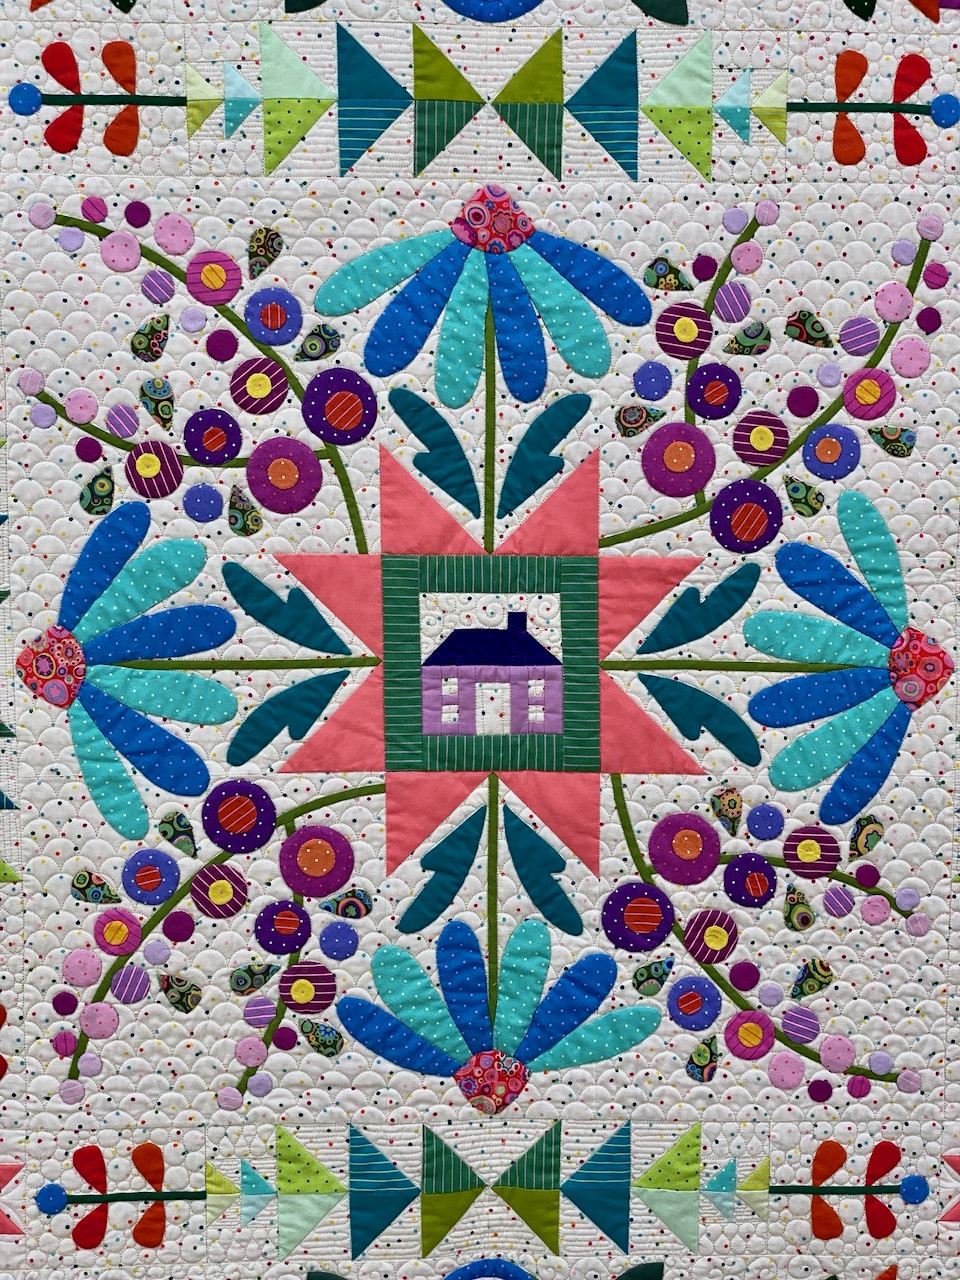
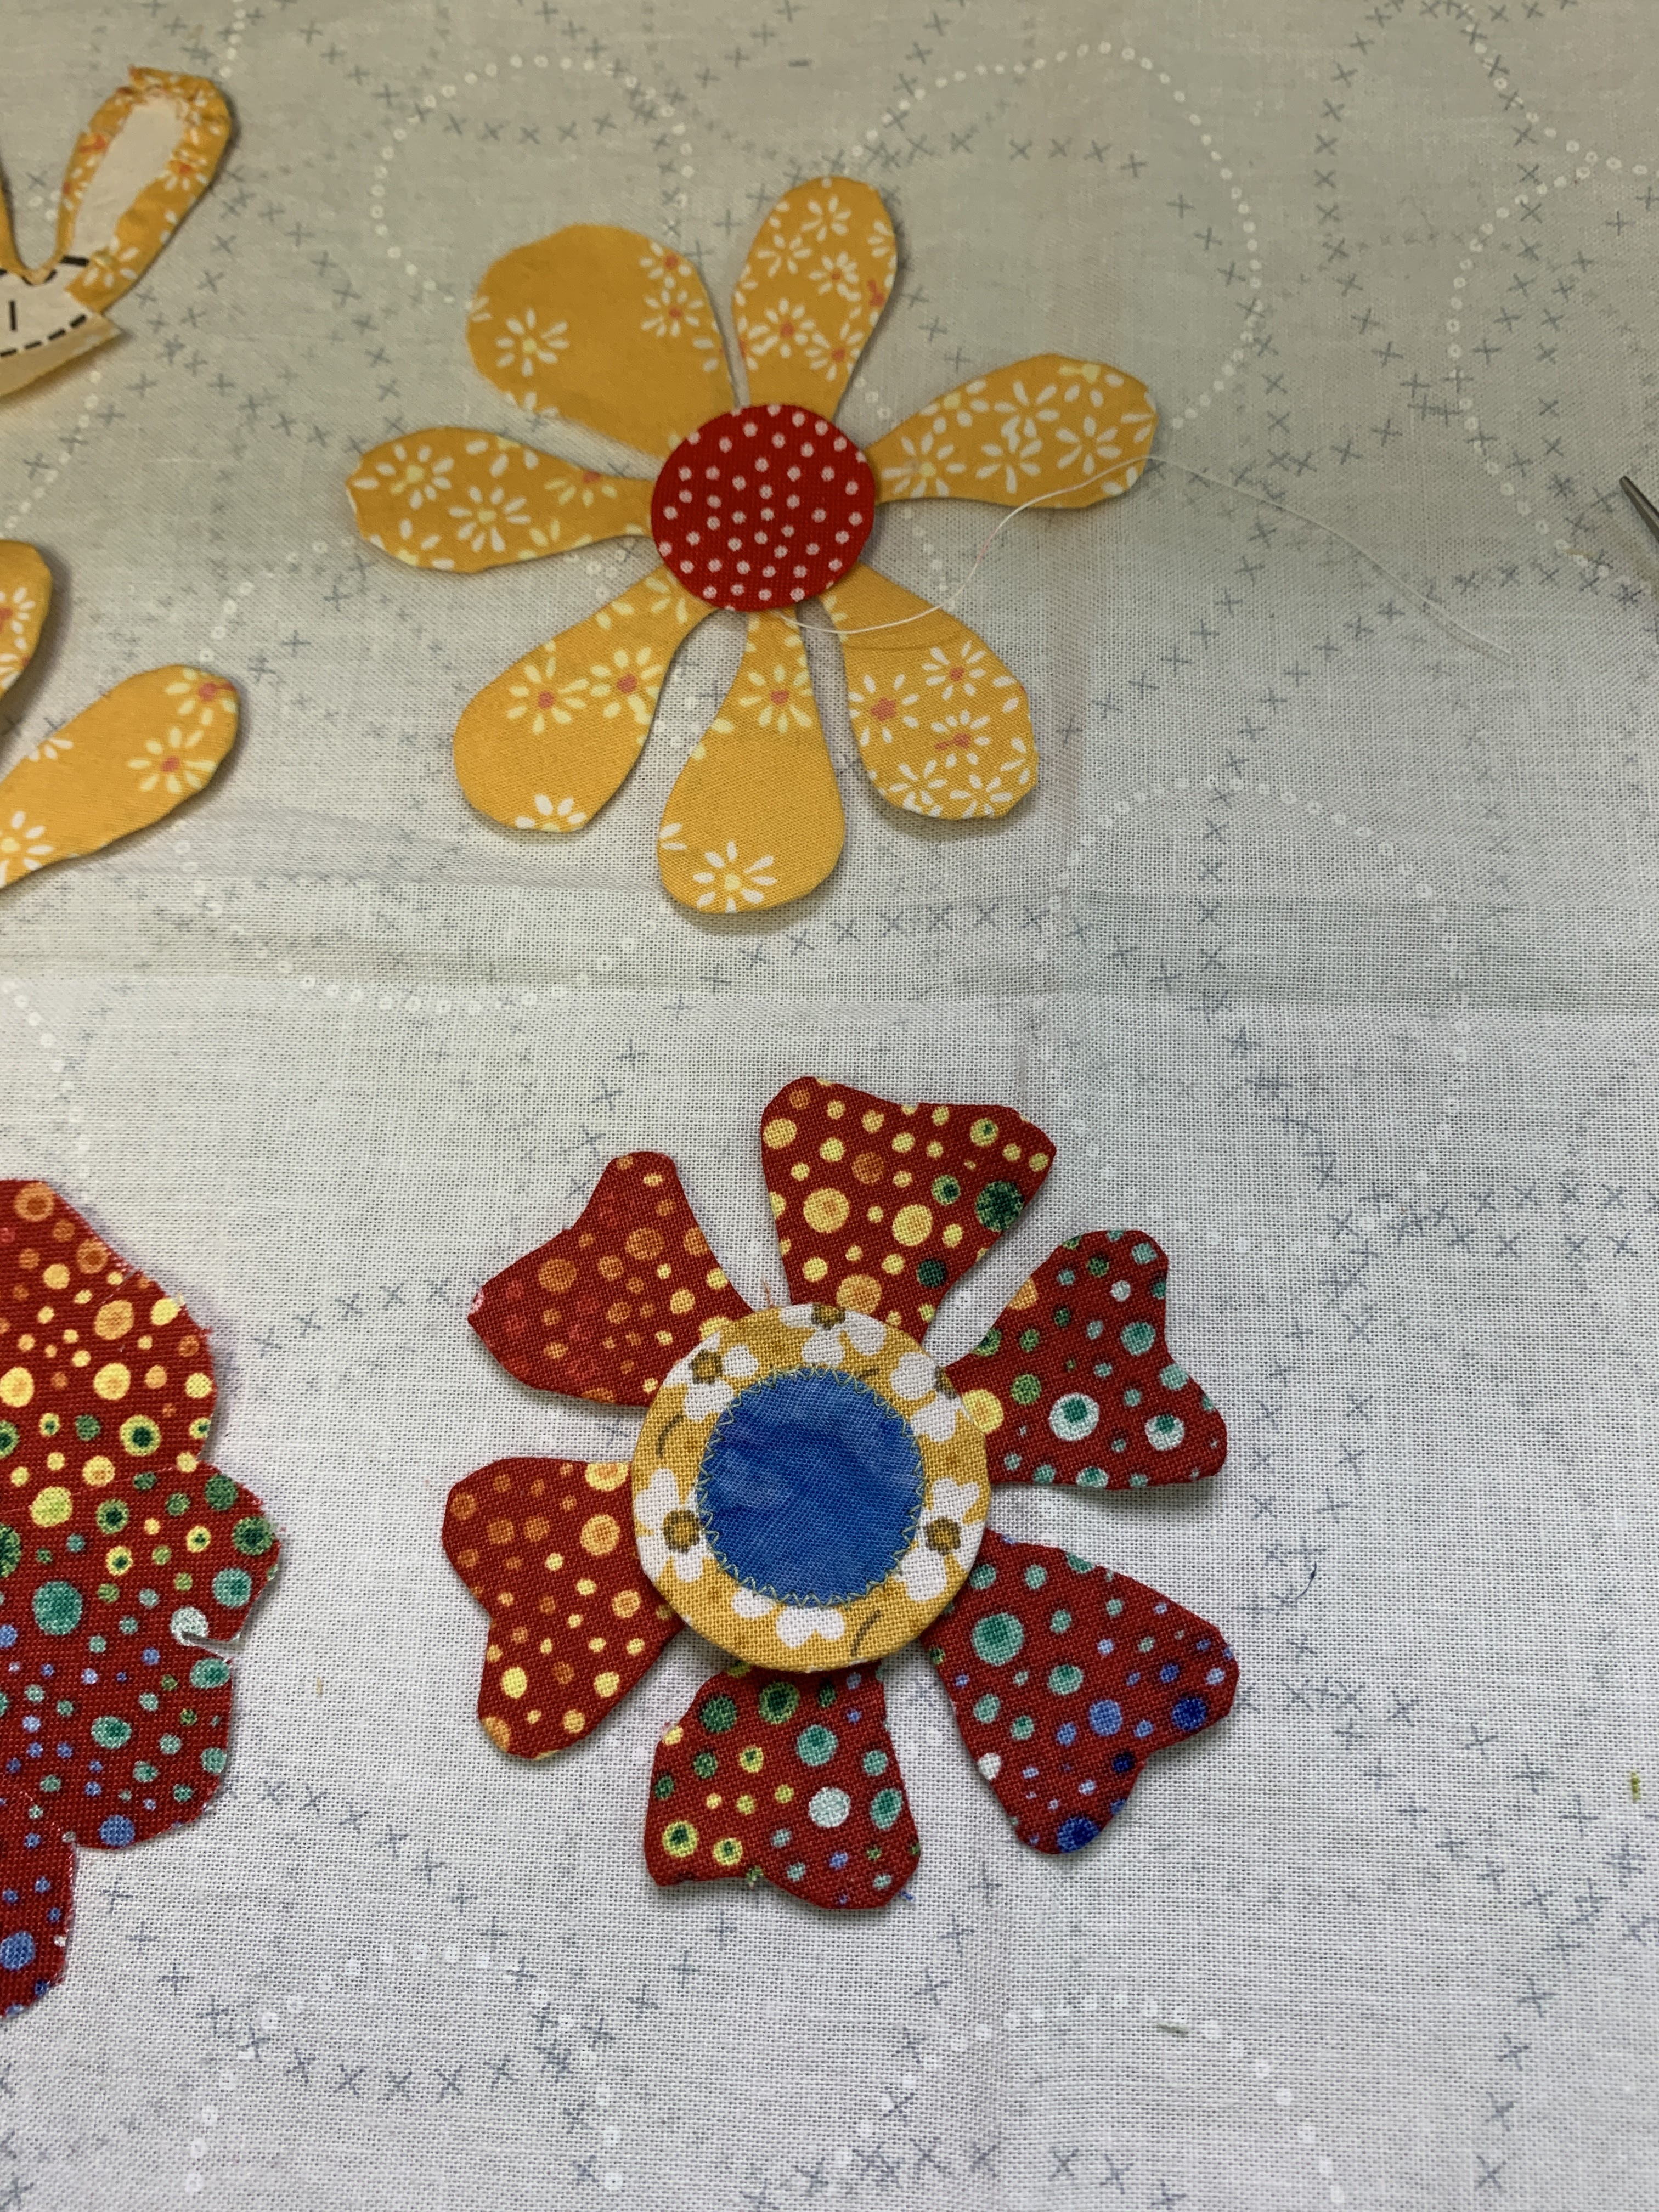
This month Applique returns--with the large spray of flowers and leaves. There are 8 of these blocks, and each is 5" x 7.5" FINISHED. 

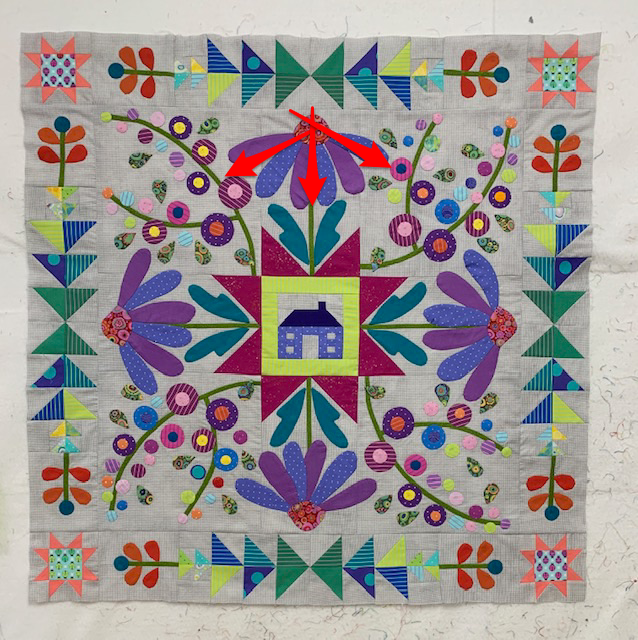
NOTE: Half these blocks tilt LEFT and half tilt RIGHT--they are reverse mirror images of each other. Make 4 LEFTs and 4 RIGHTs. 

Watch Lynn's Video for all her great tips. She strongly recommends using starch/Best Press/Terial Magic, for the background piece. It stabilizes the block so it doesn't "shrink" as the applique is done.

I have chosen not to include any applique in my quilt. But I have written about Applique many times here on my blog. Needle Turn Hand Applique was my favorite method for years. Now I often do Turned Edge Machine Applique. Find my Tutorials here:

NEEDLE TURN HAND APPLIQUE:  Afternoon Delight


TURNED EDGE MACHINE APPLIQUE: Ruffled Roses,   WashAway Paper for Applique Motifs

Turned Edge vs. Raw Edge Machine Applique--and how to Stitch Them.

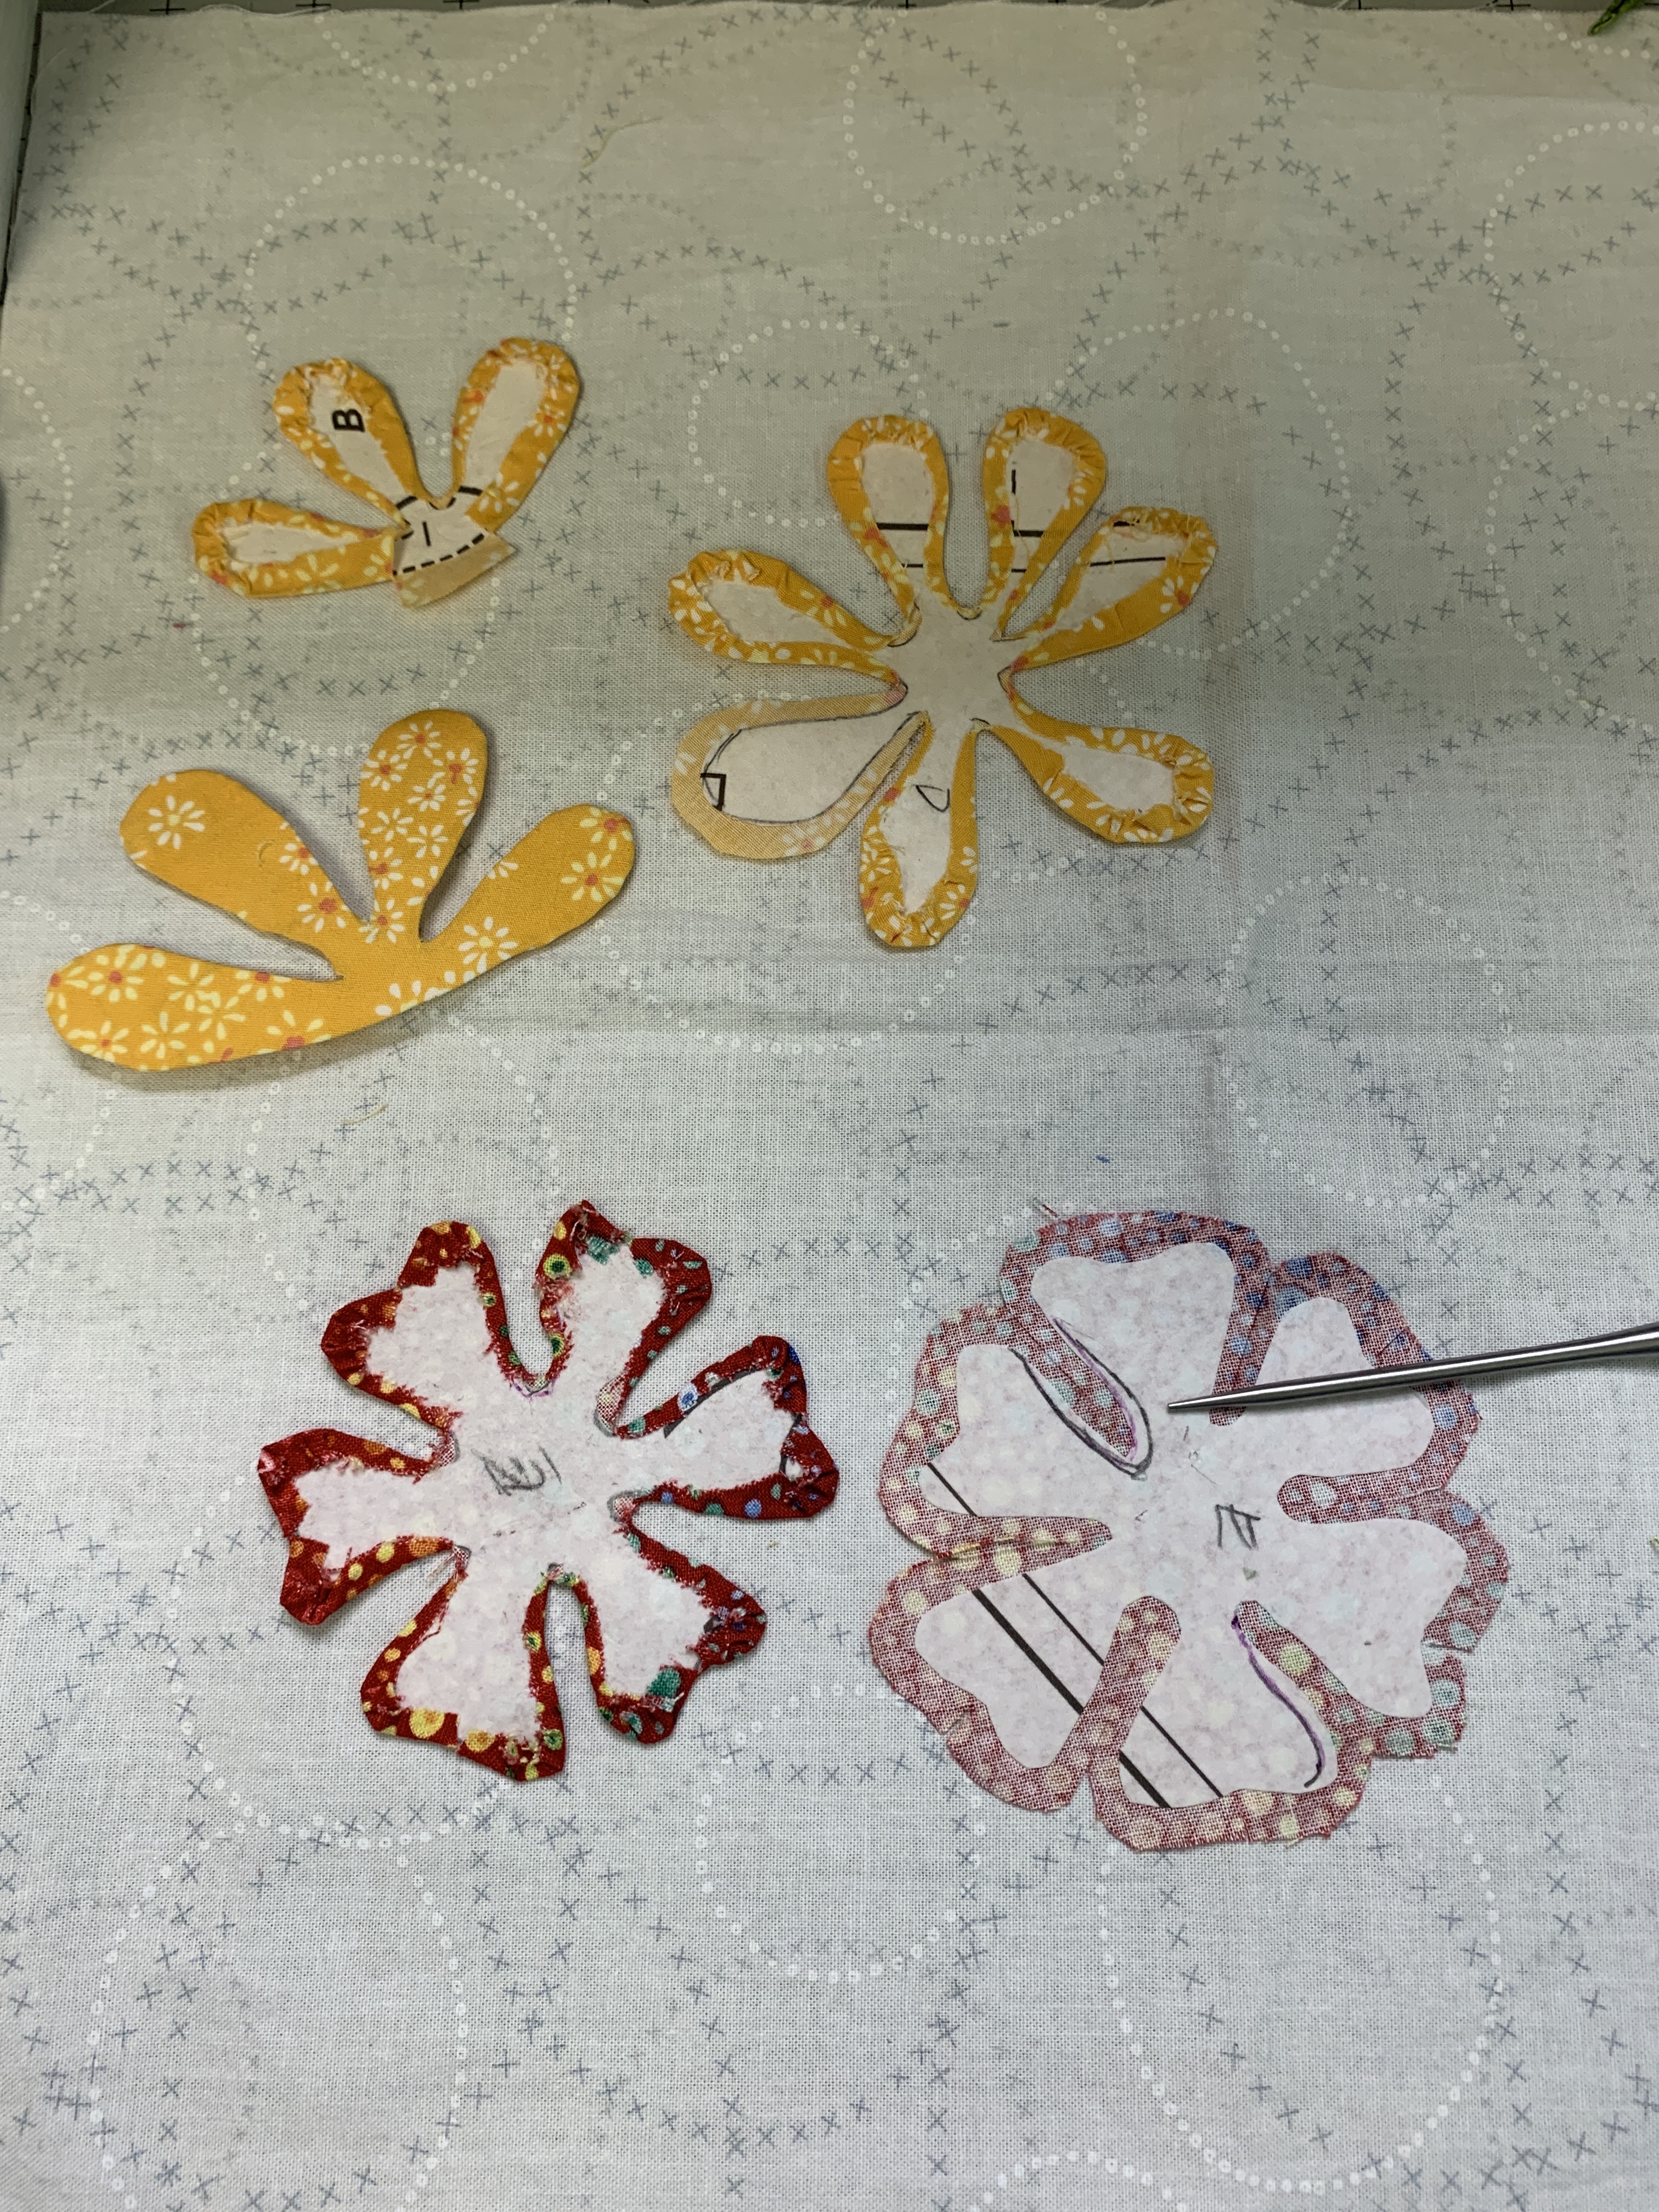
When working with patterns like these for applique, I like to print them on either wash-away paper or freezer paper. This avoids having to trace all those shapes by hand, just cut them out and you have templates for all the shapes. Quilters Select Print n Piece Fuse Lite works well, C&T Washaway Applique Sheets are similar. The washaway papers are left in and will dissolve once the finished QUILT is washed. The freezer paper has to be removed when the BLOCK is finished:


The usual problem with printing patterns like this is the shapes will be REVERSED--that's not an issue with these blocks--remember, we have 4 LEFTs and 4 RIGHTs. 

The best way to have applique stitches that don't show, whether by hand or by machine, is to use fine thread in a color that closely matches the motif being appliqued. My favorite is Quilters Select Pre-Wound bobbins, size 80 wt polyester thread:


Silk thread is lovely too--100 wt, fine as baby hair, but more expensive to gather a large number of colors. 

For Machine Applique, there are several stitches often used. Blanket stitch, Blind hem stitch, Feather stitch, Sewn-Out Zig Zag stitch, etc.. Play with your machine to see which stitches you have that appeal. 

Here is a GREAT VIDEO from Alex Anderson giving a lot of information on how she does machine applique: Alex Anderson Machine Applique  See LESSON 5 at this link. Take a look if you haven't done much machine applique. 

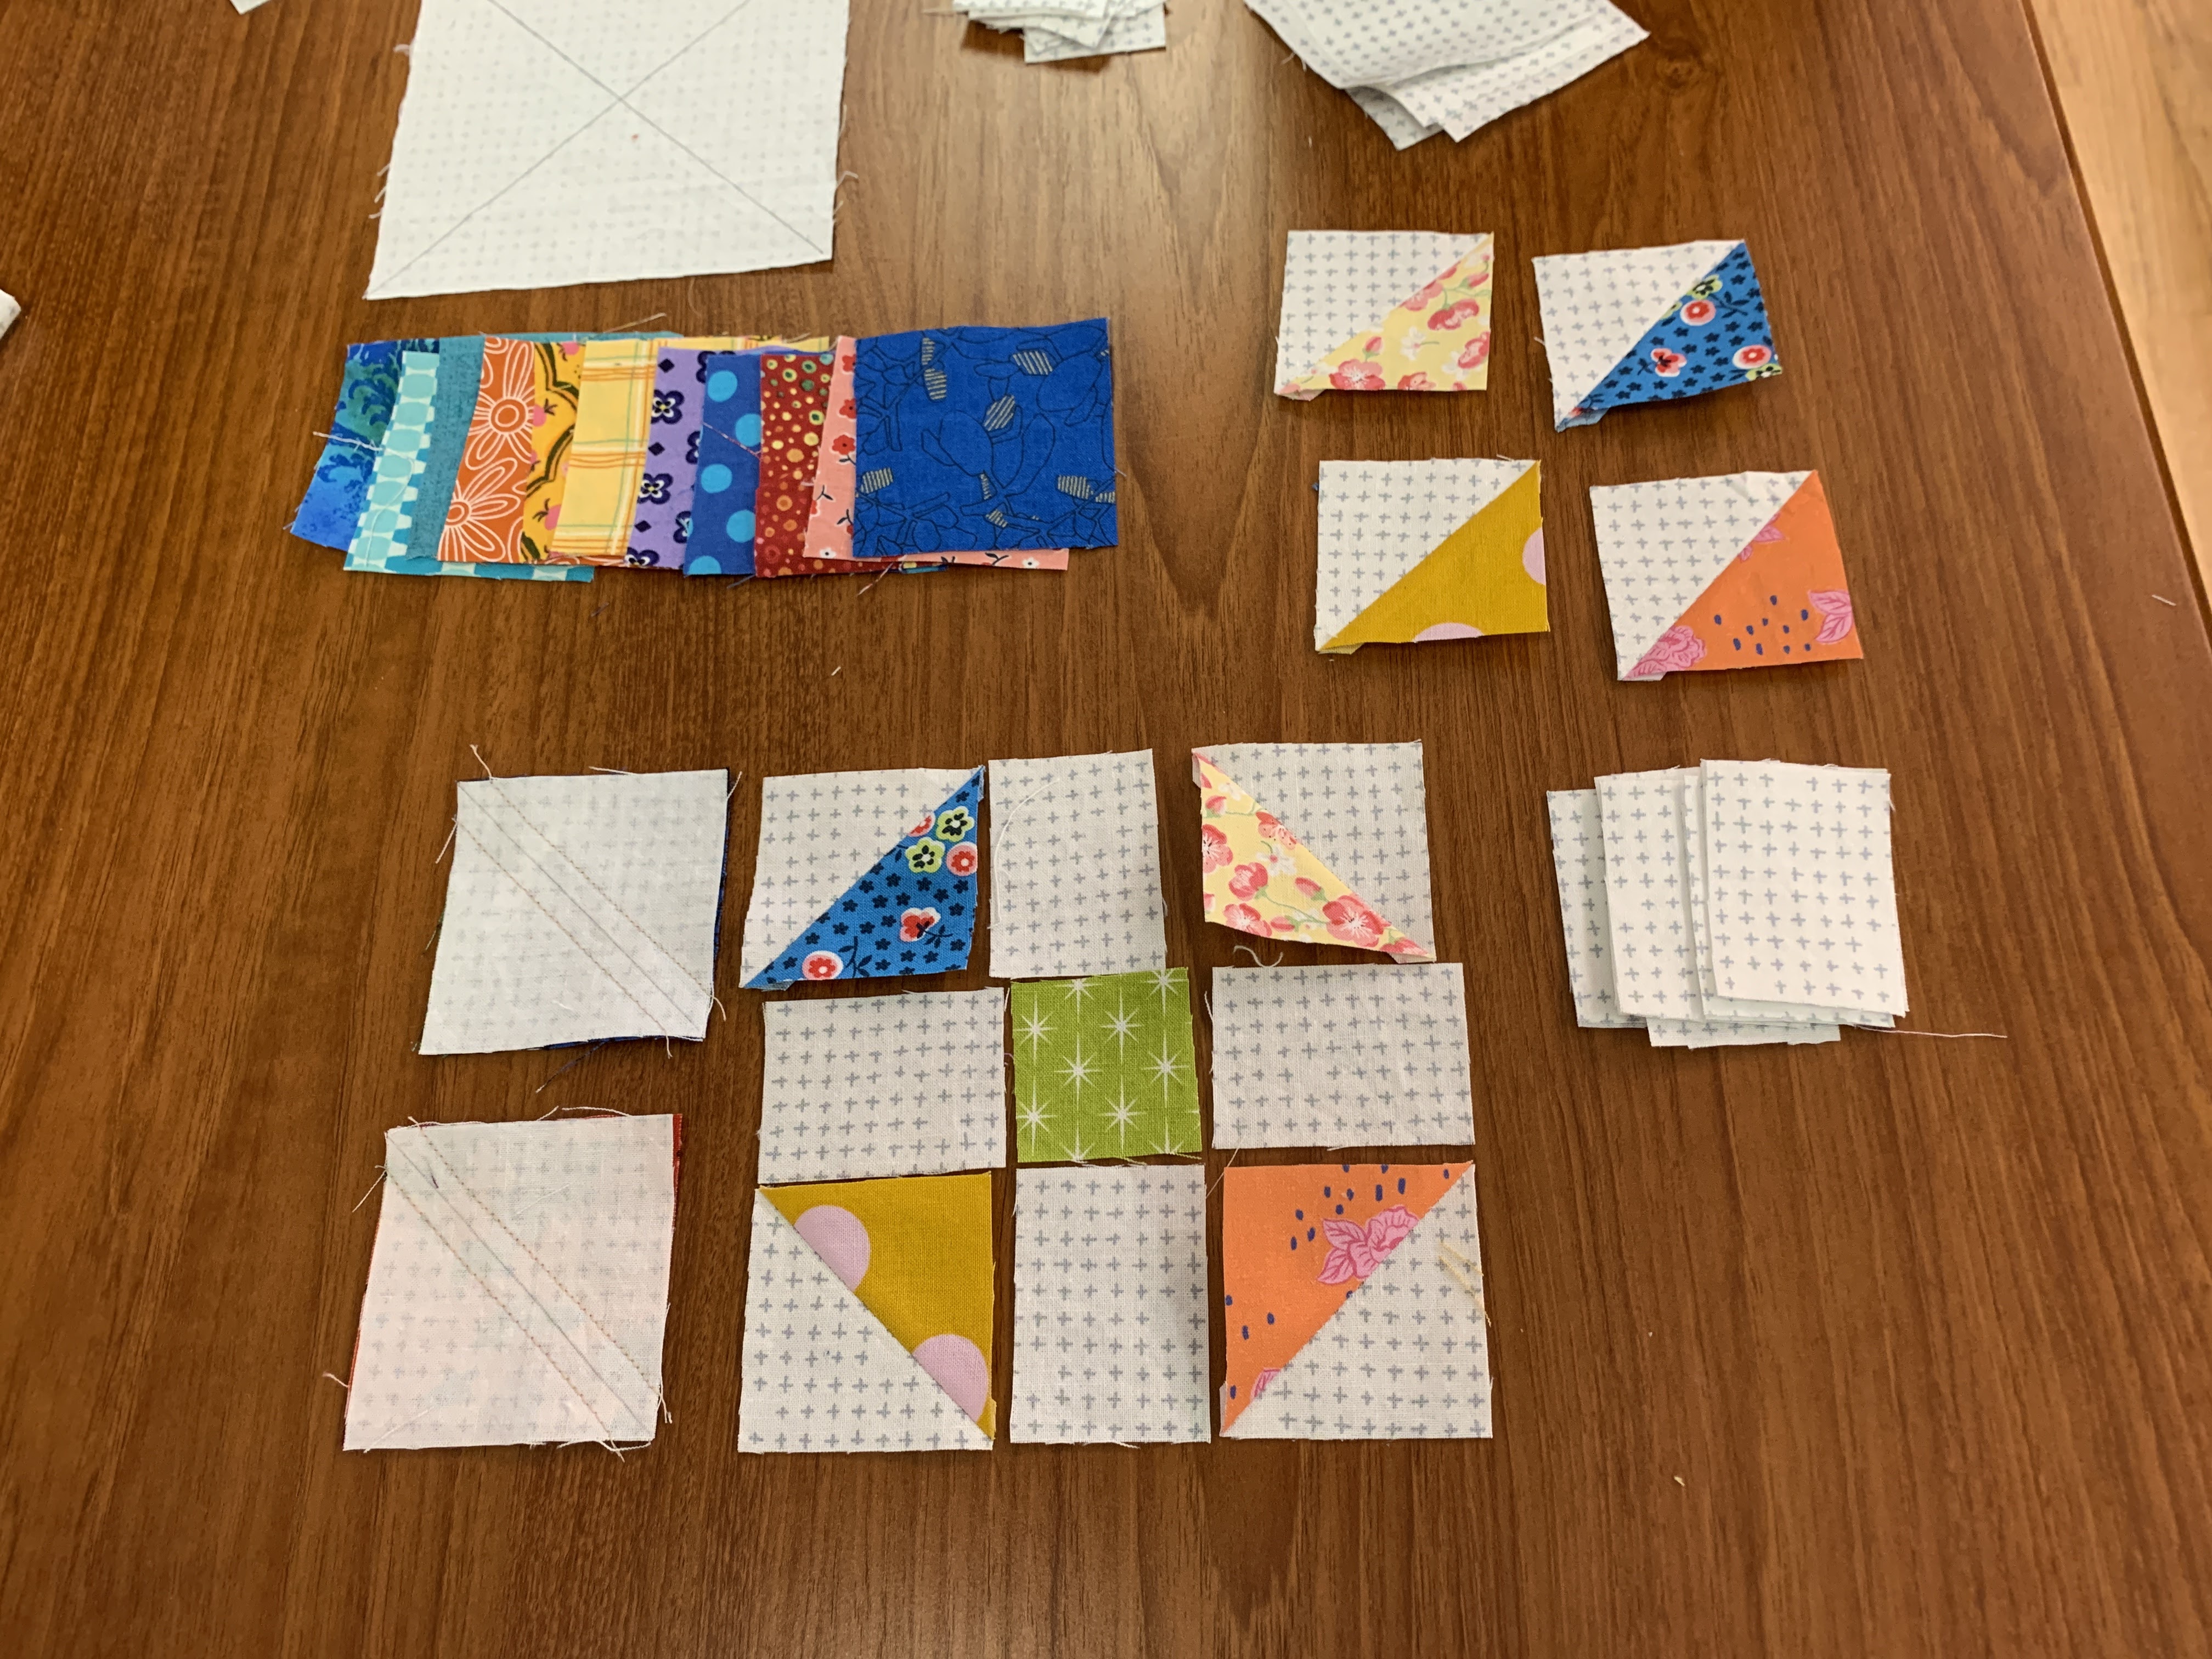
So, what am I doing instead of the applique? One 5" block with 1.25" added to each end makes a 5" x 7.5" block--this is FINISHED SIZE, the block shown below is 5.5" x 8" with seam allowance at the moment. Right now I am playing with the 8 extra Four Patch in a Star blocks I made in Month 1, but I have another idea so this may change: 

As I often say, it's your quilt, you get to decide. Make yours exactly as the pattern instructs or make some modifications to suit yourself. Your quilt will still be "INSPIRED BY LAUREL RIDGE", designed by Lynn Wilder for TheQuiltShow.com

Next month it's back to those Four Patch in a Star blocks, from Month 1, with different fabric placement for those using the Kits.

Let's quilt.

Barbara

Friday, January 31, 2025

LAUREL RIDGE -- MONTH 2

Laurel Ridge is the 2025 Block of the Month quilt designed by Lynn Wilder exclusively for The Quilt Show.  Star Members have FREE access to the patterns starting January 1, 2025. Made in two colorways, the complete patterns are excellent. You will love making this quilt. Lynn supports the pattern instructions with Videos too. 

This month the pattern is for the 5" applique blocks. There are 4 sets of 3 applique blocks this month. Lynn has a Video for the applique and discussed applique in her show, #3601, FREE FOR ALL  to watch this entire year. Follow Lynn's excellent instructions for her applique designs. 

I chose not to include any applique in my quilt so I looked through Barbara Brackman's Encyclopedia of Pieced Quilt Patterns for ideas of what to substitute. 

BIG WARNING: if you are using either of the KITS,  my substitution Blocks and/or Fabrics were not part of the Kit calculations. I know there is a "little" extra fabric in each Kit, but there is NO GUARANTEE you will have enough Kit fabric with my changes. If this makes you nervous, just FOLLOW THE PATTERN INSTRUCTIONS with NO CHANGES. 

Here are 3 options I think will work. The first two I paper-pieced, the third is a regular pieced block.

Option 1: X Block 5", 3 in a row


One block 5" FINISHED: the yellow is an additional fabric I added

The pattern is drawn in EQ8 but it is very easy to draw with a pencil and paper. Each of the 4 squares are 2.5" FINISHED--draw a 3" square, this accounts for the seam allowance around the edges. The center white strip is symmetrical on the square and 7/8" wide FINISHED--OR whatever size you like. I wrote in the 4 colors I used for the triangles so I wouldn't get confused. Make 4 of the small squares, sew them together as a four-patch and the block is 5" FINISHED, 5.5" including seam allowance.


OPTION 2: Rolling Block 5", 3 in a row: I like the circular feel of this one

One block, 5" FINISHED: the yellow and dark green are additional fabrics I added

Again, my pattern is drawn in EQ8 but is very easy to draw on paper. Each unit is 2" FINISHED, the outer white triangles are 1.5" on the outside edge, the smaller inner white triangles are 1" on the outside edge. My colored strips are 1" FINISHED OR whatever size you like. The white sashing and green squares are 1" wide FINISHED. NOTE: the center strip is NOT centered symmetrically on the block:


OPTION 3: Another X Block, 3 in a row: I love the simplicity of this. NOT paper pieced:


I simply drew a 5" square on paper, made the center white strip 1" wide and symmetrical on the square; what is left are the 4 colored QST triangles. Cut a 5" square of four different fabrics, cut on both diagonals and there you have the quarter square triangles (QST) needed to make 4 blocks. There are a total of 12 blocks in the quilt:

At this moment I am leaning toward Option 3, the easiest and fastest. I won't decide until much later in the year when a lot more of the quilt is done. 

If you want to substitute a pieced block for the applique, ANY 5" block might work. Try a few to see what you like. You can always make a "test" block with extra fabrics from your stash to see if you like it before using your "official" Laurel Ridge fabrics. You DO have extra fabrics right?!

Later this year we will have the other applique block to make, 5" x 7.5" FINISHED. I have some ideas on what I plan to do there too. Stay tuned...

I have written about paper piecing with Freezer Paper several times. Find one HERE if you are new to using Freezer Paper for foundation.

I have also written about applique, both machine and hand, quite a few times. THIS ONE might be helpful for this month's applique if you are doing that. 

Share your progress on the FORUM we want to see what you are doing!

Next month we move on to a very easy block that will get us further along on the journey.

Let's quilt.

Barbara

Wednesday, March 1, 2023

HOMEWARD BOUND -- MONTH 3

 This quilt is the 2023 Block of the Month quilt for The Quilt Show. It was designed by Sarah Fielke exclusively for The Quilt Show and is only available at The Quilt Show. The best news is it's FREE for Star Members of The Quilt Show. Each month in 2023 a new part of the quilt is released for download to Star Members. 

This month we continue with the 116 circles, in 5 different sizes, that make the Hollyhock blocks:


In Month 2 we got the circle sizes for all of them. The Fabric Requirements pages show all the fabrics used in each month. A lot of people making this quilt around the world have already added ALL the circles so all they have to do in Month 3 is add the small leaves in each of the four Hollyhock blocks.

BE SURE you watch the Month 3 Video before you begin. It is a great video on how to do beautiful needle turn hand applique. And several good tips for using pins and glue and thread.

A word of WARNING about those leaves! The pattern says to use photos of the quilt, like the one above, to see where to place the leaves. 

BEWARE: the Coneflower petals we will work on in Month 4 stick out farther into the Hollyhock blocks than you think. 

I thought I spaced the leaves out far enough but I didn't and had to remove and reposition 1 or 2 in each block when it was time to add the Coneflowers. 

To help you avoid the problem I will show you how far out those Coneflower petals go. This is my quilt, up through Month 5 with some of the stars from Month 6 in the corners.

From the top of the Coneflower to the outside petal edge at the Center, you need to allow at least 6"--that shouldn't be a problem because none of the small leaves go there

The petals on the left and right sides go out about 5 1/2" from the TOP of the Coneflower seed head. So don't put the small leaves anywhere near that area. Wait until the Coneflowers are in place to finish adding the few small leaves that go near the Coneflowers:


Sarah mentions waiting to place some of the small leaves until after the Coneflowers are added in the Block of the Month show: Homeward Bound Block of the Month  This show is FREE FOR ALL TO WATCH all this year so even if you aren't a Star Member, I encourage you to watch. There is a lot to learn in this one.

This is also a reminder to watch the show again if you are making this quilt. It is full of tips that you will use throughout the year and may have missed in January when you first watched.

Since there is not a lot of work to do this month, you could start making some of the 15 yards of 1/4 Bias for the stems used in Month 7. It will take about a half yard of fabric to make that much if you want it all the same. You DO NOT need to make 15 yards of continuous bias. Just cut the fabric as long as you can on the bias, and  make it. If you should need to join shorter pieces together, and you probably won't, you can do that as needed in Month 7. 

Detail of small stems: 


Detail of long stems:

Complete quilt:

It is not too late to start. Simply Join The Quilt Show and jump in. 

Let's quilt.

Barbara


Sunday, September 25, 2022

GPDU -- MONTH 10 The Two Skinny Vases

I am providing the Month 10 information a bit early this month. Before we can start making the Diamond Borders, we need to make the two "Skinny Vases"  so the right side of the quilt can be assembled.

This month we make TWO vases, what I call the "Skinny Vases". Each block is 14" tall x 6" wide finished, so are trimmed to 14.5" x 6.5", and then they are sewn together to make a block 14" tall x 12" wide finished.

My latest blocks, not sewn together:

My blocks from the Sample quilt made last year, thanks to Donna D:


Irene's blocks from her quilt:


These feature wonderfully shaped vases, small circles, bias stems both 1/8" and 1/4" and flowers and leaves.

They sew up quickly and I think they are great vase blocks. Star Members of The Quilt Show have access to the Month 10 Video I made showing some tips for making these vases.

Once the Skinny Vase blocks are joined together, the right side of the quilt is assembled with blocks previously made. Then we can measure the quilt to check what size the Diamond Borders will be. 

There is a second blog post on making the borders and there are TWO VIDEOS ON BORDERS--these provide very important information you need to read BEFORE cutting the Diamond Border fabrics. Find them under Month 10 in the 2022 Block of the Month section. The videos and patterns are available FREE to Star Members. 

It is not too late to start making your own Garden Party Down Under--the patterns remain available FREE for members of  The Quilt Show. until December 31, 2022. The Block of the Month patterns are included FREE with membership, a great deal. 

I use Karen K Buckley's Perfect Stems to make the 1/8" stems. For the 1/4" stems I cut bias fabric 3/4" wide and press in thirds, no sewing, no fuss, just press in thirds.  All my circles are made with Karen K Buckley's Perfect Circles. 

All the shapes are prepared with patterns cut from Print & Piece Fuse Lite, printed out then fused to the wrong side of the fabric. This reverses the design but I am fine with that. 

As you get your Skinny Vases done, post a photo on the Forum--there is a Topic specifically for Month 10 -- Show Your Progress Here.  FORUM for Garden Party Down Under

Let's quilt.

Barbara

Sunday, July 31, 2022

GPDU--MONTH 8 One Applique Block and a Shoo Fly

 Garden Party Down Under is the 2022 Block of the Month quilt from The Quilt Show with Alex Anderson and Ricky Tims. It is offered FREE all of 2022 to Star Members of The Quilt Show. Designed by Australian designer Irene Blanck, this quilt has captivated a lot of quilters around the world and many are making beautiful variations of this pattern.

This  month there is a striking applique vase. The vase can be cut from a single piece of fabric, or cut the  handle from a different fabric to add interest. Your quilt, you get to decide.

Here is mine from the quilt made as a sample last year:

Here is Irene's: 

The handles are reversed because mine was made with a pattern printed on a fusible, then ironed to the back of the fabric, thereby reversing the design. Irene does all of her applique by hand so her pattern was traced from the front side of the pattern.

That is what makes this such a GREAT PROJECT--use all the information provided to make a "Sampler of Techniques"--try several applique methods to determine which you like best. 

The borders in Months 1 and 2 can be appliqued or paper pieced.

When we get to Month 10, the outer Diamond borders will be introduced--they can be appliqued, as Irene did, or machine pieced, as I did. Instructions for BOTH methods will be provided.

Take a few minutes to look on the FORUM at some of the wonderful work being done by many quilters around the world. Click on PHOTOS  at the top, just above the purple bar, to see all the photos posted on that months' Show Your Progress Here Topic. 

You don't have to be a Star Member to see the FORUM, you do have to be a Star Member to post on the Forum:


MONTH 7 -- SHOW YOUR PROGRESS HERE

I wrote detailed instructions for the SHOO FLY BLOCK in the MONTH 6 BLOG, FIND IT HERE.

 Please take time to post your photos on the FORUM for the world to see. And if you post on Social Media, please use #gardenparty2022bom on your posts.

Let's quilt,

Barbara

Wednesday, June 29, 2022

GPDU -- MONTH 7 One Applique Block and one ShooFly Block

Moving on to the second half of this year--we have a new, beautiful applique block and another ShooFly block. This is posting a couple days early, as it will be a busy holiday weekend here in the US for July 4. I thought you might like an early start.

Remember, it's not too late to start this project. All of the blocks remain available FREE to Star Members of  The Quilt Show until December 31, 2022--Months 1-7 are up now. New blocks are posted on the first of each month. Find the information HERE.

Here is my applique block, Block 10. I used one of my favorite old fabrics for the vase, and 3 kit fabrics for the leaves: 

My Block 10

The tip for Block 10--the stems are straight so they don't have to be made from bias, straight stems will do it. 

Designer Irene Blanck's Block 10

The ShooFly block is just like last month--the instructions are exactly the same so you don't have to print that page for Month 7, unless you want to. Find my detailed ShooFly block instructions here: MONTH 6 SHOO FLY BLOCK TIPS

Cutting all the pieces needed for several ShooFly blocks in advance, allows you to sew them as Leaders/Enders--they practically make themselves. I needed two blocks for my project so I just cut all those pieces, and set them beside my machine. Over a few days they were all made:


Both of my ShooFly Blocks have double hearts in the center. Very easy and fast to make. I have seen some made with flowers from earlier months, an additional pieced block, a square of floral fabric--it's your quilt, you get to decide: 

Early on this year I decided I was not making a second full-size version of Garden Party Down Under--I love my sample made with help from the Sunday Sew & Sews last summer:

But I still needed to do something with the sample blocks I am making each month THIS YEAR, mostly from Kit fabrics.  Here is my plan. The center made in Months 1 and 2 will be a small wallhanging. All it needs is quilting--unless I decide to add a narrow outer border:


Another small wallhanging will be made with Months 4-7. It will be completed after the LIVE broadcast July 1 when I will discuss the Month 7 Vase Block:


Because the applique blocks from Month 5 are 13" wide and the pieced blocks are 12" wide, I had to add very narrow sashing to the pieced blocks in rows 1 and 3 so the rows align. They are 1/2" finished. The sashing in the middle row is 1" finished.

I wanted this quilt to be square so the sashing between the rows is 1" finished--this makes the center 38.5" including seam allowances.

I will use this to demo how I made the pieced borders when we get to Months 10, 11 and 12. Having a square quilt means I only have to do the math once. With a rectangle, I would have to figure out the left and right side borders AND the top and bottom borders. 

The Month 10 and 11 narrow applique blocks are real favorites of mine. I will make all four of those but haven't decided what I will do with them. Maybe a long narrow wallhanging or a table runner. Time will tell...

Let's quilt.

Barbara

Sunday, May 1, 2022

GPDU -- MONTH 5 Two Applique Blocks

 Garden Party Down Under is the Block of the Month quilt for The Quilt Show. The patterns are FREE all of 2022 for STAR Members.  Well worth being a Star Member, if just for these patterns.

This month we make TWO Applique Blocks. And when those are done you can sew BOTH the top and bottom rows to the center of the quilt, seeing progress!  BOTH of these blocks are RECTANGLES--they finish at 13" W x 12" H, so you will trim them to 13.5" x 12.5" after the applique is done.

My Month 5 Block 6

My Month 5 Block 7

There is a VIDEO showing a variety of tips and suggestions for making these blocks. Be sure to watch the video before you start these blocks. 

BLOCK 6: 

The petals for Flower E are fairly close together, leaving little fabric to turn to the back, either for needle turn or prepared turned edge applique, hand or machine. 

There is no reason you can't narrow the pattern a little, providing more fabric for turning. The tool in this photo shows where I could have redrawn the pattern--it's too late once the Print & Piece Fuse Lite is fused to the fabric: 


We don't need to worry about the "cleavage" areas, where there is really NO fabric to turn under, as that area will be covered by single or double circles:


The vase has a small LID on the top of it. The STEMS go under the LID. Remember to check the pattern carefully before you begin--leaves # 1,2, 3, and 4 get placed before the stems that cover the bottom edge of each of those leaves. Then small stems, then longer stems, and then the vase and lid can be added. Flowers can go on before or after the vase, whichever you prefer:


BLOCK 7:

This Vase has HANDLES--they are stitched before the vase is added. If tracing the pattern onto a fusible product, be sure to to create  Left and Right handles--mirror images of each other. 

I printed only pages 9 and 12 onto Print & Piece Fuse Lite (PNPFL). That was enough to give me most of the pieces needed. To cut the additional pieces, I layered more PNPFL, cutting more than one shape at a time. The VIDEO shows this clearly:

Page 12 provides all the ovals

Page 9 provides most of the leaves/flowers, a few extra pieces stapled in place make it easy to cut those pieces out 

All the pieces ready for fabric selection


I love using a "Window Template" to audition fabrics for the Vase. My friend, Amanda, reminded me of this method and it sure helps. I just trace the vase shape on newsprint and cut it out. Here are a few fabrics I am playing with for the vase: 


I remove some of the PNPFL from the vase before fusing it to the fabric--I don't need all that fusible on the back of the vase. The handles were cut from two layers of PNPFL, having the fusible sides facing each other to create mirror image handles. I used a staple to hold the two layers together as I cut them out:


This block has some 1/8" stems and some 1/4" stems. The small stems are placed first, then the wider stems. Remember to add the handles to the background before stitching the vase in place. The leaves, flowers, and ovals can be added before or after the vase, your choice.

Remember to trim to 13.5" W x 12.5" H. 

My recent Blocks 6 and 7, from Kit fabrics:

Block 6

Block 7
UPDATE: I decided the Block 7 vase above was not to my liking and needed to be replaced. Here is the alternative vase--I like it MUCH better. I should have listened to my little voice before I completed the block the first time: 

My new Block 7 


Irene's Block 6


Irene's Block 7


Now you can create the top and bottom rows, using the blocks from Months 3, 4 and 5. The CENTER of your quilt after Month 2 should be 38.5" square, including seam allowances. The top and bottom rows will also be 38.5" wide x 12.5" high. Check seam allowances if yours are not the same size. 

Once the top and bottom rows are added, the quilt should be 38 5" W x 62.5" H. Quilts have a tendency to "grow" as parts get added, usually because of seam allowances. If there is no more than 1/2" difference in yours, I wouldn't worry too much:


You should feel quite accomplished after Month 5, with the center of your quilt growing. Please post your photos on the Forum and use the hashtag  #gardenparty2022bom on your social media posts.

It's not a race, so don't worry if  you are not this far along. I recommend you start each month so you know what the issues are for that month, then return to unfinished blocks as you have time. Eventually, it will get done, if you work on it when you have time. 

Next month we will make ONE applique block and introduce the other pieced block, the Shoo Fly. You may choose to put the Dresden Plate in the center of the pieced block, or make the quilt your own with alternate ideas. More on that next month.

Let's quilt.

Barbara