Sunday, August 5, 2018

Spellbound--It Needed More Quilting

When deciding on quilt designs for our quilts, several factors are considered:

Use--is it a show quilt or a utility quilt?
Batting--what is the minimum space un-quilted recommended by the manufacturer?
Deadline--how soon does it have to be done?
Quilt "Worthiness"--how much time does this quilt, for it's intended use and/or recipient, deserve?

I know I almost always err on the side of too little quilting. Usually a deadline is pending and this shop sample just has to be done. Sometimes, I'm over this particular quilt and it just needs enough quilting to get by.

Rarely, have I added more quilting and wished I hadn't but from time to time I have wished I had added more after the quilt was complete--that can be done but rarely is. Done is done.

Spellbound is a great pattern from Calico Carriage Quilt Designs I first discovered at Spring Market in St. Louis in 2017. I took lots of photos of the quilt hanging in their booth, bought the pattern and secured the fabrics--two jelly rolls of a Shibori design by Debby Maddy for MODA. Here it is at Market:


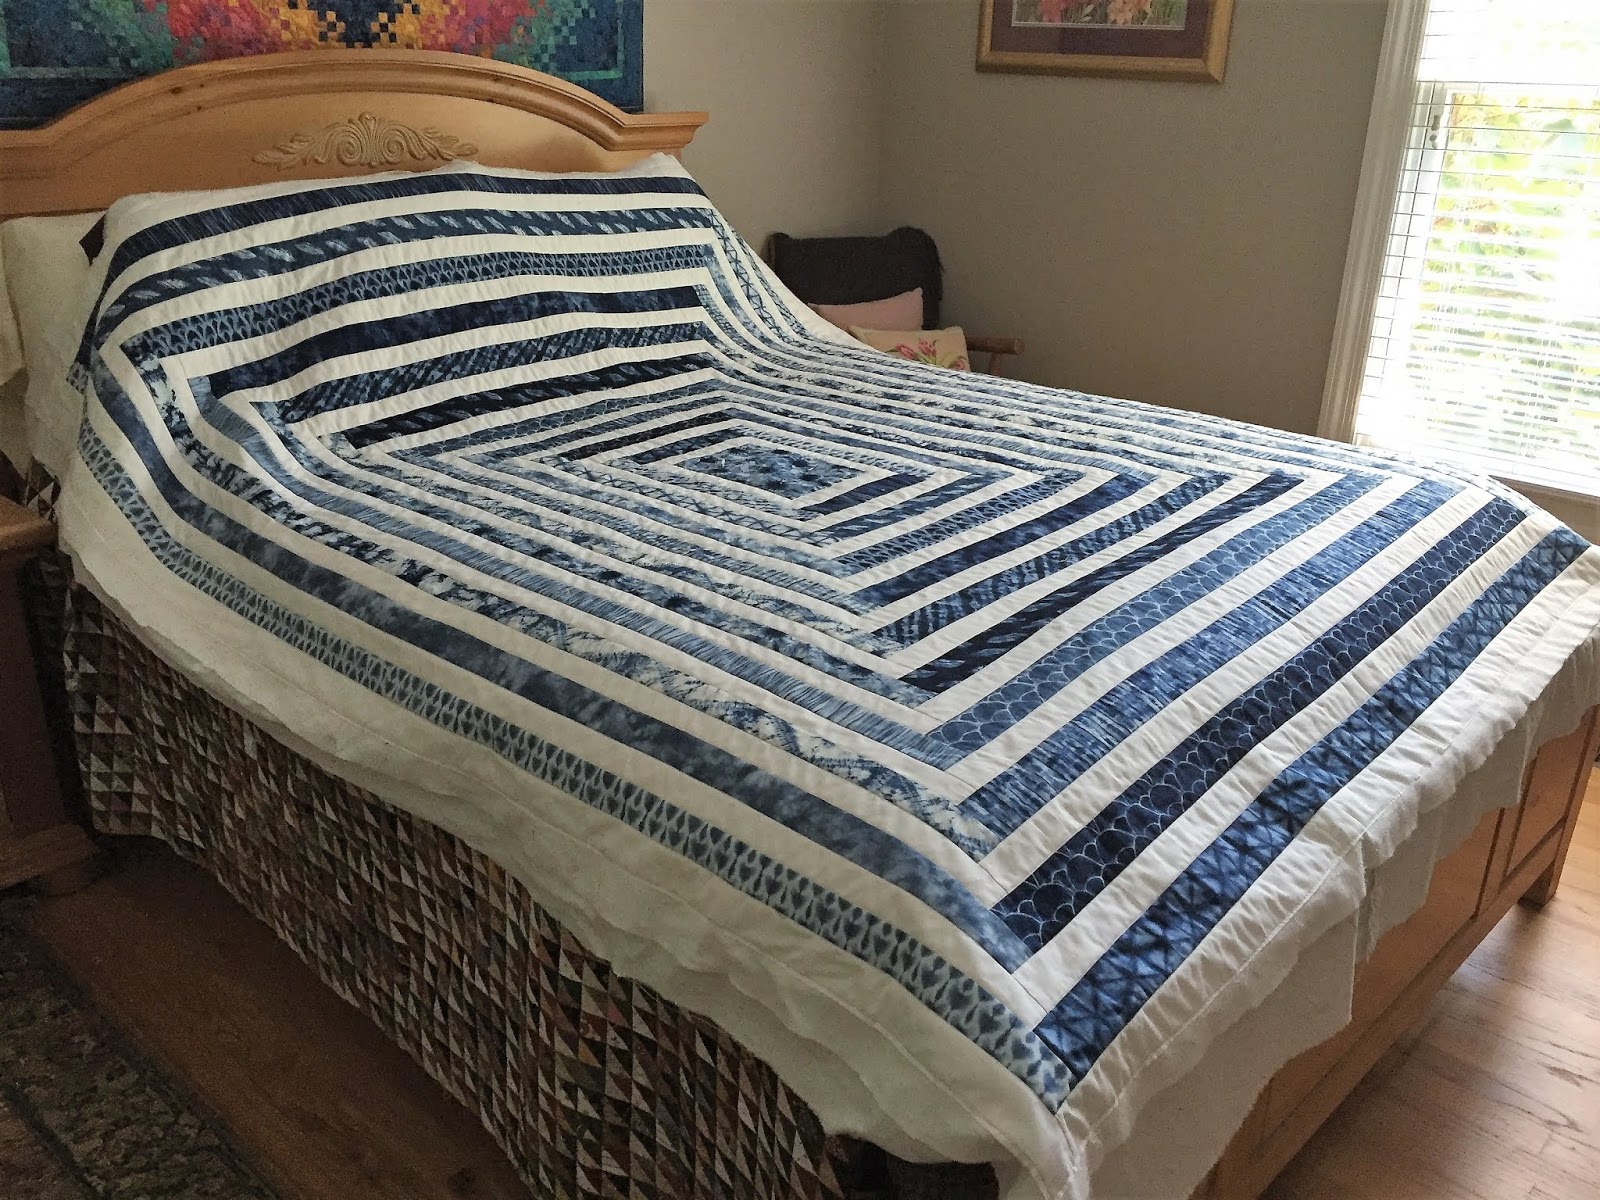
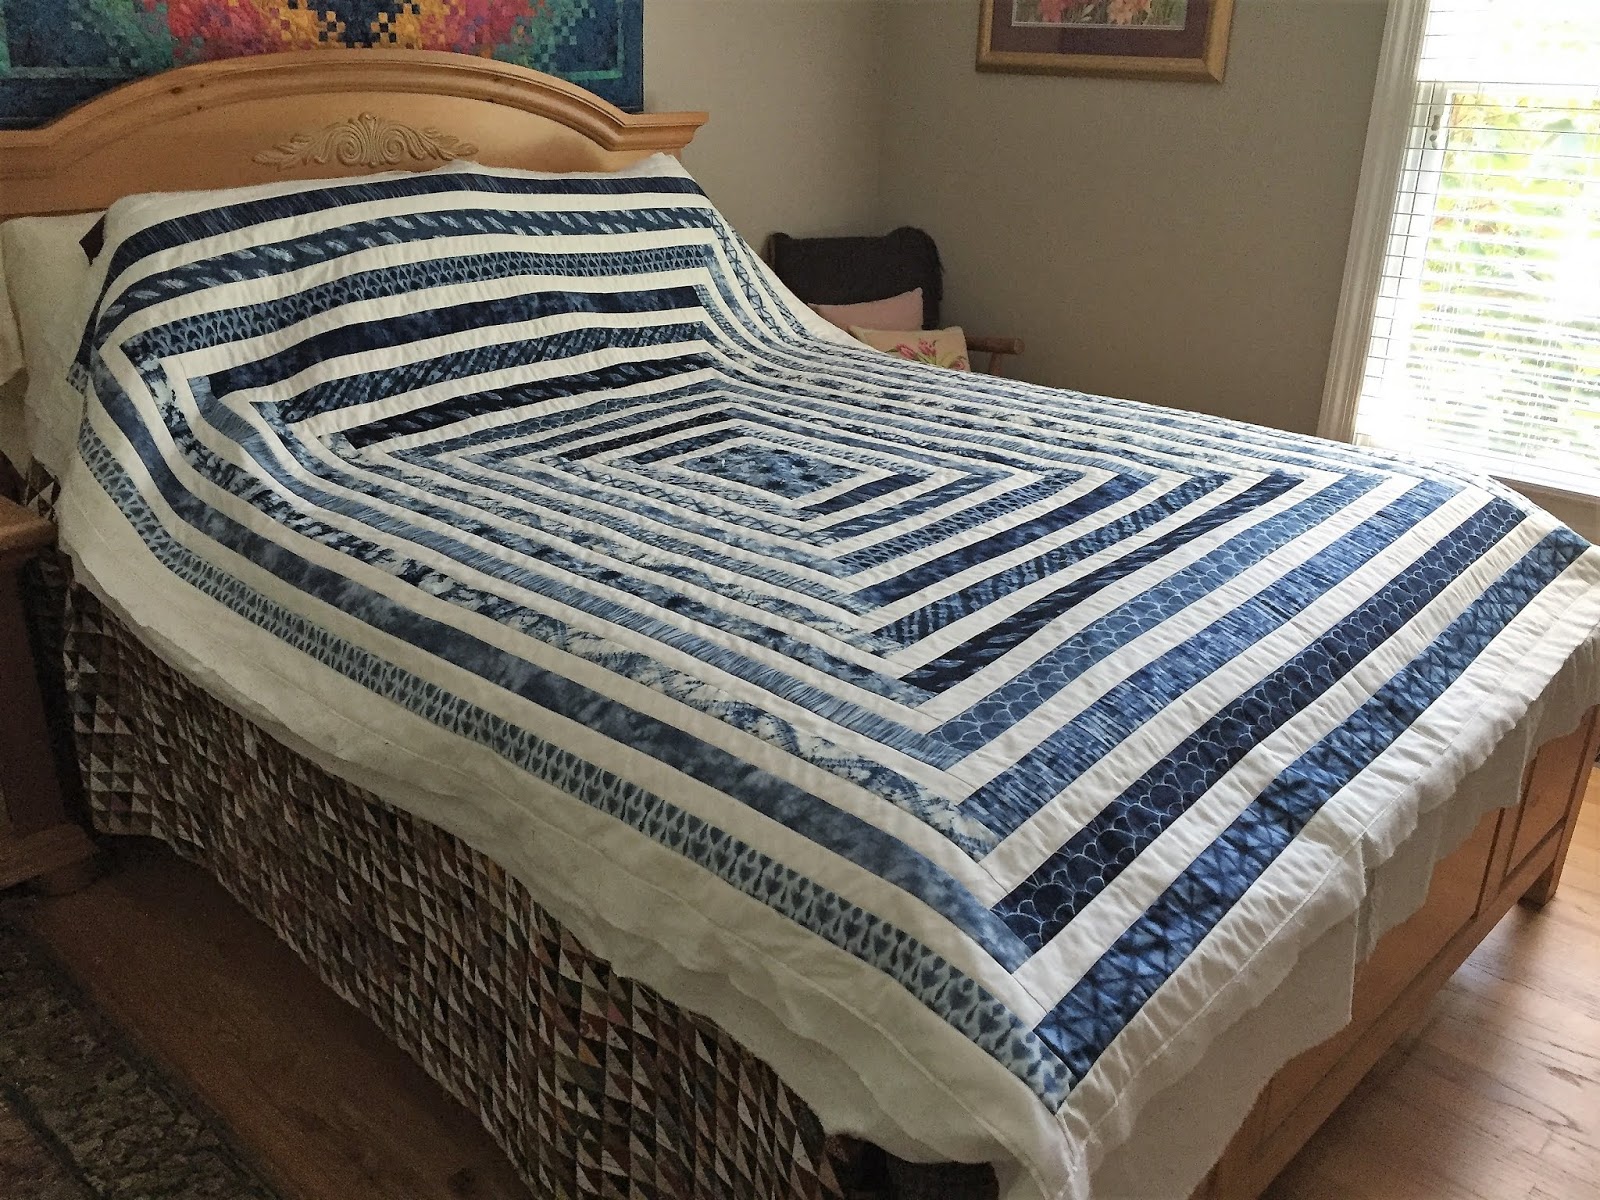
When I got the top done, I decided I would first stitch in the ditch along all the seams, using white thread top and bottom, as the back is a very light white/floral fabric. Here it is "resting" after all the stitch in the ditch was done:

Next I used navy blue thread top and white bottom for the decorative stitching in the blue bands. This took a bit of tension tweaking, each time I changed bobbins, or started each day. Machine tension in quilting is so important and can be frustrating to achieve. The Bernina Q20 Sit Down Long Arm rarely has tension issues. No problem with Bottom Line in the bobbin and MicroQuilter 80 weight polyester in the top, both by Superior Threads. All I had to do was quilt.

 I always make a "practice piece" as soon as the top is done and when it is "sandwiched"--using the exact same backing, batting and leftover fabric pieces from the top. Since it can take me years to actually quilt a top, doing this at the same time the quilt is basted is a timesaver--no more searching through fabric bins to find that backing fabric leftover, or pieces from the top, and what was this batting? Now the practice piece is made and stored with the basted quilt, waiting for me. It doesn't have to be pretty, just functional. Here is the piece from Spellbound:

When all the blue bands were quilted, I declared it done and added the binding and sleeve to the trimmed quilt. I also make the binding as soon as the top is basted, deciding what fabric I want for the binding and getting it done. The sleeve is made from the back fabric and I either make the back 9" extra long for the sleeve or go ahead and make the sleeve while preparing the back.

Here it is just after I put the last blue quilting stitches in place:
During the hours spent hand-sewing the navy blue binding to the back side of the quilt, I kept thinking I might need to quilt the white bands too. I looked at the photo of the original quilt, in the Calico Carriage booth, and could clearly see the white quilting really added a lot.

BUT the sleeve was already sewn into the binding, that's how I always do it. If I was going to quilt the white bands I had to do that BEFORE I stitched the sleeve in place along the top edge of the quilt and before I attached the printed label I made to the back. Did I want  to double the quilting? No. Did the quilt NEED me to double the quilting? Yes.

For the white thread, I switched to Glide--it has a bit of shine and is certainly thicker than the 80 weight MicroQuilter. It behaved beautifully.

I started on the outside edge, at the top where the sleeve is, pulling the sleeve out of the way and coming up with a design that would fill the space but not catch the binding or any of that sleeve. To make matters just a bit more challenging: the vertical white bands are 1.25" finished and the horizontal white bands are 1.5" finished. Both blue bands are also different sizes but that stitching hardly shows and because they are wider, it was easier to come up with designs to fill the spaces.

The top design I did with a ruler and I loved how it looked:

That helped me decide I would use the same design all around the four sides of the quilt, selecting a different design for each round of white. I alternated between ruler work designs and free motion motif designs, looking at designs I like and have saved--mainly in the many books I have or on Pinterest.

It only took a few hours to quilt all the white bands and I was so glad I put in that time. Here is the quilt just after the last white stitching was completed. Much better:

All that was left was to hand-stitch the sleeve down and sew the label on:

Sleeve ready for hand-stitching

Label ready for hand-stitching


As you can see, sometimes I make the label prematurely, or with wishful thinking. All it took was a permanent Ultra Fine Sharpie to add 2018 to the expected date of 2017 and now it's accurate.

I have written in detail about bindings a few times--find specific details here in this Tutorial and here where I explain adding a sleeve and the quilting process.

And now here is the finished quilt, ready to show off at the next guild meeting and then get installed at Huntsville Sew & Vac where it will be a one-day class October 5, 10-4. The pattern seems pretty easy, I  thought I would zip right through it but it took me over a week to complete the top. There are important tricks to staying organized with this one--students will learn those tricks.

My Spellbound 64" x 83"
It is not easy to get good photos of the quilting--this is the best I could do. I am SO glad I quilted the white bands--it really shows there:


Let's Quilt.

Barbara

Wednesday, August 1, 2018

Month 8 The Patchwork Barn


This is the FREE Block of the Month pattern "Patchwork Barn", designed by Edyta Sitar exclusively for The Quilt Show. You must be a Star member of this world-wide quilt guild/show/internet community to receive the free patterns each month, beginning January 1, 2018. Join today and get started on this journey.

Previous instructions are here:

Introduction
Month 1
Month 2
Month 3
Month 4
Month 5
Month 6
Month 7
NOTE: On The Quilt Show, the Forum is the best place to ask questions, find answers, or find out if there is a change in the pattern.  I recommend you check in there frequently. And there is a Show and Tell Topic--show us your blocks. Forum Patchwork Barn


We've made it to the last of the small blocks. If you have kept up, there are only 9 more blocks to make, three of each of this month's blocks. If you are not there yet, just keep working, it's not a race. Proceed at your own pace.

Block 22:

 This block is often called the Album block. When used in a signature quilt, the center rectangle is a plain light solid fabric. Maybe you'll want to make one like that and use it to sign your quilt on the front, not just put a label on the back. Future quilters and collectors will thank you.

This block has a mathematical "issue". I've written about it for Block 8 and Block 14. The A, D and E pieces are slightly too small at the 7/8" measurement and would be slightly too large at the next whole number. What's a quilter to do? I cut the pieces slightly larger than the pattern calls for on those 3 pieces, about 1/16" larger. That is just a few threads, not a measurement that is easy to see.

I suggest you try this FIRST with the center Unit B, pieces D and E. When the 6 squares and 1 rectangle are sewn together, the square should measure exactly as shown in the pattern. To get that size, you either cut the pieces slightly larger OR cut as the pattern lists and sew with a skimpy seam allowance, 1/16" smaller than normal--not easy to discern at the machine.

If you cut the pieces for Unit B slightly larger and are successful getting that square to be the correct size, cut the remaining A squares that slightly larger size. The background pieces, B and C, are exactly correct as shown in the pattern.

While this all may seem a little "fiddley", if it doesn't matter to you if the points are "hidden" when the block is done, just do your best and trim the block to the required unfinished size and call it done.

Here is my first block as I prepare to square it up. I place the ruler exactly at the half way mark on the top and right side, being sure I will be able to square up the remaining two sides accurately. Very little waste and the block was the correct size:


Block 23:


This one is a snap: four quarter square triangle units, four 4-patch units and one center square. I prefer to make it even easier by making the pieced units from pieces cut slightly larger than the pattern calls for, allowing me to "trim to perfection". The center square is cut exactly as the pattern says. The pattern measurements are correct--if you use them, be sure you cut accurately, sew accurately, and press accurately.

At this point, I am working from my "leftovers" bags. I found these strips which would work to give me six of the eight pairs I need for the first block. Sewn and pressed to the darker fabric:


Placed right sides together, being sure the darks and lights are opposite each other:


Sliced into pairs, ready to be sewn into four patches:

I love to "twist" the center seam allowances on these tiny blocks. See my video on how to do that here, at the end of Month 1.:


The quarter square triangles are easy too. I wrote about that unit in Month 6. Here are a set ready to be cut apart and trimmed to perfection:

 There's that cute little twisted center seam allowance again:


Block 24: 


So glad to see this easy one for the final block! Now's the time to use your most favorite fabric for this simple block--two half square triangle units and two 4-patch units.

I talked about half square triangles in Month 2 for Block 4 and Four Patches just above, Block 23--these are just larger. Choose your favorite method for these two great patchwork units and you'll soon be done.

All done! Next month we will tackle the Barn block for the quilt center. Also, next month, in a separate post, I will discuss an alternative center and an alternative layout that will make the quilt larger without having to make more blocks. Of course, if you want this quilt to be queen-size, I suggest you do make more blocks--24 more blocks to be exact--that would be one more of all 24, or two of  your favorite 12, OR...You get the idea.

Let's Quilt!

Sunday, July 29, 2018

My Favorite Quilt Books


I learned to quilt in 1985, before the Internet. It was possible, just different from the way many quilters learn today. There were a few books and lots of magazines. I learned a lot from magazines and began to buy books--I was very much a self-taught quilter in those early years.Over time I have accumulated a substantial library, almost 400 titles.

To be able to find the book I am looking for, they are filed alphabetically on these great IKEA bookcases in several categories: Amish, Applique', Children's Books, Clothing, Color, Design, Embellishment, Handwork, History, Miniatures, Pieced, Quilting, and Reference. By far, the largest number of books are in the Pieced category. And, yes, I have a spreadsheet.

When I tried to select my Top 10--the books I would keep until the very end--I just could not limit it to 10. So, here are my Top 15 Favorite Quilt Books.

15. Quilting: Patchwork and Applique' A Sunset Book

This is the first book I bought. It came from Hechinger's, a big-box store like  Lowes in Northen Virginia. I can still remember reading it, and trying to understand the difference between "Patchwork" and "Quilting". For sentimental reasons, this is a keeper.

14. An Amish Adventure by Roberta Horton

This is the first book ever published by C&T Publishing. First published in 1983, it is still available today from their website as a print-on-demand title. I bought my copy in 1987, when my small guild, the Virginia Star Quilters of Fredericksburg, VA offered a weekly "class"--we met and worked on quilts from this book. I saw my first quilt as a 10 year old when my Girl Scout troop made a visit to Lancaster County, PA. I was smitten right then but it would be 20 more years before I began my quilting journey. I think it is time to start a similar "class"--solids are very popular again--Amish, the first Modern quilters.

13. Patchwork Patterns by Jinny Beyer
As a new quilter, I was in awe of this cover quilt, "Ray of Light" by Jinny Beyer. I clearly remember saying "Some day I want to be able to make a quilt like this." Years later, when I realized I was making a lot of Medallion-style quilts, I knew exactly where my inspiration came from. I am a huge fan of Jinny's and have been able to "talk quilt" with her many times. This book discusses hand piecing but designing and cutting out patchwork blocks is pretty much the same for machine piecing, the method I  use most often. This book is full of great blocks--it opened my eyes to quilt design.

12. Clues in the Calico by Barbara Brackman
First published in 1989, I got mine about that time. It began my love affair with Quilt History, which in many ways is Women's History, and introduced me to the process of dating old quilts from their fabrics and patterns. In 1988 I bought my first old quilt top and later had it dated to about 1875 by Merikay Waldvogel, an expert in quilt history too. Using this book, I could see why she came up with that date. I have read this book cover-to-cover and learn something new each time I pick it up.

11. Heirloom Machine Quilting by Harriet Hargrave
Harriet made it OK to quilt our quilts by machine. I took classes from her in 1994, now I lived in Alabama and our guild, the Heritage Quilters of Huntsville, brought wonderful teachers for several workshops a year. I was making more quilt tops than I could hand-quilt so the "idea" of machine quilting was appealing. It's harder than it looks and I'm still learning to do adequate machine quilting. This book really helped me understand the process and provided lots of design ideas.

10. The Art of Machine Piecing and Drafting for the Creative Quilter, both by Sally Collins

The most professional quilt teacher I have ever taken a class from is Sally Collins. Besides being well-prepared in class, she really knows her stuff and makes the process of precise piecing understandable. "Drafting" scares quilters, but it's just a word for drawing a pattern and determining how to cut it out so the pieces fit together. I often tell my students "If you had known you were going to be a quilter, you would have paid more attention in Geometry class." I love "quilter's math" and the precise way patterns are created by color and cloth. These two books are like a Master's Class is quilt design. Have to keep them both.

9. Floral Applique' by Nancy Pearson
In 1989 my guild brought Nancy Pearson to teach needle-turn applique'. I was a convert right then, and loved everything about her beautiful designs. She was also one of the sweetest women I've ever met. She helped me with a quilt design I was working on in 2005, using one of her patterns as a starting point. It is one of my favorite quilts, partly because we discussed it during the design stage. I have taken many applique' classes since, but her love of beautiful applique' got me started.

8. The Quilter's Practical Guide to Color by Becky Goldsmith
I have several books on color--this is the one I have read cover-to-cover and have taught from. Many quilters struggle with "color theory" and think they are no good at color if they don't have an art background. This book makes basic concepts easy to understand and provides simple projects that teach those concepts.

7. All-in-One Rotary Cutting Magic by Nancy Johnson-Srebro
This little reference book is a great companion to Nancy's other books: Measure the Possibilities and Rotary Magic. The rotary cutter changed everything about quiltmaking and I am convinced it is the reason we have come so far. If we still had to cut out all our pieces by hand with scissors, most of us would not be quilters. This teaches "quilters math" in an easy way--whatever shape you want to cut out, from squares to trapezoids and prisms, you can easily see how to cut those shapes accurately. 

6. Oh, Scrap! by Lissa Alexander
One of the most recent books I've bought, this one stays because there are several quilts in it I want to make. The subtitle "Fabulous Quilts that make the most of your Stash" says it all--I have a stash and I want to make fabulous quilts. Add to the fact Lissa is a great person who I enjoy talking to at Market every year--she words for MODA fabrics--and this is a keeper too.

5. Small & Scrappy by Kathleen Tracy
I have several of Kathleen's books. This one has a great subtitle: Pint-Size Patchwork Quilts Using Reproduction Fabrics. That is perfect for me. I love reproduction fabrics and make lots of small quilts. Each quilt in this book inspires me--I don't often follow the directions, but am inspired by her designs here to create my own similar quilts. 

4. 19th Century Patchwork Divas' Treasury of Quilts by Betsy Chutchian and Carol Staehle
I have several of Betsy's books but this one reminds me how I fell head-over-heels in love with her group, the 19th Century Patchwork Divas'. Several years ago many of these quilts were in a Special Exhibit in Houston and I went back again and again over my two-weeks there to study and admire them. This is a group I want to be in--not just start one like it. It makes me happy to have gotten to know Betsy and I hope to take a class from her in the future. And if I start a group, what could be a better name? I am stumped, I think they have the best name ever.

3. Guide to Machine Quilting by Diane Gaudynski
Still intrigued with beautiful machine quilting. this book is a fantastic reference book for the process. Diane's work has always thrilled and inspired me. If only reading her words could make my quilting look like hers, I'd have it made. Alas, it takes lots of practice. I'm still working on it. 

2. The Encyclopedia of Pieced Quilt Patterns by Barbara Brackman
The Bible of pieced quilt blocks. I look through this book frequently when designing a new quilt, looking for blocks I might not know. For appraisers, this book is a must as it provides not only names for almost every pieced block ever printed but the years and sources of those patterns. Barbara Brackman is a TREASURE as a quilt historian--I have learned so much from her books.  This book is one of my most important titles. 

1. The Art of Classic Quiltmaking by Sharyn Craig and Harriet Hargrave
If I could keep only ONE book, this is the one. We don't have great "process" books like this today, most are "project" books. This one covers all aspects of quiltmaking, from all the sizes of standard mattresses and what size quilt to make to fit them, to great quilt projects starting with simple scrap quilts all the way up to challenging curved-pieced blocks. There is an entire chapter on borders, another on quilting, another whole chapter on finishing--the binding, etc. This one book could teach a person most everything they need to know to be a great quilter. I am so thankful they wrote it, I still recommend students try to find a copy online and I have TWO copies--just in case something happens to the first one.  It is my go-to reference book, hands down.

So, there you have it. Did one of your favorites make the list? What is your #1 book? 

And, one bit of advice--if you have great quilt books, take time to READ them, not just look at the photos. They can teach you a lot.

Let's quilt!

Barbara

Tuesday, July 24, 2018

Design Wall Wednesday

The wall still looks skimpy to me but I did make and quilt two small quilts yesterday--prep for an upcoming job. 

I do love  having my ammo box step-stool at the ready--the wall is 8.5 feet tall and I can't reach the top edge without a big step stool--the ammo box came from my Marine Corps days:


 Made and quilted in two days, ready now for binding to be prepared---these will be demo pieces:


6" Swamp Angel blocks--ready for binding demo

3" Old Italian or X Blocks--ready for binding demo. The blocks were made quickly from Charm Squares.
A few days last week I worked on my 6 month class: My Favorite Things, getting prepared for Session 3 in a couple weeks. My husbands' comment: "That's colorful"--about as excited as he gets:


Sunday, when the highs were in the upper 80's, not the 90's, we spent 3 hours walking around the Huntsville Botanical Garden. I had not been there in about 10 years--it has grown a lot and is a truly beautiful place. It was begun less than 30 years ago by those with a vision and people willing to donate a lot of money to make it happen. I will enjoy returning when the weather is cooler--something is going on there year-round. Huntsville Botanical Garden  I took lots of photos, here are just a few:

The Butterfly House

Beautiful potted arrangement

Lots for kids to do and play on--in the Children's Garden

Part of the Dinosaur Garden

One of the Water Gardens
The rest of this week will be spent finishing the machine quilting on Spellbound--the class has been set for October 5, 2018, 10-4 at Huntsville Sew & Vac--the sample now has to get done:

Let's Quilt!

Barbara

Sunday, July 22, 2018

Stitchin' The Blues

Every other year the Heritage Quilters of Huntsville guild presents a Challenge program. A committee meets, sets the rules, those are announced to the guild about six months in advance and then we get to work making an entry.

Here are a few overview shots, taken by the committee before a lot of people came and it was tough to get good photos of the room:


Some years there is a lot of interest, some years---not so much. This year may be the biggest number of entries we have ever had--75--that means at least one-third of the guild particpated!

Here are the rules as presented:
  1. The entry size, a rectangle or square only, may be anywhere from 18 inches by 18 inches to 36 inches by 36 inches. The length or width should be no longer than 36 inches or no shorter than 18 inches.
  2. Use only blue and white fabrics. These may be solids, stripes, plaids, prints or batiks.
  3. The entry must be a quilt – three layers held together with stitching.
  4. Each entry made by one person only.
  5. No kits.
  6. Please keep your entry a secret.
  7. Put a label on the back, but cover your name with tape or fabric. No obvious means of identification should be on the front, of course.
The meeting is open to the public and a lot of word-of-mouth advertising brought at least 50 guests. On the ballots we were given, we selected our top 10 favorites and "Best Interpretation of the Theme". Enjoy a little show, some of my favorites, in no particular order:

33. Blue California Star by Linda S.

37. Blues of a Feather by Pam A.

24. Carry Me Away by Linda H.

68/ My Blue Heaven by Sharon St.

44. Bluebird of Happiness by Paula N.

38. Swingin' the Blues by Teresa Rawson

34. Wedding Tradition by Kari H.
72. A Few of My Favorite Things by Anne C. This won first place for Best Interpretation of Theme. The detail in this is beyond belief--Anne outdoes herself in every challenge and show.
8. Blue Melody by Denise P.--this won 2nd place in Best Interpretation of Theme

61. Stitching the Blues Away by Leigh H. --this won 3rd place in Best Interpretation of Theme
64. Caribbean Waters by Sue B.
One of my most favorites:

51. Blues in the Night by Ben D.

15. Dave in Blues by Elaine H.--based on a photo of a well-known local musician Microwave Dave
Here is my entry, a variation of Spellbound by Calico Carriage Quilt Designs:


It is 19.5" x 21.5" and is made from the leftovers from my full-size Spellbound:


This one is bed-size and the quilting is about half-done. I am working diligently on it now. My eldest son saw it a few weeks ago and said "Who is THAT ONE for?" He really likes it. Christmas is coming. Don't you love it when someone really likes a quilt you are working on? 

Blue and White quilts have been very popular the last few years as we move toward the Sapphire Celebration of October 2019--the 45th anniversary of the International Quilt Festival in Houston. Our challenge quilts are too small to be entered in the Special Exhibit in Houston but this is a good way to get started and excited about the upcoming Celebration.

If you  have a blue and white quilt you want to consider entering in the Sapphire Celebration, here is the basic info--submission dates will be provided later this year:


I saw this quilt at the International Quilt Festival in Chicago in 2017. It is Sarah's Revival, a Sue Garman pattern, made by Gail Smith and quilted by Karen McTavish. I think it is just spectacular! I hope to see it again at the Sapphire Celebration.

Maybe a Blue and White Quilt is in your future.

Let's Quilt!

Barbara