Showing posts with label Spellbound. Show all posts

Wednesday, September 22, 2021

Ruler Work--My Favorite Kind of Quilting

 The other day I presented a 2 hour Demo on Ruler Work quilting at a local shop. Barb's Sewing Center is celebrating their 20th year anniversary and this Demo Class was a gift from them to their customers.

Congratulations to Barb Martin for 20 great years

My Bernina Q20 and I have been friends for 6 years now. The more quilting I do, the better I get. What a surprise! And I love Ruler Work. Using rulers allows me to get designs that vary from good enough to great and I am satisfied with the quilting I  can do. The machine makes perfect stitches. With care, I can make pretty close to perfect shapes/designs.

Here are my favorite rulers/tools:


The LineTamer ruler makes straight lines a breeze and I am sure I use it on every quilt I work on. Grip-Its make it easy to maneuver the quilt when doing Free Motion Quilting--much better for me than gloves, rubber finger tips, rings, etc.  Amanda Murphy's Good Measure Rulers are well-thought out and have the grippy stuff on that back that really helps. Natalia Bonner's, Mini-4-in-1 and Mini Inside Out 4-in-1 are excellent. Clamshell rules can be used for lots of circular designs.

Many videos are available to help us learn. Natalia Bonner, Amanda Murphy, and Angela Walters have some of the best for me. 

Four years ago, I wrote a blog about this with details and photos: Ruler Work--the Basics

Here is some of the quilting I showed at the Demo:

I LOVE Curved Cross Hatching

Wishbone motifs and a Leaf Border

No marking, I just winged it, Pumpkin Seed and Wishbone motifs

I love the Pumpkin Seed design, often seen in Pennsylvania Amish quilts. Easy to do with circular rulers. For this one, the Clamshell ruler was the perfect size for this block: 


One of my most favorite "go-to" border motifs is a simple leaf vine, done completely free-motion. I have done it many times and now it is almost automatic, not hard for me to do. I like it in narrow borders. There is curved cross-hatch and straight line quilting in the large outer border--nearly impossible to see on a busy print, but still good practice:


I didn't have this one with me, but it illustrates the importance of trying new motifs and working on something that matters. I used different shapes/designs in each of these borders, alternating ruler work and free motion quilting. White thread on the white, navy on the dark blue. 


Use busy fabric on the back as you are learning. Doesn't that quilting look GREAT?!


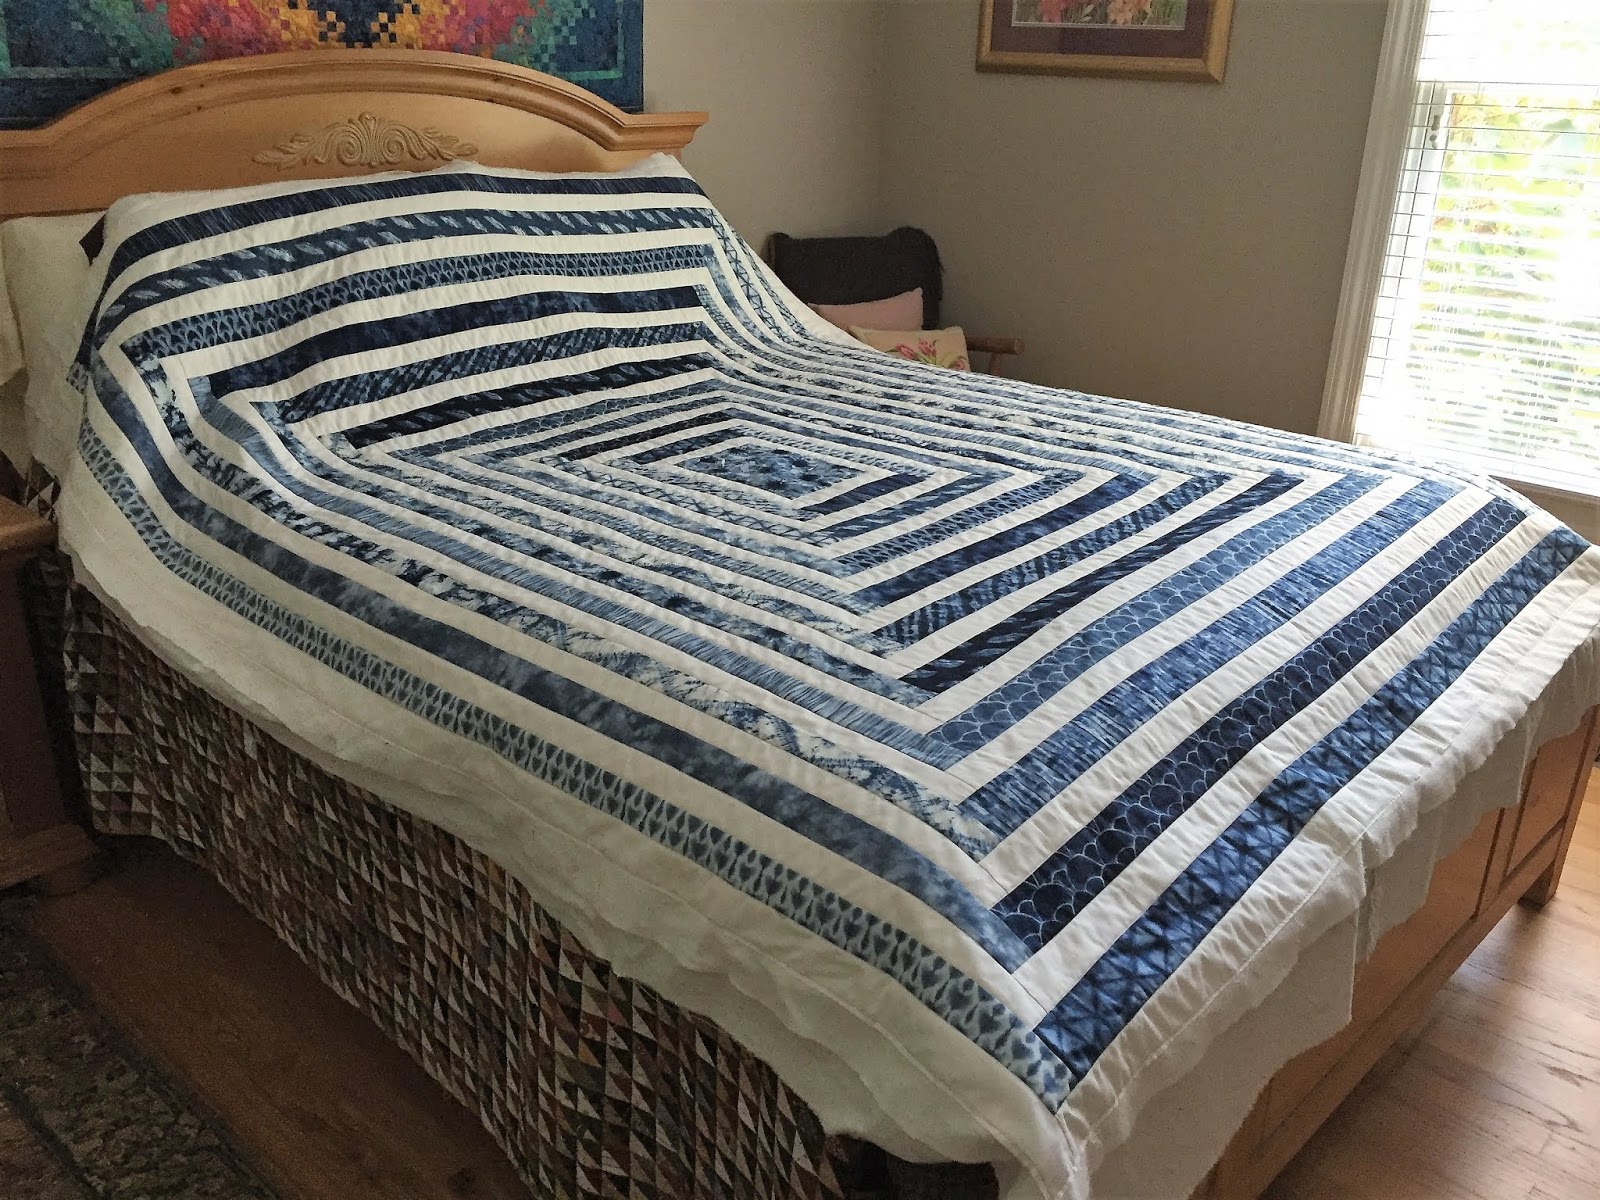
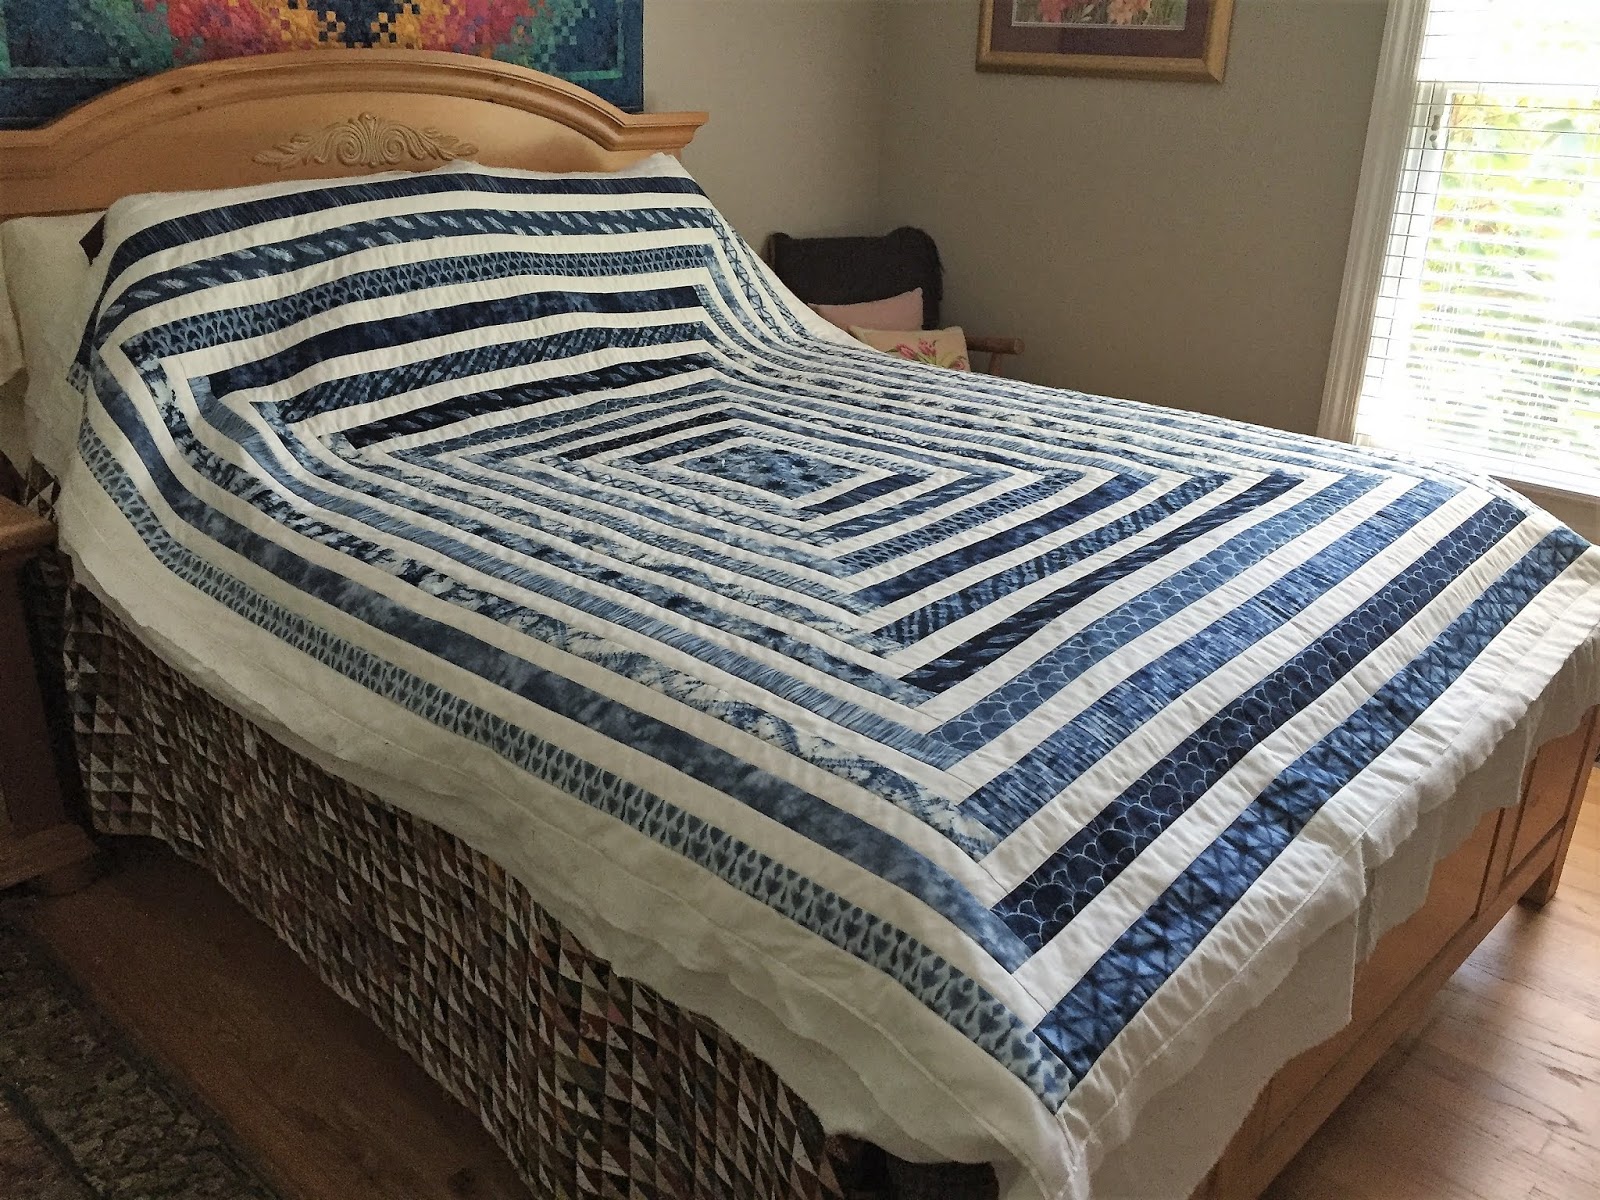
The finished quilt, Spellbound, pattern by Debbie Maddy:


If you are new to machine quilting, with or without rulers, I have a few tips:

1. Move beyond muslin sandwiches quickly. The sooner you work on things that matter the better you'll get. Placemats are a great thing to practice on. As are simple donation or baby quilts . 

2. Use busy fabric on the back--starts/stops and wobbles won't show.

3. Don't blame the machine for operator error.  Understand how to set the tension correctly on your machine. Machines don't "like" or "dislike" any brand/size of thread. A quality machine can handle just about any quality thread with the proper needle and tension settings. All thread manufacturers' provide excellent educational info on their website. 

4. Practice really does help you improve. Whether you put in 20 minutes a day, every day, or work for hours on a bed-size quilt, know you will get better and don't beat yourself up for the occasional wonky stitches. Bet you won't even be able to find them tomorrow. And if they still bother you, your stitch ripper will take them out.

Let's quilt.

Barbara

Wednesday, May 15, 2019

Spellbound for Houston

What a nice surprise to get the "Congratulations" email, that Spellbound will be joining many other Blue and White quilts in Houston this Fall, to help celebrate the 45th Anniversary of the International Quilt Festival, the Sapphire Celebration. She is nestled in a box and safely in Houston right now:


This simple but striking pattern is from Debbie Maddy at Calico Carriage Quilt Designs. I have taught it to a large group of students and they enjoyed making it too. Being organized is a must, there are 3 different sizes of strips to cut.

The SAPPHIRE CELEBRATION is sure to be as wonderful as the Ruby Jubilee was, 5 years ago. I hope you are making preparations to join us, October 31-November 3, 2019, with Preview night October 30. Find more information here: IQF Houston Show Information

I may be a bit lest "bloggy" in the next month or so--there are three working trips in the next 5 weeks: Kansas City for Spring Market, Austin/Victoria, TX and Ft Myers, FL, all great trips that I am looking forward to. At the same time, our grandkids are moving back here in 3 weeks from St. Louis--so excited! AND I am in the middle of a very big project I must keep under wraps. So when home, my head is down and the (sewing machine) pedal is to the metal!

Let's quilt!

Barbara

Sunday, October 14, 2018

Class Progress

It's always fun to see how far students get on a class project. Recently, Spellbound was an all-day class. This is a great pattern from Calico Carriage Quilt Designs, home of Debbie Maddy.

A few shots from class, starting with their progress by the end of the day:


The morning was spent organizing, then cutting the various size strips in the proper order. After lunch it was time to sew. They all did great and will continue to sew until their top is done. I encouraged them to add borders if they want the quilt larger and I hope someone does.

In class progress:

Rhonda with her Featherweight

Marilyn has her first several rounds laid out 

Judy made fast progress
Here is mine, all done:


In another class, a student brought her finished Quiltmaking 101 quilt to show me. This is the beginning class I have taught locally for 30 years, this particular quilt has been the project for 10 years. I love it when a student makes changes, making the quilt her own. Nikki added additional wider borders:


Sunday was the monthly Sunday Sew and Sews class, focused this year on The Patchwork Barn from The Quilt Show. We are getting toward the end of this year-long Block of the  Month, designed by Edyta Sitar. It is not too late to get all the patterns for this quilt. They remain FREE for Star Members to The Quilt Show until December 31, 2018. In addition, this year, the 2017 Halo Star Medallion, designed by the late Sue Garman is still FREE for Star Members, until December 31, 2018. Download and/or print them before it's too late.

Three of the Sunday Sew and Sews show off their work:

Janet's before lovely  borders, still to come. She added sashing between the blocks.

Terri used the Crystal Farms fabric kit and she also added sashing between the blocks

Here is Donna's top, all finished. Don't you love how she made the center HER house?!:


My top is done. Now to figure out a quilting plan:


We are getting excited about the 2019 Block of the Month from The Quilt Show: SIZZLE, designed by Becky Goldsmith. Find more info here.

Yesterday, we had Session 5 of My Favorite Things--a 6 month lecture/demo class featuring the quilt I designed just for this class--it is made of my favorite blocks. Here are a few photos of the works in progress from some of the students:

Rhonda's is done--AND her husband loves it so it will be his Quilt of Valor

Holly got hers done too

Joan has a wonderful selection of fabrics--we all say OOOOHHH! when we see her blocks

More of  Joan's

Kathy has used a lot of Kim Diehl prints along with other lines

More of Kathy's blocks

Sally has a quiet reproduction palette--so lovely

Cyndi is wild, about Kaffe and Tula and lots of  everything


More of Cyndi's work 
It is so fun to see what each student comes up with and I love when they make the quilt their own. My Favorite Things ends in December, I hope to have more finishes to show. Here is mine:


Let's quilt!

Barbara

Sunday, August 5, 2018

Spellbound--It Needed More Quilting

When deciding on quilt designs for our quilts, several factors are considered:

Use--is it a show quilt or a utility quilt?
Batting--what is the minimum space un-quilted recommended by the manufacturer?
Deadline--how soon does it have to be done?
Quilt "Worthiness"--how much time does this quilt, for it's intended use and/or recipient, deserve?

I know I almost always err on the side of too little quilting. Usually a deadline is pending and this shop sample just has to be done. Sometimes, I'm over this particular quilt and it just needs enough quilting to get by.

Rarely, have I added more quilting and wished I hadn't but from time to time I have wished I had added more after the quilt was complete--that can be done but rarely is. Done is done.

Spellbound is a great pattern from Calico Carriage Quilt Designs I first discovered at Spring Market in St. Louis in 2017. I took lots of photos of the quilt hanging in their booth, bought the pattern and secured the fabrics--two jelly rolls of a Shibori design by Debby Maddy for MODA. Here it is at Market:


When I got the top done, I decided I would first stitch in the ditch along all the seams, using white thread top and bottom, as the back is a very light white/floral fabric. Here it is "resting" after all the stitch in the ditch was done:

Next I used navy blue thread top and white bottom for the decorative stitching in the blue bands. This took a bit of tension tweaking, each time I changed bobbins, or started each day. Machine tension in quilting is so important and can be frustrating to achieve. The Bernina Q20 Sit Down Long Arm rarely has tension issues. No problem with Bottom Line in the bobbin and MicroQuilter 80 weight polyester in the top, both by Superior Threads. All I had to do was quilt.

 I always make a "practice piece" as soon as the top is done and when it is "sandwiched"--using the exact same backing, batting and leftover fabric pieces from the top. Since it can take me years to actually quilt a top, doing this at the same time the quilt is basted is a timesaver--no more searching through fabric bins to find that backing fabric leftover, or pieces from the top, and what was this batting? Now the practice piece is made and stored with the basted quilt, waiting for me. It doesn't have to be pretty, just functional. Here is the piece from Spellbound:

When all the blue bands were quilted, I declared it done and added the binding and sleeve to the trimmed quilt. I also make the binding as soon as the top is basted, deciding what fabric I want for the binding and getting it done. The sleeve is made from the back fabric and I either make the back 9" extra long for the sleeve or go ahead and make the sleeve while preparing the back.

Here it is just after I put the last blue quilting stitches in place:
During the hours spent hand-sewing the navy blue binding to the back side of the quilt, I kept thinking I might need to quilt the white bands too. I looked at the photo of the original quilt, in the Calico Carriage booth, and could clearly see the white quilting really added a lot.

BUT the sleeve was already sewn into the binding, that's how I always do it. If I was going to quilt the white bands I had to do that BEFORE I stitched the sleeve in place along the top edge of the quilt and before I attached the printed label I made to the back. Did I want  to double the quilting? No. Did the quilt NEED me to double the quilting? Yes.

For the white thread, I switched to Glide--it has a bit of shine and is certainly thicker than the 80 weight MicroQuilter. It behaved beautifully.

I started on the outside edge, at the top where the sleeve is, pulling the sleeve out of the way and coming up with a design that would fill the space but not catch the binding or any of that sleeve. To make matters just a bit more challenging: the vertical white bands are 1.25" finished and the horizontal white bands are 1.5" finished. Both blue bands are also different sizes but that stitching hardly shows and because they are wider, it was easier to come up with designs to fill the spaces.

The top design I did with a ruler and I loved how it looked:

That helped me decide I would use the same design all around the four sides of the quilt, selecting a different design for each round of white. I alternated between ruler work designs and free motion motif designs, looking at designs I like and have saved--mainly in the many books I have or on Pinterest.

It only took a few hours to quilt all the white bands and I was so glad I put in that time. Here is the quilt just after the last white stitching was completed. Much better:

All that was left was to hand-stitch the sleeve down and sew the label on:

Sleeve ready for hand-stitching

Label ready for hand-stitching


As you can see, sometimes I make the label prematurely, or with wishful thinking. All it took was a permanent Ultra Fine Sharpie to add 2018 to the expected date of 2017 and now it's accurate.

I have written in detail about bindings a few times--find specific details here in this Tutorial and here where I explain adding a sleeve and the quilting process.

And now here is the finished quilt, ready to show off at the next guild meeting and then get installed at Huntsville Sew & Vac where it will be a one-day class October 5, 10-4. The pattern seems pretty easy, I  thought I would zip right through it but it took me over a week to complete the top. There are important tricks to staying organized with this one--students will learn those tricks.

My Spellbound 64" x 83"
It is not easy to get good photos of the quilting--this is the best I could do. I am SO glad I quilted the white bands--it really shows there:


Let's Quilt.

Barbara

Tuesday, July 24, 2018

Design Wall Wednesday

The wall still looks skimpy to me but I did make and quilt two small quilts yesterday--prep for an upcoming job. 

I do love  having my ammo box step-stool at the ready--the wall is 8.5 feet tall and I can't reach the top edge without a big step stool--the ammo box came from my Marine Corps days:


 Made and quilted in two days, ready now for binding to be prepared---these will be demo pieces:


6" Swamp Angel blocks--ready for binding demo

3" Old Italian or X Blocks--ready for binding demo. The blocks were made quickly from Charm Squares.
A few days last week I worked on my 6 month class: My Favorite Things, getting prepared for Session 3 in a couple weeks. My husbands' comment: "That's colorful"--about as excited as he gets:


Sunday, when the highs were in the upper 80's, not the 90's, we spent 3 hours walking around the Huntsville Botanical Garden. I had not been there in about 10 years--it has grown a lot and is a truly beautiful place. It was begun less than 30 years ago by those with a vision and people willing to donate a lot of money to make it happen. I will enjoy returning when the weather is cooler--something is going on there year-round. Huntsville Botanical Garden  I took lots of photos, here are just a few:

The Butterfly House

Beautiful potted arrangement

Lots for kids to do and play on--in the Children's Garden

Part of the Dinosaur Garden

One of the Water Gardens
The rest of this week will be spent finishing the machine quilting on Spellbound--the class has been set for October 5, 2018, 10-4 at Huntsville Sew & Vac--the sample now has to get done:

Let's Quilt!

Barbara