Sunday, October 13, 2019

Best of Show

Sometimes you make a quilt you love, even if it takes 8 years to complete.

I began Ruffled Roses in January 2011 when it was the Block of the Month quilt for The Quilt Show.com. Designed by the late Sue Garman, I loved it from the moment I saw it. The fabric selections are mine but the pattern is true to Sue's design.


This took years, lots of turned edge machine applique', and was put away during tax season each year, and then was on the back burner for a few years. In November 2015, I got it back out and worked on it at a private retreat Sue and I were on together, for professional teachers, by invitation. I invited her to join us and was so pleased when she was able to arrange to come.

That week was so special for both of us. We became true friends and I felt like I was sitting at the feet of the master, trying to be a sponge, to soak up all I could from her. We shared a lot in common, and talked for hours, walking on the beach and as we worked on our projects, side by side.

Here Sue is, enjoying the sun at her favorite stitching spot at our lovely beach house getaway:


Little did we know then, she would soon be diagnosed with terminal cancer and in a little over a year from then she would pass from this world.

I finished Ruffled Roses recently and entered it in my guild show, the Heritage Quilters of Huntsville Fanfare 2019. I miss Sue so, still think of her often, and wish she could see this.

Fortunately, I have a local longarm friend who does beautiful work and wanted to have a go at this one. Lois Kindley will get her own blog post soon. For now, here we are:


Selected as Best of Show from among 225 wonderful quilts, I feel so pleased, yet humble too--I learned so much from Sue, who was the most generous, giving person you could know. She would be pleased for me, I am sure.

Soon, I'll have lots of photos from our show--it was so good. It just ended last night so I have to do the other quilts justice with a long post, including names of the makers.

If you missed this show, I am sorry. If you attended, you know how good it was.

Let's quilt.

Barbara

Wednesday, October 9, 2019

New Class Ideas

Time for me to plan local classes for 2020. I'm ready to offer a few new classes and update my Quiltmaking 101 Class--for true beginners.

The sample I have used for QM 101 is now 12 years old. While the block is still perfect for a beginning class, I am making a new sample with current fabrics and making the overall project simpler. Most students in this class are really beginners and this will be easier for them.

New blocks in progress:

This is the new plan:

Somewhat easier and faster than the current project:


I am also eager to play with large prints, using the book "Organic Applique" by Kathy Doughty, a shop owner, fabric designer and author from Australia:


The project will be a fairly simple pot of flowers from her book--it can always be enlarged to make a larger quilt. It will be a fun and easy way to work with very large prints, something most American quilters are not used to. My sample might not get done until I return from Houston in mid-November but I've been reading her great book and ideas are percolating. Stay tuned...

Yesterday I was asked to create a class using Sylvia's Bridal Sampler from Elm Creek Quilts:


This will be a year-long, lecture/demo class--all sewing will be done at home. It will be a good Quiltmaking 202 class--for those with basic skills who are ready and eager to increase their knowledge and learn lots more tips and tricks.

Fortunately, one student has a completed quilt so the sample is ready. Now I have to work on the class plan and pick dates--not that easy when trying to schedule for a year-long class. The book is ordered--I will take it with me to Houston and work on the individual classes when I have free time--just the planning, paper to pencil--or more likely, Ipad Pencil to Ipad.

My ongoing hand piecing project just came down off the design wall so I can put up another project too long in the making--a patriotic Pineapple Log Cabin that will be a Quilt of Valor. Here is the hand piecing project--far from done but it is my travel project so who knows when it will be done:


Here are two of the pineapple blocks--I have at least 25 more of these done but-- I CAN'T FIND THEM! It annoys me to not be able to find something I know I have. Looked in all the places where they "should" be--nope, haven't found them yet. Guess it will stay on the back burner until those other blocks turn up:


UPDATE: I FOUND IT!! October 22, 2019. Not where it should have been, in a stack of finished quilts. Now I know I can finish this in 2020:


In 2020 I plan to finish a few long-term quilts since I don't have to make the 2020 Block of the Month quilt for The Quilt Show--we did that earlier this year. Soon, it will all be revealed and I'll be able to show it to you--can't wait!

October 11 and 12, 2019 is the Heritage of Quilters of Huntsville's Quilt Show--Fanfare 2019. We only do a show every two years--it is a LOT of work--and our show is truly worth your time to see. Great quilts, terrific vendors, demos all day long both days. If you are anywhere near us--Nashville to Birmingham, Iuka to Atlanta, be sure you get to this show:

Heritage Quilters of Huntsville

Lots to do, little time to do it, but all this keeps me busy and happy.

Let's quilt.

Barbara

Sunday, October 6, 2019

Pieced Border for SIZZLE

Maybe you are not a fan of applique'. Why not consider a pieced border instead?


I love applique'--it just takes me a while. Since I am making two of these quilts, a Cool and a Warm, I decided to applique' the Warm version border and piece the Cool version border.

My Cool version is being made from the Kit available from  The Quilt Show Store.  I tried a few variations but I had to be able to use just the Kit fabric remaining after I finished the 9 large blocks--I didn't want to come up with a design that would require purchasing more fabric.

After "test-driving" 3 options, the border I decided on is made from 4" blocks, that are half square triangles (HST) and quarter square triangles (QST). Easy to make and I had just enough fabric to make it.

NOTE: you could make these units 3" for a narrower border--I chose 4" so the numbers here are for that size.

There are 15 of these on each of the four sides--60 total. There are 4 corner blocks that are made from HST only--white and dark blue. All 64 of these blocks are 4.5" unfinished.

My preferred way to make HST is with the Half Square Triangle Ruler. This strip of white is 4.5" wide--with two cuts I have the 4 white HST needed for the corner blocks:


I cut all the blue fabrics with the Half Square Triangle Ruler--I needed a total of 64 HST. In planning this border, I had to be sure I had enough Kit fabric left for those 64 HST--I did.  The blue fabric strips were cut 4.5".

Here the white and dark blue Corner Block HST placed right sides together, ready to be sewn:


After sewing, press toward the blue. Trim each corner block to precisely 4.5". You might notice the selvedge is still on the white triangle--I save time not cutting it off at the beginning, but I do cut it off at the end:


The Quarter Square Triangles are made from white and green fabrics. I prefer what I call the "Sew First Method". I cut strips of white and green fabrics, 5.5", then cut into 5.5" squares--15 squares of white, 15 squares of green.

NOTE: Precise quilters' math says we can cut these 5.25" square--I increased them to 5.5" to allow for a little "insurance". If cut 5.25", I have to be 100% accurate with the cutting, drawing the narrow pencil line, the sewing and the pressing.

Draw a diagonal pencil line on the back side of the white squares--I use a mechanical pencil for an accurate, narrow line. Put a white square and a green square right sides together. Sew 1/4" on BOTH sides of the diagonal line.

Use any ruler that fits from corner to corner to cut the sewn white/green squares apart on BOTH diagonals:


When cut apart they look like this:


Press toward the green fabric (note--this green is not a kit fabric, it is just used here for this demo). Notice the units are NOT THE SAME--two have the white QST on the left, two have the white QST on the bottom. This is important, you need them both:


Give each white/green QST a blue HST friend--the HST are smaller than the QST. I lined up the raw edges of the HST so they were centered on the QST:


Once sewn, press toward the blue triangle.

Trim each unit to 4.5" precisely. I place the 2.25" mark at the center of the unit, being sure the diagonal lines are diagonal. Trim two sides, rotate the block completely around, and trim the remaining two sides.

Ready for first trim, 2.25" mark in the exact center;


 After the first trim, ready for the second side trim:


Done, exactly 4.5". Make a total of 60 of these:


Lay out 15 of these units to create one border. Sew them together in pairs, then "ruler check" your work. This is important in the beginning because being slightly off with each seam will cause problems as you sew all 15.

Place the 4.25" mark at the center seam--this unit is made from two 4.5" blocks--so when sewn together two of them are 8.5": 4" + 4" + 1/2" seam allowance:

Yes, I checked every pair. I rarely had to fix anything. This when you want to find out your seam allowance is too narrow or too wide. If it is not the right size now, it will miraculously become the right size when you do the next step!

Sew 15 blocks together for the first border. When done the border should measure 60.5"--15 x 4" = 60" + 1/2" seam allowance. I use a quality measuring tape to check long borders. Fold the border exactly in half, press firmly, and "ruler check":


Ahh, perfect! Half of 60.5" is 30.25"--good to go:

What if it is not perfect? Use a ruler to check each block. When you find one or more that is smaller or larger than 4" you will know which seam to fix. I checked every seam as I made the border so didn't have any I had to fix at the end.

Make 4 of these pieced borders, being careful with the placement of the two different block units--I wanted the white all along the outer edge:


I prefer to add the left and right borders, then the top and bottom. The left and right are 60.5" long unfinished. Pin the center of the border to the center of the quilt, then pin the  two outside edges, and pin all along the rest of the border. Sew slowly and precisely--being fast is not as important as being accurate and straight.

After adding the left and right borders, press toward the body of the quilt.

Make the top and bottom borders by adding the corner blocks to each. Again, watch the placement of the HST--the white faces out, the blue faces in.

Add the top and bottom borders to the quilt, press toward the body of the quilt.


The quilt is now 68" finished. You can stop there or add another border. I had plenty of the turquoise print left so I decided on a 2" finished border of it and the same fabric for the binding. I cut 2.5" strips, 8 to piece the border.

Piece the left and right borders to be 2.5" x 68.5". Add those to the body of the quilt, press toward the border.

Piece the top and bottom borders to be 2.5" x 72.5". Add those to the body of the quilt press toward the border.  DONE!


For the binding I cut 8 strips 2.5" wide, joined them together with a diagonal seam, and pressed in half. The binding is now waiting for the top to be quilted. Making the binding now insures I won't use that fabric for something else and then hunt all over looking for it when it's time to do the binding.

I have a detailed Finishing and Binding Tutorial here.

Feel free to design any kind of border you like. It's your quilt, you get to decide.

Let's quilt.

Barbara

Friday, October 4, 2019

Machine Applique'--Stitching Shapes in Place

The pattern shown here is the 2019 Block of the Month Quilt, free to Star Members of The Quilt Show from January 1, 2019--December 31, 2019. The pattern is Sizzle, designed by Becky Goldsmith.

These instructions apply to any machine applique' pattern.

Now we get to the fun part, machine appliqueing the prepared shapes to the border fabric. The first side border is trimmed and on the wall--I like it:


You have lots of choices in this process:

Thread Size: thick or thin, anything from 40 wt to 100 weight

Decorative Stitch: Blanket Stitch, Straight Stitch, Zig Zag Stitch, Blind Hem Stitch, or others, you decide which you like

Thread Color: one or many? Matching the applique' means your stitches will hardly show. One color that blends well with most of your fabrics means you don't spend time changing thread

Becky has two videos in which she shows you both straight and buttonhole stitching. Practice a variety of stitches to see which you like. This sewing is going to take a while so you want to be happy with your stitching.

My thread choices:

Most important to me was the thread color. The blue and orange threads are Sew Complete, a 50 wt polyester thread from Superior Threads. The green on the left is 80 wt polyester thread from Quilter's Select.

The light orange thread in the back is the reject--I tested it on my orange fabric and thought it was too light so I replaced it with the darker orange in front of it.

The dull green on the right is also 80 wt Quilter's Select--it was going to be the bobbin thread I used for all of the stitching. BUT once I started stitching the orange swirls I found the bobbin thread wanted to show so I put the orange thread in the bobbin for those shapes and all was well. Much easier than making lots of adjustment to tension.

Here is my quick sample to test thread colors and stitch length:


The stitch is a buttonhole stitch, #1329 on the Bernina 765/770. I started with settings of 2.0 length, 2.0 width, as Becky recommended. The blue piece was stitched with that setting. On the rest of the pieces I increased the length to 2.3 and liked it better. Play with various sizes to determine which you prefer. Start with the machine default, then adjust until you are happy.

My sewing plan: stitch all the orange swirls first, 3 pair on the side border. Then add the 3 green leaves between the orange swirls--I chose one green thread that would work on both my darker and lighter leaves so I could applique' all three without having to change threads. Lastly, the blue circles get stitched on top of all the tails of the 5 shapes already stitched.

WHAT COULD POSSIBLY GO WRONG?

Several things. Buttonhole stitch looks best when the stitches are perpendicular to the background fabric. That means lots of pivoting. On tight curves it could be stitch, pivot, stitch, pivot, stitch, etc. Slow the speed down.

If your stitch goes into the applique' with a left swing, be sure to pivot ONLY when the needle is in the RIGHT position, in the background fabric.

If you find it hard to keep those buttonhole stitches straight and perpendicular, you might prefer a narrow zig-zag--it's supposed to be slanted.

Tension was off when I changed bobbins--check tension on a practice piece each time you change thread/bobbins.

When it was time to applique' the blue circles on top of the 5 raw edges, the 3 leaves and 2 orange swirls, I discovered the center circle had to be bigger--the shapes were farther apart then they should have been. TIP: don't make the circles until AFTER you stitch all the shapes--then you will know if your circle needs to be larger. Here  is my center blue circle after I  made it bigger:


NOTE; For the right Side Border, I used a white chalk pencil to draw the circle on the border--the only pencil marks I made on the border. This way I could be sure I placed the applique's so that all the raw edges would be covered by the circle:


Next, I put the entire border in the kitchen sink in warm water and let it sit about 15 minutes. This removes the fusible interfacing product and the glue:

Oh, my, it appears there is bleeding... No, I didn't pre-wash most, if any, of these fabrics. Unlike the Cool Kit--I did pre-wash all of that. Hopefully, the fabrics won't absorb this color, time will tell. This quilt will definitely be washed with Color Catchers when completely done.

Since the other 3 borders were cut but not sewn yet, I soaked those 3 borders before sewing the applique's in place. After 15 minutes:

After allowing the Side Border to air dry overnight, I very carefully trimmed the border to 6" x 60.5". Measure three times to cut once--there is no do-over if you get it crooked.

I was careful to measure out from the applique's, keeping the background on both sides as close to the same distance from the applique's as possible. I used a chalk pencil with a light touch to know where to trim the outside edges of the border. Using a 6" wide ruler made it possible to draw both lines at once:


Half of 60.5" is 30.25"--I folded the border in half and measured from 30.25" out:


It took several days to do all these various steps before I could machine applique'. Lots of prep, but the sewing is fast. With needle turn applique', I have less prep time but the sewing is slow. Each has it uses, decide which you prefer for any given project.

Now it's on to the second Side Border, then the Top and Bottom borders.

Let's quilt.

Barbara


Wednesday, October 2, 2019

SIZZLE Month 10--Preparing the Applique' Shapes

The pattern shown here is the 2019 Block of the Month Quilt, free to Star Members of The Quilt Show from January 1, 2019--December 31, 2019. The pattern is Sizzle, designed by Becky Goldsmith.

These instructions apply to any machine applique' pattern.

Last post I showed you how to prepare the border paper patterns. Now it's time to prepare the applique' shapes.


Becky uses freezer paper sheets to print the shape patterns. She prints onto the matt side and presses the waxy side to the RIGHT side of the fabric. Because the pattern is printed right side up and placed on the fabric right side up, there is no issue with the pattern pieces being backwards--no Reverse Mirror Image issues to consider. She has an excellent video showing how she turns her edges to the back and glues them down.

My method is different. I print the patterns onto a fusible fiber-based product that will mostly wash out when the applique' is finished. They are fused to the BACK side of my fabric--this means the patterns will be Reverse Mirror Images when placed on the border.

With Sizzle, this is not a real problem. The shapes are either symmetrical, like the center leaf, or asymmetrical but BOTH Left and Right shapes are used.

You have two choices with this method:

1. Set your printer to "Mirror Image"

OR

2. Print as usual, knowing your numbers will not match the pattern. For example, Leaf 2 goes on the pattern where it says Leaf 3 and Leaf 3 covers Leaf 2 on the pattern. I did not find this a problem at all--the shapes are clearly different and it is obvious which one goes where. Same with the orange swirls--my numbers are opposite of the pattern but I knew which was left and which was right.

There are two products for this method I have used and like. They are very similar and work the same way:


Here is information on Quilters Select Print and Piece Fuse Lite

Here is information on C&T Wash-Away Applique' Sheets

The great advantage to these products is they can be run through an ink jet/desk jet printer (NOT A LASER PRINTER) so the patterns are accurate. And it serves as a stabilizer while machine appliqueing. When the stitching is done, I simply soak the borders in warm water in the sink for a few minutes and allow it to air dry. Most of the fibers are gone and the appliques are not stiff.

Using Becky's instructions, I printed the applique' shape pages onto QS Print and Piece Fuse Lite. I stapled 3 or 4 pieces together as she suggests, and cut them out with scissors. I almost forgot to take a photo as I began to cut out the shapes:


I found I had not lined up the pages exactly on top of each other--these lightweight pages shifted a bit going through my printer. It occured to me I could have only printed 2 of the Side Border patterns instead of 6. Then I could have stacked a printed one on top of two plain ones and cut the 3 layers out. Just be sure the fusible side is face down, all three pages have the matt side on top. The bottom two would not have any numbers or writing on them but the shapes are obvious--I really don't need the numbers to know where they go. Just a thought...

I followed the directions to fuse the shapes to the WRONG side of the fabric. I found I needed to increase the heat of the iron to get the shapes to fuse. Use a press cloth:


The shape is cut out, ready to glue the edges under. Becky has an excellent video for how to trim and glue this shape.

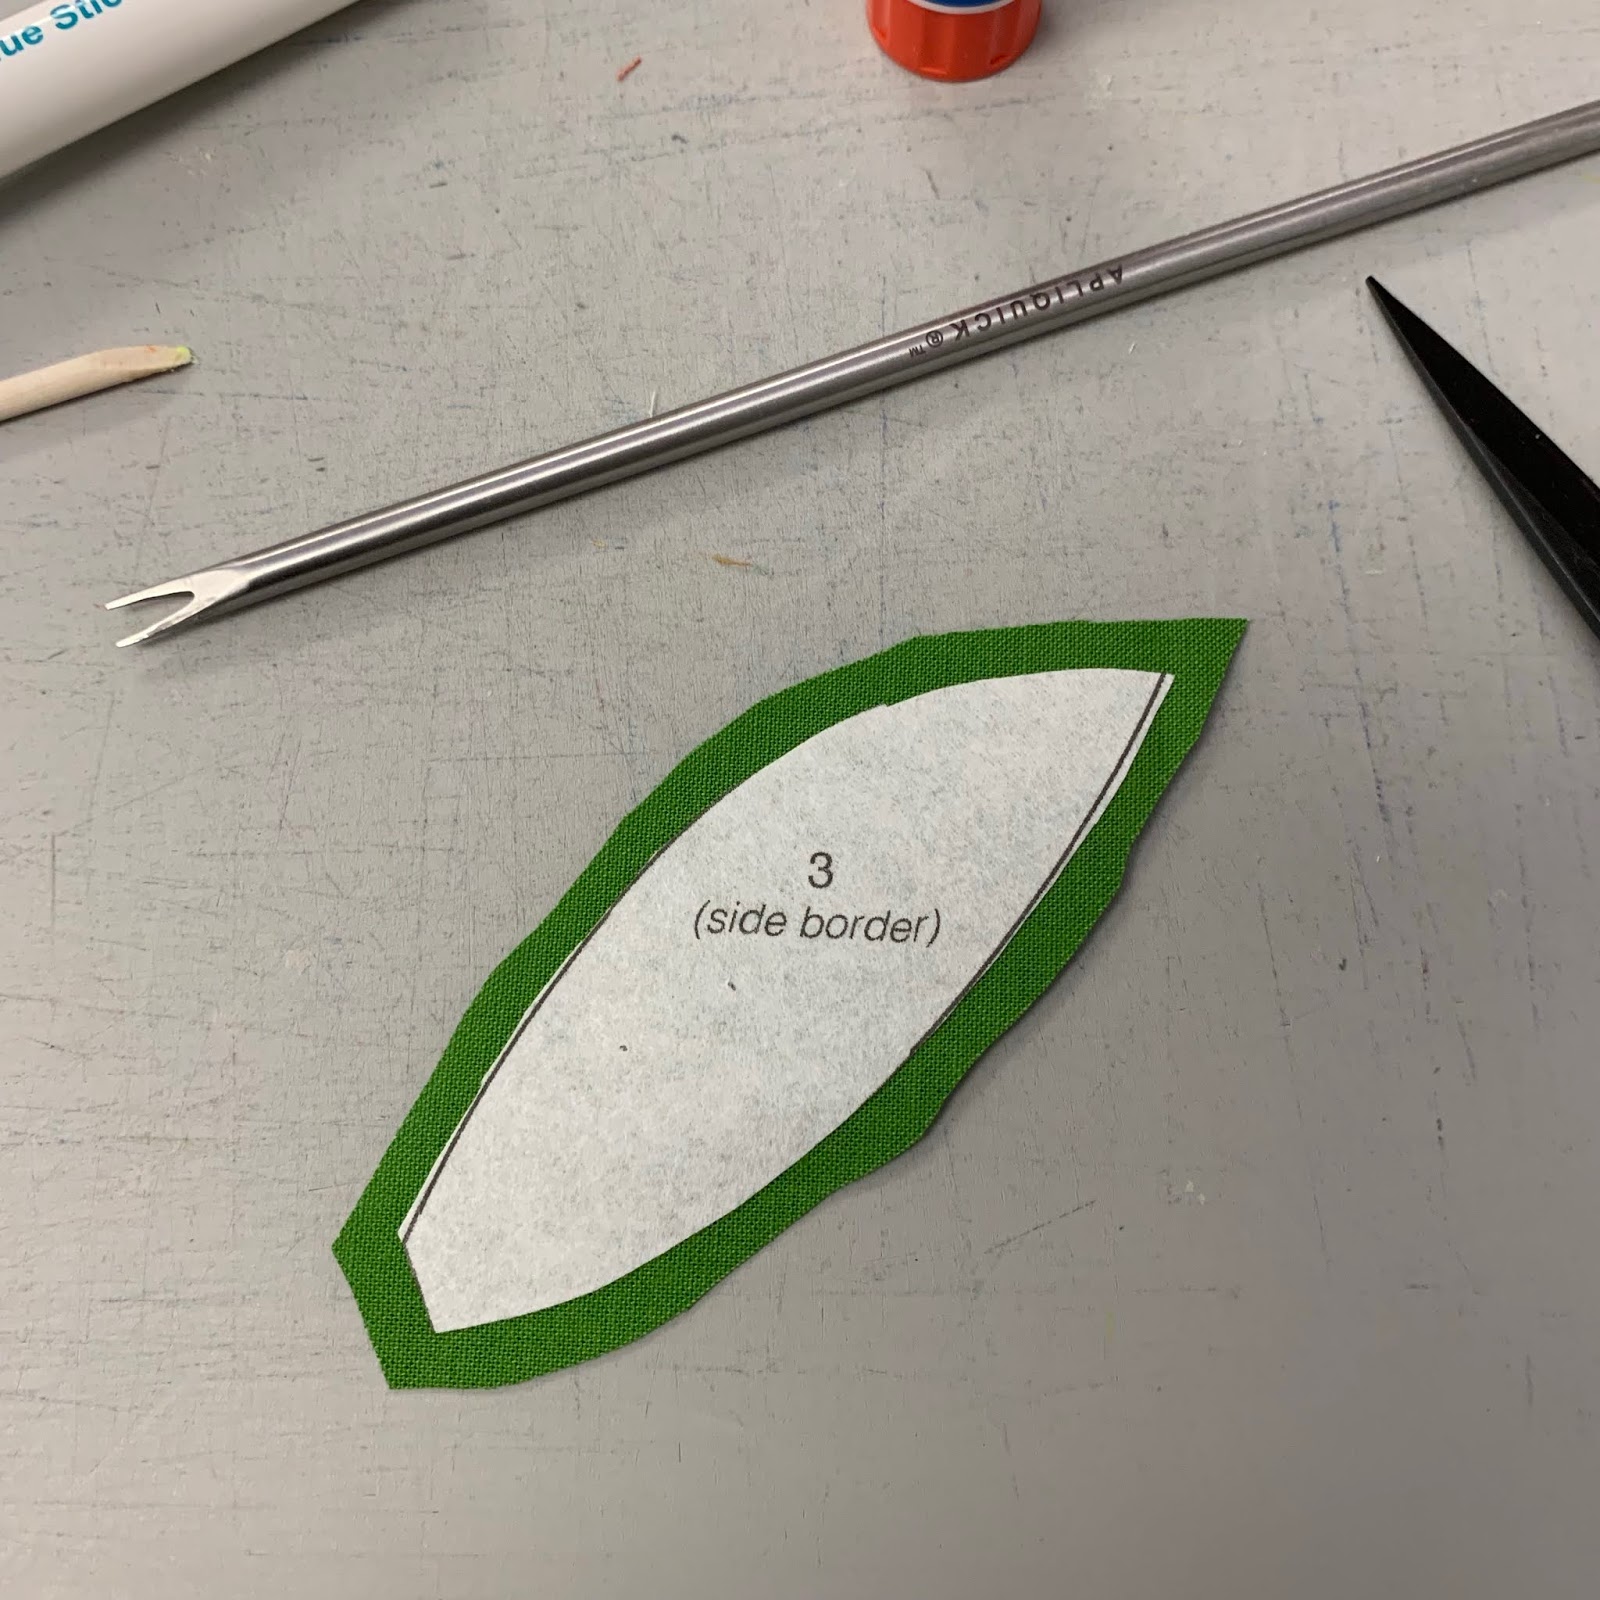
You can go wrong two ways here--too much seam allowance or not enough. No more than 1/4", less is better, but no less than 1/8":


 I used a Fabric Glue stick from Quilter's Select--it goes on yellow, then washes out. When it ran out, I used the cuticle stick to dig out the last bit of glue in the pen. Then I switched to Elmer's Washable School Glue Stick Disappearing Purple. It goes on purple, dries clear, washes out:

 The downside to the Elmer's is it makes a wide smear of glue--if you use the cuticle stick to apply the glue, as Becky does, you won't have the amount of glue on your shape that I have. Less is better.

It takes time to turn the edges under neatly all around the shape. Take it easy, small turns at a time, fix any pleats you get before the glue dries. I really like using the "forked tongue" shape end of the Appliquick tool, it grabs the fabric and allows me to get it glued down fairly easily:

 Be sure to check the front before you press the shape to finish drying the glue. What you see now is what you will get when the shape is appliqued:

 After the fiddily orange swirls, you will enjoy the leaves, they are much easier and faster to glue under:


I applied the glue all along one edge before turning it under:

 All done, the back:

Spend some time getting the outside tip as pointy as you want it to be, then glue the excess fabric in place on the back, Becky shows this in her video.

All done, the front:


For the circles, I used Karen Kay Buckley's Perfect Circles method. Watch her show to see her do it: Karen Buckley, Show 2007

I have another detailed blog post showing how I used the C&T Wash-Away Applique' Sheets for Ruffled Roses. It works the same way. Find it HERE.

Ruffled Roses was begun January 2011--it was the Block of the Month for The Quilt Show that year--another wonderful Sue Garman pattern. I did all the applique' with this method. I recently finished it:


Coming up in the next post, October 4, I will show how I machine stitched the applique's to the border.

Let's quilt.

Barbara