Showing posts with label applique' borders. Show all posts

Wednesday, October 26, 2022

MY FAVORITE QUILTS # 2

In the 1990's I made a lot of bed size quilts and when I think of how busy life was then, with kids, the house, several jobs, and a husband to keep happy I really don't know how I did it all.

Of course, I was younger then, a lot younger. And quiltmaking was absolutely my passion by then. I HAD to  make quilts, there was no other option. That remains true to this day.

Here is the story of another of My Favorite Quilts. 

LONE STAR GARDEN, 1997, 90" X 90" 


Detail 

The center star was inspired by an antique quilt in the book Star Quilts  by Mary Elizabeth Johnson. Each of the 8 very large diamonds is cut from a border stripe fabric, and each has to be cut exactly the same as the rest. I bought 5 yards of the Jinny Beyer border stripe and got started.

I had to return to the store to buy more yards--those diamonds are huge. I finally got all 8 diamonds pieced together, each is a single piece of fabric. The beauty of using a border stripe is the center will be a big surprise. I didn't know what it would look like until all 8 diamonds came together. I loved it.

I designed the applique blocks/triangles with inspiration from the book Jacobean Designs  by Pat Campbell. Using some of my most favorite fabrics, I cut flowers and leaves and stems for weeks. The hand applique process took months of stitching at night, mostly. 

When the center of the quilt was done it was time to figure out a border. It would have been simple to throw more of the border stripe on and call it done. But, no, this quilt deserved something more challenging than that.

Jinny Beyer had developed a technique she called "Soft Edge Piecing" and had written a book by that name. I knew that was just perfect for this quilt. So I went back to the store and bought the rest of the bolt--by now I had purchased close to 15 yards of this one fabric for this quilt.

I  hand basted the border stripe to a length of the pink background fabric. Then did that 3 more times to prepare the borders. Over many hours I slowly cut on a line on the border stripe, turned it under and hand appliqued the border stripe to the background. This is "soft edge piecing", an appliqued edge on a base fabric.

While it was completed in 1997 I know I worked on it for about two years. I marked it for quilting and took it to a woman who has doing hand quilting for the public back then--she quilted quite a few quilts for me in those years. She liked my quilts because I brought them marked and basted so all she had to do was quilt them. And regardless of the price she asked, I paid her in cash, the amount she asked, AND fabric. She didn't drive and getting out to a store was difficult so she loved having a big bag of fabric to use for her own quilts. 

This quilt was the first I  had exhibited at International Quilt Festival in Houston, It was included in the Special Exhibit "Traditional Treasures" in Houston, 2013. It was a thrill to see it hanging there.


This quilt taught me that a great quilt doesn't get made in a day. Lots of stitches, and time, will make a great quilt, just keep going. Learn new techniques, read a lot of books, get inspired by quilts from the past. And make it your own.

Let's quilt.

Barbara


Monday, January 31, 2022

GPDU--MONTH 2: VINE APPLIQUE AND DOGTOOTH BORDERS

Garden Party Down Under, aka GPDU, is the 2022 Block of the Month quilt for The Quilt Show. Designed exclusively for The Quilt Show by Irene Blanck, the patterns are FREE all year to Star Members. If you are not a Star Member, you can still watch the Show I taped last August. You may learn tips and tricks that will encourage you to try applique. Watch the Show Here


This month we add a vine applique border to the center made in Month 1 and then surround it with the matching Dogtooth Border on the outer edges.

IMPORTANT THINGS TO KEEP IN MIND this MONTH:

1. Cutting the borders for the vine applique:

The pattern tells you to cut 4 background borders, 23.5" x 5.5" and two 6.5" squares of background for the Basket corner. To have no seam in the border, cut FOUR Width of Fabric (WOF) strips 5.5" wide, then sub-cut into a 23.5" x 5.5" border. IF YOU ARE WILLING TO  HAVE A SEAM IN THE MIDDLE, cut TWO WOF strips 5.5" wide. From those, cut TWO borders, 23.5" x 5.5", then use the leftovers to create the other TWO borders--be sure the seam is at the exact center--11.75" from the center seam to the outer edges makes the background borders 23.5" x 5.5". 

The center seam isn't noticeable and after quilting will be very hard to see:


2. Understand the Vine Applique Border PATTERN:

The pattern presented is HALF the required size. At the Center, it says to "MIRROR pattern at this point". First, check to be sure your pattern is printed the correct size. This is easy--join pages 3 and 4 and MEASURE from the outer edge to the Center--not including any seam allowances, the pattern should be 11.5" x 5.5". With the seam allowance, it will  measure 11.75" x 5.5". If yours is not this size, adjust printer settings to get it the correct size before you begin.

Using a lightbox, you can see where the narrow stems go for the 48 leaves, 12/border. I marked them with a Self-Erase Marker, one border at a time, then stitched a Satin Stitch, 1/8" wide, instead of making 1/8" stems. Satin Stitch is a zig zag stitch with stitches very close together. My settings were 4.5 W by .15 L. It was fast and easy, the same green thread I am using for machine applique was perfect. Stabilizer is necessary for machine stitching like this--I simply lightly fused a small scrap of Print & Piece Fuse Lite to the area where each stem was to be stitched--it tore away easily after stitching: 

VERY IMPORTANT TO  UNDERSTAND: to MIRROR the pattern, you  have to TURN THE PATTERN OVER TO THE BACK SIDE. Consider printing on Vellum, a thick tracing paper, which allows you to see through it. ALLOW INK TO DRY FOR A FEW MINUTES--you don't want printer ink on your fabric. 

Here the pattern is right side up--you can READ the words: 


Here the pattern is MIRROR IMAGE--the words are BACKWARDS:

I could see through a copy paper pattern when it was upside down with a Lightbox, but the Vellum makes it very easy to see from the top side.

It is absolutely essential the vines come in and out of the border to the corners exactly as the pattern shows because the vines attach to the Basket corners as shown:

UPDATE, PLEASE NOTE: the pattern does not include two additional leaves at each of the baskets, where the vines attach to the baskets. The instructions say to add the additional leaves after the borders are attached, I missed that. See them in this photo:


3. READ Irene's Instructions before beginning:

The pattern tells you the length of vine needed for the 8 vines that go on the vine border. It says to leave at least 4" of vine off each end--these will be attached to the Basket Corner blocks AFTER THE FOUR VINE BORDERS ARE SEWN IN PLACE. 

Here vines are hanging off the vine borders. waiting to be stitched onto the Basket Corner block:


)

Here the top vine has been added to the Basket Corner block. The right vine will be added to the Basket Corner block after the top border has been sewn to the middle: 


4. Flower Petals on Large Center Circle:

I found it difficult to sew the 6 flower petals onto the large circle since I had cut  out the large circle and hand sewed a running stitch to the large circle first. In hindsight, it would have been easier to start with a 5" square of fabric for the Large Circle--sew the 6 petals in place to it, THEN carefully draw the large circle, being sure the petals were centered. Again, the pattern printed on Vellum makes it easy to see where to place the petals:


5. Double Circles:

Karen K Buckley's Perfect Circles are the method I am using for the many circles in this quilt. I waited until the borders were completely sewn on to add the Double Circles--this can be done when adding the leaves and vines if you prefer. 

Having learned my lesson with the Flower Petals on Large Circle, I first stitched the small circles to a square of fabric which would become the larger circle:

Once the small circle was sewn to the square, I used a circle template to draw the cutting line for the large circle on the back of the square. Cut out the large circle, baste a running stitch in the seam allowance, then add the Perfect Circle disc--this allowed me to be sure the small circle was centered, or very close to centered. Sew the Double Circles to the borders--there are 8 of these:

6. Dogtooth Borders: 

Whether making the Dogtooth borders by hand with Irene's pattern/instructions, or paper-piecing them with my Optional Alternative Instructions, BE SURE YOUR PATTERN IS THE CORRECT SIZE. 

Each of the 4 borders is 33" x 2.5" FINISHED--meaning when sewn into the quilt. The patterns to work with must be 33.5" X 3", including seam allowances. Irene's pattern is half the needed size, mirror at the center. My PDF paper pieced pattern is full size--when glued together, be sure they are the exact correct size. 

Be sure you sew the Dogtooth borders in the correct orientation--the "teeth" in Month 2 point IN. Month 1 they point OUT. Ask me how I learned this lesson...

They are made like the Dogtooth border in Month 1, review the video for this step in Month 1 Videos.

7. The Dangling Leaves:

There are 8 leaves which dangle off the edge of the Vine Applique Border onto the Dogtooth borders. After sewing the 4 Dogtooth borders to the outside edge, add those remaining 8 Leaves:

Missing Leaf: 


Dangling Leaf ready to be sewn in place:


Next month, we will make an applique vase and one of  six pieced blocks. We will make a tiny Dresden Plate for the center of the pieced block. More fun to come!

Need a Laugh? Here is the first photo I took, of Month 2 completed--when I thought I was done. It happens to all of us from time to time: 


Let's quilt.

Barbara


Wednesday, October 2, 2019

SIZZLE Month 10--Preparing the Applique' Shapes

The pattern shown here is the 2019 Block of the Month Quilt, free to Star Members of The Quilt Show from January 1, 2019--December 31, 2019. The pattern is Sizzle, designed by Becky Goldsmith.

These instructions apply to any machine applique' pattern.

Last post I showed you how to prepare the border paper patterns. Now it's time to prepare the applique' shapes.


Becky uses freezer paper sheets to print the shape patterns. She prints onto the matt side and presses the waxy side to the RIGHT side of the fabric. Because the pattern is printed right side up and placed on the fabric right side up, there is no issue with the pattern pieces being backwards--no Reverse Mirror Image issues to consider. She has an excellent video showing how she turns her edges to the back and glues them down.

My method is different. I print the patterns onto a fusible fiber-based product that will mostly wash out when the applique' is finished. They are fused to the BACK side of my fabric--this means the patterns will be Reverse Mirror Images when placed on the border.

With Sizzle, this is not a real problem. The shapes are either symmetrical, like the center leaf, or asymmetrical but BOTH Left and Right shapes are used.

You have two choices with this method:

1. Set your printer to "Mirror Image"

OR

2. Print as usual, knowing your numbers will not match the pattern. For example, Leaf 2 goes on the pattern where it says Leaf 3 and Leaf 3 covers Leaf 2 on the pattern. I did not find this a problem at all--the shapes are clearly different and it is obvious which one goes where. Same with the orange swirls--my numbers are opposite of the pattern but I knew which was left and which was right.

There are two products for this method I have used and like. They are very similar and work the same way:


Here is information on Quilters Select Print and Piece Fuse Lite

Here is information on C&T Wash-Away Applique' Sheets

The great advantage to these products is they can be run through an ink jet/desk jet printer (NOT A LASER PRINTER) so the patterns are accurate. And it serves as a stabilizer while machine appliqueing. When the stitching is done, I simply soak the borders in warm water in the sink for a few minutes and allow it to air dry. Most of the fibers are gone and the appliques are not stiff.

Using Becky's instructions, I printed the applique' shape pages onto QS Print and Piece Fuse Lite. I stapled 3 or 4 pieces together as she suggests, and cut them out with scissors. I almost forgot to take a photo as I began to cut out the shapes:


I found I had not lined up the pages exactly on top of each other--these lightweight pages shifted a bit going through my printer. It occured to me I could have only printed 2 of the Side Border patterns instead of 6. Then I could have stacked a printed one on top of two plain ones and cut the 3 layers out. Just be sure the fusible side is face down, all three pages have the matt side on top. The bottom two would not have any numbers or writing on them but the shapes are obvious--I really don't need the numbers to know where they go. Just a thought...

I followed the directions to fuse the shapes to the WRONG side of the fabric. I found I needed to increase the heat of the iron to get the shapes to fuse. Use a press cloth:


The shape is cut out, ready to glue the edges under. Becky has an excellent video for how to trim and glue this shape.

You can go wrong two ways here--too much seam allowance or not enough. No more than 1/4", less is better, but no less than 1/8":


 I used a Fabric Glue stick from Quilter's Select--it goes on yellow, then washes out. When it ran out, I used the cuticle stick to dig out the last bit of glue in the pen. Then I switched to Elmer's Washable School Glue Stick Disappearing Purple. It goes on purple, dries clear, washes out:

 The downside to the Elmer's is it makes a wide smear of glue--if you use the cuticle stick to apply the glue, as Becky does, you won't have the amount of glue on your shape that I have. Less is better.

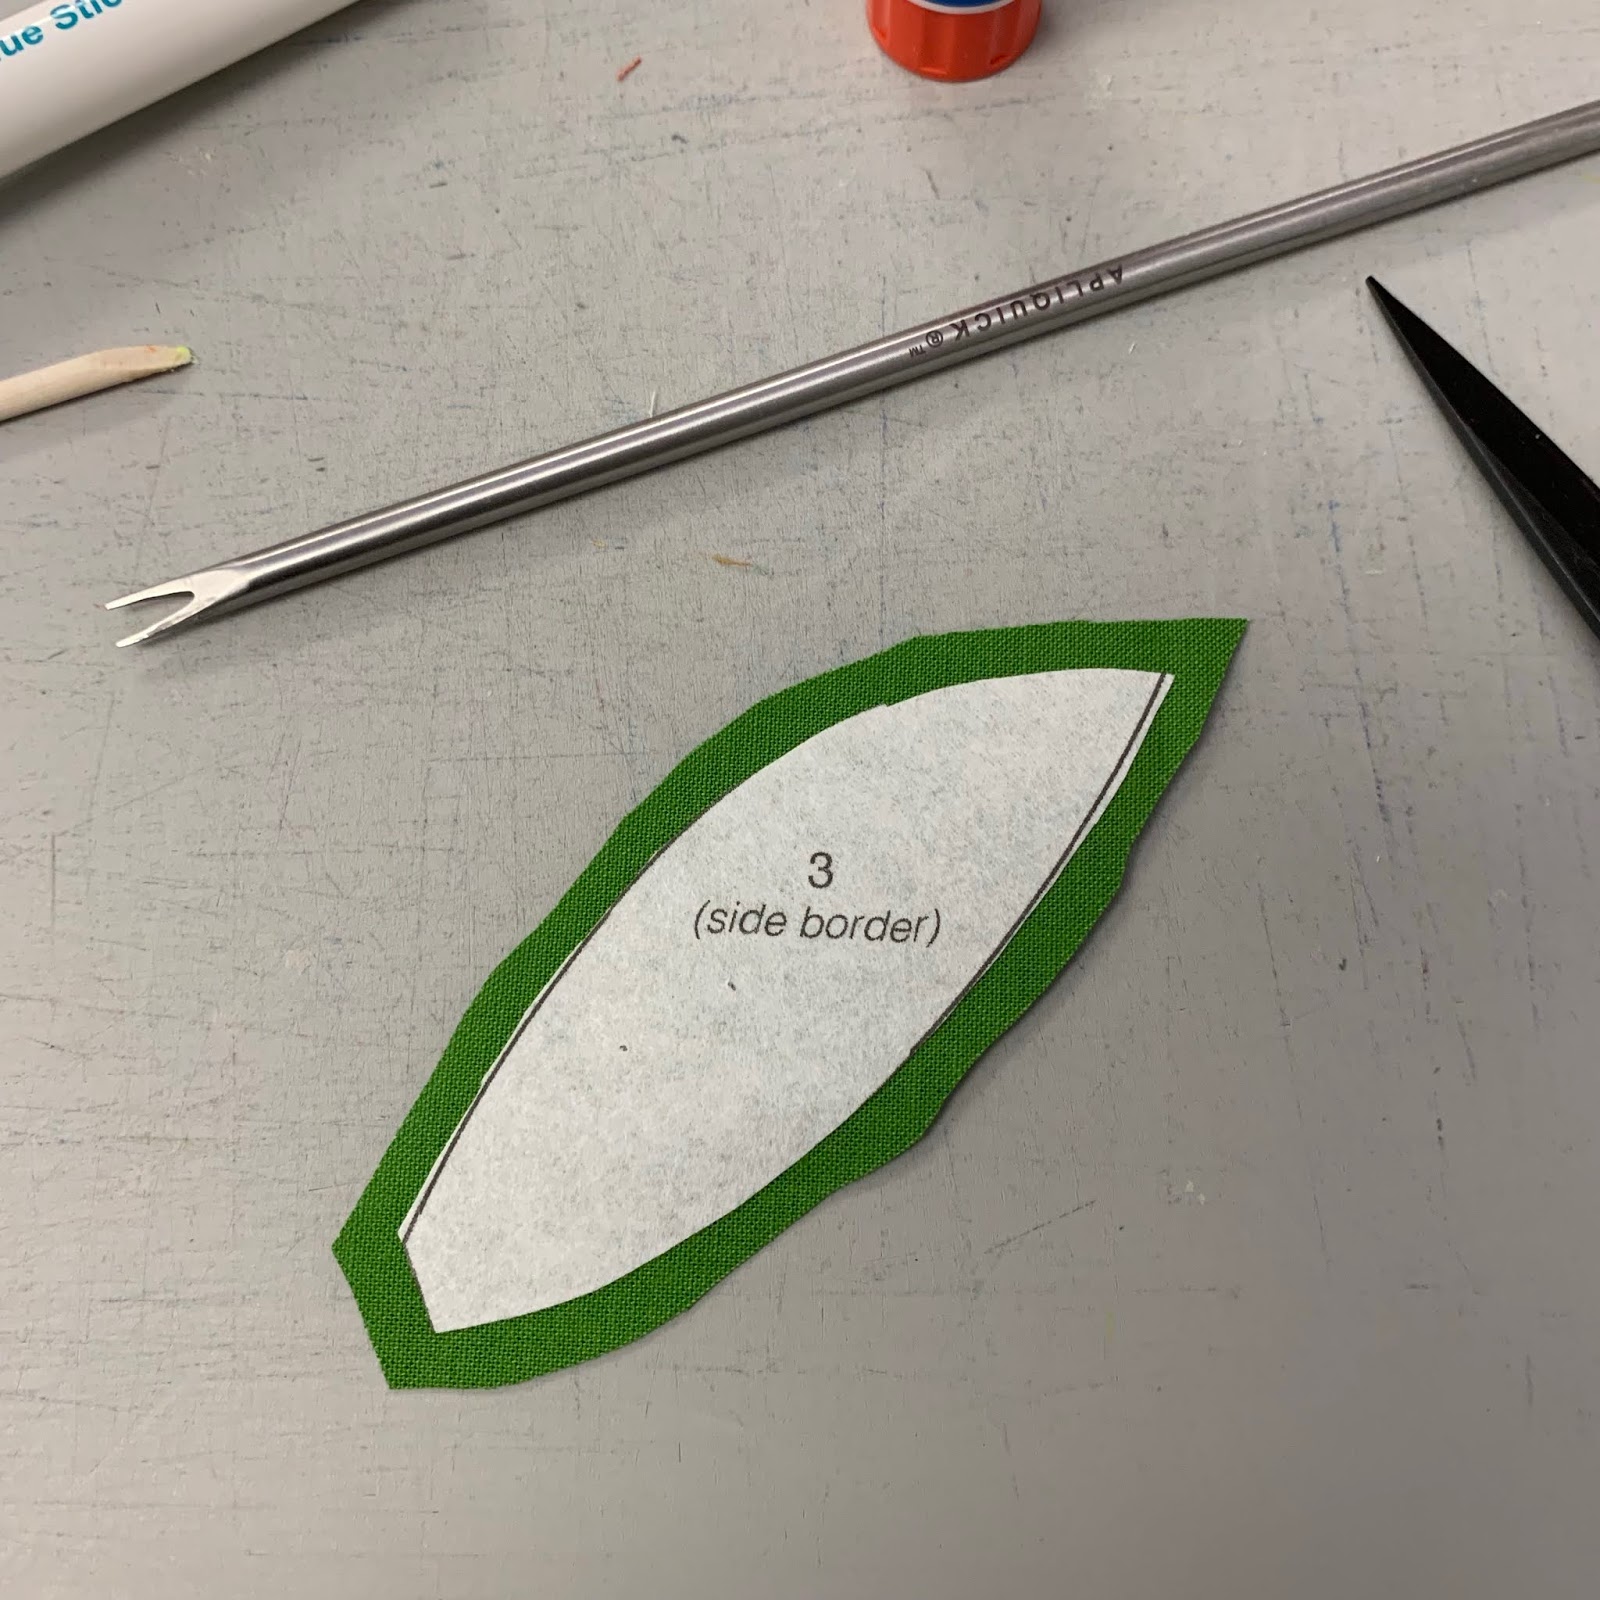
It takes time to turn the edges under neatly all around the shape. Take it easy, small turns at a time, fix any pleats you get before the glue dries. I really like using the "forked tongue" shape end of the Appliquick tool, it grabs the fabric and allows me to get it glued down fairly easily:

 Be sure to check the front before you press the shape to finish drying the glue. What you see now is what you will get when the shape is appliqued:

 After the fiddily orange swirls, you will enjoy the leaves, they are much easier and faster to glue under:


I applied the glue all along one edge before turning it under:

 All done, the back:

Spend some time getting the outside tip as pointy as you want it to be, then glue the excess fabric in place on the back, Becky shows this in her video.

All done, the front:


For the circles, I used Karen Kay Buckley's Perfect Circles method. Watch her show to see her do it: Karen Buckley, Show 2007

I have another detailed blog post showing how I used the C&T Wash-Away Applique' Sheets for Ruffled Roses. It works the same way. Find it HERE.

Ruffled Roses was begun January 2011--it was the Block of the Month for The Quilt Show that year--another wonderful Sue Garman pattern. I did all the applique' with this method. I recently finished it:


Coming up in the next post, October 4, I will show how I machine stitched the applique's to the border.

Let's quilt.

Barbara

Sunday, September 29, 2019

SIZZLE Month 10--the Borders Begin

This is the  2019 Block of the Month from The Quilt Show. This quilt pattern designed by Becky Goldsmith is FREE to Star Members.  Join Today  to be part of the fun.

Be sure to READ ALL THE GENERAL DIRECTIONS and WATCH ALL THE VIDEOS. Each month's pattern has detailed instructions as well. 

PRIOR POSTS WITH HELPFUL INFORMATION:

Block 1
Block 2
Block 3
Block 4
Block 5
Block 6
Block 7
Block 8
Block 9

It is finally time to make the borders. As I am making two of these, the Cool Kit and a Warm/Combo version using my own fabrics, I decided one quilt will have an applique' border and one a pieced border.

The Warm/Combo is getting the applique' border. Here is the top before the borders:
Here is my Cool Kit top with pieced borders--the instructions for this posts October 6:

I had just enough Kit fabric available to make this border--I was careful when cutting fabric for the blocks. If I had fabric left over, I cut pieces from the leftovers for the next month before cutting new strips. If you run low, any blue or green fabric that looks like these can easily be substituted in the border.

FIRST, before you begin the applique' borders, READ THE INSTRUCTIONS, and WATCH THE VIDEOS. Becky has put a lot of time and information into both the Instructions and the Videos--they will really help you. Find the Applique' Instructions HERE.

IMPORTANT CUTTING NOTE:  Cut the borders wider and longer than called for. They shrink some with all the applique--you can always cut off the extra but it's harder to add more later.  I recommend the side borders be cut at least 7.5" x 64".

This post will show you how to use her vinyl overlay technique. I will also offer you an alternative method you may prefer.
I printed the border pages following the instructions in Month 10 and taped them together to form the Side Border Pattern. At first, I thought I might be able to see through it on my dark border fabric. Alas, I could not. Here the pattern is on top of the border--I was  not able to place the applique' shapes under the pattern accurately. Here the shapes are simply laying on top for the photo:


So, on to the vinyl applique' method. Using an old rotary cutter blade, I cut the vinyl overlay material included in the Kit into a 5" wide long piece--I needed two of those to be able to join them to form a 60" long piece.

I pinned the vinyl to the paper pattern and used an Ultra Fine Sharpie pen to trace the pattern onto the vinyl. Tracing is not my favorite thing. My drawn lines are not perfect but close enough:


The entire border is traced on the 60" long vinyl overlay:


Now I was able to place the prepared applique' shapes on the border where they are supposed to go. Top photo shows shapes under the vinyl:


The vinyl is carefully removed and the shapes are pinned in place, ready for sewing. You can glue the shapes down if you prefer:


It took time to trace the 60" pattern onto the vinyl and I didn't enjoy that task. I got to thinking: What if I printed the pattern pages onto Vellum???

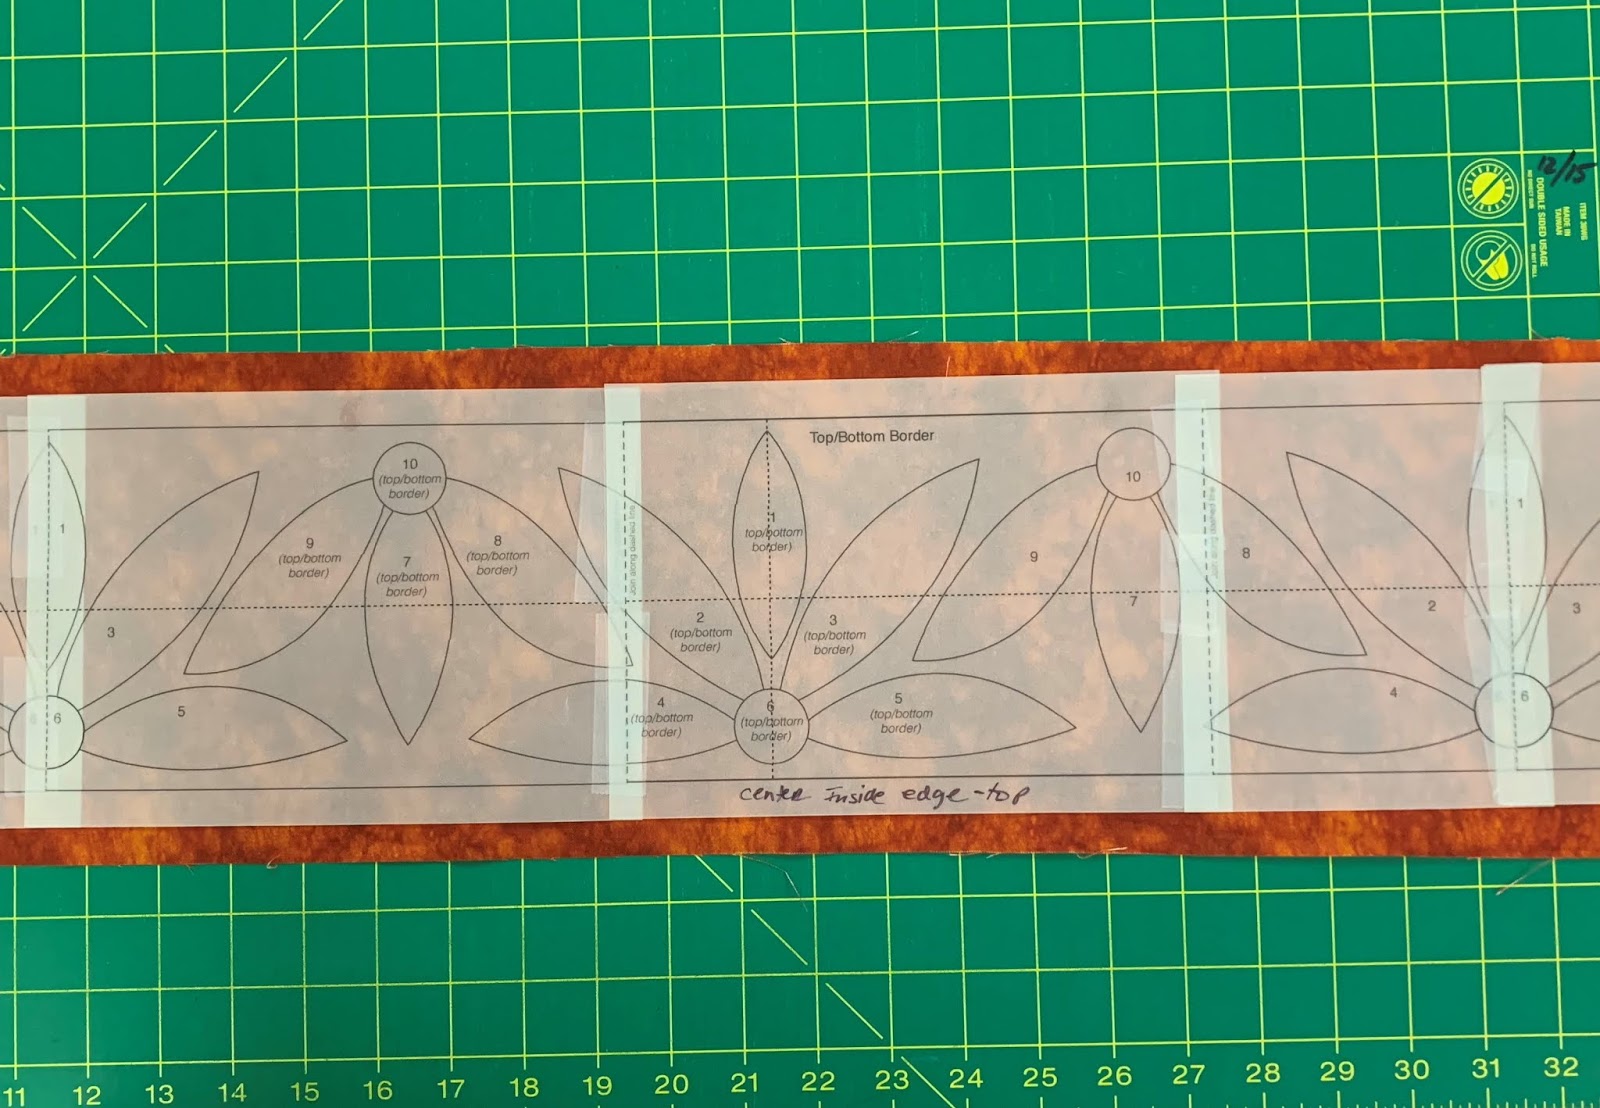
Here is the Top/Bottom border, printed on Vellum, taped together, ready to go. So much faster, so  much more accurate than my poor tracing. I can easily see through the Vellum to place the applique' shapes on the border. You don't see the prepared shapes here because I haven't made them yet--still working on the Side Borders:


In the next blog post, October 2, I will show you how I cut out the applique' shapes and prepared them for machine applique'. My method is different from Becky's--she uses freezer paper which she puts on the RIGHT side of the fabric before gluing the turned edge under. I use a wash-out fusible fabric product that I put on the BACK side of the fabric before gluing the turned edge under.

Let's quilt.

Barbara

Sunday, September 30, 2018

Month 10 The Patchwork Barn

This is the FREE Block of the Month pattern "Patchwork Barn", designed by Edyta Sitar exclusively for The Quilt Show. You must be a Star member of this world-wide quilt guild/show/Internet community to receive the free patterns each month, beginning January 1, 2018. Join today and get started on this journey.

Previous instructions are here:

Introduction 
Month 1
Month 2
Month 3
Month 4
Month 5
Month 6
Month 7

NOTE: On The Quilt Show, the Forum is the best place to ask questions, find answers, or find out if there is a change in the pattern.  I recommend you check in there frequently. And there is a Show and Tell Topic--show us your blocks. Forum Patchwork Barn


NOTE: This instructional blog is posting one day early--the pattern for Month 10 will be released October 1, 2018, as usual. 

In Month 10, you will make the two applique' borders. The pattern has the borders cut 78.5" x 7.5". This is the size the borders need to be AFTER they are applique'd and are ready to be added to the left and right sides of the quilt. 

Things to consider BEFORE cutting the borders to applique':

1. There might be shrinkage due to the applique', making the borders shorter than 78.5" once all the appliques' are sewn in place.

2. Do you plan to lengthen the quilt by adding additional sashing between each block? If so, be sure you make the borders longer to allow for that.

I always start my applique' projects with background fabric that is bigger than the size it will be when the applique' is done. For this quilt I would cut those borders 8" wide and 79" long. Make a light pencil mark 1/4" in from the top and bottom edges to show you where you will ultimately cut the long borders--they will be trimmed to 78.5" when the applique's are done.

I changed my quilt by not adding applique' at all and adding 1" finished sashing to separate the blocks. The Sunday Sew and Sews asked how to increase the size of  this project and this is what I came up with:

My Final Layout 75" x 98"

In Month 11 you will get all the instructions for putting the rows of blocks together and then adding these final applique' borders.  In my blog I will provide the measurements for my setting. 

I did make a wallhanging with the Twinkling Star center block and the same applique' shapes. I wrote about the applique' technique for Month 9, here.


We are getting  near the end of this project--I hope you are enjoying the journey.

Let's quilt.
Barbara

Wednesday, September 26, 2018

Busy Week = New Finishes

In the last week I have quilted, bound and put labels on four quilts, fairly small ones. It's good to have them in the "Done" column:


The X-block, or Old Italian Block is one of my favorites. I love to teach it and I love to make it. More information in this tutorial:  X Marks the Spot  This one has 3" blocks, it is 16" x 20" and was made from a charm pack of "Rachel Remembered 1820-1850" by Betsy Chutchian for Moda:


Twinkling Stars is my applique' sample for the Patchwork barn instructions--find it here.


I was eager to get it completely finished so I could wash it to see: 1.if it shrunk and 2. how the applique's feel after washing--they were made with Wash-Away Applique' Sheets by C&T Publishing:


It was 29.5" square before washing and 29" square after washing. It has wool batting so I laid it out to air dry after washing. The applique's feel very soft, not stiff at all like they were before washing. The Applique' Sheets package says "Sheets dissolve into tiny fibers leaving no residue".

Temecula Quilt Company had a weekly sew-along this year that drew me in. The 1880's Sampler Sew Along has 4" blocks, mostly made with half square triangles. It is a replica of an antique quilt. Mine is 31" x 40". I thought I would add another border but decided to stop with just one, like the original quilt:

Finally, Kisses + Hugs., AKA Japanese X and + is done. I have taught this several times, and really enjoy these very scrappy blocks. When I decided it would be the quilt to bring to Houston to help decorate the Education office, I had to quilt and bind it. Done. It is 45" x 60":


Now I have to get my two garments made for Houston. So this was my pre-Houston quilt marathon. There are several more quilts basted, just waiting for quilting. As soon as the garments are done I'll get right on the next one, Temecula Quilt Company, Circa 2016:


And one more thing happened in the last week--Stella became a BIG SISTER--welcome to the world, Samuel:


Let's quilt!

Barbara