
Garden Party Down Under, aka GPDU, has arrived! Designed exclusively for The Quilt Show by Irene Blanck, the patterns are FREE all year to Star Members. If you are not a Star Member, you can still watch the Show I taped last August. You may learn tips and tricks that will encourage you to try applique. Watch the Show Here
There is so much to discuss this first month I will break it down into THREE Parts.
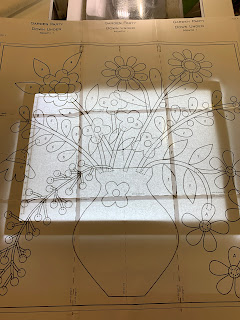
My Sample Quilt, Month 1 block, made by Sunday Sew and Sew Joan C:
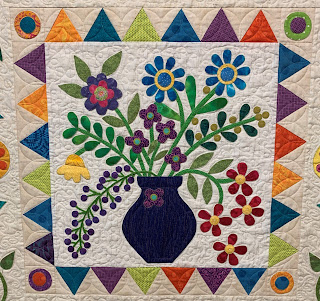
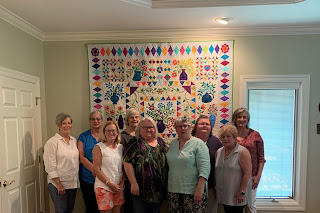
My Sample quilt was made last Summer as I tested the pattern and reviewed all the instructions. I am so lucky to have a great group of women to assist me with this task, the Sunday Sew & Sews:
1. RESOURCES:
Each month you will find the patterns and instructions on www.thequiltshow.com Find them HERE
Show #3001 is available FREE for all to watch and I strongly recommend you watch BEFORE you start
Videos are on each months' page--this month there are several
LIVE broadcasts are on the first Friday of each month, noon Central time, available on Facebook and The Quilt Show Channel on YouTube. Find them HERE
Past Shows that feature a wide variety of applique techniques are always available to Star Members Resource Guide
The Forum where you can ask questions and post your progress: The Forum
MY ADVICE: READ ALL THE INSTRUCTIONS Irene has written 4 pages of General Instructions and each month she has 2-3 additional pages of instruction for that months' patterns. She does all her applique by the Needle Turn Hand Applique method.
I have written multiple pages of "Optional Alternative Techniques". We made my sample quilt with the Turned Edge Machine Applique method. My Dogtooth Borders in Months 1 and 2 are paper pieced and that pattern is provided for you, if you want it. I have also explained how you can easily DRAW the pieced border yourself should you not want to print it.
IMPORTANT THINGS TO UNDERSTAND:
1. There are MULTIPLE WAYS to do many of these techniques. I am not going to provide ALL of them, just the methods Irene and I used to make our two quilts. You can use any method you like that gets the job done to your satisfaction.
2. If you use a fusible product to print your patterns, like Print & Piece Fuse Lite by Quilters Select, be aware your shapes will be in mirror image, meaning the REVERSE of the original pattern, because the paper pattern will be fused to the wrong side of the fabric. You can set your printer to REVERSE the image before you print. These Settings are sometimes called Reverse, Mirror Image or Flip--understand your printer if you want your quilt to exactly match the original. There are very few shapes that are not symmetrical so I am fine with my quilt having a few "backwards".
3. I wrote detailed info on how to GET READY--check that out if you missed it: Get Ready
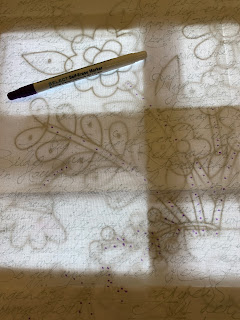
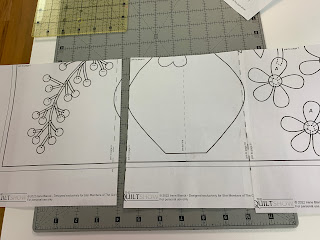
4. Print the 9 pages of Month 1 patterns on COPY paper then cut or fold the pages on the appropriate lines to create a full-size working pattern. First, I folded the edges under but found that put a lot of excess paper on the back that made it difficult to see through with the lightbox behind it:

So I cut the patterns off on the dashed line on some pages, and left 1/4" beyond the dashed line on the adjoining pages. Much easier to see to trace OR place the fabrics:
5. Irene mentions the need to understand which pieces go UNDER others. Now is a good time to study the full size pattern to see that. The first fabrics that will get sewn in place on Month 1 are the Stems. Some go under others--those are placed first. Here are my Stems sewn in place on GPDU #2 I am making with the Kit fabrics throughout 2022.
NOTE: I GOOFED! The 3 leaves #3 go UNDER the stems that lead to the large daisy-like flowers in the upper right. I discovered this after many of the flowers and leaves had been sewn in place. I had to remove 1/2" of stitches to fit the lower edge of Leaf 3 under the stem, then re-sew it. Watch out for those leaves.
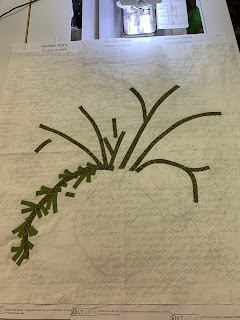
I made the decision on my first GPDU that all my stems would be made 1/4" wide, none of the 1/8" wide in the pattern. Also, I gave my Sunday Sew & Sew assistants the freedom to use Alternative Methods. Joan Cook used Perle 8 cotton to EMBROIDER the 1/8" stem on Month 1--I LOVE IT:

It is YOUR QUILT, you get to DECIDE how you will make it.
There are several Videos for Month 1--find them on the Month1 pattern page.
The 2019 BOM Sizzle, designed by Becky Goldsmith, has several excellent videos, especially the first 3 that are relevant to machine applique. Find them under LEARN, BOM, 2019.
Once all the stems (and Leaf #3) are in place you can start adding the leaves, flowers, berries and vase.
Let's take a look at those steps in Part 2.
Let's quilt.
Barbara
Barbara. Thanks so much for all you do. I watched the show and your demo but did not here what brand of marking pencil you use, prefer.
ReplyDeleteMy favorite marking tool is a mechanical pencil, .5 or .7 lead. If marking for immediate use the Quilters select Self Erase marker— it does disappear quickly so I can’t mark today and expect it to be there next week. White chalk pencils like Sewline or Bohin work well on dark fabrics.
DeleteThis comment has been removed by a blog administrator.
ReplyDeleteThis comment has been removed by a blog administrator.
ReplyDeleteWhat are the pros and cons of doing raw edge appliqué rather than turned edge....besides the makers preference?
ReplyDeleteTo me, raw edge is less stable and will show wear over time with use. Close stitching will help protect the edges better. Turned edge takes far longer to prepare but, for a quilt I will love and use, the time required is worth it. Just my opinion.
Delete