The beautiful center applique vase full of flowers is surrounded by the perfect Dogtooth Border. The instructions from Irene Blanck, the designer, is for needle turn hand applique. My Optional Alternative Techniques is for a paper pieced border. There is a Video for these borders in Month 1 Videos to help you.
Let's look at both methods.
DOGTOOTH BORDERS BY HAND:
The pattern provides a template for the triangle. Cut a total of 24 colored triangles from a variety of prints, using a 3/8"seam allowance. Turn the two bias edges in. Cut 4 borders from background fabric, 18.5" x 3". Carefully place 6 triangles along the border, being sure the straight of grain edge is on along the bottom of the border. Glue in place, and hand applique down.
NOTE: the tip of each triangle does not go all the way to the outside edge of the border.
The excess fabric at the tip will be trimmed or folded back during the hand applique process. The pattern provided is a placement guide for the 6 triangles along the 18.5" background border. Join them where indicated and be sure your paper template measures 18.5" including seam allowances:
Make 4 corner blocks, following the pattern. Join a corner block to either end of the Top and Bottom borders. Join the Left and Right borders to the center applique block. Press toward the center block. Add the Top and Bottom borders to complete Month 1.
PAPER PIECED DOGTOOTH BORDERS:
Some people find it difficult to get the hang of paper piecing. It seems "Upside Down and Backwards". You are sewing on a line on paper, the fabrics are UNDER the paper. Odd.
I have written several times about the advantages of paper piecing. Here is one very detailed post about paper piecing--even though it is making a different kind of border, the principles are the same:
Paper Pieced Border If you are new to this technique or having trouble, there is a lot of info that will help.
In my Optional Alternative Techniques Instructions I explain how to DRAW this paper pieced border if you don't want to print the pattern which we are providing. It is quite easy to draw. It is also quite easy to print the paper patterns. The two pages in the Month 1 pattern section will generate 2 borders--your quilt has 4 borders so you will have to print them twice if using the PDF patterns provided.
You need 24 colored triangles and 20 background triangles as well as 4 sets of partial background triangles for the outer edges of all four borders. I cut these oversize, from 4" strips. Then I cut 60 degree angles to make the triangles. See the VIDEO to see this process.
For paper piecing, use a small stitch, 1.5 works well for me. Be sure you are placing the triangles so the straight of grain will be on the outer edges, not the bias edge of the triangle. Start on one end, join a colored triangle to a partial background triangle. Sew on the line, then press the colored triangle open. I like to use an Add-a-Quarter ruler to trim the colored triangle 1/4"beyond the next sewing line. This allows me to know where to line up the next background triangle.
Making 60 degree cuts to create triangles:
Select the 6 printed triangles you want for a border:
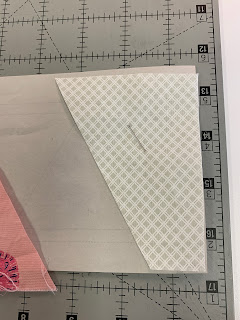
Place the back side of the partial background triangle to the back side of the paper pattern:
Align a bias edge of a printed triangle to the partial background triangle:
Open and press the triangle:
Use an Add-A-Quarter ruler to trim the triangle 1/4" from the next seam to be sewn:
Stitch on the line:
Before being trimmed:
After all the sewing is done on the border strip, use an accurate ruler to trim exactly 1/4" away from the finished size line. I don't use the outer dashed line to trim by, I want to be sure I have trimmed exactly 1/4" from the seam line:
Once trimmed, remove the paper and finish by adding corner blocks to the Top and Bottom borders. Follow the same instructions as above for the Hand Sewing method to complete your beautiful Month 1.
NEXT MONTH: There are four vine borders with flowers and leaves, coming out of four baskets in the corners. This border will be surrounded by another Dogtooth Border, using the same size triangles as Month 1. Each outer border has 11 print triangles and will be 33" x 2.5" FINISHED. The Optional Alternative Techniques instructions provided in Month 1 has all the info you need to prepare these Month 2 Dogtooth Borders--in case you finish early and want something more to do! A paper pieced pattern for the Month 2 Dogtooth Borders will be provided in Month 2.
Let's quilt.
Barbara


Thanks for guiding us along again this year. And thanks for giving us more than one way to get things done!
ReplyDeleteThere are so many ways to be successful. It helps to try several to see which you prefer.
DeleteThank you for the hints & tips. They are easy to understand & provide possible options that I'm not always aware of!
ReplyDeleteThanks--I try to provide clear explanations and am always open to questions if I haven't.
DeleteThanks so much for all the work and dedication you bring to these projects!
ReplyDeleteI think herding quiltmakers is a little like herding cats. :)
Sometimes… Thanks!
DeleteThis is my first time participating in the BOM
ReplyDeleteThank you for you excellent guidance and direction