Sunday, January 12, 2020

Quilts I Should Finish This Year

Many of us get excited to START a new project, but don't always FINISH those previously started.

Here are a few I really WANT to finish in 2020:

1. Patriotic Pineapple--I put this on my local teaching schedule to force me to dig it back out and get her done--it's about half way done and all I need is time to make it a priority:


2. Economy Block: this one is a replica of an antique top I bought a few years ago from Julia Kelly-Hodenius, owner of Pique'. It is a bit more than half done--the top photo is one block: 
 The antique top:

3. $795: A funny name which I may explain later. This was started years ago and I really WANT to finish--hoping this is the year. I have two of these rows done, about 26" wide x 54" long. I am either 25%, 50 %, or 66.67% finished:


4. Star of Texas: designed years ago from a very small graphic I saw. I wrote to the person who designed the graphic and got permission to make a quilt like it--in the old days when that sort of thing happened with letters through the mail. It took all my math skills to get this far--I remember working in 1/32 of an inch increments--nuts! 

Now I don't care for the background fabric and will replace that with a more contemporary fabric. All of this has been stored for at least 20 years but this might just be the year I get back to it:


In addition to all the usual projects I am working on, class samples, blog posts,  BOM commitments, etc., these will have to work their way into my schedule.  Having them out of the closet, on the design wall, visible, will help get them moved to the front of the line.

I'll bet you have a few UFO's (unfinished objects), or PHD's (projects half done), or PIGS (projects in grocery sacks). Whatever we call them, at some point we were excited enough to start them. 

Let's quilt.

Barbara

Wednesday, January 8, 2020

New Projects for the New Year?

This is the time of year that a lot of quilt projects get started--often offered on the Internet, some for free, some as subscription.  Some are called Sew-A-Longs, some Quilt-A-Longs, some are Mysteries. Lots to choose from.

I try not to get pulled down that Rabbit Hole but occasionally I do.

Here are a few I am thinking about:

1. Two BOM for 2020 from Barbara Brackman

This year Barbara Brackman offers two Block of the Month quilts, one pieced, one applique. I learn so much history from Barbara Brackman's Block of the Month patterns, most of which is women's history. Not sure I will do either of these but I'll be following along. Here is the 2019 Applique quilt, Hospital Sketches--this is NOT the 2020 quilt but gives you an idea of what is to come:


2. MODA Blockheads 3 starts January 15. Here is where I first learned about it: MODA Blockheads 3 is coming--this blog is by my friend, Betsy Chutchian. Here is her Blockheads 2 quilt from last year:


The Facebook group for MODA Blockheads 3 says there are 14 designers and 56 blocks. I couldn't find a link yet with fabric requirements but there must be one as the Facebook group shows lots of people's fabric bundles.

3. Kathleen Tracy's Small Quilt Lovers Facebook Group 2020 Mystery Quilt:  This is available on Facebook in Kathy Tracy's Small Quilt Lovers group. I have started this because I like small quilts, the pieces so far are simple, and I wanted a Leader/Ender project right now--Step 1 prepped and ready to go:


4. Temecula Quilt Company: Scavenger Hunt Sew Along  This starts soon and requires the latest book from Sheryl Johnson:


5. Bonnie Hunter's Annual Mystery: Frolic MysterThis one is just about over but the patterns will remain available to download/print through January 31, 2020. I am saving the patterns and when the mystery is revealed, I'll know if it's one I'm ever likely to make.

I'm sure there are many more out there, most I never  hear about until they are finished. What about you? Are you working on a new quilt this year or have a favorite coming online this year?

Let's quilt.

Barbara

Sunday, January 5, 2020

Watch The Quilt Show for Free

NOTE: I really won't post about Afternoon Delight and The Quilt Show all year. As this is kickoff week, please indulge me with this one final post for January about this quilt--thanks!


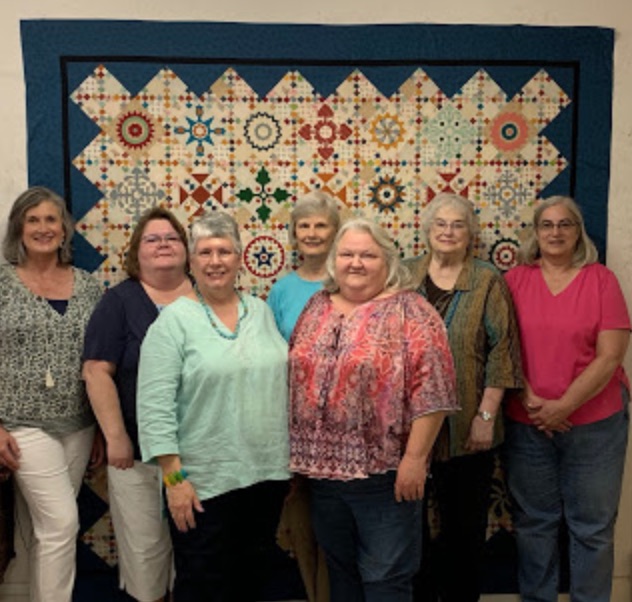
Show #2601 is now on The Quilt Show. It features the 2020 Block of the Month pattern, Afternoon Delight, by Sue Garman, and made by my friends and I.

Ricky Tims on set

Prepping On  Set
Some of the Team who "Got It Done"

As the guest artist on this show, I have a link anyone can use to watch this show for free:

Show # 2601

Please share this information with all your quilting friends. Usually, only Star Members who have subscribed to The Quilt Show can watch most shows--a few shows are always free so those thinking of joining can see the great value to being a Star Member.

This show will  be one of the free shows all year--we want people to know about the 2020 Block of the Month--they can start any time this year. 

This show is full of tips and tricks for Precision Piecing and Machine Applique. Even if you are not working on Afternoon Delight, I think you will pick up some good information for piecing and applique on your own projects.

Yes, I do get some compensation for the work I do for TQS but I have been a fan since the show first began in 2007. Here is why I think you should join in the fun too:

What The Quilt Show Offers You  Think of it as an international quilt guild community you don't have to leave your house to join.

I hope you watch "my" show and, even more, I hope you join us.

Let's quilt.

Barbara

Thursday, January 2, 2020

Local Opportunities This Quarter

If you are local to me, the North Alabama, Southern Tennessee area, there are a few opportunities I want to be sure you know about:

1. SPECIAL ANNOUNCEMENT--We have ONE opening for the first Joyful Journey Retreat, March 11-15, 2020, due to a medical issue that caused one person to have to drop out. We are sorry to lose her BUT that means one of YOU now gets to join us!


Don't miss this RETREAT--SPECIAL EVENT!--look at this post for all the information you need. Contact me or Kathy, the Admin for the Retreat, to get the brochure--this is sure to be a super-fun event--with a special small quilt that will be taught during some of our time together. I hope YOU are the lucky one who gets to join us:


2. AFTERNOON DELIGHT--class throughout 2020 for those who want some assistance with the Block of the Month from The Quilt Show.  Class meets 5 times in 2020, this starts Saturday January 4, 2020, 9-11 am. It's not too late to sign up today. No Sewing in class--lecture/demo--just come and learn, do all your sewing in the comfort of your own sewing space. Call today to sign up and don't miss the first session:  Barb's Sewing Center 256-539-2414.


3. SYLVIA'S BRIDAL SAMPLER: This class was a special request--a lecture/demo class that meets once a month for 6 months on a Friday night--dinner out first for those who want to socialize too. All sewing is done at home--I will teach lots of tips and tricks to help you on this project--only a couple spots remain, class starts Friday January 10, 2020, Patches & Stitches, 256 533- 3886.


4. SMITTEN: Such a popular class, I teach it a lot to guilds around the country. The only time this year for this class. Y-Seams don't have to be scary. Saturday January 11 and February 15, 2020, 9-1, Barb's Sewing Center, 256-539-2414. 


5. ORGANIC APPLIQUE: Have wonderful BIG prints, like Kaffe Fassett fabrics, and don't know what to do with them? How about this:

Come play all day, I will help you: February 8, 2020, 9-4, Patches & Stitches 256-533-3886.

6. PATRIOTIC PINEAPPLE LOG CABIN:  Make this terrific block in any colors you want, mine is Red, White and Blue:

Not paper pieced, you will use strips and rulers to make your blocks. Monday February 17, 2020, 9-4, Huntsville Sew Creative, 256-536-3757.

7.  ANTIQUE ROSE STAR BY MACHINE: one of my most popular classes, I teach this all over the country--don't miss this one chance to take this class locally, the only time in 2020:  March 7 and March 21, 2020, 9-1, Huntsville Sew Creative, 256-536-3757:


8. CIRCA 2016: Back by special request, this is a fun quilt to make with little blocks. This is the last time I will offer this class locally so don't miss it. Saturday March 28, 2020, 9-4, Patches & Stitches, 256-533-3886.


9. QUILTMAKING 101--if you know someone who wants to learn to quilt, now is the time to take my all-newly revised QM 101 class. Everything you need to know to get hooked for life on quiltmaking.  Five week classes, begin January 7, 2020, Patches & Stitches, 256 533 3886:


I hope you see a class or two here that interests you. We have fun and learn a lot in class! Join us.

Let's quilt,

Barbara

AFTERNOON DELIGHT--Month1, Part 2

Let's work on the first four applique blocks for Afternoon Delight.

NOTE: This post is lengthy--future posts will not show this amount of detail.

The sample quilt features these:

Block 2

Block 3

Block 1

Block 4

Sue Garman has provided four pages of instruction on applique techniques--read ALL the instructions before beginning. These instructions only appear in Month 1.

I found the color pages of all the applique blocks that appear in Month 1 to be very helpful--I recommend you print those in color to use as a guide for selecting fabrics for your blocks. 

KIT INFO: Remember, you can put any fabric you like in any of these blocks. It is absolutely not necessary that you copy the sample quilt blocks. Seven of the Sunday Sew and Sews helped me cut these fabrics and assemble the blocks--I would have selected different fabrics in some blocks if doing it myself. It's your quilt, you get to choose.

There are a variety of ways to make applique blocks, hand or machine. Use whichever method you like. For the sample quilt, we used the raw edge method, simply because we needed the fastest method possible. I prefer turned edge applique so I think will use that method for my 2020 Red, White and Blue sample. This first month I will do one of each to decide for sure.

Advantages of both Raw Edge and Turned Edge Applique:

1. Raw edge is fastest to prepare
2. Turned edge gives a finer, finished look, in my opinion
3. Raw edge needs careful, close stitching to protect those edges
4. Turned edge takes more time to prepare but may sew faster

Print the patterns. Measure the box around the pattern—it should be 6.75”, the FINISHED size of the block. I used Quilter's Select Print and Piece Fuse Lite. Be sure you print on the matte side--NOT the fused side. This product makes it easy to print the pattern, serves as a stabilizer when machine stitching, and washes out when the block is done, so the shapes are not stiff when finished.


Blocks 1 and 3 printed

How you cut cut the pattern will depend on whether you are doing raw edge or turned edge.

FOR RAW EDGE:  rough cut the shape out, most are one or a few pieces. Fuse the paper pattern to the Wrong side of the fabric--follow package instructions for how to fuse. Use sharp scissors to carefully cut on the black line.


FOR TURNED EDGE: use sharp scissors to carefully cut out the pattern on the black line--BEFORE fusing the paper pattern to the wrong side of the fabric. This is the slow part, careful cutting will make the best results.

TIP: I had an ah-ha moment--this shape is symmetrical. What if I fold the paper pattern in quarters, staple to secure, and cut out the entire pattern in quarters, saving lots of time? Just DO NOT PRESS, or it will be fused to itself:


The lines might not be perfect, but the shape is exactly the same or very close. Just be sure you like it before opening it, re-folding it in quarters again is not easy:


Once the paper pattern is completely cut out, carefully fuse it to the Wrong side of the applique fabric, following package directions:


Carefully trim the applique fabric about 1/4" away from the paper pattern, creating the seam allowance to turn under. I am a fan of Karen K Buckley scissors--she has a new pair of Craft scissors, the pink handles, for cutting paper and fusible products. I used those to cut the pattern. The blue handles are the medium size fabric scissors, with serrated edges, I used those to cut the fabric:


All cut and ready for glue-basting the seam allowance under:


FOR TURNED EDGE:  once cut out, baste the raw edges of fabric to the back of the printed pattern, using glue or thread as you prefer. Some people like the glue stick, some prefer liquid glue. 

This takes time, work slowly. However the turned edges look now, is how they will look after the applique process. I like the Apliquick tools for this job, they help for turning those narrow seam allowances to the back:
The back after gluing seam allowances in place

The front, ready to be glued to the background
FOR RAW EDGE:  once cut out, secure the fabric to the 8" background square already cut--using pins or glue as you prefer. Fold the 8" into quarters, and on both diagonals, press, to give you a general idea where to place the fabric shape--you will trim the finished block to 7.25"(unfinished) once the applique is completely done AND you have soaked the block in warm water to remove the paper. 

Here is a different block (Block 11 from Month 3) ready to be glued to the background, I like Quilter's Select Fabric Glue Pen:


Fold the 8" background into quarters and on both diagonals, press, to give you a guide for where to place the fabric shape--you will trim the finished block to 7.25"(unfinished) once the applique is completely done AND you have soaked the block in warm water to remove the paper:

For both methods, secure the applique shape to the background--in the instructions Sue shows just how tiny a dot of liquid glue she  used to do this.

Now it's time to stitch. For the Raw Edge, I am using a Double Blanket stitch (#1330 on my Bernina 765) to protect the raw edges. For the Turned Edge, I am using a Single Blanket Stitch (#1329). I used width 2.5, length 2.0. Test your fabrics/thread for the look you prefer  In both cases, I chose thread that closely matched the fabric. 

The Double Blanket stitch takes much longer to stitch but provides a good edge finish. The Single Blanket stitch is fine on the Turned edge applique. 

Once the block is done, soak it in warm water for about 15 minutes to remove the glue and the paper pattern. Allow to dry completely before you trim it.

The background started at 8". Now we have to trim the block down to 7.25" unfinished. I came up with this nifty, simple way to be sure I was trimming the block while keeping the applique motif in the center of the square--make your own "RULER":

I cut a square of template plastic exactly 7.25" and used a black Sharpie to draw registration marks up and down and on the diagonals. 

Use this to be sure your shape is centered. This is not an edge you can cut against with your rotary cutter without shaving a bit off so simply make marks at the four corners to know where to place your real square ruler--I used a Crayola Ultra-Clean Washable Marker in brown so you can clearly see the marks:

Align applique with registration lines

Use washable marker or pencil to mark the corners

Replace the plastic template with a rotary cutting ruler

Perfectly trimmed 7.25" unfinished block, with applique centered
If you would like to see another blog I wrote about Turned Edge Machine Applique, check out this Tutorial.

Like anything else, there is a learning curve to machine applique. The good news you will get lots of practice with 40 blocks. Each one will get better and the process will be easier. Next month we will  make four more applique blocks and two Shoo Fly blocks.

Let's quilt.

Barbara

Wednesday, January 1, 2020

AFTERNOON DELIGHT--Month 1, Part 1

This pattern is the 2020 Block of the Month pattern offered FREE to Star members of The Quilt Show--join today to receive the entire year of patterns free. This is in addition to all the great content provided by The Quilt Show, 26 shows, a new one every two weeks, and so much more. If you want to know more about why I am such a fan, here is why.

Welcome to Afternoon Delight, designed by the late Sue Garman. This month you will begin to make both pieced and applique blocks. Part 1 will discuss the pieced Shoo Fly block. Part 2, coming January 2, 2020, will discuss applique by machine, both raw edge and turned edge techniques.


Find information on Fabric Requirements here.

Read ALL the directions before beginning. If you have the Kit, you will find it easiest to cut the fabrics according to the list provided each month. This month simply decide which fabrics are Backgrounds 1-6 and Prints 1-6 and cut the sizes listed in the pattern accordingly.

For example, Backgrounds 1 and 2 are cut 8" x 12" to start with. They will be used for the Shoo Fly half square triangles and Applique blocks 1 and 2 backgrounds. Each fabric is listed as to where it is used that month and what size to cut the fabric to accomplish this.

TIP: All the applique backgrounds are cut 8" square to start. After all the applique is stitched, you will trim the block down to 7.25"--this is the unfinished size. More about Applique in Part 2.

The Shoo Fly Block:


Sue's directions are excellent, with great visuals. I won't repeat what she says here. I will only try to clarify a few things.

The instructions say to cut Background 1 and 2 into two 3 1/8" squares. Since you know Background 1 and 2 are also used as Applique block backgrounds, you can cut those 8" x 12" fabrics into one 8" square each and use the remaining 4" x 8" pieces to make the two 3 1/8" squares from each background. NOTE: I cut the squares 3 1/4" and sewed them first before cutting--see below.

Follow the directions for Prints 1-6 to cut the pieces needed for the Shoo Fly blocks. All of the fabric left will be used in the 4 Applique blocks. Do the same for Backgrounds 1-6.

My sample quilt is being made from red, white and blue fabrics. Here are the parts ready for two Shoo Fly blocks:

NOTE: I prefer to make half square triangles from squares and I cut them slightly larger, 3 1/4" instead of 3 1/8". After sewing on both sides of a drawn pencil line, I cut them apart, and "trim to perfection":

I am willing to waste that much fabric for that much perfection. Trim to 2 3/4"

I am working scrappy, from leftover pieces and yardage. All I do is see what sizes of Background/Prints are needed and cut those from scraps. I am using some fabrics more than called for, some less.

The entire quilt has a total of 9 Shoo Fly blocks, each with 41 pieces. They will be placed all around the quilt, not assembled until the end. So it really does not matter which fabrics are used in each block. Just spread the colors around as you like.

With my red,white and blue theme, I had at least three choices when it came to the Shoo Fly blocks--red and blue corners in each block, or some all red, some all blue. Which do you prefer?


My choice is shown at the top of this post.

You will like how those little four-patches "float", meaning the corners of the little squares not not supposed to touch the outside edges of the block or half-square triangles. That's just the way the simple math works out and it's easier too.

You are encouraged to post photos on the Forum in our Afternoon Delight Block Progress Show and Tell Topic.  Show and Tell Your Blocks Here

The Forum is the first place I post updates/suggestions and each time I post a blog that covers Afternoon Delight, I post a Topic on the Forum to alert you--just in case you don't follow my blog.

Please feel free to ask questions--the Forum is a great place to ask--I check it at least once a day.

There are 9 of these blocks in the entire quilt--Sue spread them out over 5 months. But now that you know how to make them, if you are itching to get ahead, go on and make some more--remember, just 9!

Part 2 posts January 2--we will tackle the Applique blocks there.

Let's quilt.

Barbara

Wednesday, December 25, 2019

Christmas--Quilts and Joy!

If it's Wednesday, I try to have a blog post ready.

Today is Christmas. So, Merry Christmas to You! And Happy Hanukkah! And special wishes for whatever you are celebrating this time of year.

I decorate my home with quilts year-round. But at Christmas, a few special ones come out. Here are their stories.

1. Sawtooth Stars: Found at a First Monday sale day in Scottsboro, AL, about 10 years ago. We went early, I turned left instead of right and ended up at a booth just being set up. This quilt was still folded, no price tag in place. I asked the vendor the price, she told me a really low number and I jumped on it. Fortunately, she took my check since I hadn't brought much cash. As we walked away I told my husband I got a steal. His response? "Flip it.". No, never, it's my treasure for now.


When I got it home and was able to study it more, I found two amazing motifs quilted in it. The first is an initial: this appears to be a "W" to me--since my husband's last name starts with a W, I'm going with that. If it was turned over it would be an "M"--no, it's a "W":


The second motif I found is a dragonfly. I LOVE dragonflies and have several of them on display in my home in quilts and paintings. This proves this quilt was meant to be mine. Such a kinship I feel to this maker from long ago:


And I love feathers--this wreath with heart in the center is quilted in each large block:


2. Christmas Around the Country:  I made this in 1989. I won the blocks at a guild meeting, added a couple more and pieced this top with a garden maze set. I was a baby quilter then, so everything was a learning curve. I designed the hand quilting motifs and spent about a year quilting it, so it was ready to use by Christmas 1990:

Old house, don't have that mauve sofa anymore, so 1980's


It was featured on the cover of Christmas Year 'Round magazine, 1991:


3. Cross and Crown: the one quilt that goes on the wall each year. I designed and made it in 1996. It is the first quilt I had longarm quilted:

Titled "Yuletide Elegance"


This quilt appeared on the cover of  McCall's Quilting, December 1997 issue:


4. Christmas Log Cabin: There is one more Christmas quilt I should mention. This Log Cabin I made in 1989 for Christmas Year Round magazine. It was a commission for them so I don't own it. When the magazine came out, they said a kit was available from Patches & Stitches, where I worked and bought the fabrics for this project. They neglected to mention this to Patches so when the phone started ringing with orders--this was WAY before the Internet--they scrambled to fill hundreds of orders. I suppose there are many of these quilts around the country but I don't have one, just this photo with my son's fingers and feet:


I would love to find someone who bought the kit and made the quilt. It appeared in the Premier issue of Christmas 'Year Round magazine, 1989:

That's all for red and green Christmas quilts.

A very Merry Christmas to you!

Let's quilt.

Barbara